3 Steps to Run AdGuard Home On Raspberry Pi (vs Pi-Hole)
Recently, I came across AdGuard Home which is a network-wide ad blocker that looks a lot like Pi-Hole on the user end. I decided to test it, and was pretty amazed by the results, so I will share everything with you in this article.
AdGuard Home is an ad-blocking solution, available for Linux and Mac, and can also be installed on Raspberry Pi with only one command line. Then, a web interface will be used for the software configuration and monitoring.
I highly recommend you to at least test it by following the first part of the installation. Then I will show you a few things you can tweak in the configuration and will conclude with a quick comparison with Pi-Hole.
If you’re looking to quickly progress on Raspberry Pi, you can check out my e-book here. It’s a 30-day challenge where you learn one new thing every day until you become a Raspberry Pi expert. The first third of the book teaches you the basics, but the following chapters include projects you can try on your own.
How To Install AdGuard Home On Raspberry Pi
AdGuard Home can be installed on any Linux distribution running on Raspberry Pi by using one command line.
Here are the required steps to install AdGuard Home on a Raspberry Pi:
- Install any Linux distribution (Raspberry Pi OS Lite is a great choice).
- Download and run the installation script from the AdGuard editor.
- Configure the DNS server on your computer to use AdGuard Home.
I will now explain each in detail to make sure everything is clear for you.
Join Our Community!
Connect, learn, and grow with other Raspberry Pi enthusiasts. Support RaspberryTips and enjoy an ad-free reading experience. Get exclusive monthly video tutorials and many other benefits.
Learn morePrerequisites
AdGuard Home is installed with a simple command line, and don’t any desktop environment. So, if your primary goal for this Raspberry Pi setup is to use it as an ad-blocker, Raspberry Pi OS Lite will be a great choice. You can use any Raspberry Pi model you want, it’s probably a good job for the Raspberry Pi Zero 2.
It's a free PDF guide containing every Raspberry Pi Linux command you should know!
Download now
I have had Pi-Hole running on my Raspberry Pi Zero 1 for years. Perhaps the new model will upgrade it with a new software :-).
Anyway, the easiest way to flash your SD card, will be to use Raspberry Pi Imager on your computer:
- Insert your SD card in your computer (use this USB adapter if you don’t have any SD card slot).
- Install and start Raspberry Pi Imager.
- In the OS selection, click on Raspberry Pi OS and pick the Lite version.
- I also recommend enabling SSH at this step, it might be easier to do everything from your computer as there is no interface.
Press CTRL+Shift+X to open the advanced options, and check “Enable SSH”. You can also set a custom password there. - Select your SD card (or USB stick) and click on Write to start the installation.
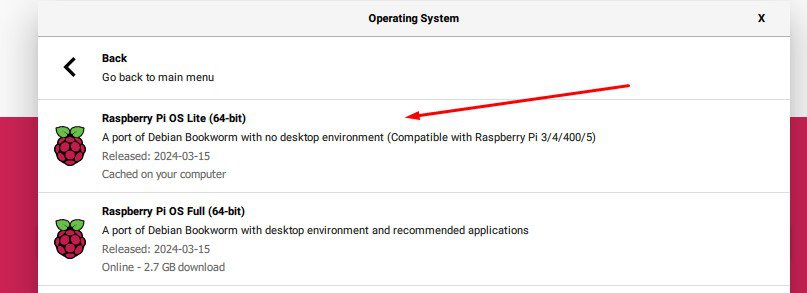
After a few minutes, your SD card should be ready to use. Insert it in your Raspberry Pi and login (pi / raspberry).
I have a detailed tutorial on how to install Raspberry Pi OS here, feel free to check it out if you are not yet familiar with this procedure.
AdGuard Home Installation
Connect to your Raspberry Pi with SSH (more details here), or continue directly on the Raspberry Pi screen.
As for any project, I recommend starting by updating your system, even if you just installed it.
Type these commands:sudo apt update
sudo apt full-upgrade
A reboot then is probably a good idea, as these first updates often contain a new kernel:sudo reboot
Are you a bit lost in the Linux command line? Check this article first for the most important commands to remember and a free downloadable cheat sheet so you can have the commands at your fingertips.
Then, you can run this command to install AdGuard Home on your system:curl -s -S -L https://raw.githubusercontent.com/AdguardTeam/AdGuardHome/master/scripts/install.sh | sh -s -- -v
You can find all the details on their GitHub page if you need more or want to check the source code before using their script :-).

The installation is very fast, it shouldn’t ask anything, and will end like on my screenshot, giving you the web interface URL and the command line to manage the service.
If you want to stop, start or check the service status you can use these commands:
- Stop AdGuard Home:
sudo /opt/AdGuardHome/AdGuardHome -s stop - Start AdGuard Home:
sudo /opt/AdGuardHome/AdGuardHome -s start - AdGuard Home status:
sudo /opt/AdGuardHome/AdGuardHome -s status
As you’ll see, you can do everything from the web interface, so you shouldn’t need it, unless you installed it with other services and that there is a conflict. For example, Pi-Hole uses the same port as both act as a DNS server, so if you have Pi-Hole running, I suspect AdGuard Home won’t start.
It's a free PDF guide containing every Raspberry Pi Linux command you should know!
Download now
AdGuard Home Configuration On Raspberry Pi
Once installed, AdGuard Home will start a web server and deliver a web interface for further configuration and service monitoring.
It's a free PDF guide containing every Raspberry Pi Linux command you should know!
Download now
Web Interface
Head over to the URL given at the end of the installation to access the web interface. Most likely, it will be something like:http://RASPBERRYPI_IP:3000
If you used SSH, you already know the IP address. If not, you can check this article, or just type this command in your terminal:ip a
When you access the URL for the first time, you’ll get an installation wizard:
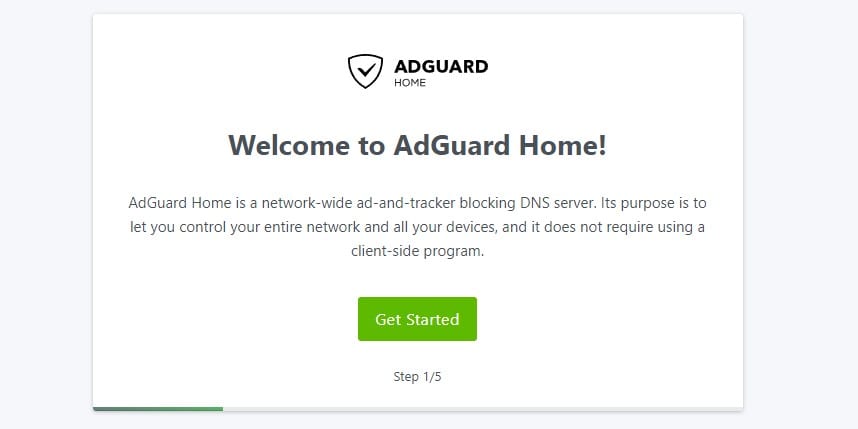
It’s really short, the main goal is to create the username and password you’ll use to access the interface after that:
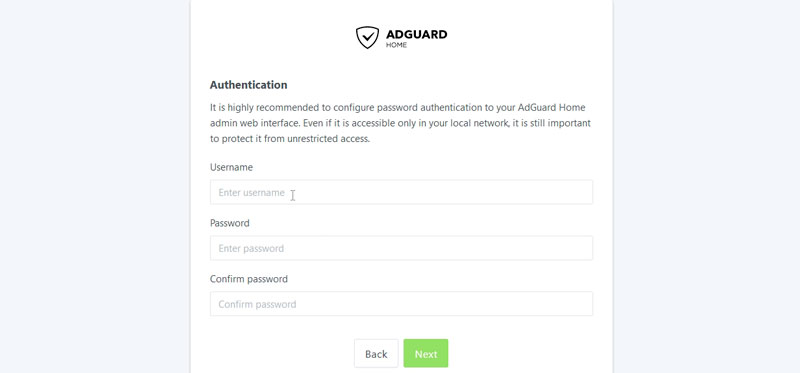
Try to use a strong password, even if you have a small network because anyone getting access to this can see everything you do on the Internet :-).
The wizard also gives you instructions for the clients configurations, we’ll see that in a minute.
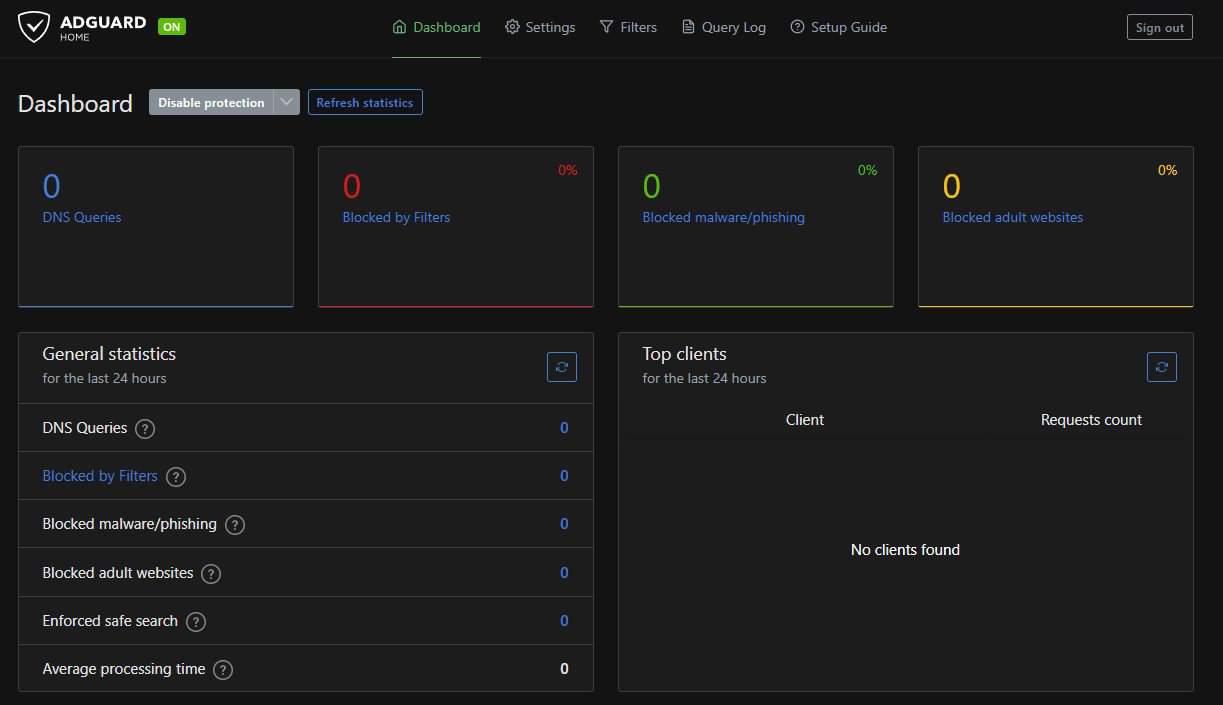
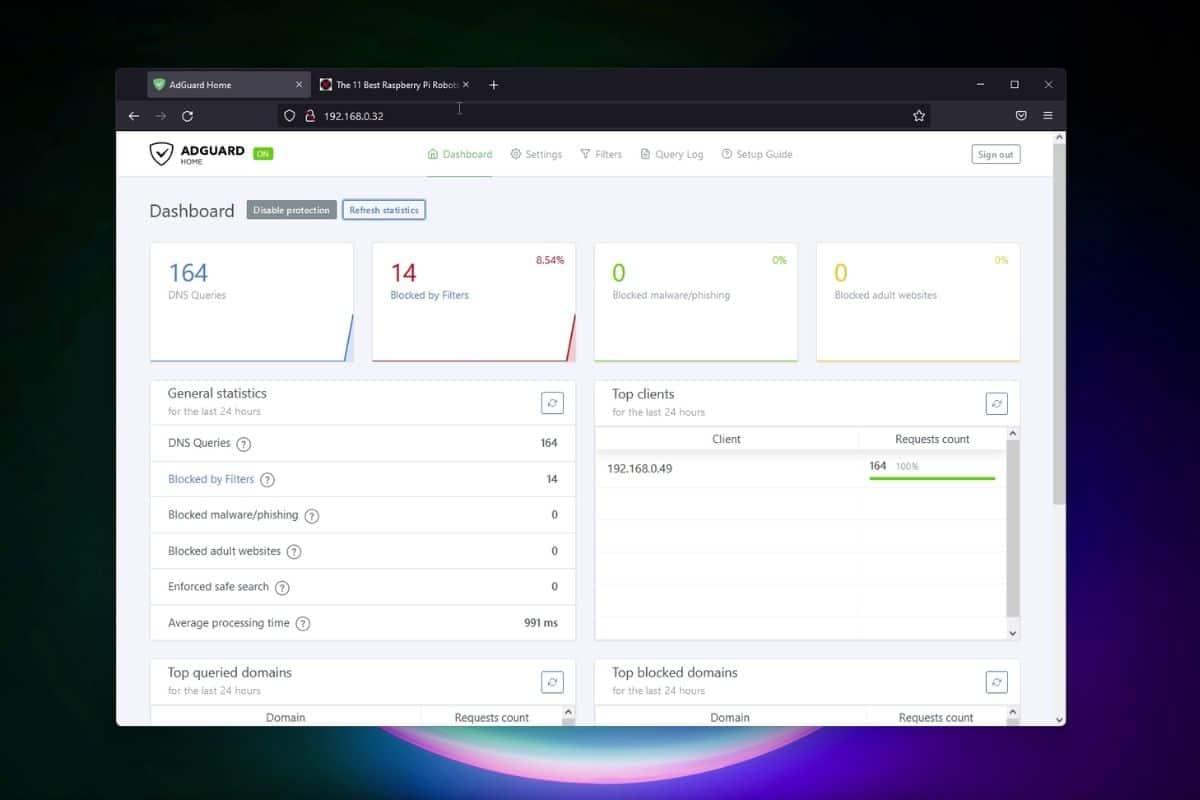
Once done, you finally get access to the main dashboard, looking like this:
Clients Configuration
AdGuard Home is now installed, but it doesn’t change anything until your clients are using the Raspberry Pi as their main DNS server.
AdGuard Home works like this:
- Your computer does a DNS request to get the IP address of a domain (raspberrytips.com, ads.google.com, etc.).
- AdGuard Home will either answer if it’s not blocked (raspberrytips.com), or block the traffic for domains hosting ads or malware (ads.google.com).
So, first, you need to tell your computer to use AdGuard Home as the primary DNS server.
You can see the instructions during the welcome wizard, or by clicking on “Setup Guide” in the web interface:

I recommend testing with one device first. For example, if your computer is on Windows, go to the Control panel, find Network and Internet settings, and change the DNS server for your current connection. On Windows 11, it looks like this:
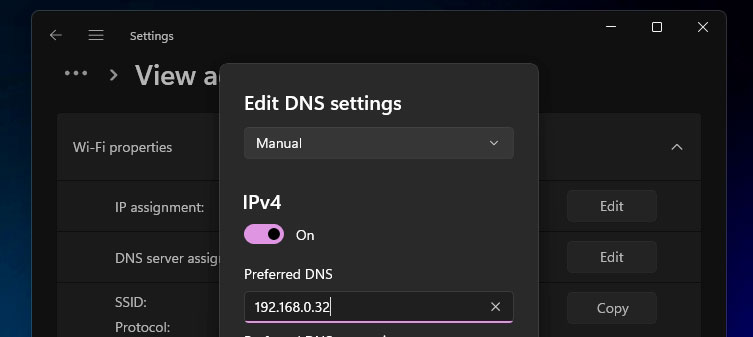
If it’s working correctly and doesn’t block too much, you can then do the same thing on any device you want. But the easiest way to get a network-wide ad-blocker is to change your router configuration to use the Raspberry Pi as the main DNS server. This way, any device connected to your router will go through AdGuard Home.
Just don’t power off your Raspberry Pi after that, or everybody will lose Internet access :-).
Further Configuration

The interface is then pretty intuitive, so I won’t be long here, but here is a quick overview:
- Dashboard: The default page when you log in. You’ll get a general overview of the job AdGuard Home has been doing (DNS queries handled, and blocked). You can also see the top websites and clients. There is also a button “Disable Protection” on top, where you can temporarily disable everything (for example, to check if an issue you experience is due to AdGuard Home or not).
- Settings:
- General settings: Basic configuration. I think you’ll use it if you want to enable parental control or safe search. Except from that, the default values should be fine. Also, if using it in a company, make sure you have the permission to keep the logs for 90 days.
- DNS settings: AdGuard Home uses Quad9 as the main DNS server by default. You can change it, or add some failover options if you want.
- Encryption settings: Probably not the most useful for home usage. But it’s good to know that everything can be configured easily from there. It’s also on this page that you can change the default ports to avoid conflict (for example, if you host another web server or DNS server on the same Raspberry Pi).
- Client settings: You can tweak the configuration a bit differently depending on each client. For example, to enable parental control on your daughter’s phone, but not on the other devices.
- DHCP settings: If you want to use AdGuard Home as your DHCP server, you can enable it easily from there.
- Filters: Choose the blocklists you use, and add some exceptions if needed. The updates are done automatically.
- Query log: You’ll find here all the requests, and see what hapened for each of them. It’s great for debug purpose.
You can also block/unblock domain from there.
If you are looking for more technical details on how to do specific things, I highly recommend checking the official Wiki. You can also ask questions directly on their GitHub project.
It's a free PDF guide containing every Raspberry Pi Linux command you should know!
Download now
Want to chat with other Raspberry Pi enthusiasts? Join the community, share your current projects and ask for help directly in the forums.
Differences Between AdGuard Home and Pi-Hole
As a whole, both solutions work the same way, by blocking ads and trackers for the clients. There are some slight differences, like the default DNS servers they use (Quad9 vs Google) and the built-in technologies. AdGuard Home seems more state-of-art and intuitive than Pi-Hole.
First impressions
As I wrote in the introduction, there isn’t much of a difference for the end-user. You have your Raspberry Pi, with a DNS server running on it, and configure your client or router to use it. After that, a good percentage of ads will be blocked, and you have a web interface to see what happened and tweak the configuration.
I didn’t use AdGuard Home enough to give you a complete review, but there are some great points I notice:
- Fastest installation: both are easy to install, but Pi-Hole installs many things during the installation script.
- Cleaner interface: Pi-Hole interface is becoming a bit old-school. They never updated it, I think. Also, their interface is a bit overwhelming when you use it for the first time.
- Different technologies: I’m not an expert, but it seems like AdGuard Home is further ahead on the technologies they use (coded in Go, HTTPS interface, DNS over HTTPS/TLS, etc.). I find this important for that kind of software.
- Maybe limited in the configuration: It’s often like that. It’s either intuitive or complete (Retropie vs Recalbox ^^). I’m not sure if it’s possible to go as far as with Pi-Hole in the configuration details. But do we really need it?
At least, I’m convinced enough to try it a bit more, and replace Pi-Hole with AdGuard Home for a while to see how it goes. I will update this article if I change my mind. But for now, I recommend you to do the same thing. Test it for a few days/weeks and see how it goes.
AdGuard Home vs Pi-Hole: Comparison Table
| Feature | AdGuard Home | Pi-Hole |
|---|---|---|
| Installation | Easy. A few seconds. | Easy. A few minutes. |
| Web Interface | Yes. Modern and intuitive. | Yes. A bit overwhelming (too many menus and options). |
| Cross-platform | Yes | Only with Docker. |
| Force safe search on search engines. | Yes | No |
| Parental control | Yes | No |
| Blocking phishing and malware sites. | Yes | Not by default, you need to add a specific blocklist. |
| HTTPS for the web interface. | Yes | You can configure it in Lighttpd. |
| DNS over HTTPS. | Yes | Not by default. |
| Block ads on YouTube, Instagram, Facebook, etc. | No | No |
AdGuard Home vs Pi-Hole: Video Comparison
If you want to learn more about Pi-Hole, and compare it to AdGuard Home, I have a complete article about it: Install Pi-Hole on Raspberry Pi (Free Ad Blocker in 15min).
Whenever you’re ready, here are other ways I can help you:
The RaspberryTips Community: If you want to hang out with me and other Raspberry Pi fans, you can join the community. I share exclusive tutorials and behind-the-scenes content there. Premium members can also visit the website without ads.
Master your Raspberry Pi in 30 days: If you are looking for the best tips to become an expert on Raspberry Pi, this book is for you. Learn useful Linux skills and practice multiple projects with step-by-step guides.
The Raspberry Pi Bootcamp: Understand everything about the Raspberry Pi, stop searching for help all the time, and finally enjoy completing your projects.
Master Python on Raspberry Pi: Create, understand, and improve any Python script for your Raspberry Pi. Learn the essentials step-by-step without losing time understanding useless concepts.
You can also find all my recommendations for tools and hardware on this page.





Is there a way to easily update the adguardhome on the rasberry pi? Official Github instructions has version 0.102.0 which is two years old and theres a new version out. I installed the old version unknowingly, and would like to update, but there is no documentations I am able to find to do it quickly. PiHole had pihole -up which was very simple.
Thanks
I don’t have one to test right now, but I think there is an update button in the web interface. Have you tried it?