Armbian On Raspberry Pi: The Ultimate Guide
Armbian has been around for a while, almost since the release of the first Raspberry Pi. It’s a Linux distribution, based on Debian and now on Ubuntu, aiming to support most single-board computers (Raspberry Pi but not only). In this tutorial, I will give you all the steps to get started with it.
The latest version of Armbian is compatible with all recent models of Raspberry Pi (3, 4, 400, and Zero 2). Two images are available on their website: CLI (minimal version) or Desktop (preloaded with XFCE). These images can be flashed to an SD card or USB stick with Raspberry Pi Imager or Etcher.
Don’t worry, I’ll explain every step in detail in this tutorial. I’ll also give you a few tips to use Armbian, and answer some of your questions about it.
If you’re looking to quickly progress on Raspberry Pi, you can check out my e-book here. It’s a 30-day challenge where you learn one new thing every day until you become a Raspberry Pi expert. The first third of the book teaches you the basics, but the following chapters include projects you can try on your own.
Install Armbian on Raspberry Pi
Here are the required steps to install Armbian on your Raspberry Pi:
- Choose the version to install (minimal or desktop).
- Download the corresponding image.
- Flash it to your SD card (or USB drive).
- Follow the first boot wizard.
I will now explain each step in detail.
Choose an Armbian version
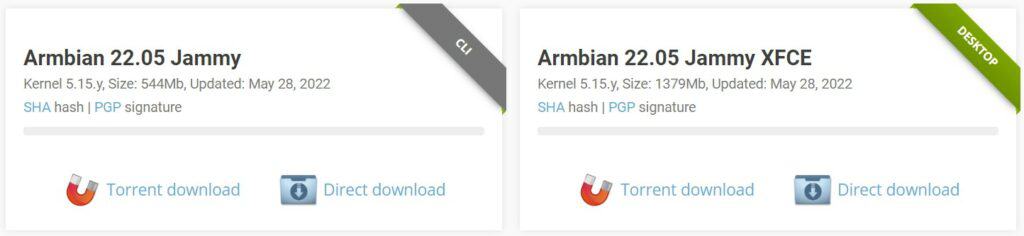
The latest Armbian version is now based on Ubuntu, and two main versions are pushed on their websites:
- The “CLI” version: as the name says, it’s a minimal setup, with only a command line (no interface).
- The “Desktop” version: with XFCE pre-installed, which is a light desktop environment that should run properly on most Raspberry Pi models.
On their download page, you can also find other variants, like one with Cinnamon. But to be honest, I would recommend starting with the minimal version in any case and then adding the desktop environment manually.
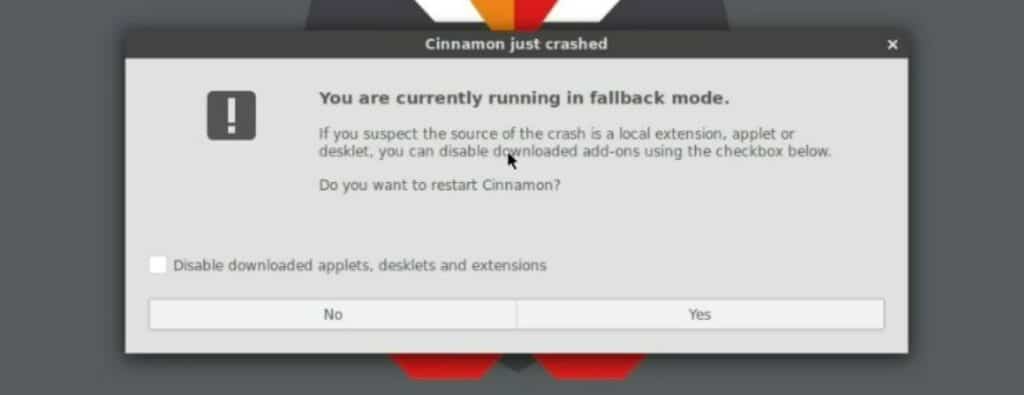
I tested the Desktop version on my Raspberry Pi 4, and it didn’t work directly. I almost did this tutorial a few months ago, but the Cinnamon edition was full of bugs. The answer developers gave me on Twitter was that Raspberry Pi was not officially supported and that they are looking for maintainers (you can apply here if interested).
I would start with the “CLI” version at this point, and follow the commands I provide in the next section to add any desktop environment you want to use. But maybe in the future, they will fix their Desktop edition, so feel free to give it a try.
Download the Armbian image
Armbian is not available in Raspberry Pi Imager, so you need to download the image manually first:
- Go to the download page corresponding to the Raspberry Pi edition.
Armbian supports a lot of Raspberry Pi alternatives, you can probably follow the same steps with other devices. - Pick the version you want to try.
You have the choice between “CLI” and “Desktop”, but can also click on “Check other download options” to get other ones, such as the Cinnamon edition (another desktop environment). - Click on “Direct Download” or use Torrent to get the image on your computer.
That’s it, we can now move forward and flash it on an SD card or USB drive.
Flash Armbian on your media
As for any new operating system, you need to copy the system files to your media storage.
In this case, I would recommend using Balena Etcher, as it’s a bit faster when you already have the image on your computer, but Raspberry Pi Imager is fine.
It's a free PDF guide containing every Raspberry Pi Linux command you should know!
Download now
- Install Balena Etcher on your computer if you don’t have it yet.
It’s a free tool, you can download it here. - Start Etcher.
The window looks like this: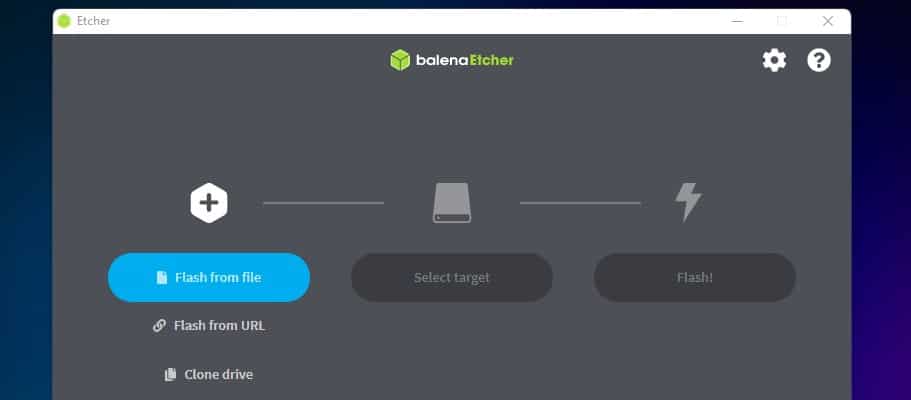
- Click on “Flash from file” and select the Armbian image you just downloaded.
You don’t need to extract the archive, Etcher will do it for you. - Then insert your SD card or plug in the USB drive you want to use for Armbian.
- Click on “Select target” (if not done automatically) and pick the corresponding media.
- Finally, click on “Flash!” to start copying the files.
After a few minutes, the media will be ready. You can eject it from your computer and insert it into your Raspberry Pi.
First boot
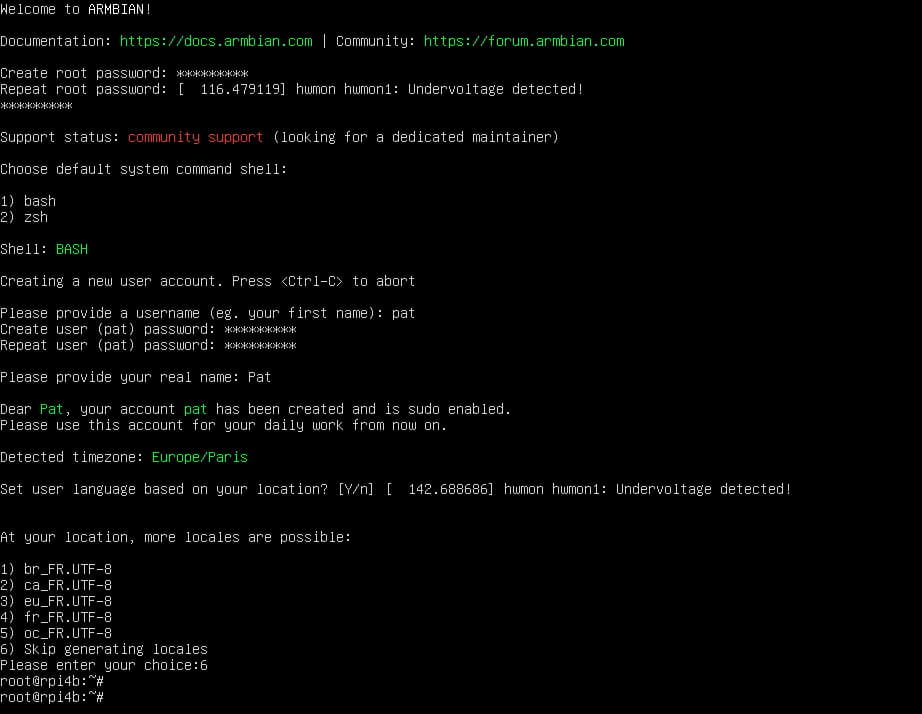
Plug your network cable, keyboard, and monitor, and turn on the Raspberry Pi. After a few minutes, you should get a prompt asking you to create the root password:

Note: if you don’t get this directly, but a prompt asking you to login, the default login is “root” and password “1234”. You’ll then get access to the same wizard for the basic settings.
You can then follow the welcome wizard to configure a few things:
- Change the root password.
“root” is the administrator user. In general, you won’t need it, but please set a strong password there. - Create the first normal user.
You’ll use it all the time, so create one with your first name for example. - Choose the default shell (bash or sh).
- Change the locale if needed.
By the way, the default setup uses en-us, so the keyboard is in QWERTY to set the passwords in the previous steps.
That’s it! Once done you’ll get access to the terminal interface, and can then do everything from the command line, like with any server distribution. Don’t worry if you are new to this, I’ll guide you with the first steps in the next section.
Note: During my tests with the XFCE version, the desktop environment didn’t start automatically, so you’ll probably end up at the same point, with a terminal. You can start the environment by running lightdm manually:sudo lightdm

Join Our Community!
Connect, learn, and grow with other Raspberry Pi enthusiasts. Support RaspberryTips and enjoy an ad-free reading experience. Get exclusive monthly video tutorials and many other benefits.
Learn moreGetting started with Armbian
Let’s take some time to complete the configuration. If you are new to a terminal-only setup, you might need some extra help to get started. Armbian is based on Ubuntu, so it’s really close to Raspberry Pi OS anyway.
On the first boot, you’ll be connected with “root”, but after that, I recommend using the normal user you created and adding “sudo” before any command that required administrator privileges.
Network configuration
If you plugged a network cable during the installation and have a DHCP server on your network, everything should already be configured properly.
You can use a ping command to make sure everything is working:ping google.com

But, if you need to configure the Wi-Fi, it has to be done now, before going further with the system configuration. The easiest way I find is to use raspi-config, which is installed by default:
- Start raspi-config with:
sudo raspi-config - Go to “System options” > “Wireless LAN”.
- Follow the wizard to set your country, SSID, and password.
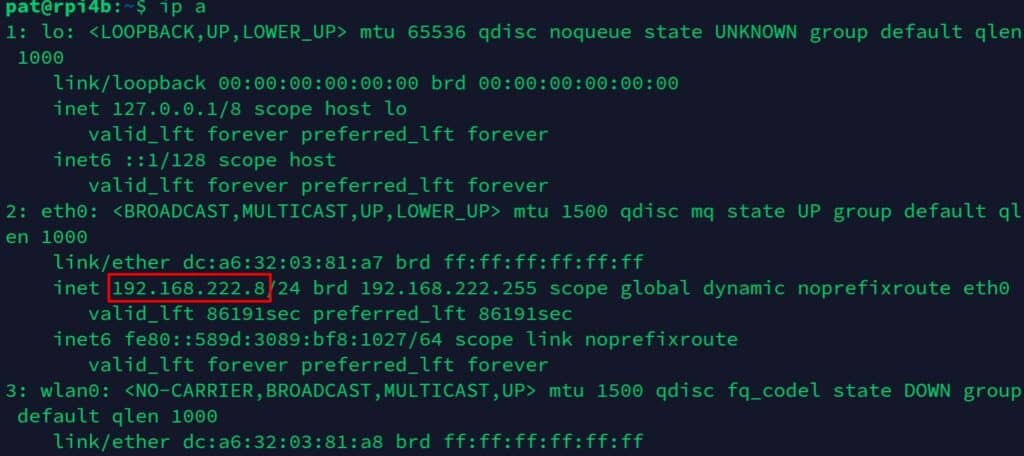
After that, the network should be working. You can also use the ping command I gave earlier to make sure it’s connected. You can also use this command to check the network card status and get your current IP address:ip a
Are you a bit lost in the Linux command line? Check this article first for the most important commands to remember and a free downloadable cheat sheet so you can have the commands at your fingertips.
Enable SSH
I like to use SSH for my Raspberry Pi configuration. This way, I can do everything from my computer, copy/paste commands, etc. Also, with Armbian I got a lot of “Undervoltage detected” issues that made the configuration complicated (created a typo with my keyboard not working all the time for example).
I will show you how to address this issue later, but let’s start by enabling SSH:
- Open raspi-config again:
sudo raspi-configThere are other ways to enable SSH, but as raspi-config is there, let’s use it. - Go to “Interface options” > “SSH”.
- Confirm that you want to enable it.
- Exit raspi-config.
That’s it, you can now connect to Armbian from another computer.
If you need help with this, you can read my complete guide about SSH on Raspberry Pi here.
System updates
We now have the network ready and an SSH connection to the Raspberry Pi.
As with any new operating system, the next step will be to do the system updates.
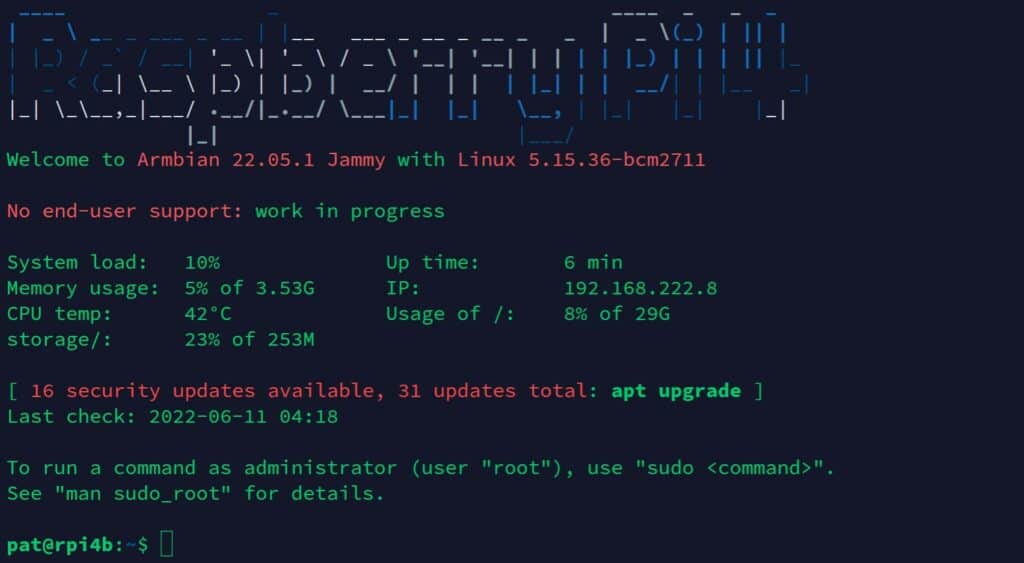
Armbian is a rolling release, so you shouldn’t have too much of them to do, but it’s a good practice anyway. As Armbian is based on Ubuntu, you can use the same commands as on Debian / Raspberry Pi OS:sudo apt update
sudo apt upgrade
It's a free PDF guide containing every Raspberry Pi Linux command you should know!
Download now
Tools you can use
So, raspi-config is available on Armbian, which is nice if you are already used to it with Raspberry Pi OS. But there is also another configuration tool you can try: armbian-config.
It’s basically similar to raspi-config, with a simple interface, you can use in a terminal or via SSH.
The main menu will like like:
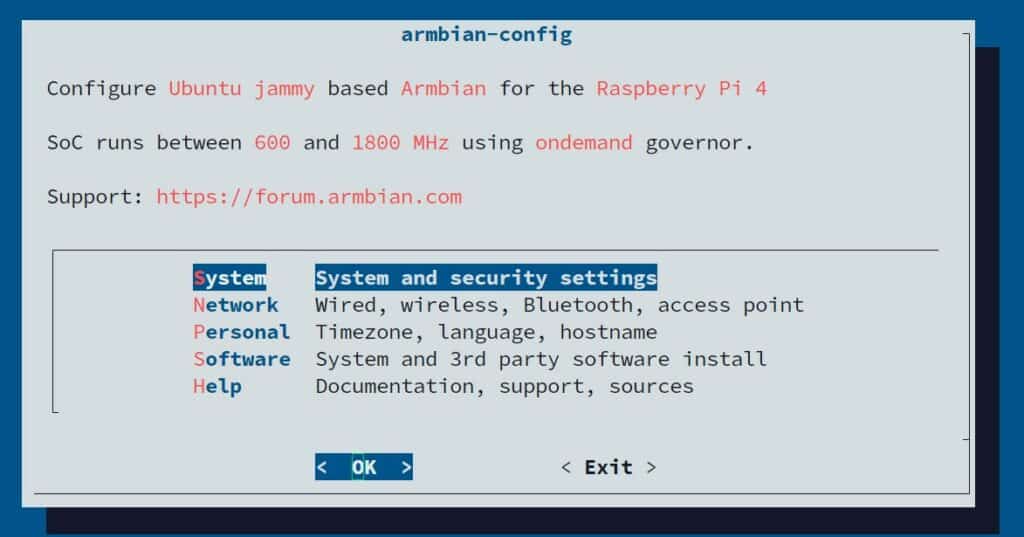
You can start it with this command line:sudo armbian-config
You will then find several submenus:
- System: Advanced configuration options for your system. I think you’ll use raspi-config for the basic stuff, and this one for more optimization settings (overclocking, upgrades, etc.).
- Network: Same idea here. I explained how to set up your network with raspi-config, but you’ll find advanced settings in armbian-config, under Network (static IP, hotspot, Bluetooth, etc.).
- Personal: If you need to make some changes to the initial configuration (timezone, locale, etc.). I would probably use raspi-config for this, but you can do it there too.
- Software: That’s one interesting option. Armbian supports a few tools you can easily install on your system. “Softy” is a third-party software installer, where you can for example install Plex, Pi-Hole, or Home Assistant in one click.
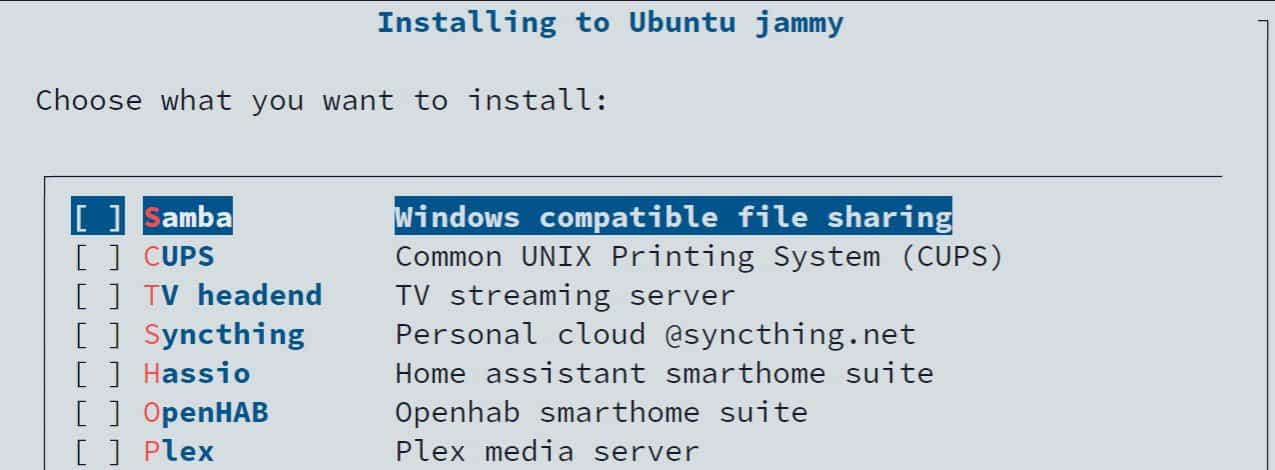
That’s something I would love to see on Raspberry Pi OS by default.
Unfortunately, the list is pretty short (maybe 15 items), but it’s already that.
Fix the under voltage issue
Maybe it’s just my setup, but I usually never get this issue, so I think it’s because Armbian has some kind of overclocking enabled by default. When you open armbian-config, you’ll see something like this:
“SoC runs between 600 and 1800Mhz using performance governor“.
You can then open armbian-config and go to System to change the CPU speed and governor.
I kept the same CPU speeds (600Mhz and 1800Mhz) but chose “powersave” instead of “performance” and I never got any “low voltage” errors after that.

I don’t really know the impact on performances for changing this, so you may need to test a few other options depending on how you plan to use your Raspberry Pi, but at least it should stop the warnings.
It's a free PDF guide containing every Raspberry Pi Linux command you should know!
Download now
Install a desktop environment on Armbian server
As Armbian is based on Ubuntu, you can use the same desktop environments with it. All of them are available in the default APT repository and can be installed easily on the CLI version of Armbian.
I already have a detailed tutorial on how to install a Desktop environment on a Lite version of Raspberry Pi OS, and the steps will be the same here. So, if it’s your first time, you might need to check the other article. But I’ll give you the short version here.
Choose a desktop environment
Ubuntu supports almost any desktop environment, so whatever the one you prefer, you should find a way to install it on Armbian too.
You can find a list of the support environment on the official Ubuntu website to get an overview.
Once done, use apt to find the corresponding package you need to install.
You can generally find the package name with something like:
apt search <string>
For example:
apt search cinnamon
The main package is generally named “<DE>-desktop-environment”, for example:
- Cinnamon: cinnamon-desktop-environment
- MATE: mate-desktop-environment
- Budgie: budgie-desktop-environment
- KDE: kde-plasma-desktop
Another option is to install the package corresponding to each Ubuntu flavor:
- Kubuntu: kubuntu-desktop
- Lubuntu: lubuntu-desktop
- Ubuntu: ubuntu-desktop
There is also a specific version for Raspberry Pi I didn’t test: ubuntu-desktop-raspi - Xubuntu: xubuntu-desktop
These are “meta-packages” and will install a bunch of other packages with them, to get your initial setup ready.
Install a Desktop environment on Armbian
Once you know the package name, you can just install the corresponding desktop environment with the apt command:sudo apt install <package-name>For example:sudo apt install cinnamon-desktop-environment
Or:sudo apt install xubuntu-desktopFor XFCE and the full set of applications you would get with Xubuntu.
During my tests with Cinnamon, I also need to add another package to have lightdm starting automatically on boot:sudo apt install lightdm-gtk-greeter
Maybe other desktop environments and meta-packages will install it automatically, but if your desktop environment doesn’t start on boot, you probably have to install it manually.
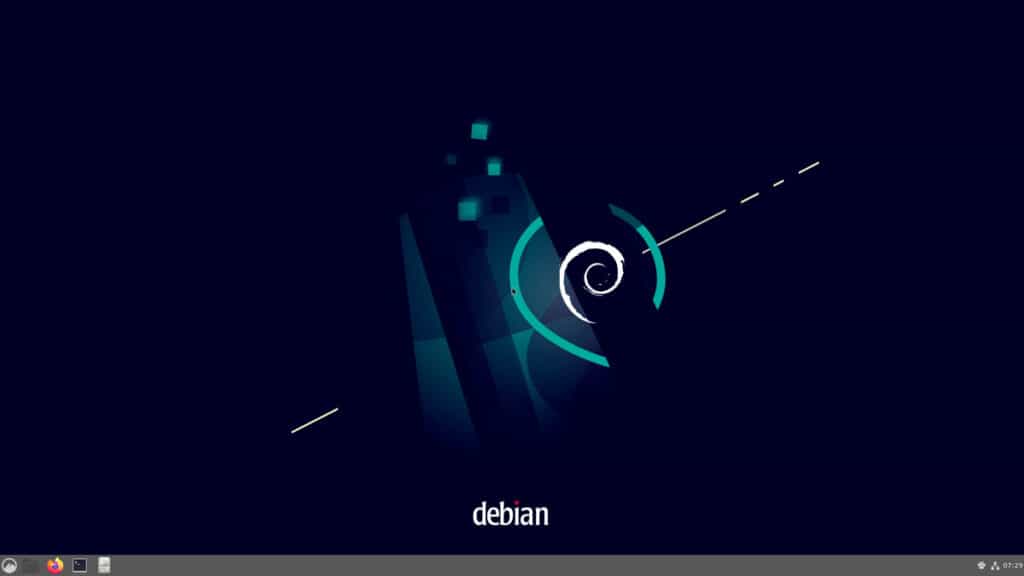
Once done, reboot your system, and you should get access to a basic desktop interface:
Install Synaptic to install new applications
From there, you’ll need to install everything else manually. The XFCE version of Armbian comes with a bunch of apps pre-installed, and the Ubuntu meta-packages I gave you earlier also install a ton of apps by default. But if you started from scratch and just added the desktop environment, there is almost nothing pre-installed on your system currently.
You can use the same apt command to install the basic apps, for example:sudo apt install vlc
sudo apt install chromium-browser
sudo apt install libreoffice
But if you prefer, Synaptic is a great tool to manage packages on a Debian distribution. It looks a bit like the “Add / Remove software” tool on Raspberry Pi OS:
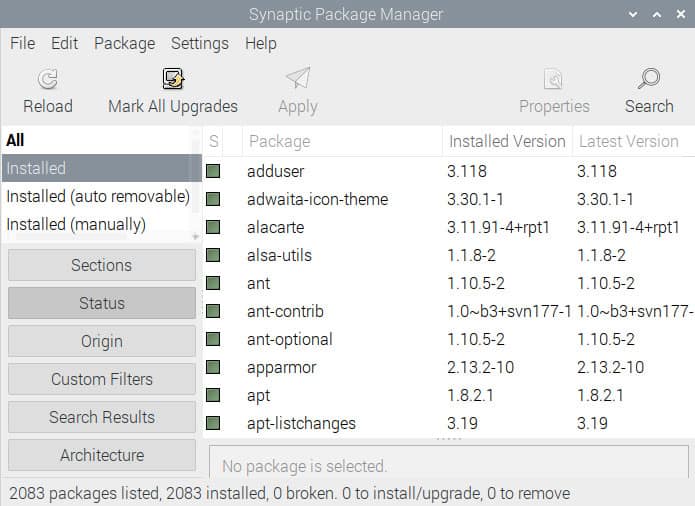
You can install it on Armbian with:sudo apt install synaptic
It's a free PDF guide containing every Raspberry Pi Linux command you should know!
Download now
Reminder: Remember that all the members of my community get access to this website without ads, exclusive courses and much more. You can become part of this community for as little as $5 per month & get all the benefits immediately.
Armbian FAQ
What is Armbian?
Armbian is a Linux distribution, based on Ubuntu, with pre-built images for almost all the single-board computers.
While Raspberry Pi OS is focused only on Raspberry Pi, and other distributions have traditional PC as their main target, Armbian tries to bridge the gap and address all SBC, not only the Raspberry Pi.
So Armbian is a great choice, especially if you use Raspberry Pi alternatives (Orange Pi, Odroid, Banana Pi, etc.), but it can also be used on Raspberry Pi.
What is Armbian based on?
Armbian was based on Debian for a long time, but it’s now based on Ubuntu. The latest version is based on Ubuntu Jammy (22.04). Armbian is a rolling release, meaning software is continuously updated in the default repositories.
How to install Armbian headless? (without monitor/keyboard)
If you don’t have a monitor and keyboard, you can still install Armbian headless, by adding a few files on your SD card after flashing it. Create an empty ssh file will enable SSH on the first boot, which allows you to configure the system from your computer.
You can follow this tutorial I did for Raspberry Pi OS. It works the same way with Armbian.
How to enable I2C on Armbian?
To enable I2C on Armbian, use raspi-config (sudo raspi-config) and go to Interfaces > I2C. The tool will enable I2C directly, so you can use it with any compatible device.
If you have any questions or suggestions on this tutorial, feel free to leave a comment in the community, I will do my best to address them.
Whenever you’re ready, here are other ways I can help you:
The RaspberryTips Community: If you want to hang out with me and other Raspberry Pi fans, you can join the community. I share exclusive tutorials and behind-the-scenes content there. Premium members can also visit the website without ads.
Master your Raspberry Pi in 30 days: If you are looking for the best tips to become an expert on Raspberry Pi, this book is for you. Learn useful Linux skills and practice multiple projects with step-by-step guides.
The Raspberry Pi Bootcamp: Understand everything about the Raspberry Pi, stop searching for help all the time, and finally enjoy completing your projects.
Master Python on Raspberry Pi: Create, understand, and improve any Python script for your Raspberry Pi. Learn the essentials step-by-step without losing time understanding useless concepts.
You can also find all my recommendations for tools and hardware on this page.