Best Desktop Environment on Raspberry Pi (Tests & pictures)
Raspberry Pi OS is the default operating system we use in almost every project. It comes with the PiXeL desktop environment, which is a modified version of LXDE. But it isn’t the only one you can use. I installed the most popular ones on my Raspberry Pi, and will share my impressions with you in this article.
For each desktop environment, I started with Raspberry Pi OS Lite and installed the desktop environment with apt and the default repository. I didn’t change anything to the appearance or default apps that come when you install the meta-package. So, my opinion is based on the default settings. I know that you can always improve the interface look, or install apps to make your life easier with settings etc. But the goal is to give you a general idea of what you can expect by default.
Keep reading if you are looking for your next desktop environment, it’ll save you time as I tested them all, provide screenshots, and list the pros and cons of each one. I’m starting with PiXeL which is the reference, and then the other ones are basically my favorites in order.
If you’re looking to quickly progress on Raspberry Pi, you can check out my e-book here. It’s a 30-day challenge where you learn one new thing every day until you become a Raspberry Pi expert. The first third of the book teaches you the basics, but the following chapters include projects you can try on your own.
PiXeL
You already know everything about it, even with the new Raspberry Pi OS version there are not many changes in the interface overall. So, I will keep this part short, but it’s important to start from there to explain the limits of it, and why I’m looking for another desktop environment in the first place.
Interface
How to say it well? Minimalist? Yes, maybe. PiXeL doesn’t have a fancy interface at all, and that’s not the goal.
It always comes down to the goal of the Raspberry Pi Foundation. They are not looking to create the best desktop experience or the most beautiful system. Their goal is to help young students to learn how to code. So, the interface needs to be simple to use, with easy access to the basic settings and that’s all.
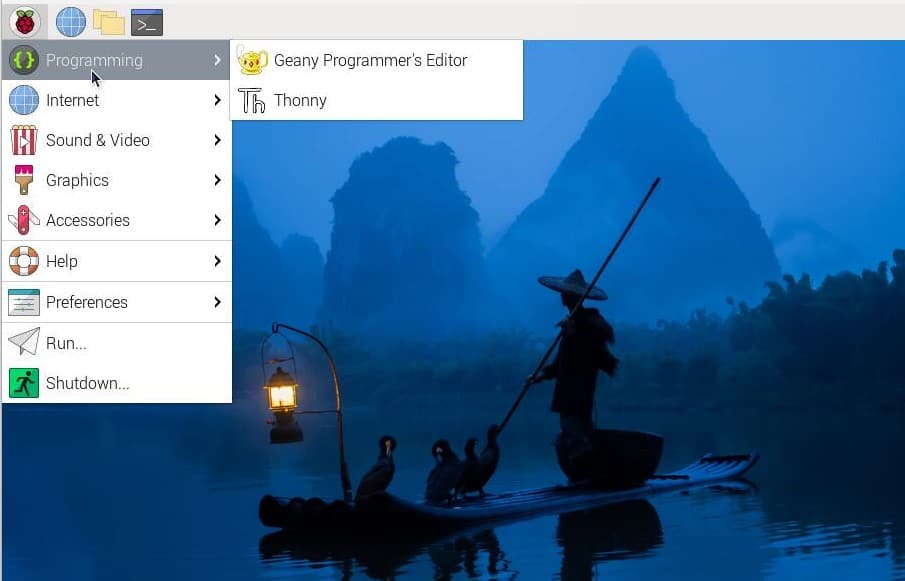
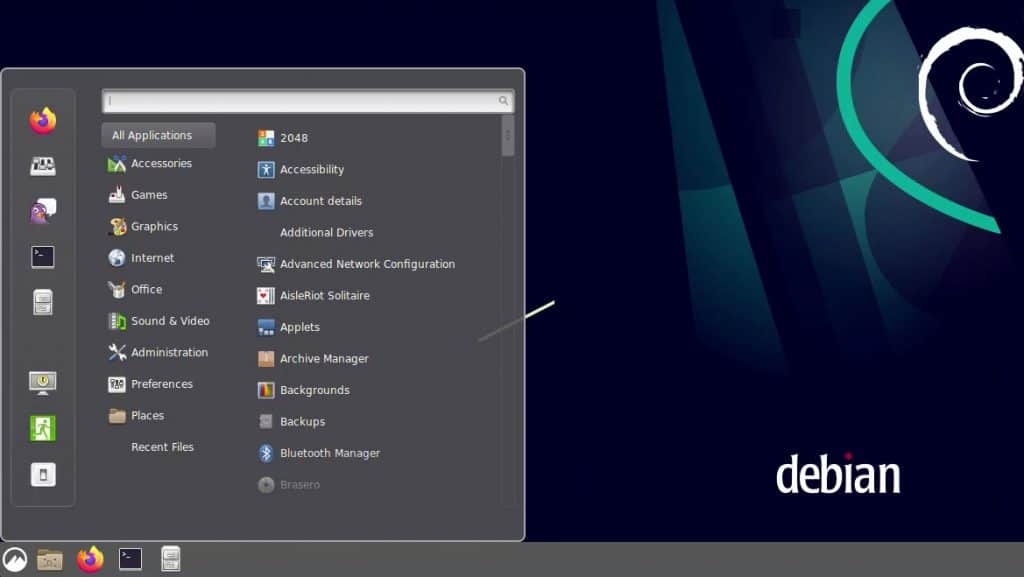
So the main menu is simple. Basic design, apps sorted by category, nothing fancy or complicated:
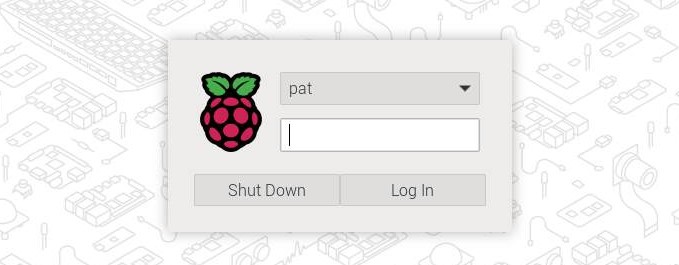
And when you look at the login screen, it’s even more obvious. Login and password, it’s as minimalist as it can be. You’ll see with other options that the login screen is often a beautiful page, with options. With PiXeL, however, it’s just log in and password:
As I was saying in the introduction, it’s always possible to use themes to improve the default look (I have a tutorial about this here). But if you are looking for the most beautiful interface, you should probably try something else (more on that later).
Settings
For each desktop environment, I’ll also show you how they handle their settings. With modern operating systems, there are more and more options, and developers try to make your life easier with an intuitive interface (think about Windows 10 settings, or even Ubuntu / MacOS).
On Raspberry Pi OS with PiXeL, most of the options will be found in the “Raspberry Pi Configuration” tool:
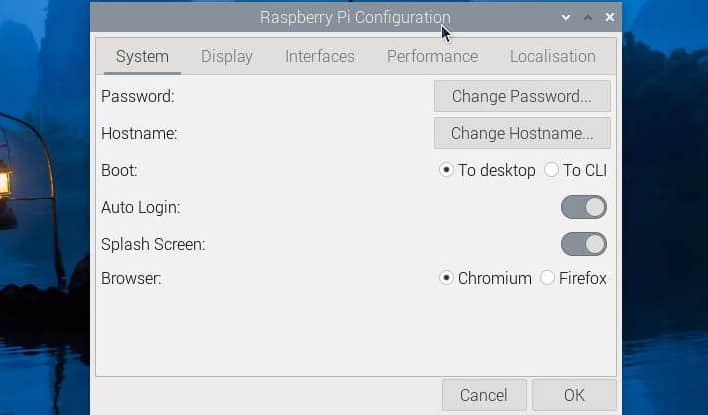
Password, time zone, keyboard layout, etc. everything is here. But what is misleading is that there are other tools that you’ll also need to use for the system configuration.
Want to change the screen resolution? That’s another tool. Change your wallpaper? Another place again. Raspi-config (the command line configuration tool) also has options that are not available via the interface.
I don’t really understand why they haven’t simplified this. I suppose there is a logic behind it, but I don’t get it. It isn’t the end of the world anyway, you’ll quickly find the important settings.
However, you’ll see that other desktop environments have better interfaces to adjust the system configuration.
Performances
I haven’t done any benchmarks for the desktop environments, but I’ll give you my first impression for each of them.
Performances will vary a lot depending on your Raspberry Pi model, settings and interface tweaks. So, I don’t think it will be your main choice. It can play a role if you are using your Pi as a desktop computer, working with it all day, but for most people, waiting 2s or 4s for the web browser to open won’t make a significant difference in their life.
Anyway, PiXeL has been developed with the Raspberry Pi in mind (the whole series), so you won’t experience any performance issues, or at least not directly due to the desktop environment.
If you are lost in all these new words and abbreviations, request my free Raspberry Pi glossary here (PDF format)!
Download now
Installation
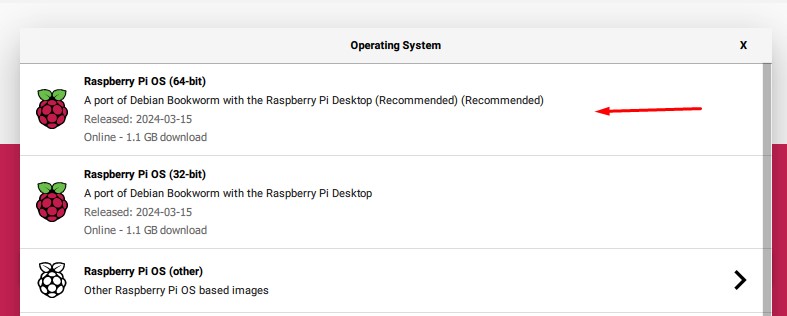
The easiest way to get PiXeL installed on your Raspberry Pi is to use Raspberry Pi Imager and to selection one of the two options: Raspberry Pi Desktop or Raspberry Pi Desktop with recommended software. PiXeL will be installed for you.
If you need further assistance with this, you can read my article on how to install Raspberry Pi OS.
It’s also possible to install it on Raspberry Pi Lite. If you started with a Lite version and want to install a desktop environment on it, you can follow this tutorial. That’s exactly what I have done for all the other environments listed in this article.
Pros & cons
To make it easier to skim through the content packed in this list, I will sum up my impressions with a pros & cons table.
For PiXeL, you already know the verdict: simple interface optimized for the Raspberry Pi, but not the best-looking one.
| Recommended for | Not the best at |
|---|---|
| Easy installation | Settings not intuitive |
| Optimized performances on Raspberry Pi | Overall interface design |
| Simple menu |
KDE Plasma
KDE is one of the most popular desktop environments on PC (with GNOME that comes later), and it can be installed easily on Raspberry Pi, let’s see how it performs.
Interface
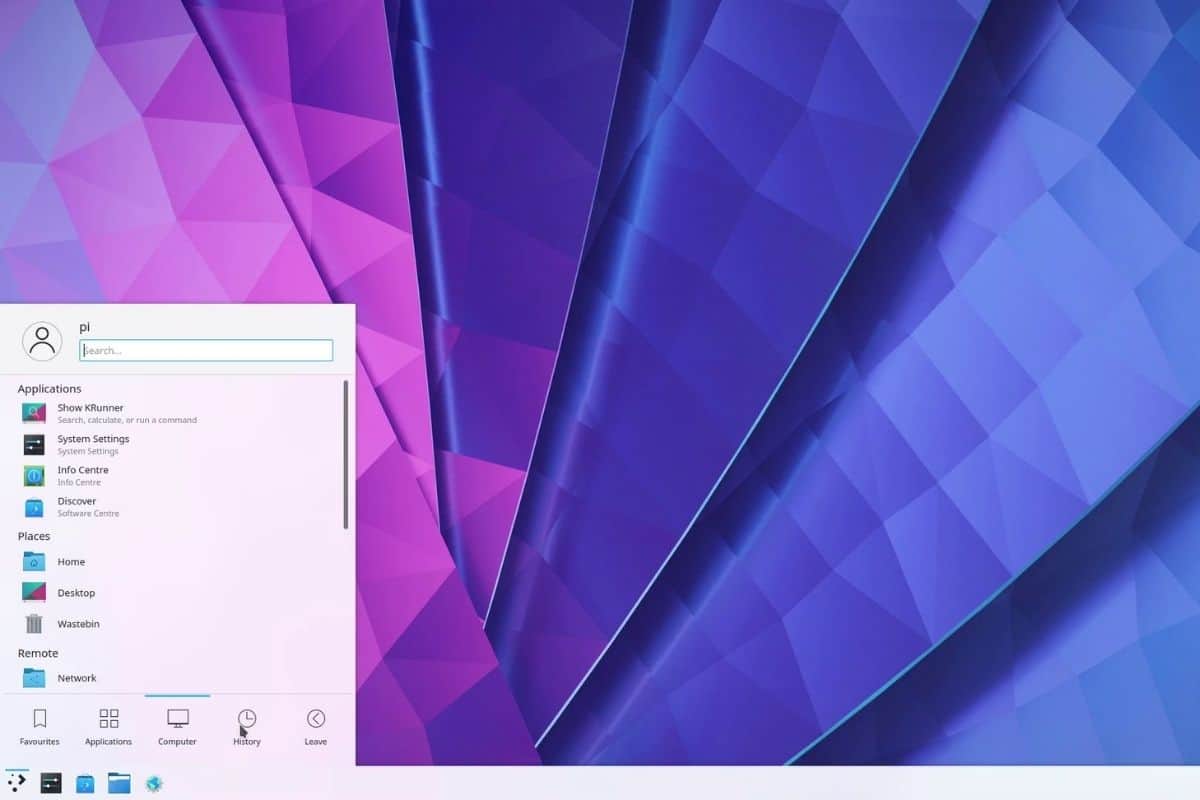
KDE Plasma is a great interface if you are used to Windows. With the main menu in the bottom-left corner of your screen and the task bar also at the bottom of the screen, you shouldn’t be too disoriented.
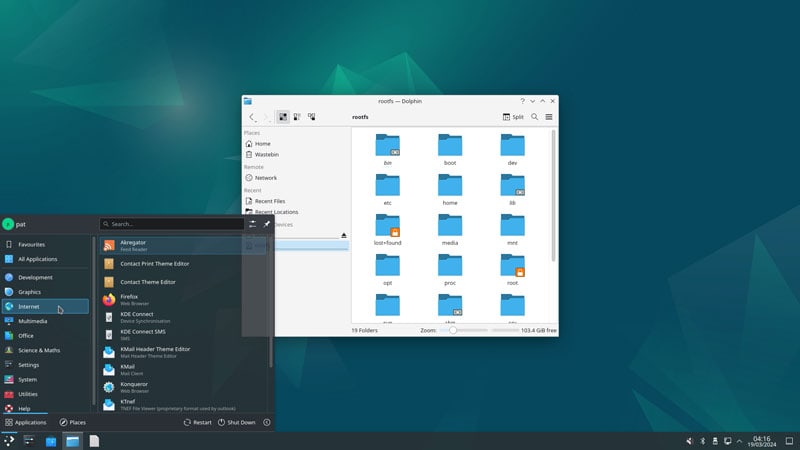
But as you can see, it’s also a more modern interface (in the design but also in the features, like the search engine in the main menu).
I find the interface of this main menu a bit messy if you are not used to it, with different categories and submenus, but with the search engine, it’s not really an issue. Type the first letter of what you are looking for, and you’ll get a filtered view of the corresponding apps or settings.

Join Our Community!
Connect, learn, and grow with other Raspberry Pi enthusiasts. Support RaspberryTips and enjoy an ad-free reading experience. Get exclusive monthly video tutorials and many other benefits.
Learn moreI was speaking about the login screen in the previous part, here is what it looks like on KDE:

Most of the other options have something similar. You can choose your user in a graphical list, but also tweak a few options like the environment for this session, the keyboard layout and have quick reboot and shutdown buttons so you don’t need to open the session to stop the computer.
Settings
The system settings are all bundled into the same application:
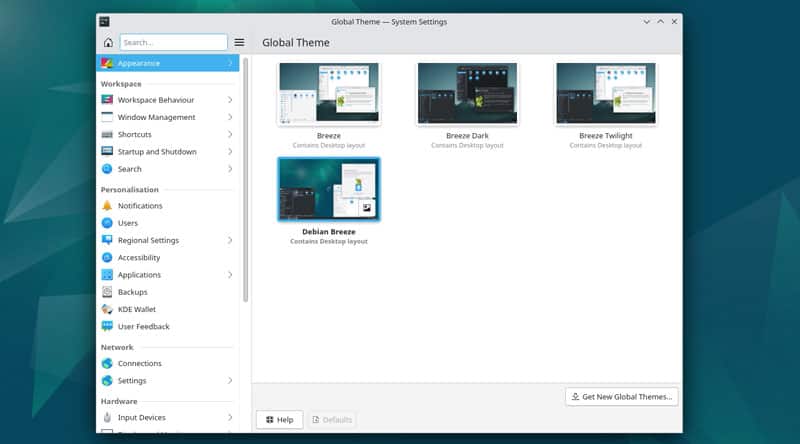
That’s what I was talking about previously. It’s way easier for a beginner to find a configuration option in something like this. Everything at the same place, a search engine that works really well, and that’s it. Don’t know how to change the keyboard layout? Type “lay” and it will show you where to go. It’s as simple as that.
In this “System Settings” app, you can also switch to another theme or style easily. KDE has another tool to manage the applications, but it didn’t work for me. I don’t know what happened, the package list was never updated. Maybe it’s not yet available with the Raspberry Pi OS repositories.
For most environments, the easiest way to manage your applications will be to use apt in a terminal, or install something like Synaptic to do this in the graphic interface:sudo apt install synaptic
Are you a bit lost in the Linux command line? Check this article first for the most important commands to remember and a free downloadable cheat sheet so you can have the commands at your fingertips.
Performances
In my mind, KDE has always had a bad reputation in terms of performances. Yeah, obviously it’s not the most lightweight option you can find, but on my Raspberry Pi with 4 GB it wasn’t as bad as expected. The navigation is fluid in the menus and settings.
I didn’t use much of the applications, so I don’t have a 4-hour experience to tell you if something like Chromium is really slower than on PiXeL, for example. But overall, it seems decent, it’s worth a try at least.
I suppose with the increased memory on new Raspberry Pi models, the recent system upgrades (with the slight performance boost that came with them) and probably the work of the KDE team, performances will be less and less an issue on Raspberry Pi.
Installation
Installing a new desktop environment is not complicated, and KDE can be installed almost like any other, by using apt.
I did my tests by starting with a Raspberry Pi OS Lite version, to not have conflict, useless apps or whatever. But you can also install it on Raspberry Pi OS with Desktop, if you want to try something new on the same SD card.
Since Raspberry Pi OS Bookworm, I figured that the easiest way to install a desktop environment on top of the Lite edition is to use a tool named “tasksel” instead of installing the packages manually.
Tasksel is a tool, helping you to add new features to an existing Linux system. You may have already seen its interface during a traditional Linux installation (on a standard computer or server).
Here is how to use tasksel to install KDE on Raspberry Pi OS:
- Open a terminal or log in on the Lite version.
- Run this command:
sudo tasksel - A menu shows up, asking you what you want to install, select KDE in the list:
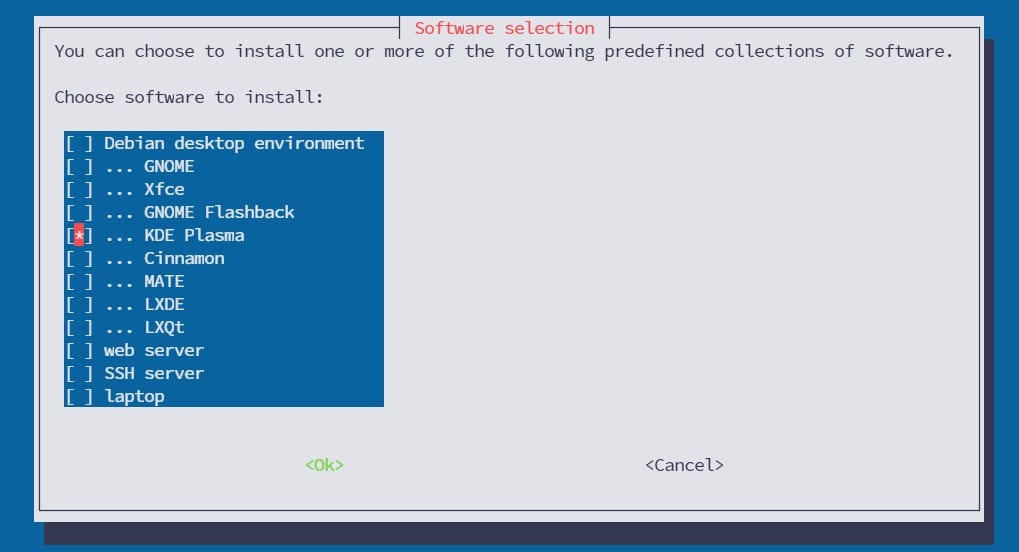
Press “Space” to select it, and “TAB” to go to the “OK” button and start the installation. - It will download something like 850 packages, about 600 MB to download.
So, the installation duration will mostly depend on your Internet connection speed. - Once done, just reboot your system and enjoy!
If the desktop environment doesn’t start automatically, you may need to install “lightdm” and enable the desktop auto-start via raspi-config. I explain everything in this article: Upgrade Raspberry Pi OS Lite to Desktop (PIXEL, KDE, …).
If you do this on Raspberry Pi OS with Desktop, there is an additional step. You need to tell Raspberry Pi OS which environment to start. You can do this with the command:sudo update-alternatives --config x-session-manager
Pick the corresponding option in the list and reboot your system.
Pros & cons of KDE Plasma
| Recommended for | Not the best at |
|---|---|
| Great interface design | Main menu a bit complicated |
| Easy to use system settings | Decent performances but not the best |
| Best for Windows users |
Cinnamon
Cinnamon is not the best known interface, but it’s one of my favorite after PiXeL and KDE. I recently tried it to write my article on how to install Linux Mint on Raspberry Pi, and I was impressed by the progress of this desktop environment.
If you are lost in all these new words and abbreviations, request my free Raspberry Pi glossary here (PDF format)!
Download now
Interface
The interface is also a Windows-like one, as for KDE. You will find the taskbar, the main menu and shortcuts at the bottom of the screen.
I prefer the main menu of Cinnamon over KDE, but it’s an opinion. You have the favorite applications on the left (the most used or recently used, I think). Then a list of categories as on PiXeL and the apps they contain. You also have a search engine if needed, so you’ll quickly find anything here:
As you can see on the screenshot, Cinnamon comes with a bunch of applications by default, so you’ll have everything you need available directly. I think Synaptic is also installed by default, so you can use it to manage your applications and install the ones that are missing (like Chromium ^^).
Settings
Cinnamon has a similar system center as on KDE, and you can also see on the screenshot above that each parameter is listed in the main menu. So using the search engine in the main menu is probably the fastest way to find and change an option.
What I really liked with Cinnamon is the interface customization. There is an app where you can install new themes in a few clicks and enable it directly. You can also use different icons or mouse cursors if you want. That’s what I used to install a fake Linux Mint theme:
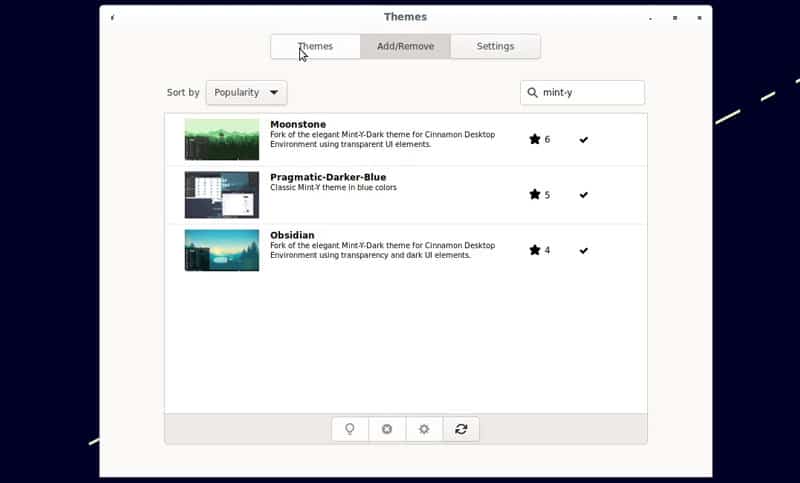
If you use PiXeL, finding and installing new themes is an adventure, so seeing this on Cinnamon is really a great point.
Performances
No problem with the performances on Cinnamon. It’s a pretty lightweight option, so it should be between KDE and PiXeL. You won’t have any issues due to the desktop environment.
The only thing I can say here, is that as Cinnamon comes with a lot of applications, it may load your system more that you need. Also, some choices are questionable, such as installing Firefox by default. I find that Chromium is way faster than Firefox on Raspberry Pi, so I would recommend installing it instead of Firefox.
Anyway, that’s nothing you can’t fix after the installation, so there is no major issue here.
Installation
As for KDE, the safest option is probably to use “tasksel” to install Cinnamon will all its dependencies (instructions here), but you can also try to use apt, so you can try to install the minimum (especially for old Raspberry Pi models).
I installed the full environment from Raspberry Pi OS Lite with:sudo apt install cinnamon-desktop-environment
Other packages are available if you want to try a more minimal environment first: sudo apt install cinnamon #minimal
sudo apt install cinnamon-core #essentials
I suppose the second one is the best option, if you want some apps by default but not the full suite of programs you’ll never use. Or use the first one if you are on Raspberry Pi OS Desktop, as you already have the apps you need.
If you are on Raspberry Pi OS with Desktop, refer to the previous part to select the default desktop environment.
Pros & cons of Cinnamon
| Recommended for | Not the best at |
|---|---|
| Good performances | Not the best looking one by default, but easy to improve |
| Main menu & themes settings | |
| Easy to use for Windows users and beginners |
GNOME
GNOME is also a popular one, like KDE, and was almost the only option when I was at school.
Interface
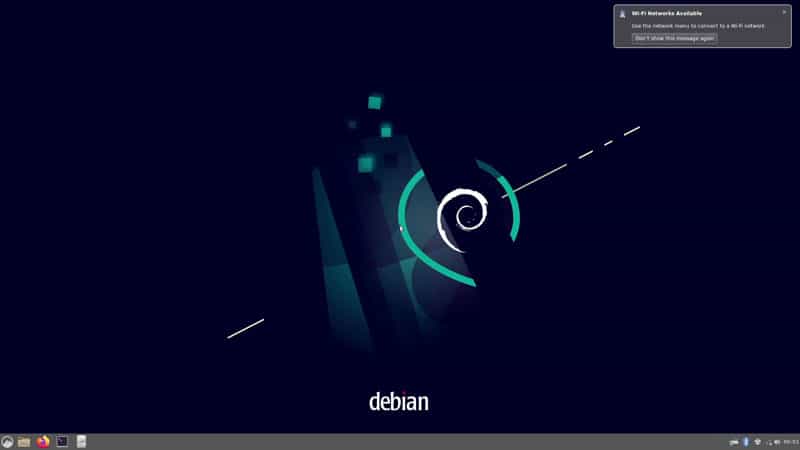
Unfortunately, the interface has evolved a lot since that time, and I don’t really like the new style. But it’s also an opinion, and if you are used to systems like Ubuntu, you are at home with GNOME:
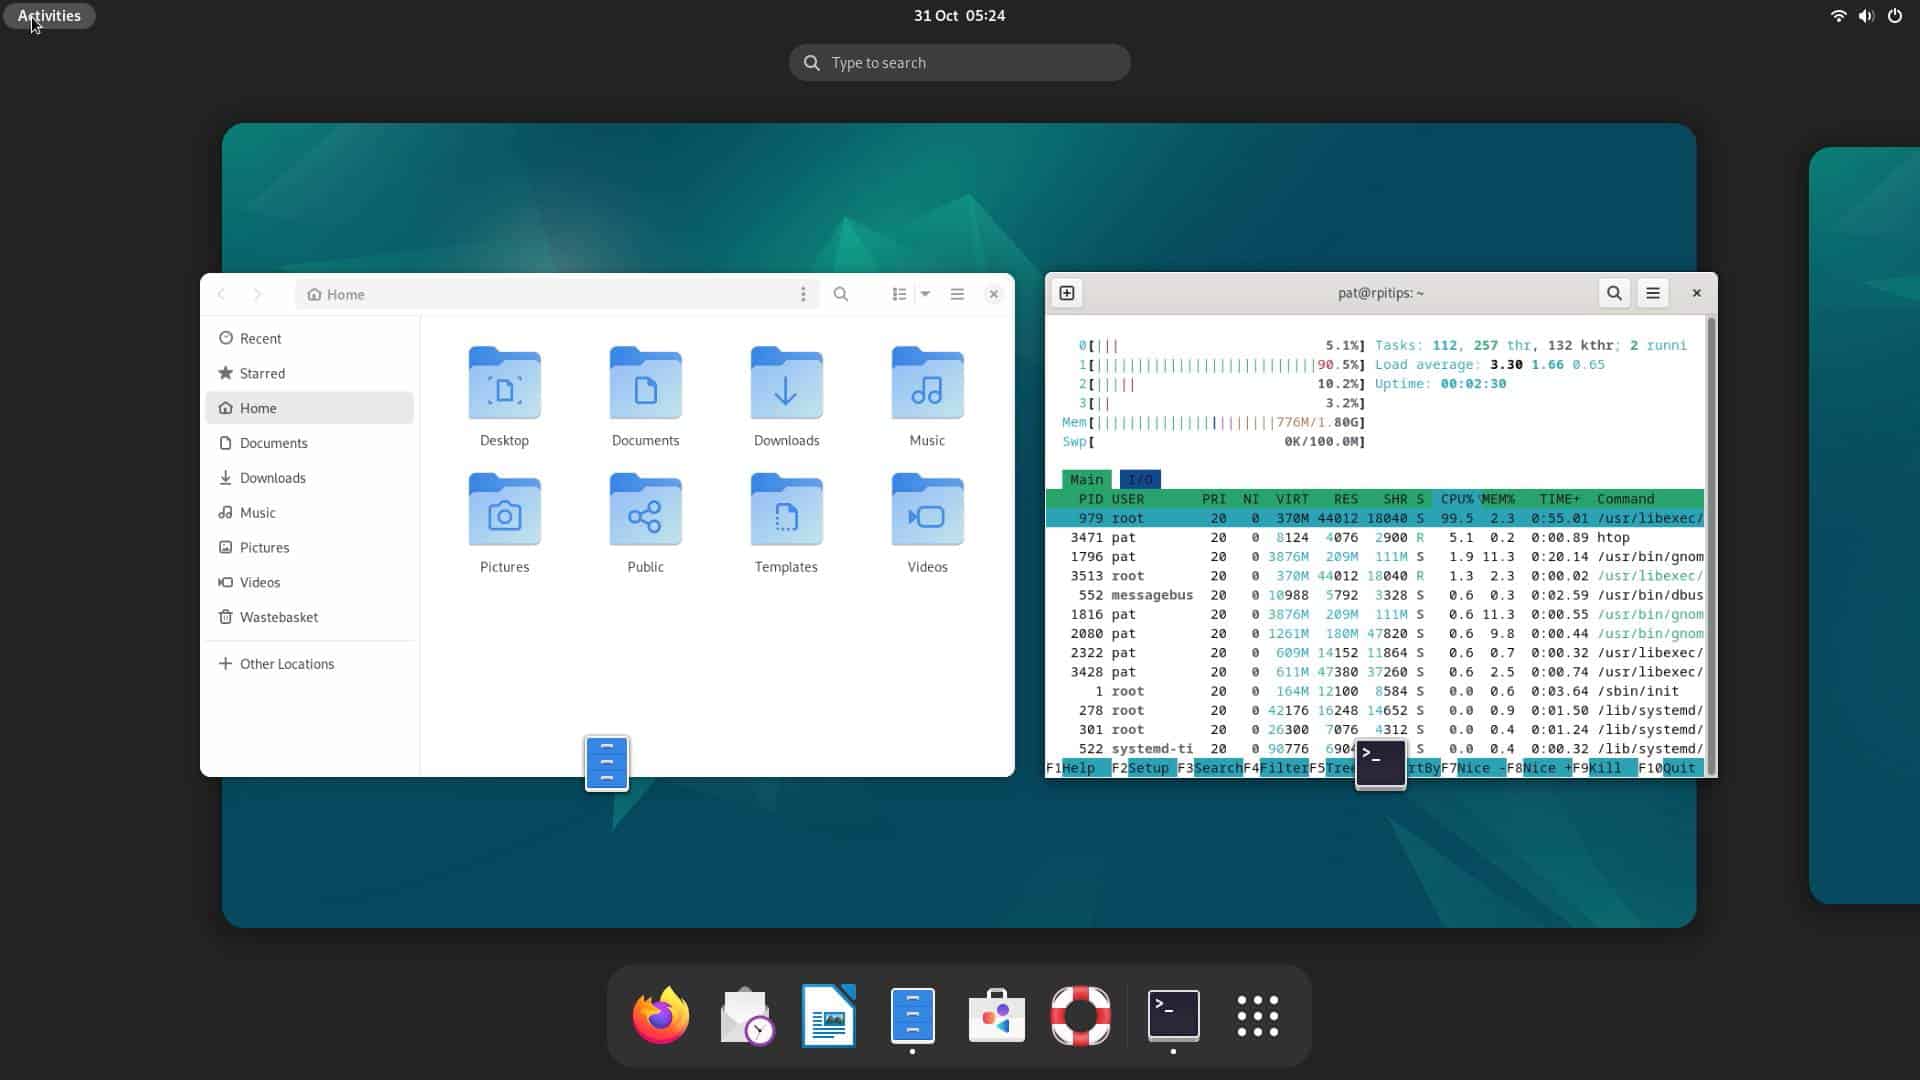
You need to click on “Activities” in the top left of your screen to access this interface. You’ll find the shortcuts on the left, and all the apps can be found by clicking on the bottom icon in the shortcuts bar. There is also a search engine to quickly find an app, which will be pretty handy once your system installed because apps are presented with big icons, so you can only see a few apps on each page (think to something like Android or iOS).
Anyway, the interface is modern and looks great, but it’s maybe not for everyone. I don’t like it, and maybe for beginners a main menu with categories is easier. But it depends a lot on the systems you are used to on your computer, so I won’t enter a rant against it there.
Settings
Great point, however, with the settings that are all gathered in a nice-looking tool, similar to what you can find on KDE:
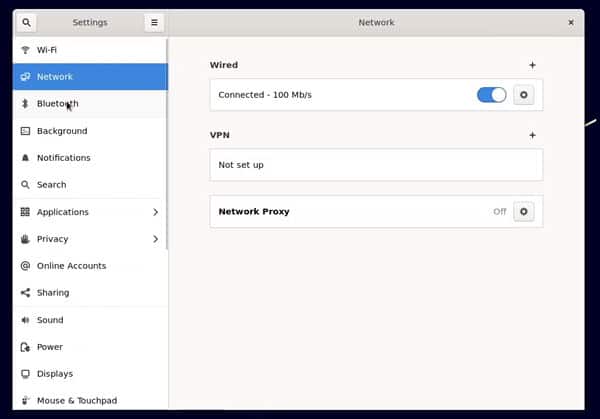
I even think it’s the best tool over all the desktop environments. It makes me think I’m on macOS. Everything is clear, easy to find, and you have a search engine if needed. Applications and privacy settings have a submenu, but aside from that, everything is one or two clicks for a quick configuration.
Performances
It’s not horrible, but GNOME is the heavier option in this list. It’s the only one where I felt a drag when using it, you can see that it takes time to browse in the settings or use the interface to configure your Wi-Fi or whatever. It’s a great option on a PC, with more powerful components, but on Raspberry Pi it’s a bit slow.
If you love GNOME, I think you can still give it a try because it’s not unusable at all. You’ll just need to be patient sometimes, or maybe try to tweak a few options to fix this.
Anyway, as said previously, I haven’t completed any tests and it’s based on my first impression. Perhaps there is another reason, and you won’t have the same experience, but just expect GNOME to be a bit slower than other options. Probably not the best choice if performances are in your criteria.
Update: I recently tested it on Raspberry Pi 5, and it’s way better. If you have a recent model, it’s probably fine. Just don’t expect top performances with this option, but there are other advantages of using it.
Installation
The GNOME installation can be done the same way as the other options.
Use “tasksel” again for a straightforward process, as explained for the previous desktop environments:sudo tasksel
On Raspberry Pi OS, you can also use APT to do the same thing:sudo apt install gnome-shellThe installation is minimal, there is not even a terminal by default.
I don’t know if there is another package with more apps included.
Surprisingly, the download required is less important than with KDE. You’ll “only” need 600 packages and 350 MB in total (1.1 GB once installed).
Pros & cons
| Recommended for | Not the best at |
|---|---|
| Ubuntu users | Performances |
| Best settings app | Not the most intuitive for beginners |
| Good design overall |
MATE
And the final one on this list is MATE. For a time, I used MATE instead of the new GNOME versions because it’s similar to what I was used to. That’s why I decided to try it again and include it in this list.
Interface
The problem is that, at first sight, MATE doesn’t seem to have evolved since I last used it years ago. So, I find it looks a bit dated compared to the other alternatives we previously discussed:
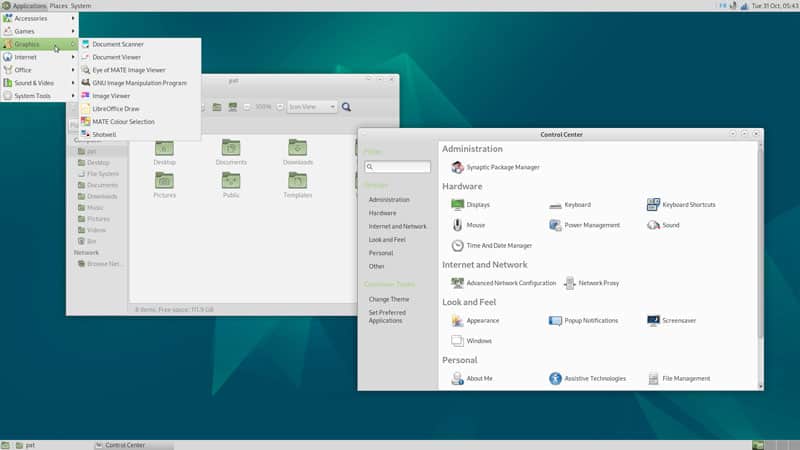
The main menu is divided in 3 parts: applications, places (file explorer) and system settings. I like that, you’ll use the applications menu most of the time, and won’t be bothered by the settings apps you generally use once at the beginning and never after that.
It’s a bit of a mix between PiXeL and Cinnamon. The main menu is at the top of the screen, with the clock and other icons. Then, the open applications will be accessed via a bottom bar, where you can also find several virtual screens (bottom right).
Many themes are available for MATE, so you can always improve the interface design, but I judge the default options here.
Settings
The settings part of the interface is a bit less neat. You’ll find a “Control Center”, like on most desktop environments, but it’s very limited:
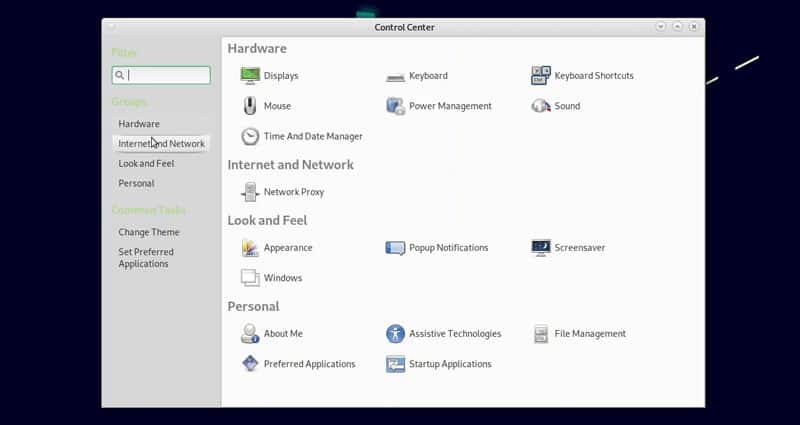
The most important options are here (display, keyboard, language, etc.) but that’s it. There is a menu on the left to go directly to a subsection, but I don’t really get it as everything is on one page (if you click on “Internet and network” it does nothing as you can already see it).
Also, the search engine only works on tools title, so if you type “layout”, there is no result. Meh, not that great.
All the tools can be found directly under the “System” menu, so you’ll probably never use this control center anyway.
Performances
No performances issue with MATE. Like Cinnamon and PiXeL, MATE is a light desktop environment, nothing that a Raspberry Pi 4 can’t handle easily.
I haven’t tried on other models, but I suspect it will be similar to PiXeL.
Installation
To install MATE on Raspberry Pi OS, you can use apt too:sudo apt install mate-desktop-environment-core lightdmLightDM is not added automatically with the meta-package, so it’s mandatory if you are on Raspberry Pi OS Lite.
You already have it if PiXeL or another desktop environment is installed.
MATE requires 425 packages for a total of 250 MB to download. It will use about 900M on your SD card once installed.
Pros & cons
| Recommended for | Not the best at |
|---|---|
| Solid performances | Old-looking interface |
| Similar to PiXeL in many ways | Obsolete control center |
| Main menu easy to use |
It's a free PDF guide containing every Raspberry Pi Linux command you should know!
Download now
Video
If you want to see all these environments in action, you can watch the video version of this article here:
It's a free PDF guide containing every Raspberry Pi Linux command you should know!
Download now
Want to chat with other Raspberry Pi enthusiasts? Join the community, share your current projects and ask for help directly in the forums.
Final Thoughts
If you were looking for the absolute best desktop environment for Raspberry Pi, you won’t find the answer here. I can only share the pros & cons of each one, to help you make a choice. There is no absolute truth, it’s like asking for the best wallpaper ever – it’s a personal choice.
If I had to use my Raspberry Pi as my main computer today (I already did this experience previously), I would probably go for KDE. I use Windows on my laptop, so I like the main menu location, the interface is modern with a good look and search engines everywhere, and it’s not too slow, so it should be a good fit.
Cinnamon is pretty good too, and will come shorty after KDE.
For beginners, I recommend staying with PiXeL, as it’s the best choice for performances, compatibility and also because most tutorials will guide you in this interface, not with another one.
Once your choice is made, go to this article to install the best apps on your Raspberry Pi. And if you haven’t found what you were looking fore here, you can also try another operating system (or distributions at least), here are my favorites.
Whenever you’re ready, here are other ways I can help you:
The RaspberryTips Community: If you want to hang out with me and other Raspberry Pi fans, you can join the community. I share exclusive tutorials and behind-the-scenes content there. Premium members can also visit the website without ads.
Master your Raspberry Pi in 30 days: If you are looking for the best tips to become an expert on Raspberry Pi, this book is for you. Learn useful Linux skills and practice multiple projects with step-by-step guides.
The Raspberry Pi Bootcamp: Understand everything about the Raspberry Pi, stop searching for help all the time, and finally enjoy completing your projects.
Master Python on Raspberry Pi: Create, understand, and improve any Python script for your Raspberry Pi. Learn the essentials step-by-step without losing time understanding useless concepts.
You can also find all my recommendations for tools and hardware on this page.