How To Create A New Python File In Terminal On Raspberry Pi
Programming for the first time can already be challenging, but when you add new Linux skills on top of it (like the command line), it can quickly become overwhelming. In this article, I’ll show you how to create a Python script from the terminal, even if you know nothing about Linux command lines.
On Raspberry Pi OS, Nano is the default text editor and can be used to create a new Python file from the terminal. The command syntax will be “nano <filename.py>”.
As often with computers, it’s not that easy. There are a few additional steps and some tips you’ll need to know to get started. Let’s do this!
By the way, if you get overwhelmed as soon as Python is required for a project, I recommend checking out my e-book “Master Python on Raspberry Pi“. It will guide you step-by-step to learn the essential concepts (and only the essential concepts) required to achieve any project in the future. Raspberry Pi without Python is like a car without an engine, you miss all the fun parts. Get 10% off by downloading it today!
How to create a new Python file in the terminal
Here are the required steps to create a new Python file from the terminal:
- Create a new folder for your scripts and go into it.
- Create a new Python file with Nano.
- Type the code and save the file.
- Run the Python script.
Let’s learn how to do this step-by-step.
Move to your code folder
A good practice is to create a subfolder where you’ll store all of your Python scripts. You can also create a main subfolder (like “code” or “scripts”) and create another subfolder in it for each project. Just try to be organized from the beginning, as it will make things easier later on.
Open the terminal on your system, and follow the instructions below.
On Raspberry Pi OS, you have a shortcut to the terminal in the top bar.

Join Our Community!
Connect, learn, and grow with other Raspberry Pi enthusiasts. Support RaspberryTips and enjoy an ad-free reading experience. Get exclusive monthly video tutorials and many other benefits.
Learn more
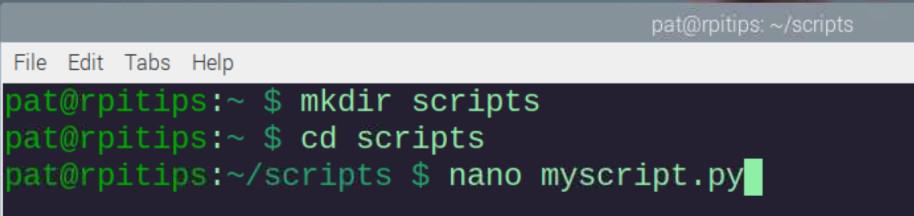
To create your main folder, you can type this command into the terminal:mkdir scripts
Press “Enter” to execute the command.
“mkdir” is the command name you can use to “make directory”.
“scripts” is the name of my folder, but you can obviously use whatever you want.
If like me, you always mix the languages syntax, download my cheat sheet for Python here!
Download now
Then you can go into this folder with the command:cd scripts“cd” is the abbreviation of “change directory”.
If you want to create subfolders there, feel free to use the “mkdir” command again and then move into them with “cd”.
Are you a bit lost in the Linux command line? Check this article first for the most important commands to remember and a free downloadable cheat sheet so you can have the commands at your fingertips.
Create a new Python file
Once in the correct folder, the easiest way to create a new Python file from the terminal is to use Nano.
Nano is a text editor, that is installed by default on Raspberry Pi OS and can be used in the terminal (no desktop environment required).
To create a new file, simply use this command syntax:nano <filename>Python scripts have a “.py” file extension, so you can for example use:nano myscript.py
It’s also possible to specify the full file path directly in the command, so you don’t have to be in the destination folder. For example:nano /home/pat/scripts/myscript.pyThis command will do the same thing as on my screenshot, even if you are in an entirely different folder.
Related: Should You Learn Linux or Python first?
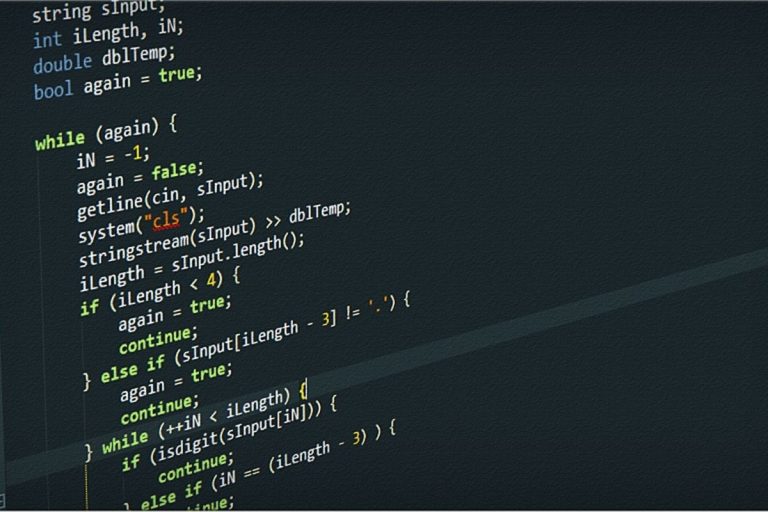
Type your code in the editor
When you use nano in the terminal, it will open a basic text editor, where you can type your Python code:
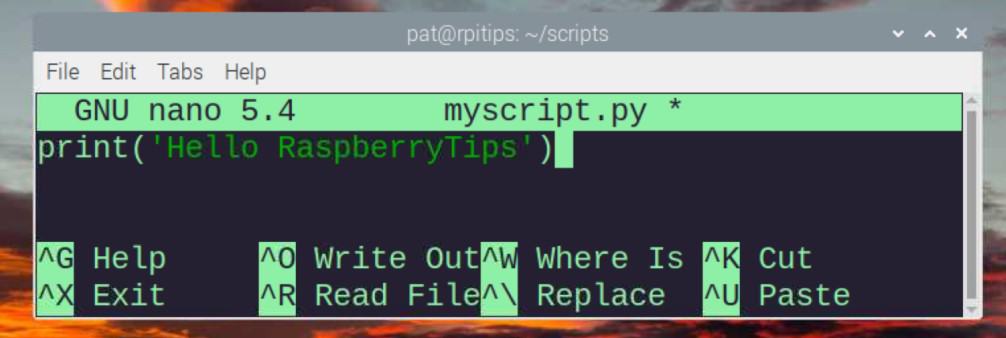
You can directly type your code, for example, you can try something simple first:print('Hello RaspberryTips!')
Feel free to check my tutorial on how to get started with Python on Raspberry Pi if you need some guidance at this point.
Nano has a color highlighting feature enabled by default for Python, so it’s a good editor to get started with, even if there is no GUI and it can be challenging if you are new to Linux.
Save your file
Nano is intuitive in a way, as you can directly type your code in the terminal window. But using other features, even the most basic like saving the file, is not very intuitive.
Shortcuts are mentioned at the bottom of the editor, but here is how to save your new Python script:
- Once your code is completed, press “CTRL+O” simultaneously to write the file content.
- Then press “CTRL+X” to close the Nano editor window.
You’ll get back to the terminal, where you can see your previous commands and run the Python script.
If you’ve never used Nano before that, you should probably read my article explaining the important commands and shortcuts to know with this tool. It’s powerful, but can be confusing in the beginning.
If like me, you always mix the languages syntax, download my cheat sheet for Python here!
Download now
Test your Python script
Last step! You have now created your script from the terminal by using Nano to write the code. You can now run it to make sure it’s working as expected.
To run a Python script from the terminal, you can simply use this command syntax:python <filename>So, in my example, it’s:python myscript.py

If you used the code I gave you previously, it should just display something like “Hello RaspberryTips!”.
Well done! You now know how to create a new Python script from the terminal. It works the same way with any text file, by the way. For example, creating a script in C/C++ from your terminal will be exactly the same (more details about this here).
It's a free PDF guide containing every Raspberry Pi Linux command you should know!
Download now
How to edit an existing Python script from the terminal
To edit an existing Python script from the terminal, Nano can be used by specifying the filename in the command line, for example:nano myscript.py

So, it’s basically the same thing as creating a new file. If the file already exists, Nano will start and show you the file’s content instead of a blank page.
Remember that you can specify the file’s path in the command line, you don’t have to switch to the destination folder each time. For example:nano /home/pat/scripts/myscript.py
The “cat” command I use on my screenshot allows you to quickly see the file’s content without editing it.
It's a free PDF guide containing every Raspberry Pi Linux command you should know!
Download now
Want to chat with other Raspberry Pi enthusiasts? Join the community, share your current projects and ask for help directly in the forums.
Other options to create Python files on Raspberry Pi
Using Nano to create Python files on Raspberry Pi is the default option, as it’s preinstalled, but many alternatives are available if you want to test something else.
Use another text editor in your terminal
If the only interface you have is the terminal, Nano is probably the best option.
An alternative would be to use “vim” which is a popular text editor for the terminal on Linux, and can be installed easily on Raspberry Pi OS.
You first need to install it with apt:sudo apt install vim
And you can then edit your files with the following:vim <filename>
As you can see in this screenshot, there is also some color highlighting available.
It’s a bit more challenging to get started with it, as you can’t edit the file directly (you have to press “I” to switch to “Insert” mode), and there are some weird commands to do everything (like “:wq” to save the file).
I have a full tutorial on how to use Vim on Raspberry Pi here. I recommend checking it out if you don’t like Nano and want to try something else.
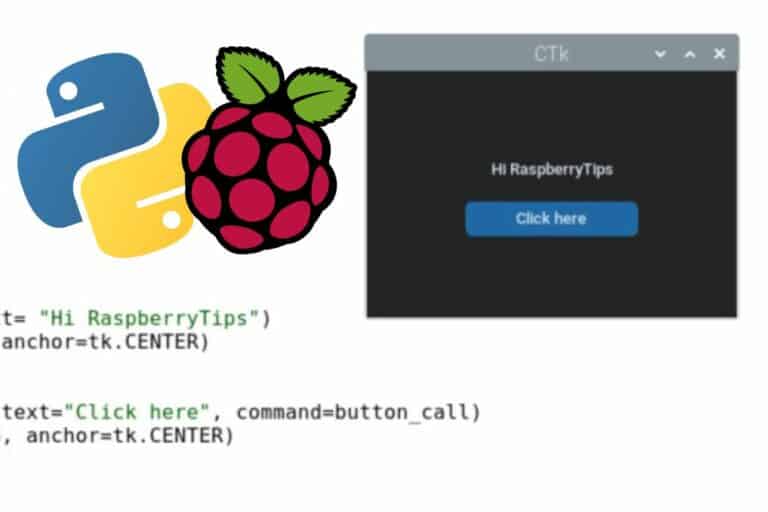
Add a desktop environment for better editors
The easiest way to code in Python would be to use a desktop environment and install a graphic text editor.
Geany and Thonny are preinstalled on Raspberry Pi OS with Desktop, and Visual Studio Code is available in the “Recommended software” tool. It will be way more intuitive to use than the terminal, especially if you are new to Linux.
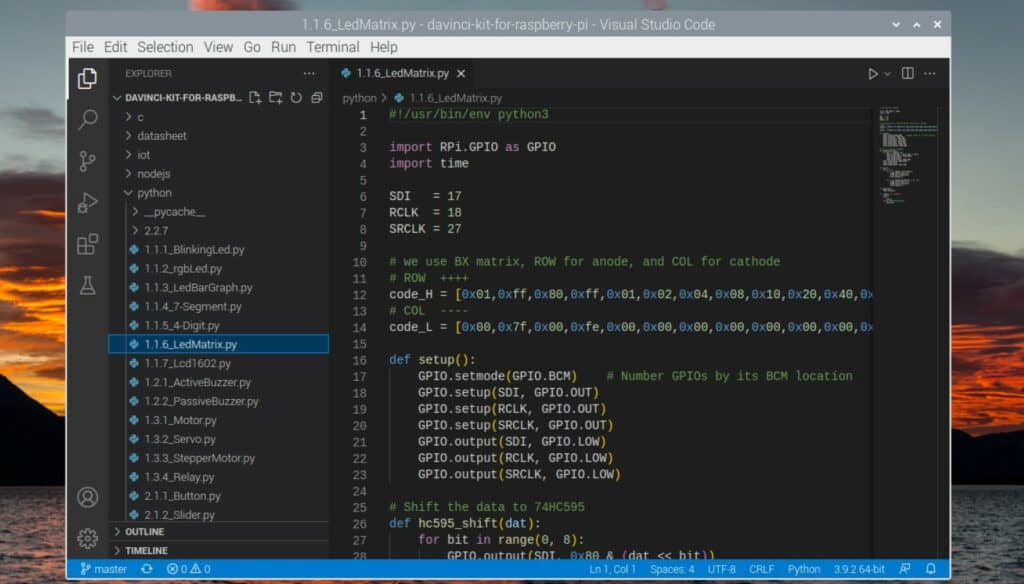
VS Code is my favorite editor currently (yes, even if it’s a Microsoft product…), but you can find my list of the top code editors for Raspberry Pi here if you want other suggestions.
Remote development
Another suggestion if you don’t have the choice and need to use a Lite edition of Raspberry Pi OS (terminal only), is to code from your computer, and send the Python files to the Raspberry Pi.
You can do this manually, or even better, you can configure remote development on Visual Studio Code (and most major editors I think).
The idea is to enable SSH on the Raspberry Pi, configure your project to connect to a remote folder (/home/pat/scripts for example), and edit the Python files from your computer directly. Each time you save the file on your computer, it will update it on the Raspberry Pi.
It’s not that complicated to set up, and it will be way more comfortable to use on a daily basis.
Whenever you’re ready, here are other ways I can help you:
The RaspberryTips Community: If you want to hang out with me and other Raspberry Pi fans, you can join the community. I share exclusive tutorials and behind-the-scenes content there. Premium members can also visit the website without ads.
Master your Raspberry Pi in 30 days: If you are looking for the best tips to become an expert on Raspberry Pi, this book is for you. Learn useful Linux skills and practice multiple projects with step-by-step guides.
The Raspberry Pi Bootcamp: Understand everything about the Raspberry Pi, stop searching for help all the time, and finally enjoy completing your projects.
Master Python on Raspberry Pi: Create, understand, and improve any Python script for your Raspberry Pi. Learn the essentials step-by-step without losing time understanding useless concepts.
You can also find all my recommendations for tools and hardware on this page.