My CrowPi2 Raspberry Pi Laptop Review After One Month Usage
The CrowPi2 looks like a traditional laptop, but it’s way more than that. It’s powered by a Raspberry Pi and has all the sensors hidden under its removable wireless keyboard, to easily get started with electronics projects.
I got the chance to test it for a few weeks, and I’m now ready to introduce it to you: especially the package content, the customized operating system, and the learning process. I will also give you my honest opinion after that, and tell you whether it’s for you (or not).
If you are interested, click below to check the options and pricing on the official store.
Get 5% off at checkout by using this coupon code: RPITIPS.
Note: To be completely honest with you, Elecrow sent me this kit for free, to test it and write a review about it. I’ve tested it for a few weeks, and I’m free to share with you my real opinion. I just want to be transparent with you. Now that’s clear, let’s move on.
What is CrowPi2?
Introduction
The CrowPi 2 is like a laptop, but it has a lot of sensors already plugged in, so you can easily learn electronics (GPIO, code, etc.). You’ll focus on discovering the sensors and playing with them in small code projects, to learn step-by-step how they work.
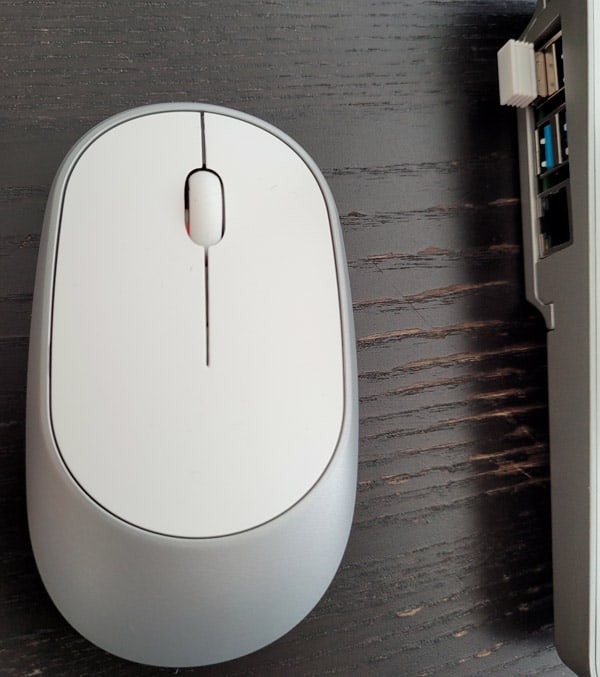
It’s basically the ultimate Raspberry Pi kit. An 11.6″ monitor, a wireless keyboard and mouse, the GPIO playground under the keyboard, and everything is ready to use.
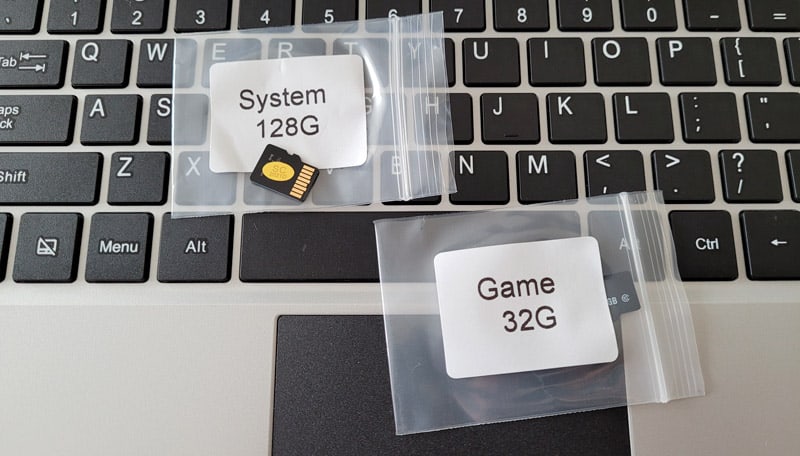
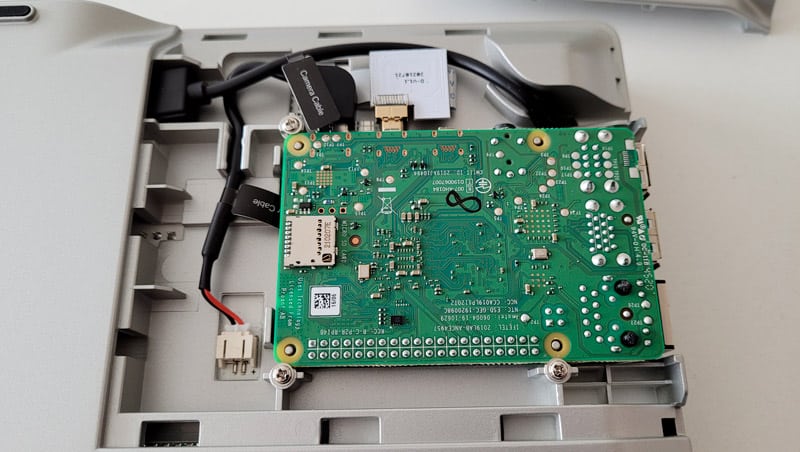
On my device, the Raspberry Pi was already plugged in, I just had to insert the SD card to boot on the customized operating system.
Features
- 11.6″ IPS Screen (Resolution: 1920×1080).
- Wireless keyboard.
- 2MP camera, built-in microphone, and stereo speakers.
- All-in-one board with all sensors already plugged in.
- It includes a complete course with tutorials to learn Scratch, Python, AI, and Minecraft.
- Online account to save your progress.
- Compatible with Raspberry Pi 3B+ and 4B.
- Weight: 1.3 kg.
Kits & pricing
The CrowPi 2 is available in three kit versions:
- Basic kit: The minimum you need to get started.
- Advanced kit: Adds two books about Python and Scratch, the game controllers, a bigger SD card, etc.
- Deluxe kit: Includes everything I have in my kit, more sensors, and the storage bag for example.
The price difference between those kits is not excessive, so I feel you should probably get at least the advanced kit. Adding the books and bigger SD cards already justifies the slight price increase.
Aside from that, there are many options you can choose from on the product page, that can quickly bump up the price. For example, you can order it with a Raspberry Pi or use your own, add a powerbank, etc.

Join Our Community!
Connect, learn, and grow with other Raspberry Pi enthusiasts. Support RaspberryTips and enjoy an ad-free reading experience. Get exclusive monthly video tutorials and many other benefits.
Learn moreAt the time of writing, the price goes from around $300 for the basic kit without Raspberry Pi, to almost $600 with all the options and a Raspberry Pi 4B / 8 GB. Your interpretation of this price will be very different depending on your goals and current hardware.
If you are lost in all these new words and abbreviations, request my free Raspberry Pi glossary here (PDF format)!
Download now
If you are just comparing the CrowPi 2 to a Chromebook or other entry-level laptops, this might seem like a steal. But if you want to learn how to code, consider the price of each component or the resources included, and the fantastic learning experience, it’s almost a given.
The truth is probably in the middle, I’ll get back to this point at the end of this review.
Remember that you can get 5% off by using the coupon code “RPITIPS” at checkout.
Here is the direct link to order it now.
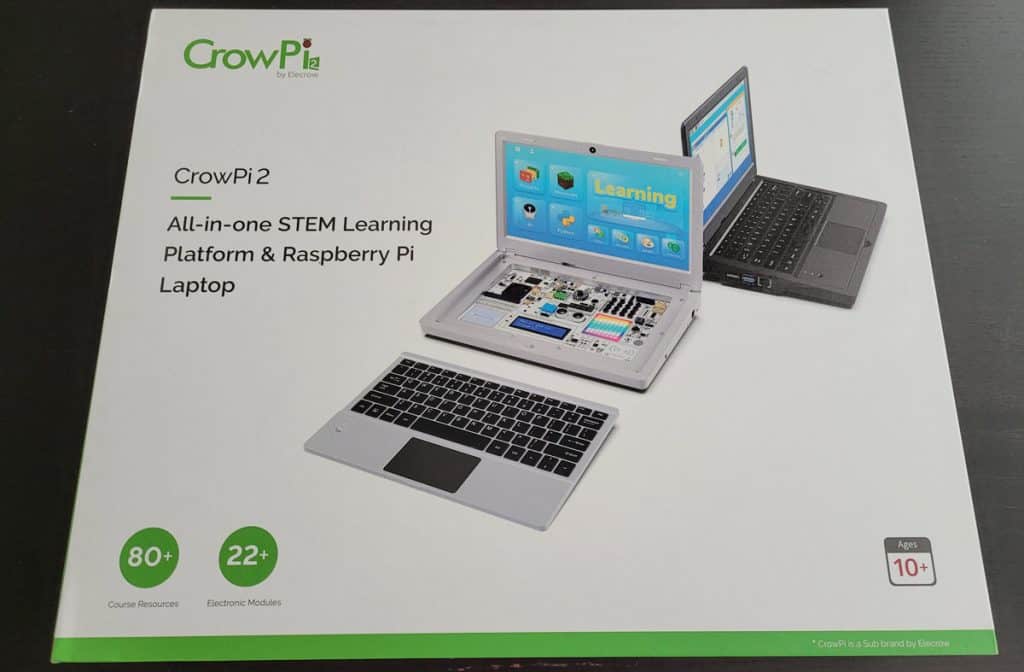
CrowPi2 Packaging
The box content is impressive, I wasn’t expecting all of this:
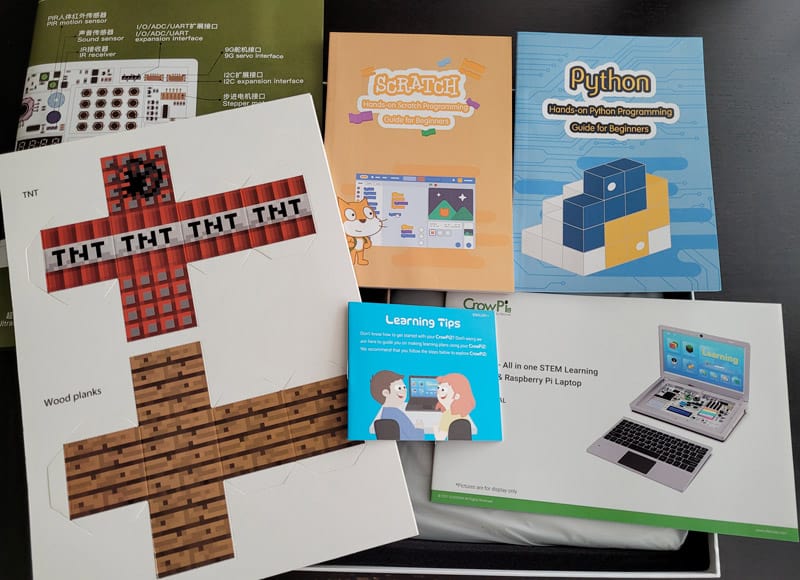
You get all the information you need to get started the right way, for example:
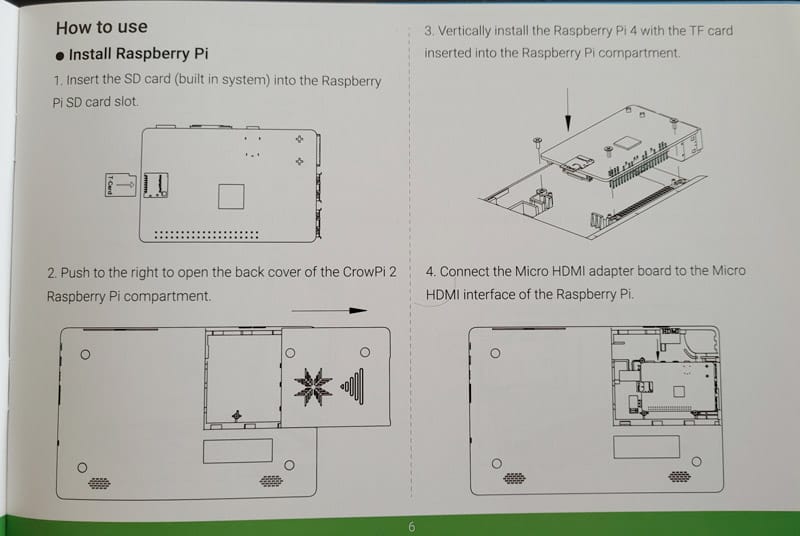
- The user guide: Especially useful for the assembly if you didn’t get a kit with a Raspberry Pi inside.
- Learning tips: As there are tons of things you can do with the CrowPi 2, this leaflet explains how to get started, what to do first, etc. I will get back to this.
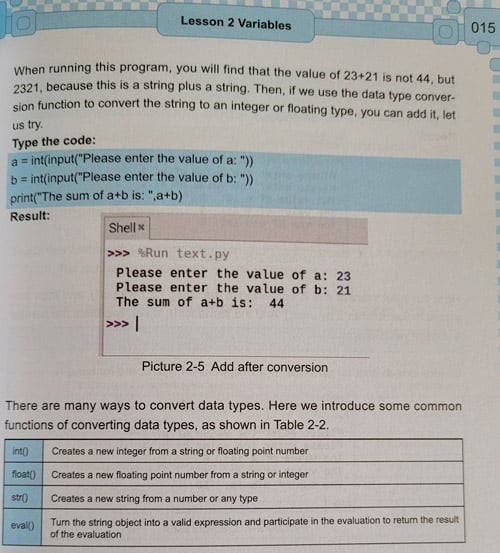
- Python & Scratch books: You don’t necessarily need them if you follow the learning experience offered by the CrowPi 2, but it’s a nice reference to have after that. If you don’t remember the syntax in Python, or how to do something with Scratch, you’ll quickly find it in these books.
- A plan of all the onboard modules: When you start, you don’t necessarily know the difference between one sensor and another. This small poster is pretty useful when you start to play with these components.
Here is a closer look at the hardware.
The laptop is built with environmental-friendly material and it’s very light, so it’s perfect for kids. Don’t expect the aluminum quality of a MacBook, it feels more like plastic. The keyboard stays in place via small magnets and can be recharged via USB.
I didn’t have the power bank option, so I can’t speak to that. But it might be something missing in this version. I can imagine your kids having some questions or wanting to show their results, but they can’t come to show you with the laptop as there is no battery.
Aside from that, I don’t have any major criticism of this product. Everything seems well-thought-out, and getting started is easy. We’ll dive deeper into the following parts, but at first glance, it’s like the perfect gift for someone who wants to learn Raspberry Pi and especially how to code and use electronic components.
The CrowPi2 Operating System
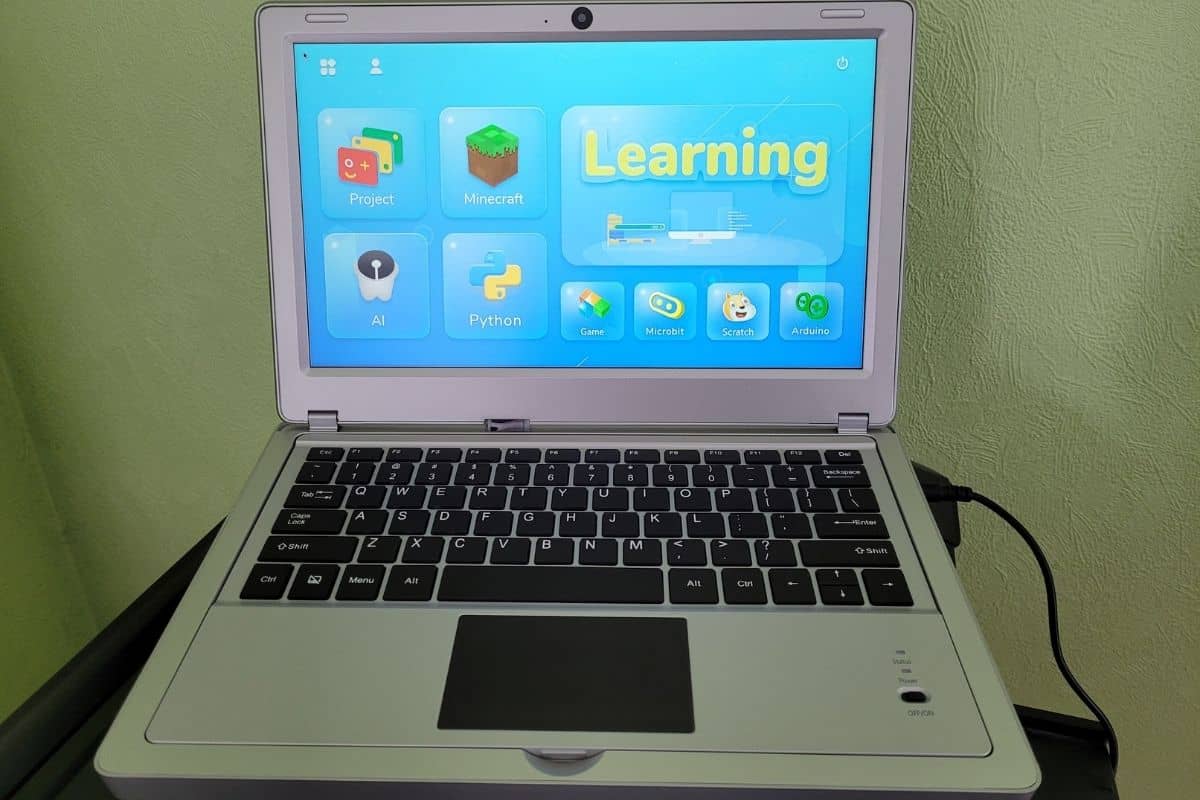
The CrowPi2 comes with a pre-installed SD card, with everything you need to get started. It’s based on Raspberry Pi OS, with all the apps pre-installed for you, and a nice menu to explore all the options.
Custom tailored for education & kids
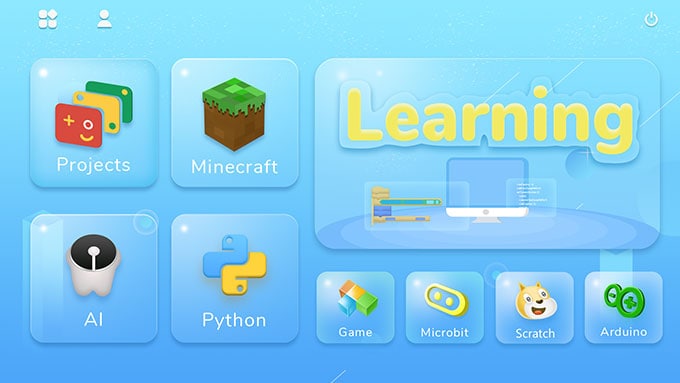
When you start the CrowPi 2, you’ll get a nice interface looking like the image above. Each step of the learning process is accessible through it, for example:
- Projects: to see the onboard modules in action (no code).
- Minecraft: to interact with the Minecraft game with Python.
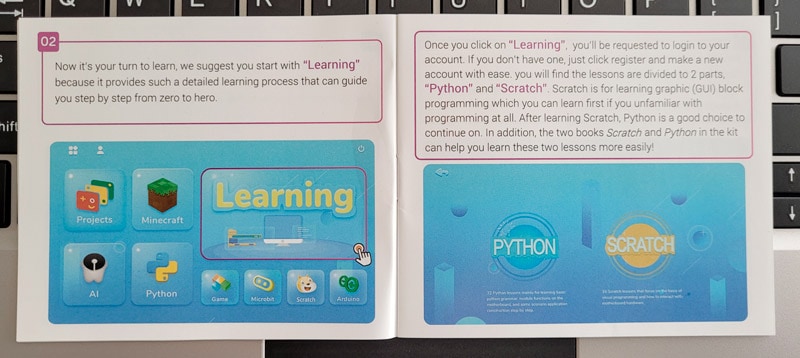
- Learning: The main part. It’s like showing you how to code the things you have seen in the “Projects” section. An account is required to store your progression, and you’ll learn how to use Python and Scratch to control all the sensors.
Then you have various buttons, to start other activities, like playing mini-games, discovering Microbit or Arduino.
This interface makes me think of Kano OS, a Linux distribution based on Raspberry Pi and customized for kids with a similar learning experience through gamification (more details here).
But even for adults, this interface is very convenient. I’ll show you a screenshot later, but when you click on “Minecraft”, for example, it opens 3 windows already resized on your screen so you can read the tutorial, have Minecraft running and type your code without having to switch between everything all the time. Same idea with each activity.
Note: You can download the CrowPi image from their GitHub project if you need to reinstall it, but if you don’t have the CrowPi laptop, the custom layer (main menu, tutorials, etc.) won’t work.
Based on Raspberry Pi OS Buster
Behind this custom menu, the Linux distribution is Raspberry Pi OS Buster. It’s not (yet) the latest version, but it’s probably better, as Bullseye is a bit funky currently with Python libraries. I wouldn’t upgrade it for now, as you’ll likely have a ton of issues.
But the good news is that it’s not a closed operating system, so you can build your own projects on top of it. Want to show your kids how to host a website or a file server? You can do it, even if it’s not planned at all in the CrowPi projects.
If you are lost in all these new words and abbreviations, request my free Raspberry Pi glossary here (PDF format)!
Download now
It’s the same thing if you want to play with additional components. You can plug a HAT on the GPIO interface or any component to the breadboard to go even further than the included projects. As it’s Raspberry Pi OS, it’ll be plug & play, or you’ll easily find the missing packages in the default repository.
The Learning Process with a CrowPi2
This leaflet will suggest a specific order in which to use the various modules from the main menu. I think the recommendation is pretty smart: projects, then learning, then Minecraft.
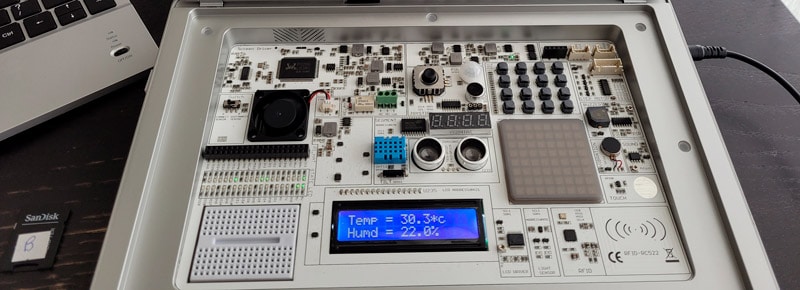
Projects
The “Projects” section is like a demo of all the modules and sensors available. For example, the “Environment monitoring” project will monitor the temperature and humidity, and display the value on the LCD screen:
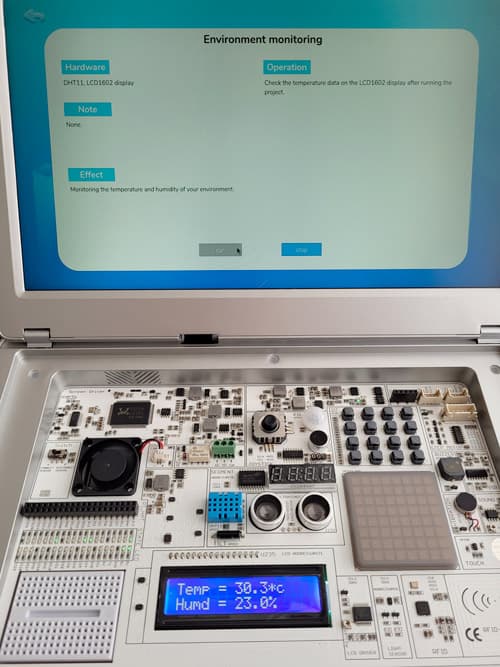
There is nothing complicated there, no code or whatever. You just click on “Run” and the LCD display will be powered on with the current values. I think this is a nice introduction. The app tells you which components are in use (DHT11 and LCD1602 in this case).
I think they could have put a little more detail there, maybe including pictures of the components or explaining how it works – just to give a bit more context. You’ll use them in the “Learning” module later, but maybe there is an intermediate step missing there.
Projects include more or less interactions, depending on the sensors used in them. For example, there is one where you use the ultrasonic module to measure distances or one where you can play Tetris on the LED matrix:
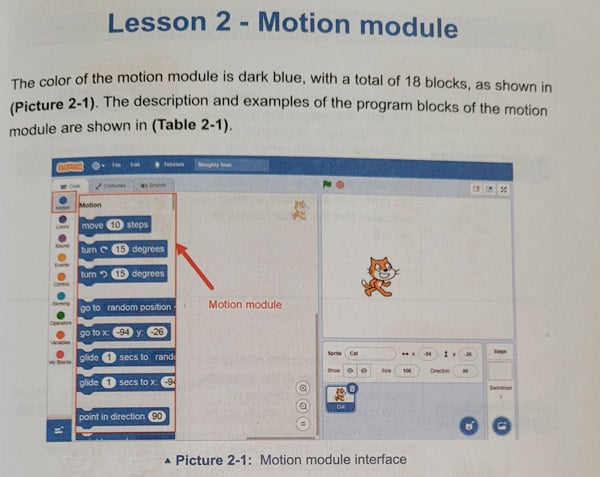
Learning (Python & Scratch)
But my favorite part of this custom OS is the “Learning” part. You’ll have the choice between Python and Scratch (and can do both), but basically, the idea is to learn each language with practical applications.
After creating your online account (it’s free), you’ll have access to a list of lessons to discover the language and how to use the different modules.

For each lesson, the interface will look like this:
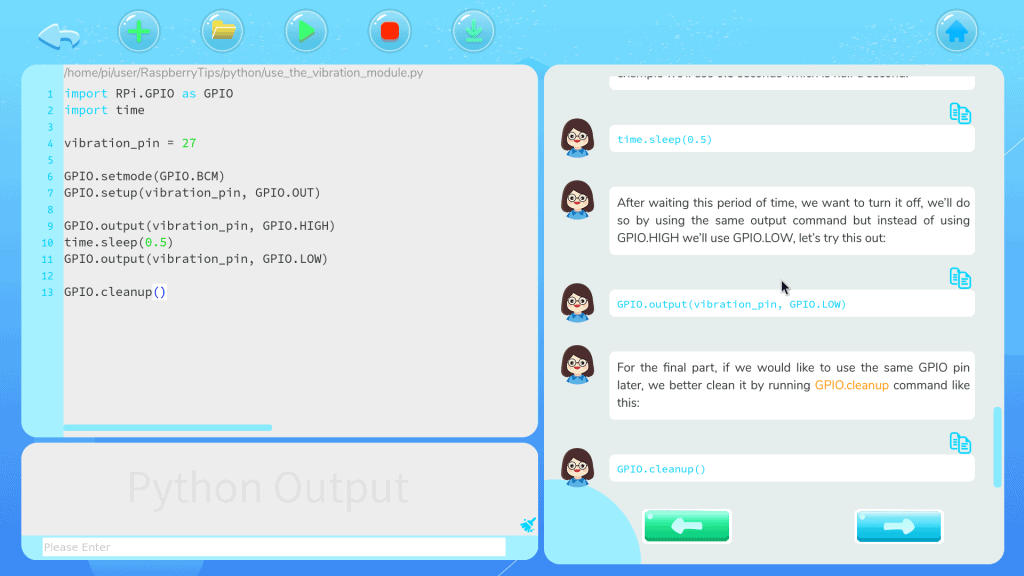
On the right, your teacher will explain every step. Unlike in the “Projects” part, you’ll get all the details here: the general idea of the lesson, the sensors and modules that will be used, any theory input that is required to move further, and then the code explanation, step-by-step.
It’s really well done. The virtual teacher will introduce the next step, and only give you the line of code on the next click. So, you can try to write it on your own, or at least think about it before seeing the answer.
You can easily copy and paste the code given on the right to the left part of your screen, where you create the full script for this lesson (the full script is also displayed at the end of each lesson).
So, the pedagogy of this module is perfect. If you are buying the CrowPi for your kids, I would still have an adult with them all the time (especially at the beginning). Sometimes, the instructions are not super clear, or the transition from one lesson to another is a bit hard.
For example, in this vibration lesson, if you follow the steps, you’ll get the laptop vibrating non-stop at the beginning and I’m not sure how an 8-year-old would handle it.
Another example is that the first lesson with Scratch starts directly with GPIO usage. I would have started with something more basic. It’s fine if you have some notions about Raspberry Pi, but if your kid is a complete beginner and alone, I fear he/she will be quickly lost.
Just something to have in mind. But overall, it’s the perfect course. You have it all in one place: the theory, the direct application, and instant feedback when you run your script.
Minecraft
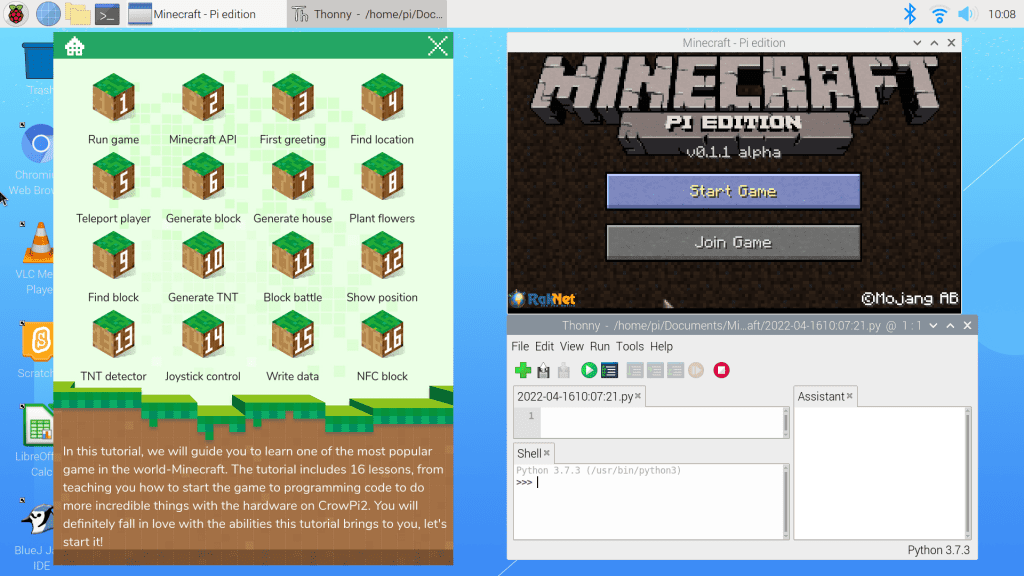
Once the learning module is completed, you can move to the Minecraft part. The idea is similar, you have a bunch of tutorials on the left, and the Minecraft game and Thonny on the right, to follow the steps and see how it affects the game.
It starts with basic tutorials (interactions with the in-game chat and players) and goes way deeper with NFC and block detection. It shouldn’t be anything too complicated if you’ve completed the Python course in the “Learning” module, but I wouldn’t start with the Minecraft tutorials without learning some Python basics first.
Other options
Projects, Learning, and Minecraft are the three main modules. But many other apps are pre-installed, so you can go even further after that. You’ll find tools to experiment with AI (Artificial Intelligence), Microbit, or the Arduino IDE.
And obviously, after following all the tutorials, you’ll be ready to try your own projects, by using the onboard modules or adding other components.
It's a free PDF guide containing every Raspberry Pi Linux command you should know!
Download now
Video overview
It's a free PDF guide containing every Raspberry Pi Linux command you should know!
Download now
Reminder: Remember that all the members of my community get access to this website without ads, exclusive courses and much more. You can become part of this community for as little as $5 per month & get all the benefits immediately.
CrowPi2 Review
Overall, the CrowPi2 is an excellent learning platform. It’s pretty easy to get started, and the custom OS, apps, and books will accompany you in the discovery of the different languages, modules, and sensors.
The laptop itself feels a bit like a toy, and the keyboard is not very stable. So, I wouldn’t necessarily use it for desktop use. But as a learning platform, it’s good enough. And you still have access to the Raspberry Pi ports, so you can easily switch to better accessories if needed.
There is a small fan running all the time. It’s a bit annoying, but not too noisy. The temperature stayed low during all my tests, even when I let the Minecraft environment run for hours, so it’s pretty efficient.
Another comment is that there is a power button to turn it on, but you can’t shut it down properly, the only way I found is to unplug the power cable (not ideal but OK).
I also had an issue with the provided SD card. The system crashed during the updates, and the SD card got corrupted. I had to flash the system again on another SD card to use it. I don’t know if it’s due to the SD card quality or just bad luck, but it was the first time I had this problem after years of using a Raspberry Pi.
In short, here are the important points to have in mind before making your decision:
| Pros: What is well done | Cons: What could be improved |
|---|---|
| Hardware: everything is ready to use. | No battery. |
| Software: great interface, especially for kids. | The keyboard is not very stable when placed on the laptop. |
| The learning experience, I love the way they did it. | The “plastic” case. I was expecting better given the price of this kit. |
| Decent price given the kit content. |
If you want to introduce coding or electronics to your kids, or even learn for yourself, this is a good choice. The pricing is correct (check the current price here), especially if you have nothing yet, and the overall experience is great. The journey from the project experimentation, to learning how to code them yourself, is well done.
If you are interested, click below to check the options and pricing on the official store.
Get 5% off at checkout by using this coupon code: RPITIPS.
Whenever you’re ready, here are other ways I can help you:
The RaspberryTips Community: If you want to hang out with me and other Raspberry Pi fans, you can join the community. I share exclusive tutorials and behind-the-scenes content there. Premium members can also visit the website without ads.
Master your Raspberry Pi in 30 days: If you are looking for the best tips to become an expert on Raspberry Pi, this book is for you. Learn useful Linux skills and practice multiple projects with step-by-step guides.
The Raspberry Pi Bootcamp: Understand everything about the Raspberry Pi, stop searching for help all the time, and finally enjoy completing your projects.
Master Python on Raspberry Pi: Create, understand, and improve any Python script for your Raspberry Pi. Learn the essentials step-by-step without losing time understanding useless concepts.
You can also find all my recommendations for tools and hardware on this page.