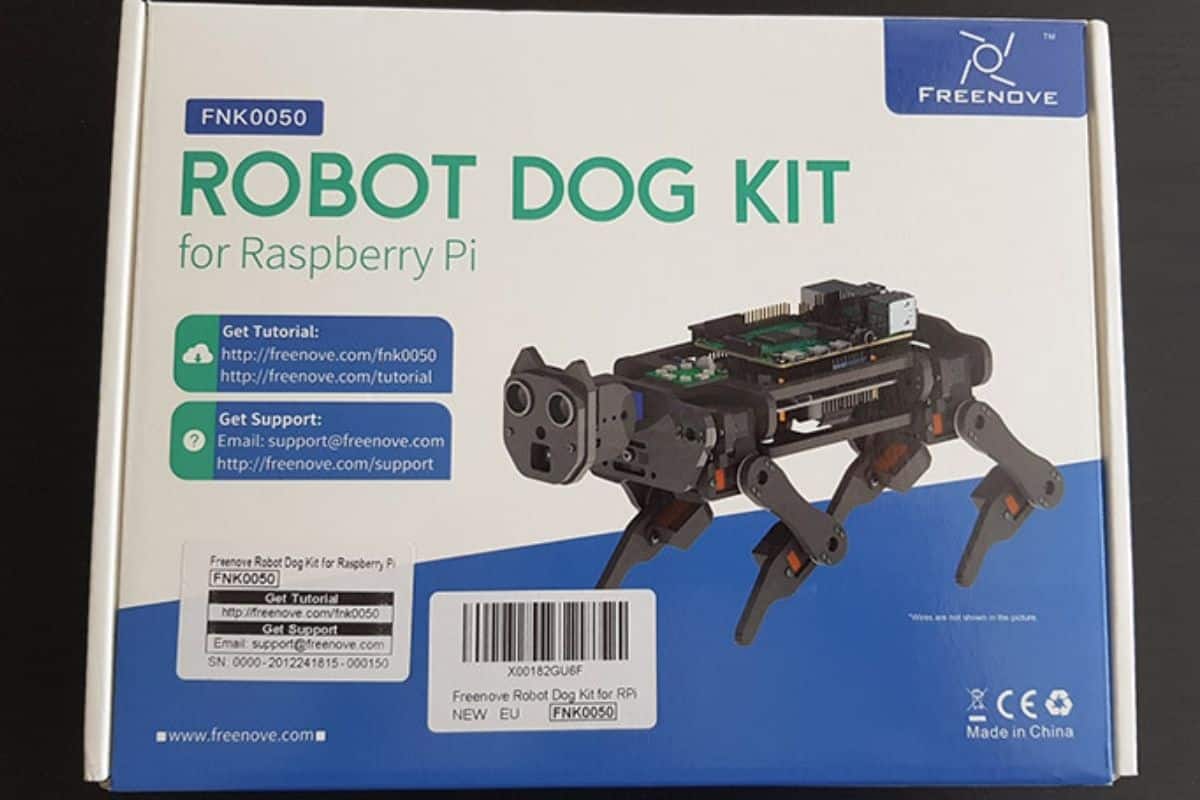
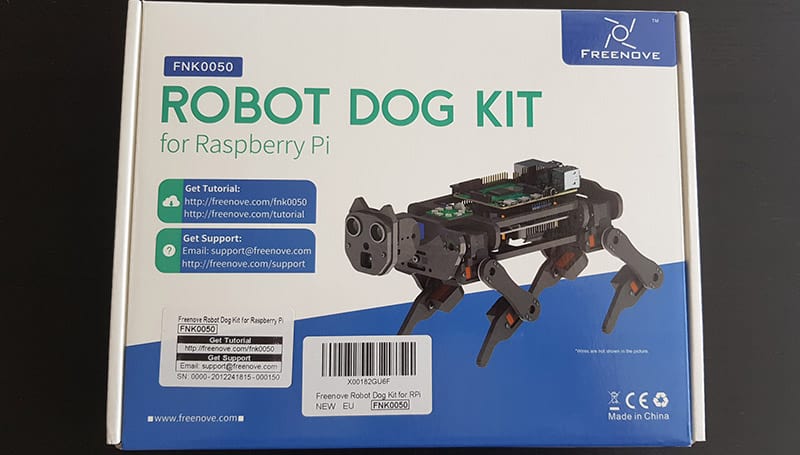
Freenove Robot Dog Review: Is It For You? (I tested it)
The Robot Dog kit from Freenove is an original robot in its format, as it’s a dog instead of a car for most of the competitors. I selected it as my two favorites in a previous article, and it seems my colleagues are reading my articles because they gifted one to me a few months ago. I can now share with you exactly what to expect from it.
| Things I loved | Things I didn’t like |
|---|---|
| Originality vs other kits | Probably too complicated for a beginner |
| A detailed step-by-step tutorial is provided | Mysterious issues with two motors and the camera |
| Complete source code available | Calibration required (regularly) |
| Fun movements (push-ups, yoga, …) | Assembly: some nuts are hard to put |
| Many sensors to play with |
Key takeaways: While the Freenove Robot Dog kit is excellent and original, it’s probably not ideal for everyone. For a first kit, I would consider something simpler to build (assembly, calibration, and programming a 4-legged robot is not the easiest thing to do for a beginner).
You now have my short answer to your question, so let’s dive in to see exactly how my test went.
Update: I recently had the chance to test another dog robot, the PiDog from SunFounder. You can click on the link to read my review, you might be interested in the features.
Overview
The first thing I saw of this robot kit was the overview video made by Freenove and available on YouTube:
If you are like me, maybe you are already seduced by this robot just by watching the video. If so, you can buy it on Amazon without losing more time :).
Compared to the competition (mostly cars), this robot was fascinating to me, which is why I picked it as one of my favorites in this article with 11 robots kits for Raspberry Pi. On the paper, it has everything we need to have fun (many sensors, a smartphone app, and funny movements that are possible).
It’s compatible with almost any Raspberry Pi (I put my Raspberry Pi 3A+ on it), but the older models may require additional parts. The main features are:

Join Our Community!
Connect, learn, and grow with other Raspberry Pi enthusiasts. Support RaspberryTips and enjoy an ad-free reading experience. Get exclusive monthly video tutorials and many other benefits.
Learn more- Movement: 12 servos are included (3 on each leg). You can move it in all direction (it moves like a crab on the sides, as you can see in the video above).
- Vision: you’ll receive a camera and an ultrasonic module in the box. The camera can be used for face detection and object tracking. The goal of the ultrasonic is to measure the distance between the robot and the closest object.
- Sound & light: an LED module and a buzzer are also incldued in the package. It’s a nice add-on, even if I don’t know exactly how you can use them for something useful. Maybe for notifications, like if you are getting closer to a wall or to debug your scripts. Anyway, I’m sure you’ll find something to do with it, even if it’s not related to the other features.
- Gyroscope/accelerometer: I haven’t played with this a lot, but there is a nice stability feature. A specific sensor (MPU-6050) is included for this.
The price is reasonable for an advanced robot kit (check the current price on Amazon). It isn’t the cheapest one available, but with all of these features and the kit’s originality, I think it is worth it.
We’ll see in the following how it works.
If you are lost in all these new words and abbreviations, request my free Raspberry Pi glossary here (PDF format)!
Download now
Assembly
Obviously, the kit doesn’t come ready to use out of the box. It’s similar to IKEA products, you must first sweat a little to enjoy your new toy. I’m sure some of you are most excited by this part, but for me, the fun is rather in programming it. Anyway, we have to start with something :).
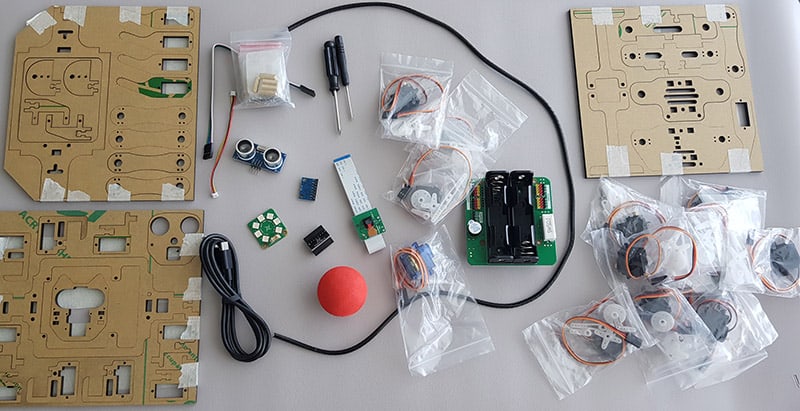
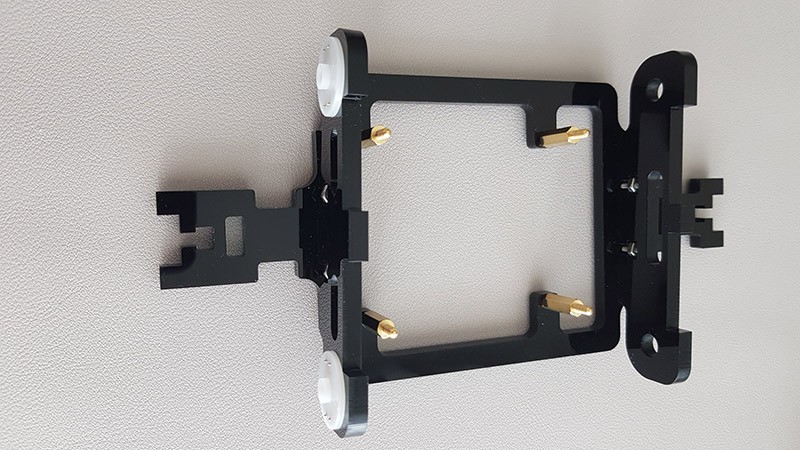
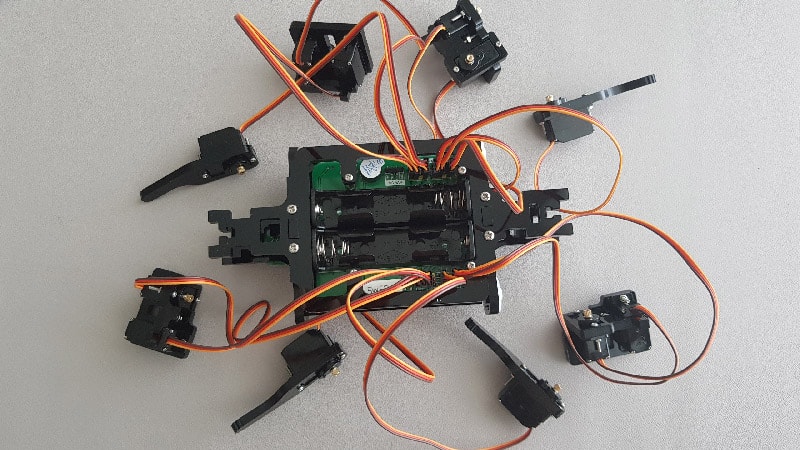
I don’t know what I expected before starting the assembly, but the picture above stressed me out. I’m not at all a great handyman and seeing all these small pieces, screws and cables quickly worried me. Also, as it was a gift, I couldn’t fail – I had to show them the results.
Anyway, the good news is that Freenove provides a detailed tutorial to assemble it (you can take a look at it here). They are also at our disposal for any questions or issues (as we’ll see later).
You’ll start with the legs, then the body, and finally, put everything together.
It took me 5 to 6 hours to assemble it in total. Remember that it’s my first robot, so I’m a complete beginner and not the best handyman. You may be able to assemble it much faster if you’ve done something similar before, I just give this as information.
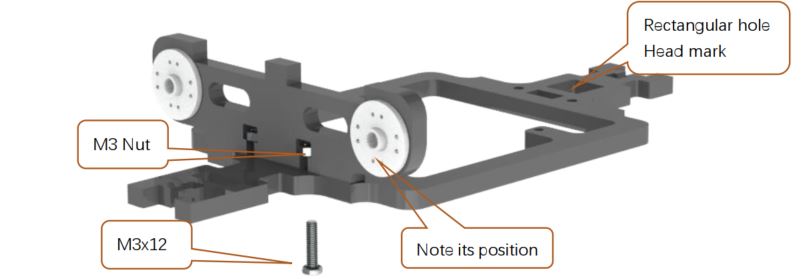
I suspect that this robot takes a bit longer and is more complicated than assembly a car kit (like this one from Sunfounder). For the robot dog, each leg includes 3 motors (servo) and two acrylic parts that you have to put together. Most automotive robots only have 2-wheel drive.
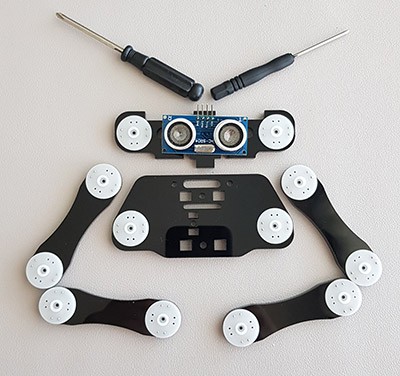
Here are a few pictures of my progress to give you a better idea of what to expect:

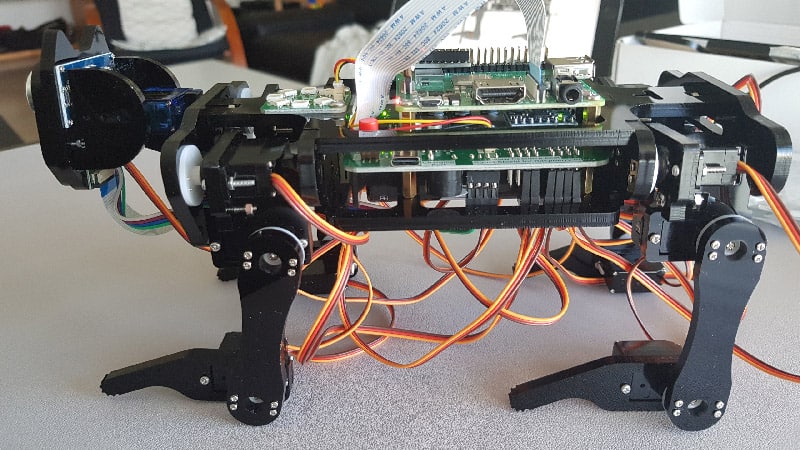
I finally managed to complete it, so I’m guessing that it shouldn’t be a big deal for most of you. I put my Raspberry Pi on top of it and installed Raspberry Pi OS with Desktop on it. I was proud to succeed and was ready to move to the next phase.
Tests & calibration
Tests
Once the robot is assembled, there is a test procedure to follow, to check that each piece is working as expected (motors, camera, sensors, etc.). You need to download the code from the GitHub project and run a few scripts to make sure everything works.
The tutorial will guide you through all the steps, with each command line to run.
For example, the LED test will turn on the LED and try a few colors, the Ultrasonic test will display the distance from the next obstacle, the servo test will do a few movements to make sure all legs are plugged correctly, etc.
Calibration
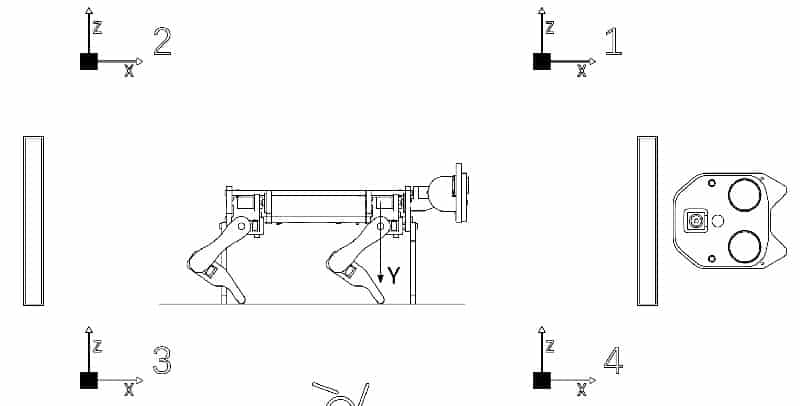
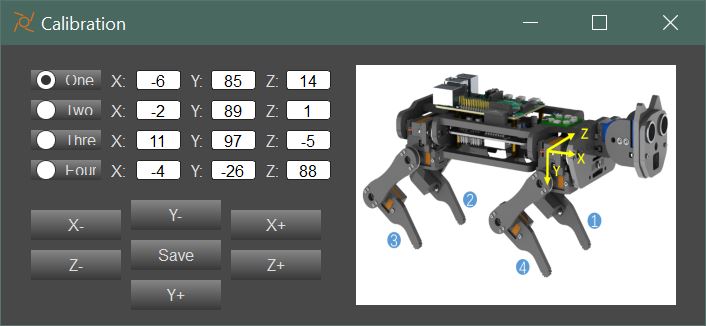
If your tests are going well, you can move to the next step, which is calibration. It’s a tricky part. You have 4 legs to calibrate in three dimensions. The feet need to be aligned with the same angle on each joint or the dog won’t be stable enough to do anything.
To complete this, you need to add two calibration supports to stabilize the robot. Then a piece of paper is provided to align everything. You put the two supports on the marks, and then you can use the app (I’ll talk about this later) to adjust each of the four legs in the three directions (X, Y, and Z).
Freenove has done its best to make this step clear enough, but I find this really annoying (once again, it’s my first robot, maybe it’s the same with any kit, I can’t compare at this stage).
Basically, you have a piece of paper that looks like this:
You need to put the robot on it, and you’ll use the calibration tool in the app to configure each leg. The goal is to have each foot on the corresponding square.
Once done, you can remove the calibration supports and start to use the robot. It should stay stable long enough to move at any speed in any direction. I had some issues at this stage though, I don’t really understand them. After a few days, one of the legs tried to always go backwards:
After explaining my problem to Freenove and sending them this video, they sent me two new Servo and a camera module (that was also not working anymore). I suspect a power issue, maybe I plugged the wrong power supply or something else they didn’t like.
If you are lost in all these new words and abbreviations, request my free Raspberry Pi glossary here (PDF format)!
Download now
Anyway, it was a good opportunity to test their support team, which was exceptional. A quick answer and new parts sent, I couldn’t expect a better resolution. You can buy their products without any doubt, you’ll receive help if you experience any issue.
Cabling
Just a small note about the cabling because it is something you don’t see in the presentation video.
There are 13 motors in total (3 on each leg + one for the head), the camera module, and other sensors. In short, it’s a mess once you have plugged everything.
A short cable tidy is provided, but I didn’t understand how to hide everything correctly, it’s not explained in the documentation. So, I asked Freenove, and once again they were perfect, sending me a video to explain how to use it. I can share it with you here, it might be useful:
I didn’t find the perfect method to tie everything together, but at least the dog doesn’t walk on the cables ^^.
Application
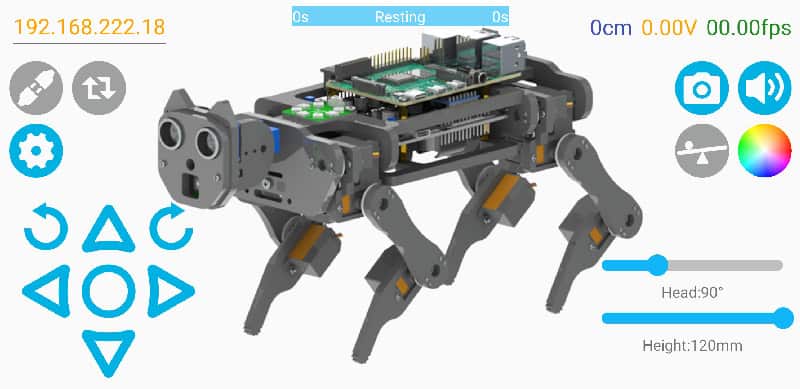
Once the assembly, test, and calibration steps are completed, you can start to play with it. Programming is an option, but you’ll probably start with the application. It’s available on smartphones (look for Freenove in your app store, Apple and Android are supported), it’s the same app for any Freenove robot kit.
You can also run the client provided on the Github repository:

That would be the easiest way to test all the features, without having to type any line of code. Not a lot to add here, you can adjust the speed of the robot, I highly recommend starting with a low value, just in case the calibration wasn’t done correctly (my first try resulted in an epic forward roll).
The “Relax” button will get the dog back to its rest position. Keep in mind that the motors can’t run all the time, there are protections enabled to avoid overheating (I think it’s 3 minutes max before it needs to rest).
Programming
The Robot Dog kit from Freenove uses standards components, so it will be easy to program (or at least not more complicated than using the sensors directly). The tutorial is really well done, and explains how to use each component in C++ and Python.
If you are new to these languages, you can check my tutorial about C++ here, and a similar one about Python here.
If you have some basic skills in programming, it shouldn’t be complicated to work with this robot. Freenove also provides a few classes to make everything easier for you. You don’t necessarily have to code everything.
Here is an example on how to do push-ups with it:
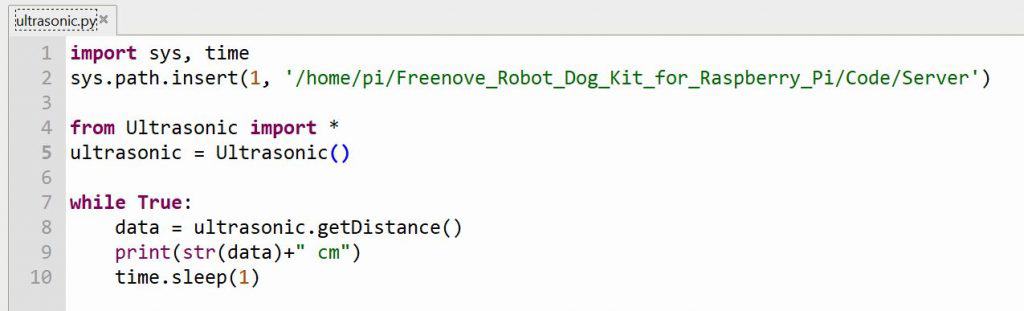
import sys, time
sys.path.insert(1, '/home/pi/Freenove_Robot_Dog_Kit_for_Raspberry_Pi/Code/Server')

from Action import *
action=Action()
time.sleep(2)
action.push_ups()
The Action class will help users with all the basic movements:
- Push-ups
- Hello (with the head or one hand)
- Swimming
- Yoga
- etc.
I also tested the Ultrasonic and LED classes that work the same way. I won’t explain all the details here, it might require a specific article if you are interested, but you should be able figure this out by reading their tutorial.
I just added the sys.path.insert line in their examples, as I preferred not to keep all my files in their folder.
By the way, if you get overwhelmed as soon as Python is required for a project, I recommend checking out my e-book “Master Python on Raspberry Pi“. It will guide you step-by-step to learn the essential concepts (and only the essential concepts) required to achieve any project in the future. Raspberry Pi without Python is like a car without an engine, you miss all the fun parts. Get 10% off by downloading it today!
It's a free PDF guide containing every Raspberry Pi Linux command you should know!
Download now
Batteries & charging
Before wrapping up this review, just a quick word about the power supply. The robot dog kit works with two batteries that unfortunately are not provided in the kit. You’ll need 2x 3.7V 18650 rechargeable batteries to use it. I got mine on Amazon (like this pack), but you can find them anywhere.
You can plug the batteries into your robot and use a USB-C cable to recharge them, but I didn’t have a lot of success with it. I plug it in, the green light turns on, but it doesn’t seem to charge.
I prefer removing them and use a charger. Buying 4 and a charger was a good idea I think, I recommend you do the same, especially if you expect to play with it for long periods.
I don’t have enough hindsight to tell you how long the batteries last, and how often to change them, but that’s not the most important thing here.
It's a free PDF guide containing every Raspberry Pi Linux command you should know!
Download now
Want to chat with other Raspberry Pi enthusiasts? Join the community, share your current projects and ask for help directly in the forums.
Is it worth it?
If you are looking for a new robot kit that isn’t as boring as some of the other ones, I think this Robot Dog kit from Freenove is definitely worth it. It includes all the sensors and components you would dream of, and the detailed tutorial made it easy to use overall.

My main warning is that it might be a bit too complicated for a beginner. You can find robots already pre-assembled (like this one) or easier to build (like this other one from Freenove). But even if you don’t have experience with other robots, you can do it (proof: I succeeded), especially if you are used to DIY, models, or anything like that.
Anyway, that was a very cool gift that I should probably add to my gift ideas for Raspberry Pi enthusiasts.
You can always ask the Freenove team if you encounter any problems, which is rather reassuring when you start.
Still not sure? Check my other suggestions in this article, where I introduce 11 of the best robot kits for Raspberry Pi.
Whenever you’re ready, here are other ways I can help you:
The RaspberryTips Community: If you want to hang out with me and other Raspberry Pi fans, you can join the community. I share exclusive tutorials and behind-the-scenes content there. Premium members can also visit the website without ads.
Master your Raspberry Pi in 30 days: If you are looking for the best tips to become an expert on Raspberry Pi, this book is for you. Learn useful Linux skills and practice multiple projects with step-by-step guides.
The Raspberry Pi Bootcamp: Understand everything about the Raspberry Pi, stop searching for help all the time, and finally enjoy completing your projects.
Master Python on Raspberry Pi: Create, understand, and improve any Python script for your Raspberry Pi. Learn the essentials step-by-step without losing time understanding useless concepts.
You can also find all my recommendations for tools and hardware on this page.