How to Easily Install Apps on Raspberry Pi OS? (5 methods)
Today, we’ll see a basic question that everyone will ask at one point when starting on Raspberry Pi, or on Linux in general: how to install new apps?
On Windows, you are used to downloading a setup file (.exe) and install it directly. It’s the same thing on macOS.
On Linux, it’s a bit different. We rarely go online to install new applications. That’s why you might need some help with this topic.
How to install an application on Raspberry Pi?
The first way to install an app is to use the “Add / Remove Software” tool in the main menu.
It’s a catalog for the Raspberry Pi OS system, to install new applications in a few clicks.
I will explain this first option, which is the easiest one, for those who need help about it. And I will also introduce 4 other solutions, so that you’ll probably learn something in this article, even if you have more experience 🙂
If you need help getting started on Raspberry Pi, I have an entire course to guide you through your first steps. I’ll help you use the perfect hardware, plug everything in and install your first system. You’ll also do your first projects with me, just to make sure you are ready for the next level. Get all the information on this page if you are interested.
Install an app from the Raspberry Pi OS desktop environment
The first method is to use the graphical tool available on any Raspberry Pi OS with desktop installation.
Linux repositories
Before anything else, you need to know that on Linux, software distribution is mainly done through centralized servers, managed by the system developers.
For example, there are servers managed by Debian, hosting hundreds of applications, built to work on their system (with subfolders for each system version by the way).
Raspberry Pi OS is based on Debian, but is using different servers to store the compatible packages.
If you are curious, here is the address of the main server.
By default, official repositories are enabled on a fresh new Raspberry Pi OS installation. But it’s possible to add other ones later, to access more software. In general less stable versions, or directly repositories from other developers.
I will briefly introduce this at the end of this tutorial, and you’ll find several other tutorials on this website where you need to do this.
If you are lost in all these new words and abbreviations, request my free Raspberry Pi glossary here (PDF format)!
Download now
The “Add / Remove software” tool
Now that you understand the idea, let’s move to the practice.
Open the main menu and click on Preferences > “Add / Remove Software”.
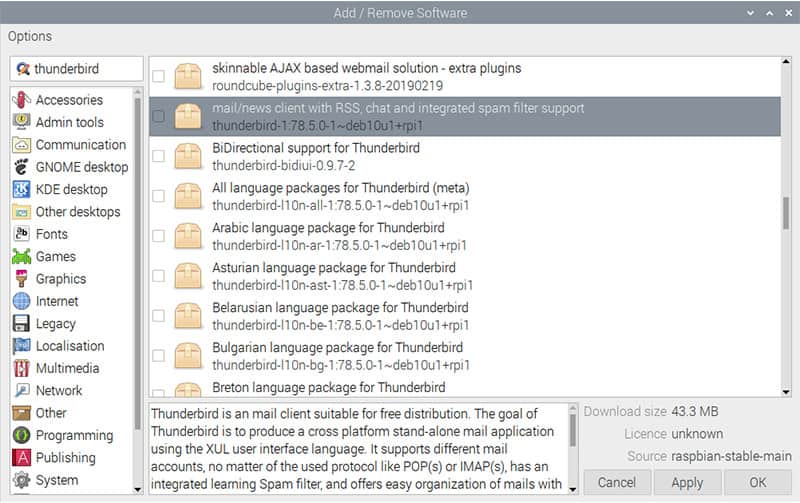
This window will show up:
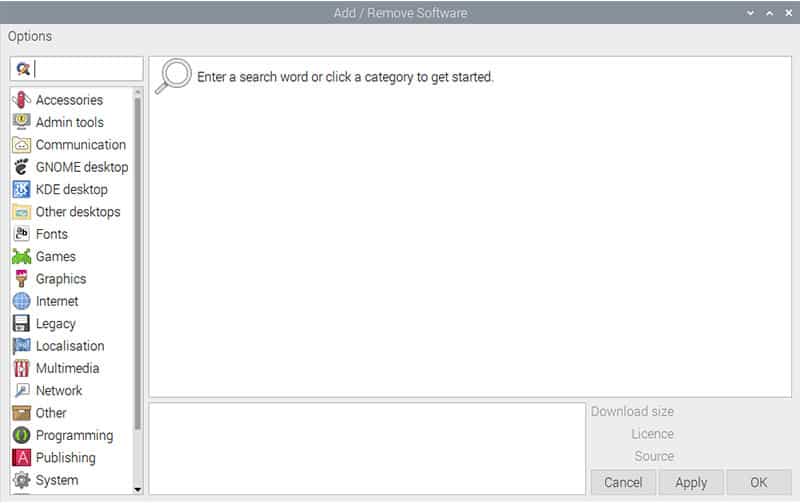
It looks like any other applications catalog (Play store, Ubuntu Lightpad, etc.)
The left menu lists all the categories, and by clicking on one of them you can see the corresponding packages, displayed on the right.
A search engine is also available to easily find an application.
What is a bit complicated is that, in the results, you’ll get the applications, but also all the dependencies. So, the list is a bit hard to analyze. We’ll get back to this.

Join Our Community!
Connect, learn, and grow with other Raspberry Pi enthusiasts. Support RaspberryTips and enjoy an ad-free reading experience. Get exclusive monthly video tutorials and many other benefits.
Learn moreUpdates
The first thing to do before installing anything, is to update your system.
Open the “Options” menu and choose one of these options:
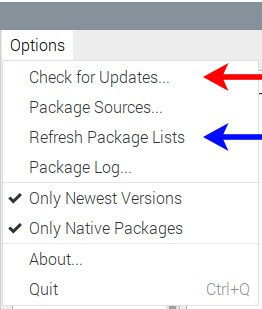
- Red arrow: “Check for updates” will compare your applications versions on your system with those available in the repositories. If there is a more recent version available, an update will be suggested (a bit like the Windows updates, but for all the apps, not only the system core).
- Blue arrow: “Refresh package lists” will synchronize the files available on the repository with your local cache. Indeed, in the previous step, the tool doesn’t check directly online, but in a file stored on your Raspberry Pi. So, the blue arrow action will update this file.
In short, I recommend clicking on “Refresh package lists” and then “Check for updates” before any new app installation.
Installing a new software
Once the updates are done, I suggest using the search engine to look for the application you want to install.
In my example, I typed “thunderbird” in the search engine, a popular email client:
As I already told you, the list on the right includes Thunderbird, but also all the language packages to translate the app in any language. It’s not the best experience.
In general, you’ll need to install the shorter package name, the one that correspond to the application name.
In this case, I’ll check the box on the highlighted line only. Obviously, if you are interested in another language, you can check it too.
The system will automatically check the language corresponding to your system configuration.
Once all the lines you want are checked, click on “Apply” in the bottom right of this window.
Applications will be installed, and Thunderbird will be added in the main menu (under the Internet category I think).
For example, you can use Raspberry Pi Imager with this method (I explain everything in this article).
Uninstalling an application
You can use the same tool to remove a software from your system, if you don’t need it anymore.
To achieve this, uncheck the corresponding line in this tool and apply changes.
If you are lost in all these new words and abbreviations, request my free Raspberry Pi glossary here (PDF format)!
Download now
If you want to learn more about this, I have a dedicated tutorial on how to uninstall programs on Raspberry Pi. I recommend checking it.
How to install an app with the command line on Raspberry Pi?
If you are not using a desktop environment, or if you want to learn a bit more, it’s also possible to do the same thing in the command line (and it’s often easier / faster !).
Basic syntax
The command we’ll use here is “apt”.
It’s a service used by the “Add / Remove Software” tool, so that the logic is the same, and you can do the same thing with it.
Here is the basic syntax of this command:apt [options] action
- action: this is the action you want to do on your system (ex: update, search, install, remove, etc.)
- options: this is not mandatory, but in some cases you can add additional parameters, like to force an installation or choose a specific version for example. Most of the time, you’ll not use them, especially when you are new on Linux.
By the way, you’ll need administrator permissions to use these commands, or at least for most of them. So make sure to add sudo before the command if you are not on an administrator account (like “pi” for example).sudo apt [options] action
Examples with “apt”
Here are a few concrete examples on how to use apt on Raspberry Pi OS:
- Update repositories:
sudo apt update - Update the packages you already have on your system:
sudo apt upgrade - Upgrade the entire system:
sudo apt full-upgrade - Search for a package with apt:
apt search thunderbird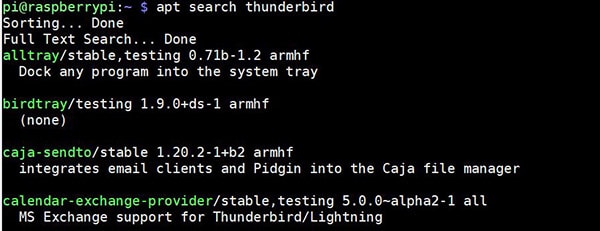
As you can see, it’s the only case where “sudo” is not mandatory.
Quick tip by the way, the grep command allows you to filter the results (explanations):apt search php | grep mysql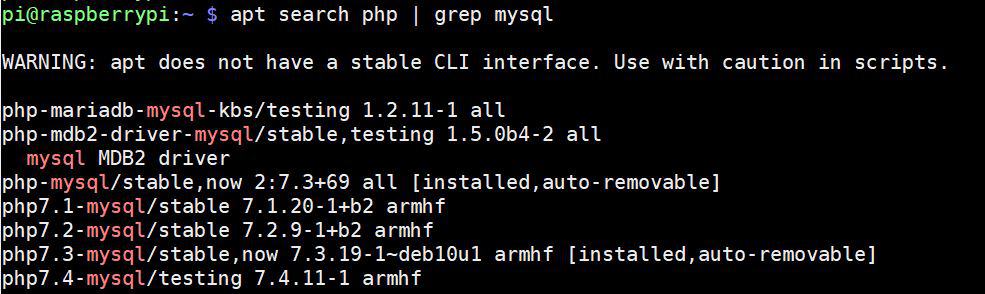
- Install an app in command line:
sudo apt install thunderbird - Uninstall a software:
sudo apt remove thunderbird
That’s it, you should know the essential commands.
It’s not so complicated, and you’ll save time by using this rather than the graphical tool (in fact I never use the tool).
If you are interested in learning more about the useful Linux commands you need to know on Raspberry Pi, you can click on this link to check the most important ones.
By the way, you can also download my cheat sheet, a PDF file including all these commands and even more, that you can get for free.
Add a new repository
I will go faster on the three last solutions, as they are only useful in specific cases, and probably more for advanced users. Also, the documentation from the developers will generally be enough to install these other apps.
(if it’s not the case, let me know i the comments, I can detail a bit more some methods here).
The first of the third additional options is to add a new repository.
For example, in my tutorial on how to install Webmin (a web interface to manage a Raspberry Pi), there is one installation method where you need to do this.
Check it if you need a step-by-step procedure.
The dpkg command on Linux
This other solution, is useful only if the application you want to install is not available in the official repositories, and also doesn’t offer an additional repository you can add to get it.
In this case, the developers can sometimes have an ARM version of their package available in direct download (a .deb file).
If you are in this scenario, you can download it and use the “dpkg” command to install it on your system, without using apt to do this.
You can find more details about the dpkg command in my article about the 57 most useful commands on Raspberry Pi.
It's a free PDF guide containing every Raspberry Pi Linux command you should know!
Download now
Use the source code to install an app
The last case, that is the less frequent, and that you will try to avoid at the beginning, is to install an application from the source code.
You’ll generally use it if the package is not available in the official repository, no additional repository and no downloaded pre-compiled package!
The only solution here is to download the source code (if available) and compile it directly from your Raspberry Pi.
It’s the case with Asterisk for example, a VoIP server that works on Raspberry Pi, but for which you need to compile everything from scratch.
In general, the main steps are:
- git clone <url>: If the source code is hosted on a Git repository, like on GitHub. You can download the files with this command.
- wget <url>: Another option, if the source code is available as an archive file, wget is a tool to download files from the command line (on desktop, your web browser will be the easiest solution).
- tar -zxvf <file>: You’ll use tar to decompress the archive file (in command line only, on desktop you can use the extraction tool directly).
- configure: will do many checks before the installation, to make sure all the required dependencies are installed. You’ll get an error each time there is one missing (that you need to fix by using apt, and then run the configure command again).
- make: compile the source code to generate the binary files
- make install: copy the binary files in the correct path on your system, so that you can use it normally.
Once again, you’ll find more details about these commands in my article and my cheat sheet available here.
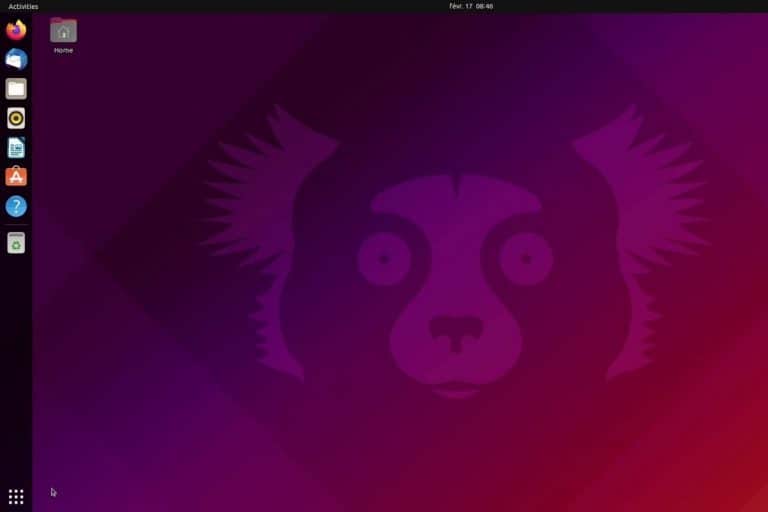
By the way, you can also install a desktop environment on Raspberry Pi OS Lite. It might slow down your system a little, but with a recent model, it shouldn’t be a major concern.
It's a free PDF guide containing every Raspberry Pi Linux command you should know!
Download now
If you are looking for exclusive tutorials, I post a new course each month, available for premium members only. Join the community to get access to all of them right now!
Conclusion
That’s it, I think we have seen the most important solutions to install an application on Raspberry Pi.
I showed you 5 methods to install a new software on Raspberry Pi OS, with more details on the first two that you’ll use all the time.
I hope that this article was helpful to you, whatever your level, and that you are now ready to install anything on your system.
For information, these methods are almost the same on any Linux distribution, so they are a fundamental skill on any Linux system, PC or servers.
Feel free to share this article on your favorite social network if you liked it.
And if you want to learn more about the Raspberry Pi, you can check my e-book and course on the dedicated page here.