How To Safely Install Bitwarden On Linux (Debian/Ubuntu)
Bitwarden is an open-source password manager. Like other alternatives, you can use it for free by hosting your passwords on their servers, but you can also self-host it on your own server, running at home or on your company network. That’s the project we’ll try throughout this article.
Bitwarden can be installed on a Linux server by using a docker container named Vaultwarden. This is a lighter and easier alternative to the official method. Using Bitwarden this way is safe if you use HTTPS, port redirection, a DMZ, or even a VPN and create regular backups of the server.
I’ll guide you from the beginning to the end, to make sure everything works and is safe. It’s a medium to long project, so stay focused and follow all the steps.
Why should I use Docker to install Bitwarden?
Using Docker is not the only way to host Bitwarden on Linux, but it’s the easiest and lightest way to do it. The installation is already complicated enough with Docker to avoid using the source code directly. It will also run faster with Docker than the original service.
As explained in my complete guide about Docker, I’m generally not a big fan of Docker for small projects, as I prefer to control everything on my system. Docker is often the default option nowadays, but I find it adds a level of complexity that is generally not needed for most projects.
But Bitwarden is one project where it makes sense to use Docker. By using a Docker container, we will avoid most security issues, conflicts, and installation steps. That’s why I chose this solution for this tutorial, even if it isn’t the only option.
Prepare your Linux server to host Bitwarden
Here are the first steps to prepare your system before installing Bitwarden:
- Install your system (Ubuntu and other Debian-like systems should work fine).
- Complete any system updates.
- Enable SSH and find your device’s IP address.
- Install Docker.
If this is already overwhelming, don’t worry. I’ll explain each step in detail.
System installation
I tested this installation for you on a small virtual machine running Ubuntu Server. So, you don’t need anything fancy. Bitwarden doesn’t need much space or RAM.
Depending on your network and server architecture, creating a new virtual machine for it is probably the best choice for a company. For personal use, you can definitely add Bitwarden to an existing installation (like a VPS or even a Raspberry Pi).
Since we’re using a Docker container, it won’t break anything existing on your system.
We don’t need a desktop environment for this tutorial, but it’s fine if you have one.
System configuration
Before going any further, I recommend enabling SSH (so you can do everything from your computer, like copying and pasting the commands that I’ll give you later), and taking note of the server IP address, as you’ll need it later.
SSH is a network protocol that you can use to control your system remotely (more about this here).
Depending on your distribution, or if you are using a new installation or not, you may need to install and enable SSH (obviously, on an online server, it’s done for you by your host).
If SSH is not working directly, follow these steps:

Join Our Community!
Connect, learn, and grow with other Raspberry Pi enthusiasts. Support RaspberryTips and enjoy an ad-free reading experience. Get exclusive monthly video tutorials and many other benefits.
Learn more- Open a terminal or just directly log in to the server if you can.
- Make sure SSH is installed:
sudo apt install openssh-serverOn some distributions, it could be:sudo apt install ssh - The service should start automatically, you can check with:
sudo service ssh statusAnd start it manually if needed:sudo service ssh start - If you have a firewall enabled, make sure to allow the SSH protocol.
With ufw, it will be something like:sudo ufw allow ssh
That’s it.
You can now get your IP address with this command:ip a
You should get something like:
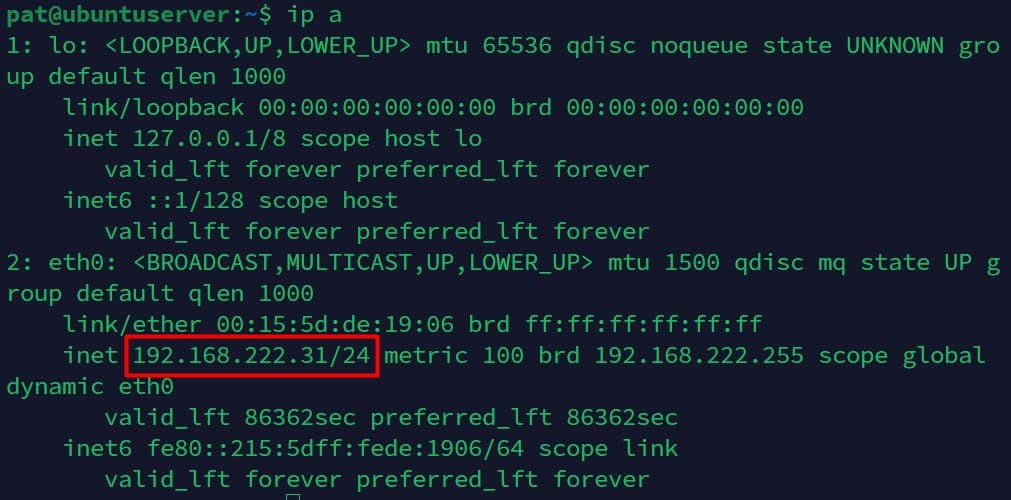
It will be under “eth0” if you use a network cable or “wlan0” for a Wi-Fi connection.
Find your IP address and remember it, you’ll need it in the following steps.
If you’re new to the Linux command line, this article will give you the most important Linux commands to know, plus a free downloadable cheat sheet to keep handy.
Download your exclusive free PDF containing the most useful Linux commands to elevate your skills!
Download now
System updates
If you just installed your system, the installation wizard probably did it for you, but it’s always good practice to do the system updates before starting a new project.
So, just to make sure, run these commands:sudo apt update
sudo apt upgrade
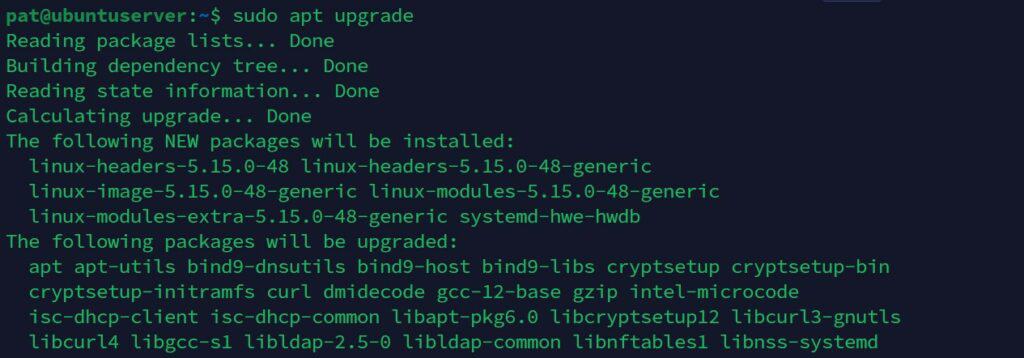
If updates are available, install them before going further. Even if you lose a few minutes, it will avoid any potential issues in the next steps.
Docker installation
The last requirement is to install Docker on your system, as we’ll run Bitwarden in a Docker container. I have a complete guide explaining everything about Docker. I recommend reading it if you are not used to it already.
But anyway, here are the commands you need to get Docker on your server:curl -fsSL https://get.docker.com | sh
sudo usermod -aG docker $USER
Once installed, make sure it’s working by running:docker ps
It should show an empty table like this:
If you get an error, fix it before going further.
Note: At this point, if you are not using root, you’ll probably need to restart your session if the previous command doesn’t work. So disconnect and reconnect if you are using SSH, log out or restart the terminal if you are directly on the server. The usermod command is not effective directly.
How to host Bitwarden on Linux?
Once the system is ready, we can now start installing Bitwarden on the Linux server.
Here are the main steps to install Bitwarden on Linux:
- Download and run the Vaultwarden Docker container.
- Test the HTTP interface.
- Enable HTTPS.
- Install apps or browser extensions to use Bitwarden on all your devices.
Let’s learn how to do this step-by-step.
Find the best Docker container
Several Docker containers are available to run Bitwarden, but most of them are no longer supported, and recommend using the Vaultwarden server. It’s the one I used and it works well, so you should probably use the same one:
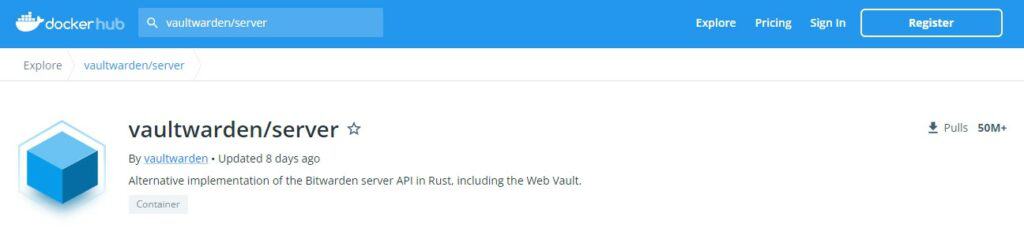
Here is their page on the Docker hub website if you want more about the project.
Install the Vaultwarden container
Once the project is chosen, we can install it like any Docker container, with:docker pull vaultwarden/server:latest

Then, you can start the container with:docker run -d --name vaultwarden -v /vw-data/:/data/ -p 80:80 vaultwarden/server:latest
It will start with HTTP only, which is absolutely not a good idea for hosting a password manager, but at least we can check that everything works.
Note: At this point, I got the following error: “Error starting userland proxy: listen tcp4 0.0.0.0:80: bind: address already in use.” because I had Apache installed.
In this case, you need to uninstall Apache (if not used) or choose another port for Bitwarden or Apache.
The basic test of Bitwarden with HTTP
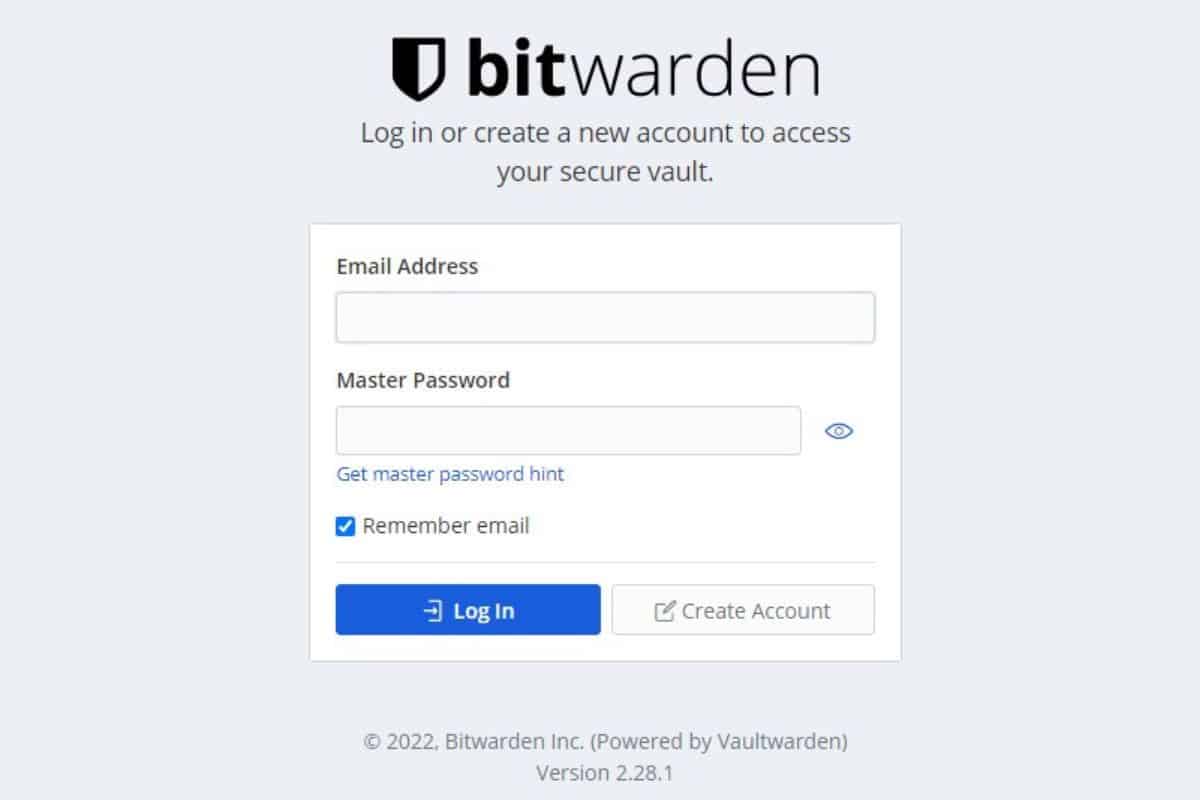
From your computer, type the server address you noted earlier in your web browser, probably something like:http://192.168.1.XOr in my case:http://192.168.222.15
If it’s working correctly, you should get this login form:
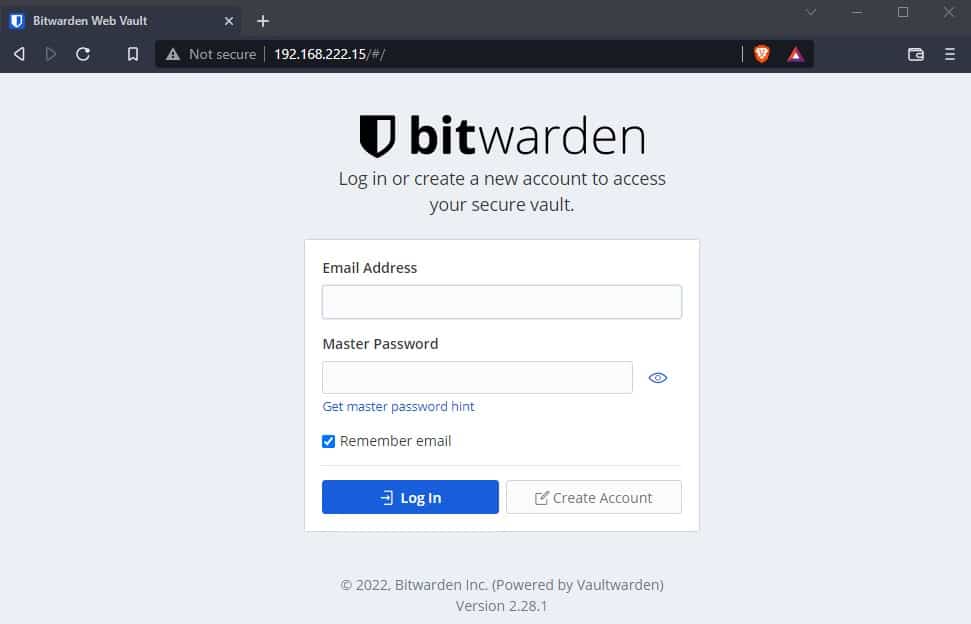
Don’t do anything there for now, as we first need to enable HTTPS (It won’t work with HTTP anyway).
If you don’t get this page, you know that you made a mistake somewhere, and have to double-check the previous steps to make sure you didn’t miss anything.
Bitwarden on Linux: Enable HTTPS
With most home projects, I won’t enable HTTPS. This is not a good practice, but I often find it too complicated, especially on a small local network. And in most cases, it’s not a big deal if you have low security for basic projects like home automation, media servers, or things like that.
But a password manager server is an entirely different thing. If you store all your passwords on your server, and somehow someone is listening on your network and gets the Bitwarden master password, you are screwed. All your logins and passwords can be stolen.
Anyway, I don’t think you have a choice, if I remember well Bitwarden doesn’t work in HTTP, which is a good thing. Enabling HTTPS is a bit complicated, especially if it’s your first time, but it’s mandatory and I’ll explain everything in detail.
Read more: 17 Security Tips From A Pro To Protect Your Linux Server
Two solutions: Use a domain name or generate your own certificates
The best way to enable HTTPS is to get a domain name, redirect it to your server, and generate (or buy) an SSL certificate for this domain. Then, you add the SSL certificate to the web server configuration to secure the connections.
If you are installing it for your company, you probably already have a certificate (maybe a wildcard domain that you can use). Or, you can most likely generate one for your domain and deploy it to all users.
Another option if you won’t have tons of users could be to generate the SSL certificate yourself on the Linux server (by using openssl), associating it with your IP address or hostname, and then adding it to the trusted certificates on each computer.
This could be easier for many projects where you only use one computer to access the web interface, but I don’t think it’s a good idea for a password manager. I’m guessing you’ll install Bitwarden on your computer, but also on your smartphone, tablet, and maybe other devices.
And if you have several users, it’s a lot of work.
Download your exclusive free PDF containing the most useful Linux commands to elevate your skills!
Download now
That’s why I decided to use a domain name for this project. Don’t worry, there are free options, and I’ll explain how to do it.
Redirect the domain name to your IP address
I’m testing this at home, so the steps might be slightly different depending on where you have installed Bitwarden. On a dedicated or VPS server online, it should work almost directly. However, while on a company network, you might have 10 extra steps for security reasons.
I don’t have a static public IP address at home, so I’m using No-IP services to redirect a custom domain name to my current IP address. Basically, they give you a subdomain (like yourname.hoto.org), and software that will regularly update your current IP on their DNS server.
I explain everything about No-IP in this article if you are interested (especially how to set up the software part).
The alternative, if you have a static IP address, is to get a real domain name (like yourname.com) through GoDaddy or a similar company to buy it. You can then configure the DNS zones to redirect the domain (or a subdomain) to your IP address.
Either way, it’s important to make sure you have a domain name redirecting to your current IP address before moving forward. You can’t generate a free SSL certificate without doing this first.
Note: This part can be a bit tricky. I have a video lesson available for the community members where I show you how to host a website at home (not Bitwarden, but it’s the same steps). You can join here and watch it directly if you are interested (with 10+ other lessons for Raspberry Pi and many other benefits).
Port forwarding
In most cases, you’ll redirect the domain or subdomain to your IP address to get access to the Bitwarden login page from outside your network. So, you’ll need to configure your Internet router or firewall to redirect inbound requests to the local IP address (192.168.X.Y).
This will be a different procedure for each router, so I can’t explain exactly how to do it on your network, but if you look for “port forwarding” in your router documentation, you’ll easily find the instructions.
On my router, I have to go to the Advanced mode, and then find the NAT/PAT section, where I can redirect an external port (I chose 4443) to an internal port and IP address (443 and 192.168.222.15 in my case). You also need to redirect port 80 temporarily to generate the SSL certificate in the next step.

So, basically, my NAT configuration is:
| Service | External Port | Internal IP | Internal Port |
|---|---|---|---|
| Bitwarden HTTP | 4443 | 192.168.222.15 | 443 |
| Bitwarden HTTPS | 80 | 192.168.222.15 | 80 |
Do something similar on your router, and make sure it works from outside your network before moving forward. You can test it by disabling the Wi-Fi on your smartphone, and trying to access the HTTP login form with your domain name, for example:http://yourname.hopto.org
Note: I prefer not to use the default port when I do port forwarding. I know many guys are scanning default ports like 80 and 443 to find breaches. I just hope to avoid their scripts when doing this. I know it’s not perfect, but it’s an extra layer of protection.
If you get the login form, everything is ready to generate the SSL certificate and switch to HTTPS.
If not, check the previous steps and linked articles to make sure you did everything correctly.
Generate a certificate with Certbot
We are almost there! We’ll now use the free Let’s Encrypt service to create an SSL certificate that will be valid and recognized in any web browser.
First, stop the Vaultwarden container to avoid any conflict:docker stop [ID]
You can find the ID at the end of the “start” command, or with:docker ps
Then, install Certbot, it’s the app from Let’s Encrypt that we’ll use to generate the certificate:sudo apt install certbot
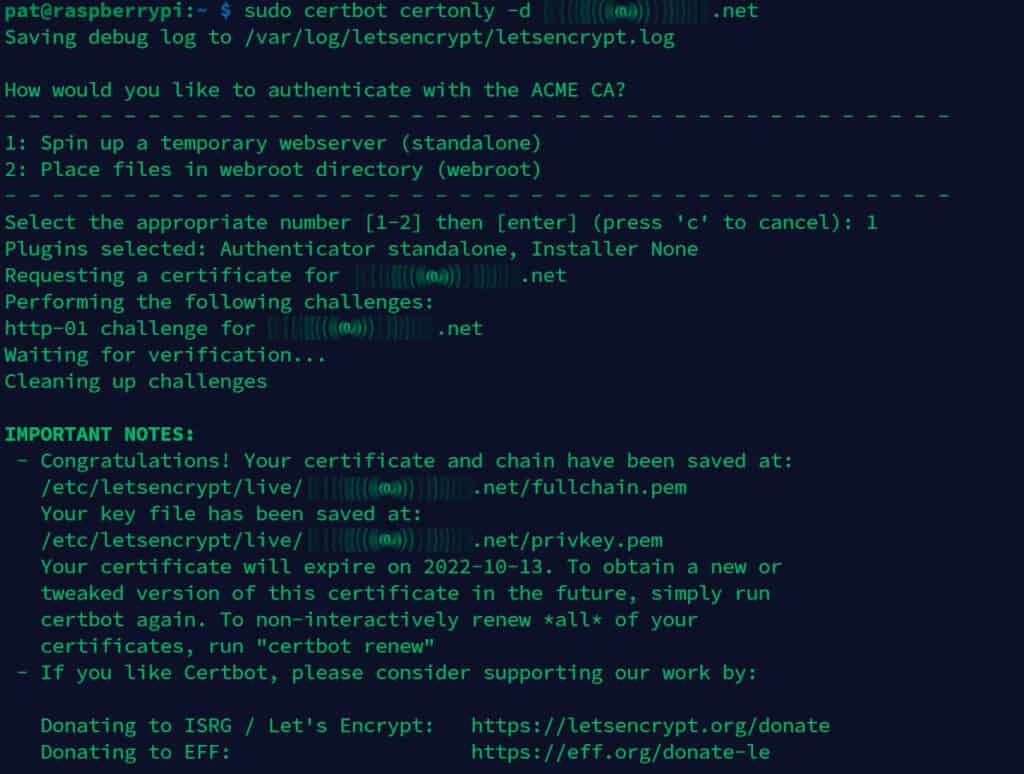
Once done, use the following command to generate the certificate:sudo certbot certonly -d yourdomain.com
Follow the wizard to create the certificate. Choose to spin up a temporary web server (as we don’t have any if you started this from scratch), and it should work. You’ll get the certificate and key locations on your screen, remember this.
Use Rocket to run Bitwarden with HTTPS
There are several ways to use Bitwarden with HTTPS. I first thought of using a proxy with Nginx to redirect port 443 to the container running in HTTP. But in fact, they give us a better and easier way on the Vaultwarden page: you can use “Rocket” directly once your certificate is generated.
So, I just copied my certificate files to a new folder:sudo cp /etc/letsencrypt/live/yourdomain.com/fullchain.pem /ssl/keys/certs.pem
sudo cp /etc/letsencrypt/live/yourdomain.com/privkey.pem /ssl/keys/key.pem
And then started the container with a few more parameters, to use HTTPS instead of HTTP, and tell it where to find my certificate:docker run -d -e ROCKET_TLS='{certs="/ssl/certs.pem",key="/ssl/key.pem"}' -v /ssl/keys/:/ssl/ -v /vw-data/:/data/ -p 443:80 vaultwarden/server:latest
From there, Bitwarden is now accessible via HTTPS, with the domain name you chose and the port you defined on your router. In my case, it’s:https://yourdomain.com:4443
Testing HTTPS
To make sure it’s working, you can use your phone again (make sure to be disconnected from your house Wi-Fi), and use the previous URL to access Bitwarden.
If everything is set up correctly, you should get the same login form, but this time with the HTTPS lock enabled on your browser:

Good job! You did the hard part, the server is ready to use. We just have to create an account and configure the other devices (clients) to use your self-hosted Bitwarden server from anywhere.
Download your exclusive free PDF containing the most useful Linux commands to elevate your skills!
Download now
Use self-hosted Bitwarden on Linux
Using a self-hosted version of Bitwarden is not very different from their cloud plans.
But let’s take a moment anyway to explain the first steps to using your new Bitwarden server.
Create an account on the Bitwarden server
You have access to the login form via HTTPS, so you can now use this form to create a new account. This account will be created on the server only, so even if you already have a Bitwarden account, you need to create one there.
That’s one of the benefits of using a self-hosted version of Bitwarden, everything stays on your server (your vault with all the usernames and passwords, but also the master account).
Once the account is created, make sure you can log in. You should get access to your vault, which is empty for now, it looks like that:
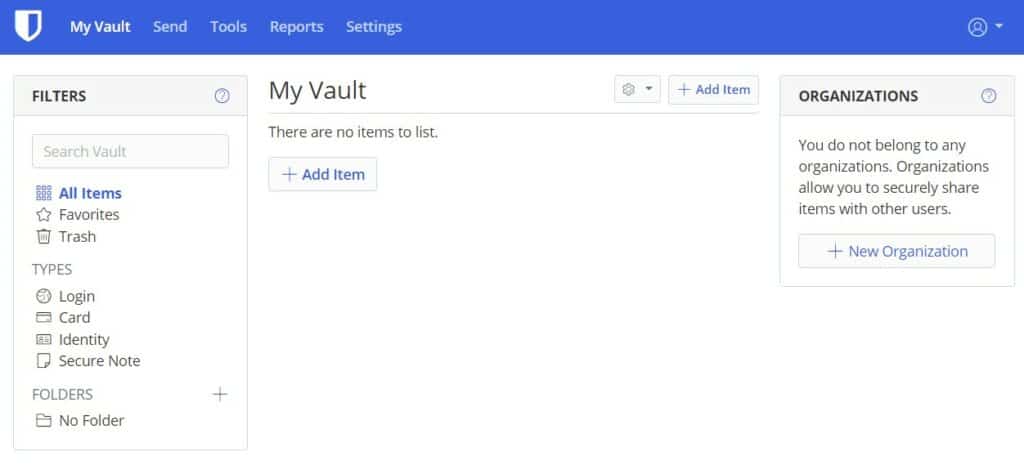
You can add and upload items manually, but the most convenient way to use Bitwarden is to install their apps or extensions on all your devices.
Install the Bitwarden apps on your devices and web browsers
Bitwarden is available as a Desktop application for Windows, macOS, and Linux. There are also extensions available for almost all web browsers (Chrome, Firefox, Opera, Brave, etc.) and mobile apps for Android and iOS.
In fact, there are so many ways to use Bitwarden, that even on exotic systems you should be able to find a way to use it. You can even use it via the command line if you like.
Download the corresponding app or extension here for all the devices you want to use Bitwarden with.
Once the app or extension is installed, it will ask you to log in. But as you use a self-hosted environment, there is one additional step, you need to specify your server URL in the settings:
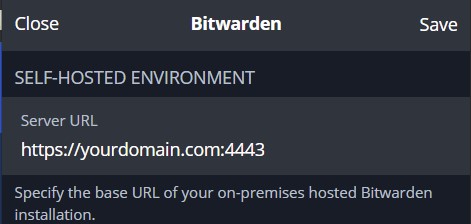
By default, Bitwarden tries to connect to their cloud servers, so it won’t work. Once your custom URL is set up, you should be able to log in with the account you created earlier. From there, Bitwarden works like any password manager. Each time you login to a new website, it will ask you if you want to save the password in your vault, with a message looking like this:

Click Save, and the password will be stored on your server. Everything is safe and encrypted, as long as you are using HTTPS and nobody gets your master password.
That’s it, you are now using a password manager that you have full control over. Bitwarden is installed on your Linux server, and all your devices are connecting to it to save your password and fill out the login forms automatically.
Local network usage
One last quick tip before wrapping up, as your domain name probably won’t work when you are on the same network as your Bitwarden server. When your computer asks for the IP address corresponding to the domain name, it returns your public IP address, and routers are generally not doing the port forwarding stuff for the local computers.
There are several ways to handle this.
The best way is probably to add the domain name to your local network DNS server (maybe it’s your router) and tell it to redirect to the local IP address (192.168.X.Y) instead of the public IP address.
But an easier way, if you only have one computer, might be to add this domain name to your “hosts” file.
On Linux, it is under /etc/hosts, and on Windows, it’s under C:\Windows\system32\drivers\etc\hosts.
Add this line at the end:192.168.X.Y yourdomain.comReplacing the IP address with the one from your main server, and the domain name you generated the SSL certificate for.
Something like:
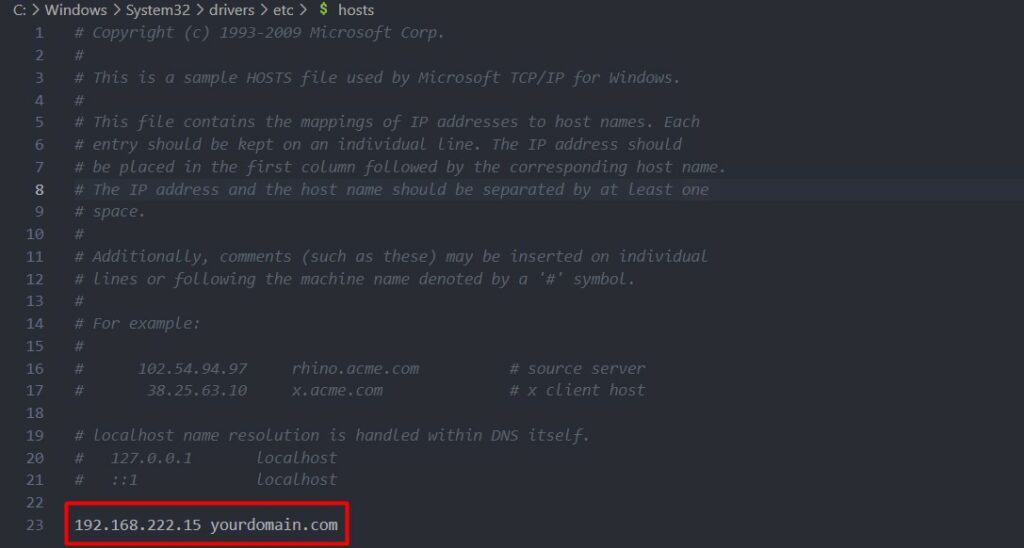
After doing this, Bitwarden should work from your computer.
Repeat these steps on all computers if needed. But if you want to use Bitwarden on your phone, adding an entry on your DNS server is a better idea (or you’ll add to disconnect your phone from your Wi-Fi).
Once the initial setup is done, I highly recommend reading the official documentation before going further, to learn more about security and also on how to back up your server properly.
If your system is corrupted and won’t boot anymore, you’ll lose all your passwords.
In this case, I would try to do a complete backup at least once a month (and test it to make sure it works).
I liked testing this project for you, I hope this tutorial will be useful. Feel free to leave a comment in the community if you have any feedback or suggestion about this.
Download your exclusive free PDF containing the most useful Linux commands to elevate your skills!
Download now
If you are looking for exclusive tutorials, I post a new course each month, available for premium members only. Join the community to get access to all of them right now!
Additional Resources
Overwhelmed with Linux commands?
My e-book, “Master Linux Commands”, is your essential guide to mastering the terminal. Get practical tips, real-world examples, and a bonus cheat sheet to keep by your side.
Grab your copy now.
VIP Community
If you just want to hang out with me and other Linux fans, you can also join the community. I share exclusive tutorials and behind-the-scenes content there. Premium members can also visit the website without ads.
More details here.
Need help building something with Python?
Python is a great language to get started with programming on any Linux computer.
Learn the essentials, step-by-step, without losing time understanding useless concepts.
Get the e-book now.