How to Install Debian 12 Bookworm on Raspberry Pi (2024 update)
Debian is one of four main versions of Linux and has been around since 1993. It forms the basis of Raspberry Pi OS, Ubuntu, and many others. When I first got started on Linux, I tried it out because it was a key distribution. However, it wasn’t as beginner-friendly as other distributions, so I didn’t spend much time with it. Now that I have more experience, and Debian has a Raspberry Pi version available, it’s time to try again and share my journey with you.
An unofficial image of Debian “Bookworm” is available for most Raspberry Pi models. There is no graphic interface by default, but it’s possible to add one with a few commands.
Read on to discover how to configure and install Debian with a desktop environment!
If you’re looking to quickly progress on Raspberry Pi, you can check out my e-book here. It’s a 30-day challenge where you learn one new thing every day until you become a Raspberry Pi expert. The first third of the book teaches you the basics, but the following chapters include projects you can try on your own.
A Brief History of Debian
Debian had a long history, even before the Raspberry Pi was invented. Founded in 1993 by Ian Murdock, it is one of the early Linux distributions and one that is the basis for many other Linux distributions.
The Debian name is derived from Ian’s girlfriend at the time, Debra, and his first name, Ian. Debian’s key feature at the time was the Advanced Package Tool which is still used with the APT command in Raspberry Pi OS.
Debian releases are named for characters from the Toy Story movies. The current release of Raspberry Pi OS is named Bullseye, named after Woody’s horse that appeared in Toy Story 2 (list here).
Much of Debian will be familiar to most Pi users, as it is what Raspbian and now Raspberry Pi OS are based on. It is, however, not ready for novice users out of the box.
Debian itself is used on a lot of servers and other high-security-type installations, so minimal things are pre-configured.
Can you install Debian on a Raspberry Pi?
Thanks to the work of Gunnar Wolf, a Debian developer, it’s possible to install Debian on Raspberry Pi, even if there is no official release for it.
While not officially supported by the Debian project, it is well done and Gunnar explains that it is intended to be a very basic Debian system that is bootable on the Raspberry Pi, and not much else, as we’ll see.
If you download a Debian image for a Windows or Mac computer, you will have choices about installing desktop software and different kinds of installers with several options. On the Raspberry Pi, there is only a minimal install, and you can do what you like with it after that… but you have to know how.
How to install Debian for your Raspberry Pi
Here are the required steps to install Debian on a Raspberry Pi:
- Download the Debian image built for the Raspberry Pi.
- Flash it on a new SD card with Raspberry Pi Imager.
- Insert it into the Raspberry Pi and start it.
Download the Debian image
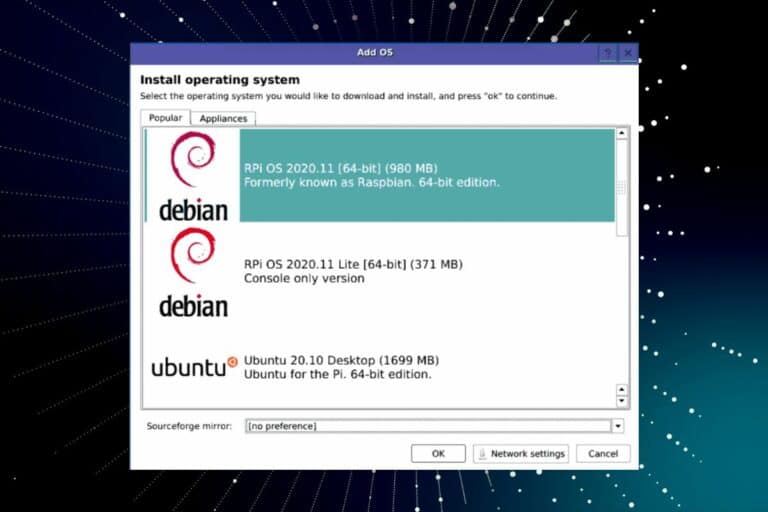
The first thing we need to do is download an image from this site for our Raspberry Pi. You can download it from the official website here.
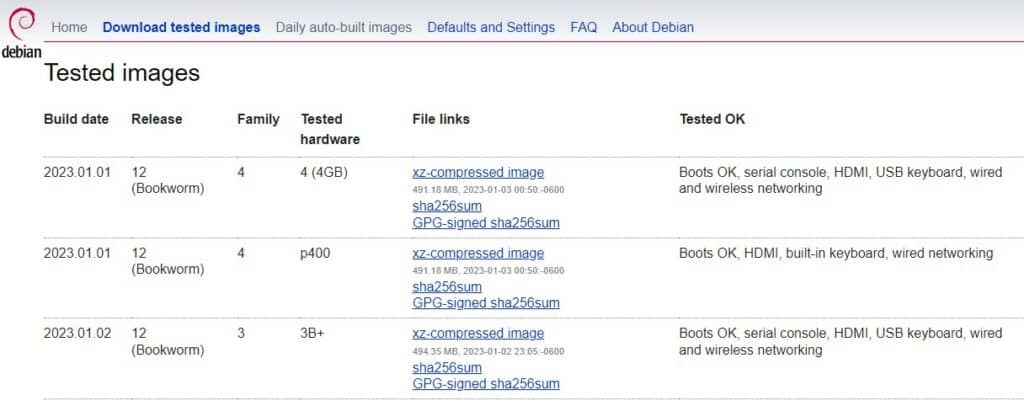
Here, you’ll find a list of available images and the configurations they have been tested with. I chose the latest one, which is Bookworm at the time of writing. I click on the first link, that is for the Pi 4 (4 GB), get the xz compressed image for your model and move forward.
It's a free PDF guide containing every Raspberry Pi Linux command you should know!
Download now
There are images for each of the Pi families from the Pi 0 through the 400 and versions for Bookworm and Bullseye of each. Bullseye is the previous release, but there aren’t enough differences to matter in these installers. Pick the one that matches your hardware and version choice, and then download the file.
Flash Debian to the SD Card
Once downloaded, we need to write the image to an SD card for booting in the Raspberry Pi. The process is the same as for any other image file you may have done in the past, and either Etcher or Imager is an easy choice to accomplish this.
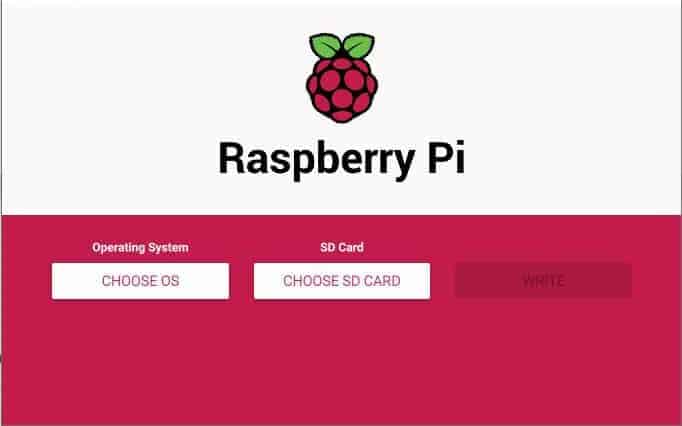
For our example, we’ll use Raspberry Pi Imager, which is available here.
- Download the version for the computer you’re using to create the SD card (note, you can do this on a Raspberry Pi if you like).
- Install the downloaded file and launch the software.
- Once launched, you’ll be presented with the Imager home window.
We need to select what we want to install and where we want to install it before we can write the image. - Click on Choose OS, and select “Use Custom” from the bottom of the list.
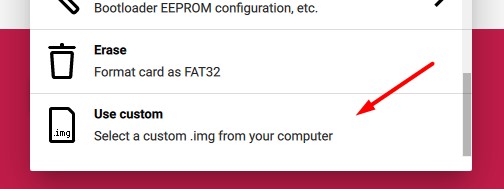
This will prompt you to locate the image that you want to write to the SD card.
Navigate to your Downloads folder (or wherever you saved the Debian image) and select it. - Next, pick where you want to write the image to.
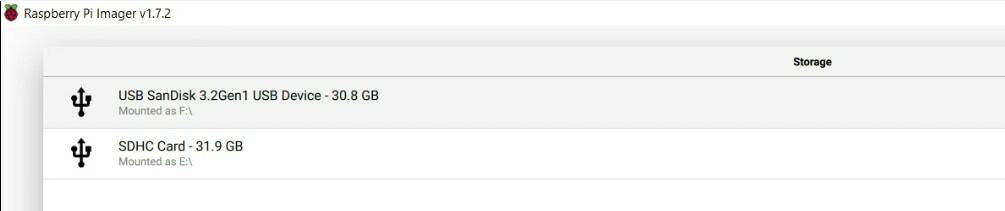
- Once complete, we are ready to write the image.
It won’t take long, as there isn’t a lot of data to write since the image does not contain a graphical desktop interface or software. We’ll install those next!
It’s the short version, but if you need a full tutorial about Raspberry Pi Imager, just click on the link for more details.
Note: I tried to use a USB stick instead of the SD card, and got a lot of I/O errors. I guess the power required by the USB drive is not well managed by Debian, so using an SD card is recommended. You might be more lucky, but I recommend using an SD card for this tutorial.
First Boot
Once the SD card is done verifying, it’s ready to boot. Put the SD card in your Pi’s SD slot and power it up. The first boot takes some time as it has a bit of housekeeping to do, but you will eventually get to a very underwhelming prompt:

Join Our Community!
Connect, learn, and grow with other Raspberry Pi enthusiasts. Support RaspberryTips and enjoy an ad-free reading experience. Get exclusive monthly video tutorials and many other benefits.
Learn moreDebian GNU/Linux bookworm/sid rpi4-20230101 tty1
Rpi4-20230101 login:
Your numbers may be different, but the rpi4-20230101 is the current name of the computer. We can change that later if desired. The login part is waiting for us to type a user name, and the only one set up is root.
- Default login: root
- Default password: <none>
Once you enter root and press return, you’ll get some more info about the distribution and that it comes with absolutely no warranty and then a prompt:
root@rpi4-20230101:~#
Root is the user who is in complete control of the Linux system and has access to everything, so you need to be careful. On Raspberry Pi OS, we usually have the sudo command that can be used when something needs root access, without actually having to open up the system.
Debian explains on the Raspberry Pi download page that they made this choice on purpose because they expect you to need to access the system and didn’t want to have to track or publish usernames and passwords. We need to be careful with the next few steps.
Related: How to Fix: “sudo command not found” on Linux (2 reasons)
Advanced Configuration of Debian on Raspberry Pi
Now that we have it booted, we still have some work to do to make it usable on a day-to-day basis.
Activate Wi-Fi
If you have an Ethernet connection, you can skip this step. Otherwise, the first thing we need to do is to establish a network connection with Wi-Fi.
All the files we need are there, but we have to give details about your Wi-Fi network, as clearly Debian wouldn’t have those to include in the setup.
- To get there, we use the command:
nano /etc/network/interfaces.d/wlan0 - You’ll need to remove the # symbols at the front of the lines starting with allow-hotplug wlan0 (I left the one for inet6).
- Replace the sample information following wpa-ssid with your Wi-Fi network name (SSID).
- Replace the sample information after wpa-psk with your Wi-Fi password.

- Once done, you can reboot your system:
rebootNo need for sudo as we’re root. In fact, sudo it’s not available by default. - Once that’s complete, and you log back in, you should be able to do:
apt update
If you have a connection to the internet through your Wi-Fi, it will go through the motions of checking with the network repositories to see what needs to be updated. If your internet connection is not working, you’ll get error messages that they can’t be reached. Go back and check your settings if this happens.
Once you get the update, it’s a good idea to do the apt upgrade command so that you’ll have an up-to-date system before we continue:apt upgrade
Are you a bit lost in the Linux command line? Check this article first for the most important commands to remember and a free downloadable cheat sheet so you can have the commands at your fingertips.
Configure the keyboard
If you need to switch the layout of the keyboard, this can be done with: dpkg-reconfigure keyboard-configuration
It's a free PDF guide containing every Raspberry Pi Linux command you should know!
Download now
On the latest Debian version, this is not available by default, you have to install it manually, with:apt update
apt install keyboard-configuration console-setup
This will ask you first for the type of keyboard you have and then a second screen will ask for the language.

If you make changes and doesn’t work right away, you need to apply them with the command: setupcon
Add a user
So that we don’t have to continue to log in as the root user, and so that we can log in once we install the graphic desktop, we need to create a user. This can be done with the command: adduser <username> Try to avoid “admin”, “pi” or obvious names like that for security reasons.
You’ll get a reply that a new user is being added and a group is being created for that user and a home directory is being created. That’s all normal, and if you think about the home directory on the Raspberry Pi, the user has its own home directory with all your files.
It will then ask for a password and to confirm your chosen password.
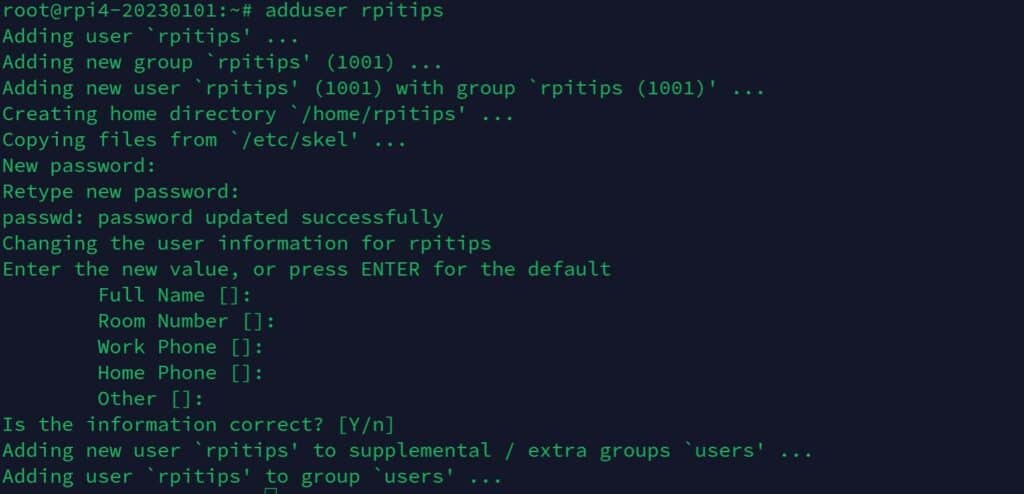
Following that, it asks for a Full Name. I recommend that you give it something because that will be the user account that the graphic desktop uses to help you log in.
It then asks for several other pieces of information like Room Number and phone numbers. You can just hit return on those, or fill them out if you like. The last question is “is the information correct?” Press y and you’ll be returned to the prompt.
While we’re here, it’s a good time to change (or more correctly, add) the root password. Enter the command passwd at the prompt:passwd
Since we’re still logged in as the root user, that’s the password we’re changing. It will ask for the new password and then a repeat.
Once complete, that password will be set for logging in as well as any other time you need a root password.
More details here: How to Create a New User on Raspberry Pi?
Allow sudo for your user
The system needs to know that this user is allowed to use sudo to execute commands. Here is how to allow administrative commands to your new user.
Make sure you are root or switch to it with: su - root
This will switch the user to root, as the Pi user doesn’t have permission to do this yet. You’ll be asked for the root password if you set one in the step above.
Then install the “sudo” package, that is not available by default on Debian:apt install sudo
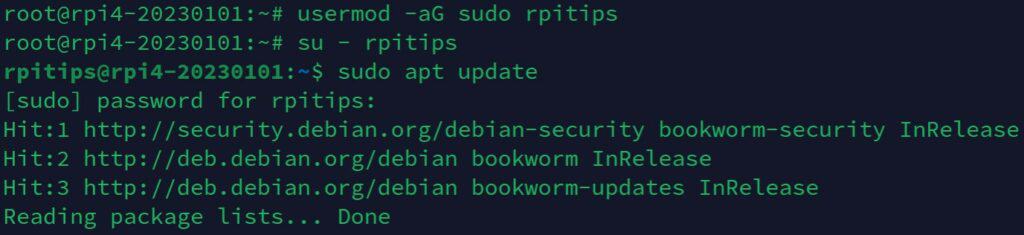
Then, give privileges to use “sudo” to your username: usermod -aG sudo <username>Replace <username> with the user you created (pi for example).
This will add the user to the sudo group so that it will now have permission to issue sudo commands. You should now be able to switch back to the normal user by typing:exit
Hopefully, everything will then work normally. If you want to try it out, you can issue any sudo command, including: sudo apt update
Adding the desktop environment
At this point, we have enough information to add the desktop environment, but you’ll have some choices to make here too. Entering the command: sudo tasksel
This will bring up a window with choices of desktop environments you can install. These include several, ranging from lightweight choices like MATE and LXDE to some pretty heavyweight distros like Plasma and Gnome.
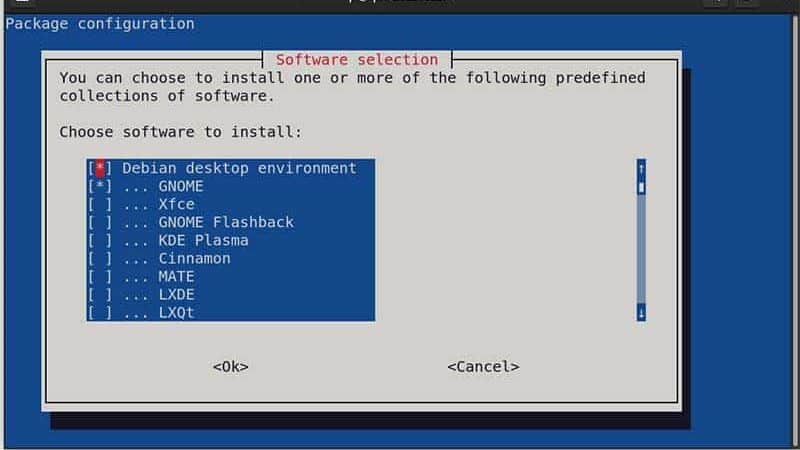
Gnome is the default package if you download a full Debian installer for other computers (you can find my dedicated tutorial here), but since we only have the basics, we have to install one, and we can choose. I have installed Gnome, and it works reasonably well on the Pi 4, even though it’s considered a fairly heavy distro.
LXDE is the one that the Raspberry Pi OS is based on, so it will be most familiar, although it will still look quite different than the classic Pi OS that you’re used to. The nice thing is that you can install more than one, if you have space, and select which one you want to use at startup.
Don’t know which one to pick? Find my favorite desktop environments here.
Keep your eye on the installation for a few minutes, as it will pop up and ask what language should be installed. Once you answer that, you can just let it run.
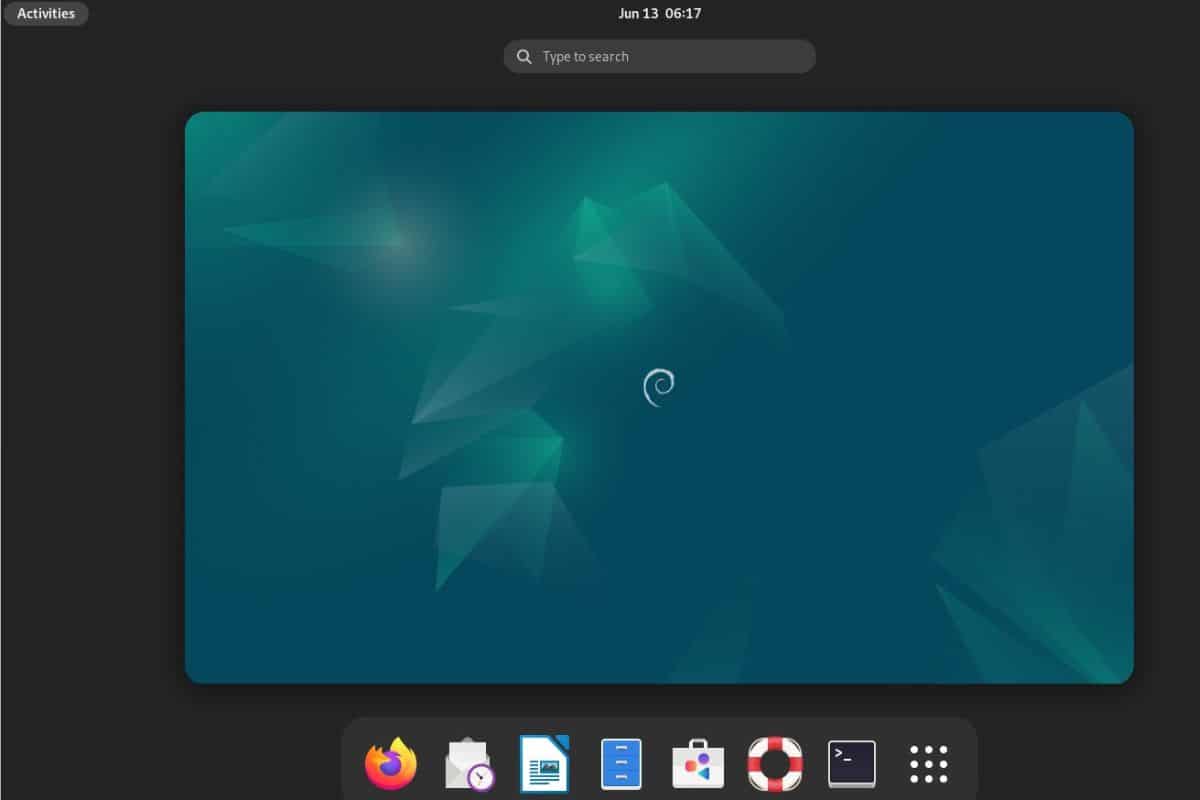
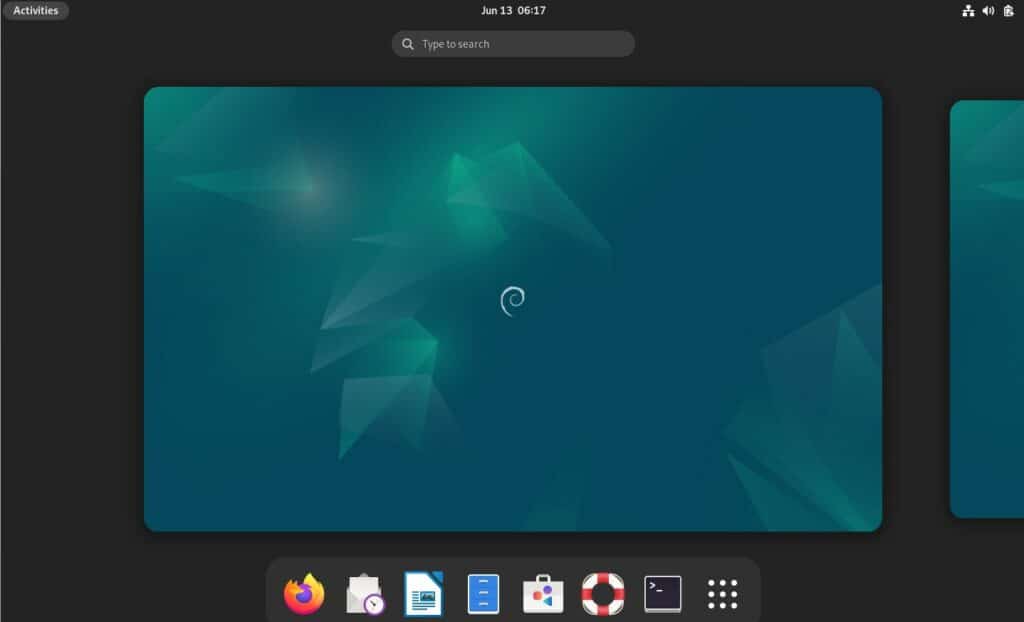
Once installed, a reboot should bring you to the graphic desktop login, and you should see the user name’s Full Name that we entered earlier as a choice. Log in, and you’ll get the desktop screen.
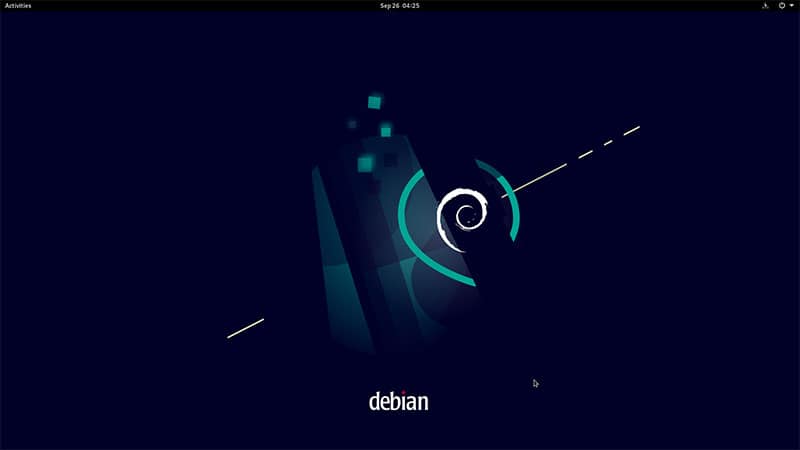
At this point, feel free to explore the desktop environment. You might want to look at all apps, settings and under power, adjust the time before the screen is blanked – 5 minutes is not nearly long enough for my taste.
As you look around, you’ll see many familiar programs and commands, but also a lot of new ones, particularly in settings. Gnome is highly customizable, and just about every piece of the user interface can be adjusted to your liking.
Install another desktop
If you’d like to play with another desktop environment, it’s easy to add more.
- Open a terminal window and type:
sudo tasksel - You’ll get the same window with choices that you can pick.
- Pick one or more and wait for the installation to complete.
After the installation completes, you’ll need to restart. On the login screen, you pick the username, and then in the lower-right corner, there’s a settings menu (looks like a gear).
You’ll find listed all of the desktop environments you have available. There is a Gnome classic as well as the Gnome that is the new standard.
From there, it’s Debian as usual, you shouldn’t be lost if you already used it.
And you can find many tutorials about Debian on this website. Whether you use it on a Raspberry Pi, a PC or a server, it works the same way. Here are a few suggestions:
- How To Safely Install Bitwarden On Linux (Debian/Ubuntu)
- Hosting A Minecraft Server On Debian: The Ultimate Guide
- Install Nextcloud on Debian
- How to Install PyCharm on Debian? (With Shortcut)
It's a free PDF guide containing every Raspberry Pi Linux command you should know!
Download now
Video
It's a free PDF guide containing every Raspberry Pi Linux command you should know!
Download now
Want to chat with other Raspberry Pi enthusiasts? Join the community, share your current projects and ask for help directly in the forums.
Conclusion
Debian is one of the old Linux distributions that has stood the test of time. It is a very relevant distribution because it is the basis of so many other distributions. However, it is difficult to recommend this as anything other than a fun experiment, and it is not for the beginner. If you’re curious and would like to play with Debian, then have fun.
If you’re just getting started and want a new distribution or a different type of desktop environment, I’d suggest using one of the many that are pre-configured for the Pi, such as Ubuntu or Twister. Have fun!
Whenever you’re ready, here are other ways I can help you:
The RaspberryTips Community: If you want to hang out with me and other Raspberry Pi fans, you can join the community. I share exclusive tutorials and behind-the-scenes content there. Premium members can also visit the website without ads.
Master your Raspberry Pi in 30 days: If you are looking for the best tips to become an expert on Raspberry Pi, this book is for you. Learn useful Linux skills and practice multiple projects with step-by-step guides.
The Raspberry Pi Bootcamp: Understand everything about the Raspberry Pi, stop searching for help all the time, and finally enjoy completing your projects.
Master Python on Raspberry Pi: Create, understand, and improve any Python script for your Raspberry Pi. Learn the essentials step-by-step without losing time understanding useless concepts.
You can also find all my recommendations for tools and hardware on this page.