How to install heat sinks on a Raspberry Pi 3 B+ ?
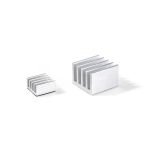
When I bought my first Raspberry Pi 3 B + kit, it came with two heat sinks. There was no explanation on how to install them. I didn’t know what to do with it.
I knew it was probably one on the CPU, but I was not sure for the second one.
Where to install heat sinks on a Raspberry Pi?
Heat sinks should be installed at least on the two main components of the Raspberry Pi: the CPU and the LAN Chip.
Some kits also provide a heat sink to put on the back of the Raspberry Pi.
And now let me tell you more about this topic following these 4 simple questions :
- Which are the components of Raspberry Pi that give off heat?
- Why do you need a heatsink (or not)?
- How to install heatsinks?
- How to monitor the CPU temperature of the Raspberry Pi?
If you need help getting started on Raspberry Pi, I have an entire course to guide you through your first steps. I’ll help you use the perfect hardware, plug everything in and install your first system. You’ll also do your first projects with me, just to make sure you are ready for the next level. Get all the information on this page if you are interested.
Components location on a Raspberry Pi 3B+
I need to be sure that you’ll understand the rest of the article and that we are talking about the same thing.
So, we will start to see where the components are located on a Raspberry Pi 3B+.
The Raspberry Pi is designed with these primary components:
– Processor
– Memory
– Wireless card for Wi-Fi and Bluetooth
– Network Card
– USB ports
– HDMI output
– Audio output
– SD card slot
– Micro USB connector
– GPIO Pins
You will see each component’s location in the following image:

Join Our Community!
Connect, learn, and grow with other Raspberry Pi enthusiasts. Support RaspberryTips and enjoy an ad-free reading experience. Get exclusive monthly video tutorials and many other benefits.
Learn more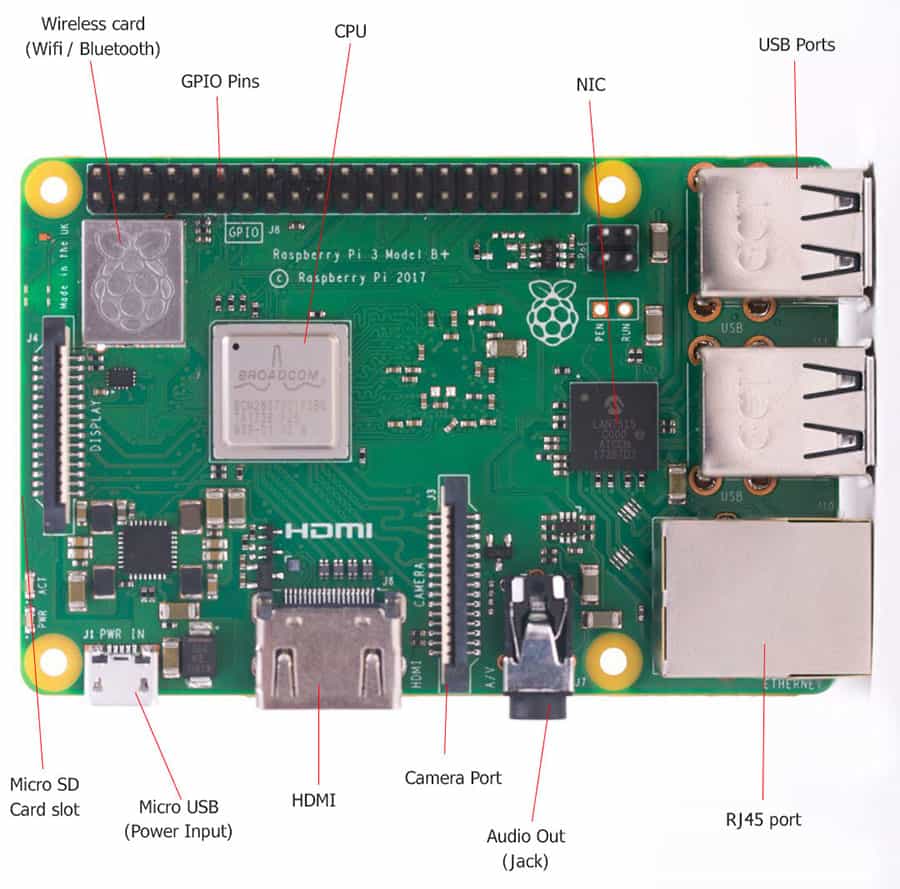
A thermal camera makes it possible to highlight the points where the heat is the highest (Red being the highest temperature and blue the lowest).
If we take a picture of a Raspberry Pi running, it looks like this:
If you are lost in all these new words and abbreviations, request my free Raspberry Pi glossary here (PDF format)!
Download now

Using this photo, we understand very well the two areas where heat sinks will be the most useful to protect the Raspberry:
- The processor, in the center of the raspberry, which is the most visible.
- The LAN chip, on the right, which also produces a lot of heat.
Are the heat skins needed?
In most cases, heat sinks are not essential. You can find more details in this post: Does Your Raspberry Pi Need Heatsinks? The definitive answer. But I’ll give you the short answer here.
Indeed, the Raspberry Pi, when used for basic usage, does not generate a lot of heat and the components don’t risk anything without the heat sink.
The basic version of the Raspberry Pi is also delivered without a heat sink, which proves that the manufacturer did not consider it essential.
The Raspberry Pi was designed to work in a small box without heat sinks, so don’t worry about that.
If they were provided with your pack when you bought your Raspberry, I recommend you to install them anyway.
It will have more thermal protection. Anyway, a pack of heat sink is very inexpensive if you want to try them (check the price on Amazon).
It will take you 5 minutes and you will be more confident in the future if you use your Raspberry Pi more intensely.
If you start using your Raspberry Pi in a more sustained way, for example by using it as a very loaded server or by overclocking it, it will be necessary to monitor the temperature of your Raspberry Pi closely.
I will give you some tips at the end of this article on how to be sure that your Raspberry Pi is running in the expected temperatures.
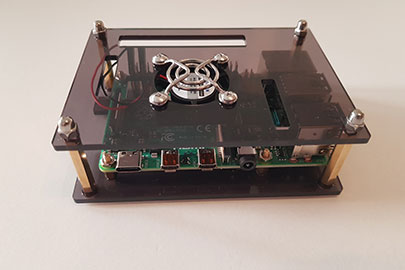
In some cases, you will even need to add a fan to ensure that the CPU is cooled properly.
Nowadays, I rarely use heat sinks anymore, I prefer to use passive cases. I have review a bunch of them on this website if you want to give it a try:
- Raspberry Pi 4 Passive Cooling – Is It Worth It?
- Argon NEO: Honest Review After 1 Month Usage
- Flirc Case Review: Is it Really the Best? (6 Months Usage)
Heat sink installation
As I wrote at the beginning of this article, we must install heat sinks on two components:
– the processor, which is in the center of the board.
– the network chip, which is close to USB ports.
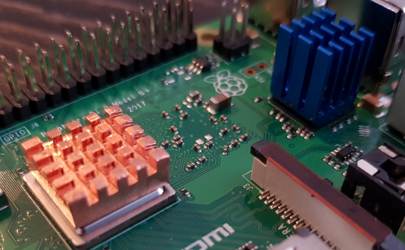
Here are the two places where we have to put our heatsinks :
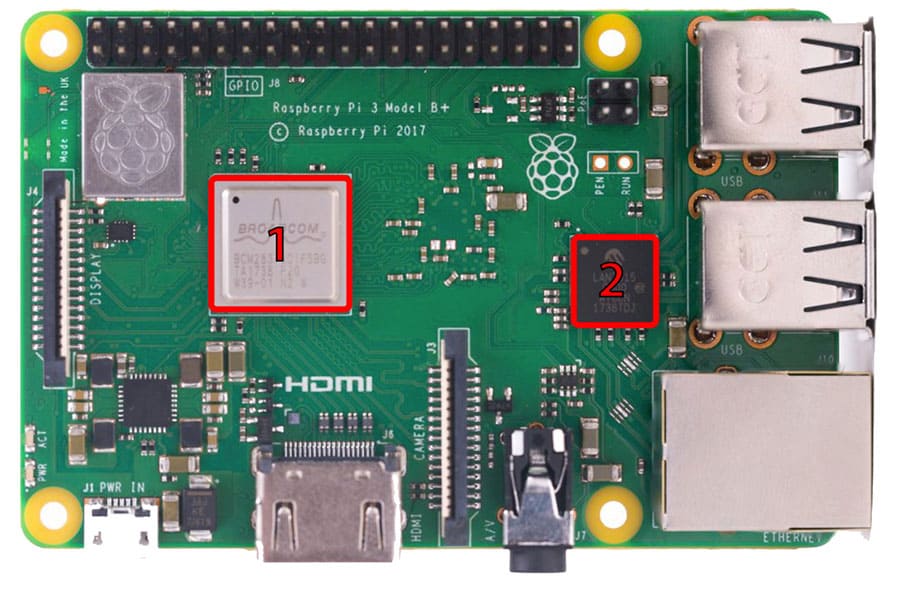
The bigger heat sink will go to the CPU in the center and the other to the LAN chip.
The orientation of the heat sink does not matter, try to center it on the CPU so that the heat can smoothly flow over the entire surface.
If you are lost in all these new words and abbreviations, request my free Raspberry Pi glossary here (PDF format)!
Download now
To install the first heat sink follow these simple steps:
- Take the first heat sink (the larger of the two).
- Peel off the adhesive pad underneath.
- Place it on the processor (1).
- Press lightly to make sure it is properly attached.
Repeat the same steps with the second heat sink, sticking it this time on the network chip (2).
You can take the Raspberry Pi in your hands and slightly tighten the heat sinks between thumb and index to complete the operation.
Once the set up is complete, it should look something like this:
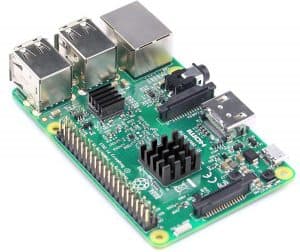
And that’s it. It’s not complicated once you know where to install them.
It's a free PDF guide containing every Raspberry Pi Linux command you should know!
Download now
Monitor your CPU temperature
To go further on this topic, we will see how to check the temperature of your processor to ensure that it stays in the recommended range.
What is the maximum safe temperature?
The lower the CPU temperature is, the more efficient it will be.
The Raspberry Pi will start to run slower over 85 °C, and it is not recommended going higher because you risk CPU damage.
So we will see how to know the temperature of the CPU at any time to ensure that it is well below this limit.
How to get the current CPU temperature?
On Desktop :
If you are on the Raspberry desktop, you can add the current temperature in your taskbar by following these steps:
- Right-click on the taskbar.
- Then Add/Remove Panel Items.
- Click on the Add button in the right menu.
- Choose Temperature monitor in the list.
- Then Add.
The top bar will now display the current temperature of your CPU
You can also customize items order, add space between elements.

With command line :
It is possible to know the temperature of the CPU if you are connected using ssh or if you want to use it in a script.
There is a command for this:/opt/vc/bin/vcgencmd measure_temp
This command will return the current temperature of the CPU in Celsius, for example :/opt/vc/bin/vcgencmd measure_temp temp=61.2'C
Are you a bit lost in the Linux command line? Check this article first for the most important commands to remember and a free downloadable cheat sheet so you can have the commands at your fingertips.
And if the temperature is too high?
If despite the installation of heat sinks, the temperature of the CPU is still too high, you will have to find a way to improve its cooling.
For example, by following these few ideas:
- Make sure the environment does not make the situation worse (if you put your raspberry under direct sunlight or near a radiator, it will not help).
- Check for dust that clogs the components.
- Think about investing in more suitable equipment :
- More massive heat sinks
- Better-ventilated case
- Fans
- Water cooling stuff
You will find the products I use on the resources page.
It's a free PDF guide containing every Raspberry Pi Linux command you should know!
Download now
Want to chat with other Raspberry Pi enthusiasts? Join the community, share your current projects and ask for help directly in the forums.
Conclusion :
Now you know why and how to install your heat sinks and also how to monitor the temperature of your Raspberry Pi to avoid overheating.
You are ready to start creating amazing projects with your Raspberry Pi cooled correctly 🙂
Whenever you’re ready, here are other ways I can help you:
The RaspberryTips Community: If you want to hang out with me and other Raspberry Pi fans, you can join the community. I share exclusive tutorials and behind-the-scenes content there. Premium members can also visit the website without ads.
Master your Raspberry Pi in 30 days: If you are looking for the best tips to become an expert on Raspberry Pi, this book is for you. Learn useful Linux skills and practice multiple projects with step-by-step guides.
The Raspberry Pi Bootcamp: Understand everything about the Raspberry Pi, stop searching for help all the time, and finally enjoy completing your projects.
Master Python on Raspberry Pi: Create, understand, and improve any Python script for your Raspberry Pi. Learn the essentials step-by-step without losing time understanding useless concepts.
You can also find all my recommendations for tools and hardware on this page.