Install Home Assistant on Ubuntu: A Step-by-step guide
Installing Home Assistant at home is an interesting project to start playing with home automation. Once connected to all your smart devices, you’ll have the control and can do anything you want easily. In this tutorial, I’ll show you each step to get it running, so you can begin automating your home.
Home Assistant is available as a Docker container on Ubuntu, making it easy to install and allowing us to use this application with other services installed on the same system.
I know that not everybody is used to Docker, that’s why I created this guide, where I will explain everything step-by-step. Just follow this tutorial to get Home Assistant running on your system in no time.
Home Assistant Installation with Docker
There are many ways to install a service like Home Assistant on Linux, but when Docker is an option I often recommend it, as you are guaranteed it will work after a straightforward installation. No compilation error or packages conflicts is expected with it :-).
Update your system
I’m testing this setup on the latest Ubuntu version available at the time of writing (22.04), but it should work on any Debian-like distribution. If you are using other Linux systems like Manjaro or Fedora, you’ll need to adapt some of these commands.
Before anything else, make sure your system is up-to-date, to avoid any issue during the installation.
Open a terminal or connect to your server via SSH and type the following commands:sudo apt update
sudo apt upgrade
You can obviously use the desktop interface to do the same thing if you have a desktop environment installed.
If there are a lot of updated packages, a reboot is recommended before going further:sudo reboot
Are you a bit lost in the Linux command line? Check this article first for the most important commands to remember and a free downloadable cheat sheet so you can have the commands at your fingertips.
Install Curl
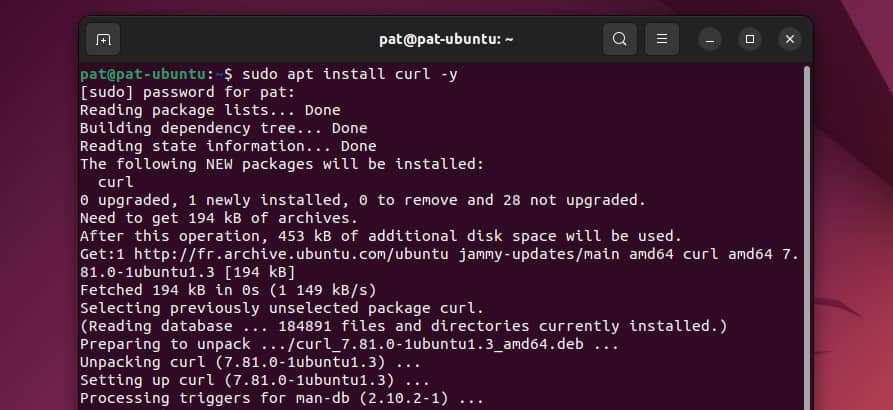
Curl is a command line we’ll use on the next step to install Docker. It’s not installed by default on Ubuntu, so you may need to install it before going further:sudo apt install curl
Download your exclusive free PDF containing the most useful Linux commands to elevate your skills!
Download now
How to Install Docker
If you never used Docker previously, you first have to install it on your computer.
The easiest way to install Docker on Linux is to use this command:curl -sSL https://get.docker.com | sh
You don’t need to use sudo, the script will do it for you. Basically, this command will add a new repository to your APT sources, and install the packages from there.
Join Our Community!
Connect, learn, and grow with other Raspberry Pi enthusiasts. Support RaspberryTips and enjoy an ad-free reading experience. Get exclusive monthly video tutorials and many other benefits.
Learn more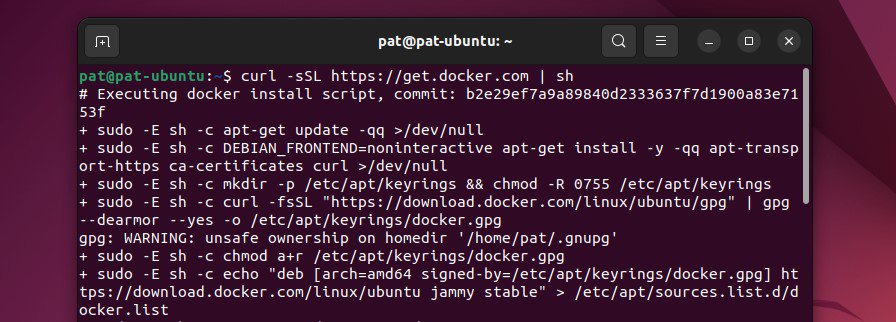
If you are new to this, I recommend reading my complete guide about Docker first. Just to make sure you understand what you’re doing here. It’s oriented for Raspberry Pi users, but the idea is the same on Ubuntu.
Also, if you want to give the permission to your normal user to use Docker commands directly, without sudo, you can run this command to add it to the docker group on your system:sudo usermod -aG docker $USERYou need to log out and log in again to apply changes (same thing on Desktop and SSH).
You can test if it’s working with:docker ps
Install the Home Assistant container
Now that Docker is set up on your system, you can follow the documentation and create a new container with Home Assistant. Here is the command syntax to do this:
docker run -d \
--name homeassistant \
--privileged \
--restart=unless-stopped \
-e TZ=MY_TIME_ZONE \
-v /PATH_TO_YOUR_CONFIG:/config \
--network=host \
ghcr.io/home-assistant/home-assistant:stable
Yes, that is a big command, and you need to adjust it for your system:
- Replace MY_TIME_ZONE with your current timezone. The format is Country/City.
For example: TZ=Europe/Paris - Replace PATH_TO_YOUR_CONFIG with the folder where you want to store the configuration files.
In my case, I just used this command:
docker run -d \
--name homeassistant \
--privileged \
--restart=unless-stopped \
-e TZ=Europe/Paris \
-v /home/pat/hass:/config \
--network=host \
ghcr.io/home-assistant/home-assistant:stable

After doing this, the container will start and the web interface will be available at the same address as with the complete setup. So, you can continue this tutorial to find out how to access it and start using Home Assistant.
Note: It worked fine the first time I tried, but after a second try on another VM, I got this error:
“docker: Got permission denied while trying to connect to the Docker daemon socket at unix:///var/run/docker.sock”
I fixed it with:sudo chmod 666 /var/run/docker.sock
Download your exclusive free PDF containing the most useful Linux commands to elevate your skills!
Download now
Updates
Updating Home Assistant with the Docker installation method is a bit tricky. You can’t just run apt upgrade and hope that you’ll keep it up-to-date. After reading the documentation, the only way to update it seems to remove the container and create a new one with the new version.
Here is the command to run (in this order):docker pull ghcr.io/home-assistant/home-assistant:stable
docker stop homeassistant
docker rm homeassistant
Then, you can use the same command as during the installation to recreate the container. Make sure to use the same path for the configuration folder if you don’t want to start from scratch after each update.
Getting Started with Home Assistant
Once Home Assistant installed, it’s now time to connect it to all your smart devices and start having fun with it!
First access to the web interface
Whatever the installation method you chose, Home Assistant will start a web interface on the port 8123 of your system. You can generally it access it with http://localhost:8123 or http://IP_ADDRESS:8123.
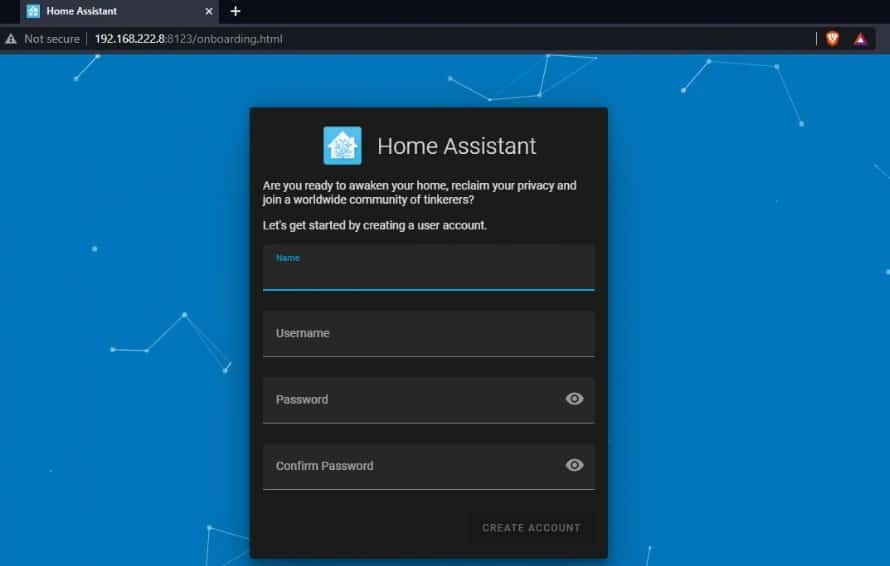
You should get a form, as seen on the above screenshot, asking you to create the first user account.
Then you will be asked a few questions to customize your setup:
- Give a name to your Home Assistant installation.
- Set your location, timezone, unit system and currency.
- Check the boxes corresponding to the data you are ready to share with the developers (or skip this screen).
- The wizard will then scan your network, and offer you to quickly add any supported smart devices:
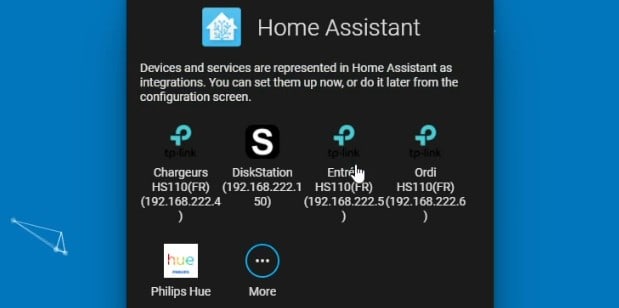
- Just click on the one you want to add, or click “Finish” to do this later.
In my case, it detected most of the ones that were connected during the installation (lights, smart plugs and NAS). - Adding each device may require additional steps. For example, for Philips Hue lights, you need to press the button on the hub to allow Home Assistant to control it, and then assign each light to a room.
- You can obviously click “More” to add additional integrations (like websites or things that have not been detected automatically), but I recommend doing this later in the full interface.
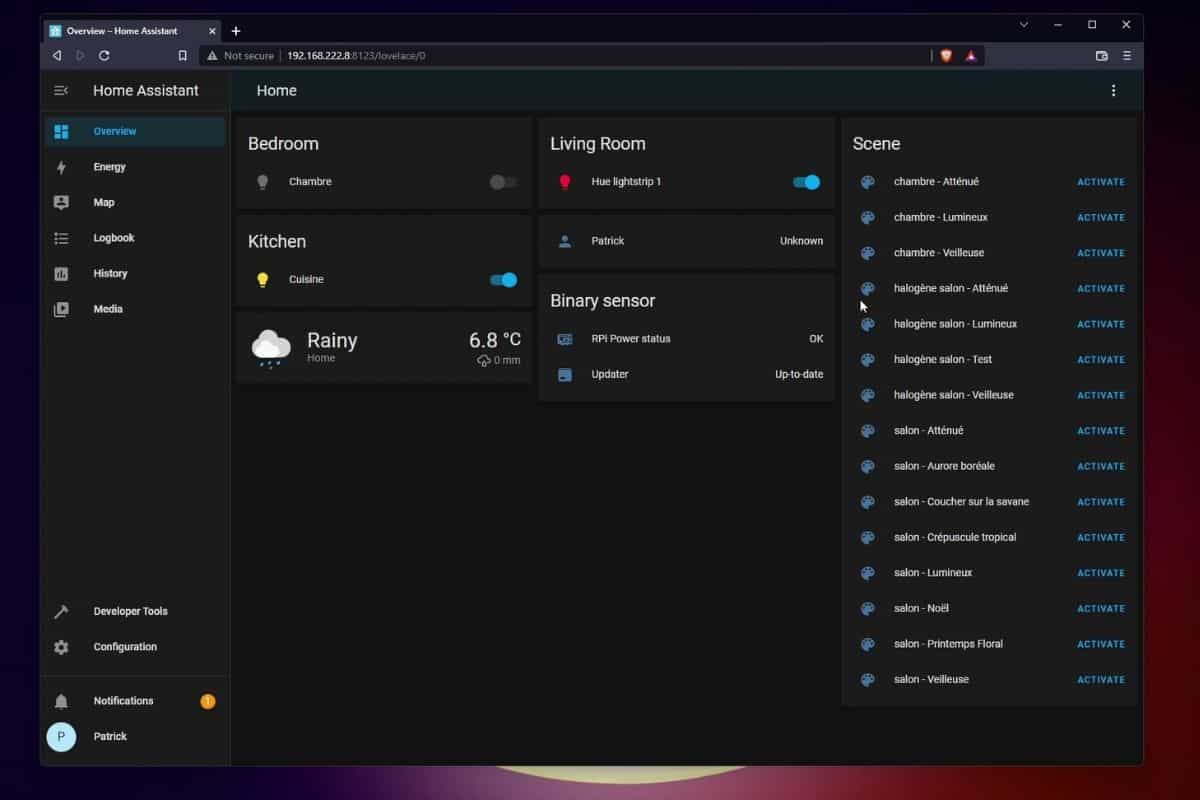
Once this onboarding wizard completed, you should get access to the full interface, with a nice dashboard including the integrations you set up:
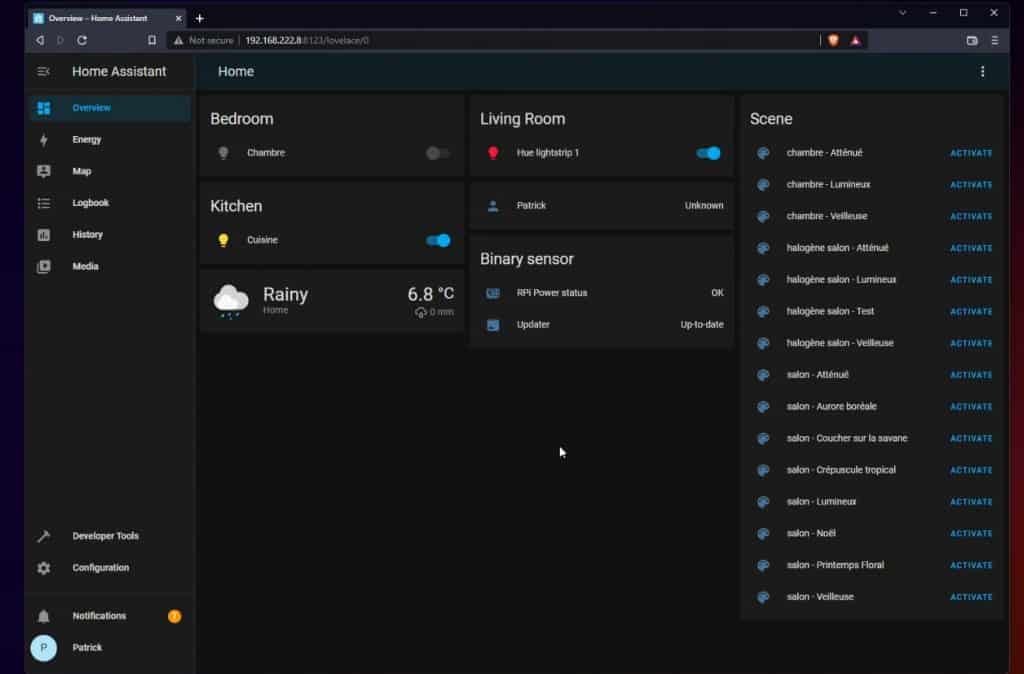
You can now use this interface to manage your smart devices. For example, I can switch off or on the kitchen light by clicking the corresponding button. But Home Assistant goes way further than that.
Add more integrations
First, make sure to set up all your smart devices on this interface. You can use the configuration item in the left menu to add new ones:
- Click on Configuration and then Devices & Services.
- You’ll get the same list as during the onboarding process, but you can also add new integrations.
- Home assistant is compatible with a lot of services related to home automation.
Here are a few examples: weather websites, network devices (Unifi, Synology, …) , cloud services (Google, Apple, …), robots (vacuum), smart plugs (home, car, …), etc.
You’ll get the full list when you click on “Add Integration”, it’s insane all the things you can monitor and use in your automations. - You’ll then get extra steps depending on the integration you want to add.
For example, to connect to a weather API, you’ll generally need an API key (you can often get one for free, just by creating an account on their website).
For a robot vacuum, you’ll probably need to press a button on it. Etc.
Try to add a few integrations. Obviously, Home Assistant is an exciting project when you have many smart devices and can make them work together by creating some automation (ex: when I open the door, light on the living room and after 10s start my favorite song). But even with a few of them and addition web services, you can already build some nice dashboards.
Create a new dashboard
By default, Home Assistant will create a basic dashboard (Overview), and another one named “Energy”. But you can edit them, delete them or create new ones. Here is how to do this:
- Go to Configuration > Dashboards.
- Choose a title and an icon:
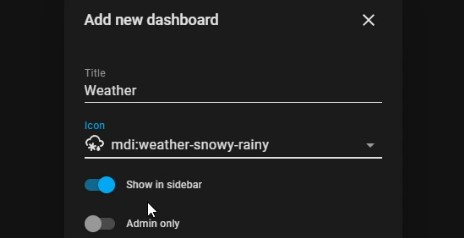
- Then click on it in the left menu to open it.
- You can now click in the top-right corner menu and choose “Edit Dashboard” to customize it.
- From there, you can do everything you want: add new cards, delete some, move the existing ones up and down, etc.
- For each card, there are many templates you can use to format the data differently (button, calendar, history graph, gauge, etc.).
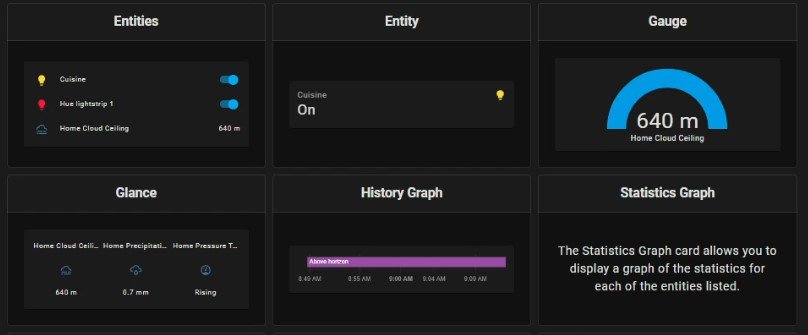
- After choosing a template, you’ll need to pick the exact value you want to display on it.
For example, in my Weather dashboard, I can choose to display the temperature, precipitation, UV index, etc.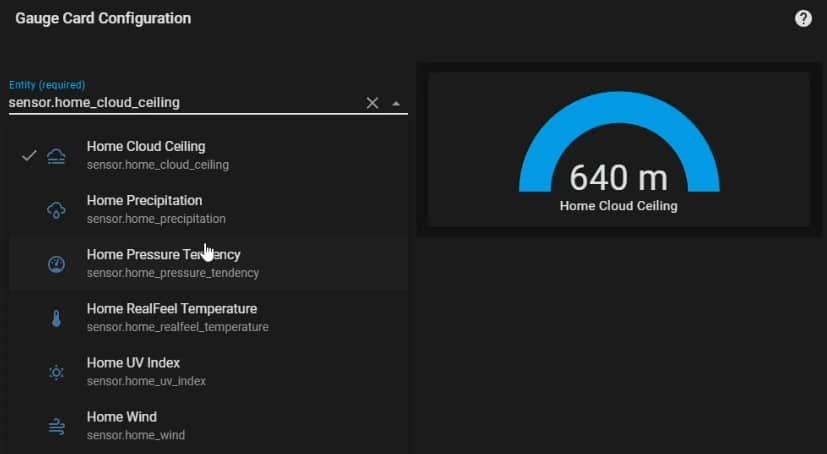
You may think it’s complicated while reading this, but try to use it. It’s pretty intuitive, so I’m sure you’ll understand everything quickly. Start with something you really want to have on your dashboard, and find the best way to display the value.
Create your first automation
Obviously, Home Assistant is not only a way to have nice dashboards and replace several apps with one. It’s also the most effective way to automate your home.
Automation is a process that will run automatically when a trigger is detected:
- If the inside temperature drop below 20 °C, turn on the heater.
- When motion is detected in the bedroom, turn on the wall light.
- If the wind is over 60 km/h, close the shutters.
- Etc.
Creating an automation is not complicated once you get the idea. Find something simple you want to try, and follow these steps to configure it:
- Go to Configuration > Automations.
- Click on “Add Automation”.
- Change the automation name to something you’ll remember.
A one sentence telling exactly what it does is best. - In the triggers part, set the device that will be used to start the automation.
- Then set the exact trigger sensor and value that will start the automation.
For example, I tested with AccuWeather (a weather web service), and tell that when the cloud ceiling is below a certain threshold, it will start an automation to light on the house.
But you can simply use the “Sun” trigger, and turn on the lights on sunset for example.
- You can add conditions in the next section if needed.
Dumb example: don’t turn on the kitchen if the light is already on. - Then, set the actions that should be triggered when the conditions are fulfilled.
In my case: Turn on the kitchen light, for example.
You may also tweak other settings like the brightness for lights, etc.
Try to create something simple first, and check if it’s working. Depending on the smart devices and integrations you set up, this will be more or less easy to test. The possibilities are endless, just try to think of something useful for your house.
Download your exclusive free PDF containing the most useful Linux commands to elevate your skills!
Download now
Final Thoughts
Overall, Home Assistant is a great application. The installation is pretty straightforward, and you can do almost anything with it. The interface is intuitive, it’s just getting complicated if you try to build complex automations with multiple smart devices interconnected.
If you have smart devices, but find they are not that smart, and you still need to do many tasks manually, Home Assistant could be what’s missing in your home. Try to install it and find some ways to make it useful, you’ll have an excuse to spend more time on your computer :-).
Download your exclusive free PDF containing the most useful Linux commands to elevate your skills!
Download now
Want to chat with other Raspberry Pi enthusiasts? Join the community, share your current projects and ask for help directly in the forums.
Additional Resources
Overwhelmed with Linux commands?
My e-book, “Master Linux Commands”, is your essential guide to mastering the terminal. Get practical tips, real-world examples, and a bonus cheat sheet to keep by your side.
Grab your copy now.
VIP Community
If you just want to hang out with me and other Linux fans, you can also join the community. I share exclusive tutorials and behind-the-scenes content there. Premium members can also visit the website without ads.
More details here.
Need help building something with Python?
Python is a great language to get started with programming on any Linux computer.
Learn the essentials, step-by-step, without losing time understanding useless concepts.
Get the e-book now.

