Install Nextcloud on Debian: The Ultimate Guide
NextCloud is probably the most popular solution to create your own storage in the cloud that is self-hosted, self-managed, and doesn’t have limitations. It’s great for sharing files with all your devices (or doing an automatic backup of them), but there are also many add-ons that you can install on it for other tasks. Let’s learn how to set up NextCloud on Debian (or any Linux server, by the way).
NextCloud requires an existing LAMP server (Linux, Apache, MySQL, and PHP). The source code archive is available on their website and can be installed in a new Apache subfolder. The web interface can then be used to do the original configuration and access all the included tools.
After an introduction to the NextCloud features, I’ll give you the step-by-step installation guide. And at the end, I’ll give you a few tips to start the right way with NextCloud.
NextCloud introduction
What is NextCloud?
You probably know Dropbox or Google Drive.
Basically, the goal of NextCloud is to offer the same thing but it keeps control of data on your server.
And it’s free!
You may also know OwnCloud, it’s the same thing (it’s even the same developer).
You can install NextCloud on many platforms, including Linux and even a Raspberry Pi (I have a tutorial for it there).
NextCloud features
NextCloud offers many features as soon as you install it:
- Main features:
- File hosting
- Picture manager
- Contacts
- Calendar
- Notes
- Task manager
- News feed reader
- Desktop and mobile clients for automatic synchronization
- Some integration is possible (calendar, mail, LDAP …)
- User and right management
- HTTPS and server-side encryption
It’s already a good tool, but that’s not all.
You can download and install extensions (or “Apps”) to add new features from the community.
For example, I use the “Passwords” extension to store my passwords safely on my network.
To check the apps available before installing NextCloud, you can check the NextCloud Apps store here.
NextCloud technology
Like many of the open-source apps out there, NextCloud code is available on GitHub.
They use web languages like PHP and JavaScript, so it’s easy to install on any device.
On the official website, you can also find appliances for specific needs: Virtual Machine, Docker image, or Snap package.

Join Our Community!
Connect, learn, and grow with other Raspberry Pi enthusiasts. Support RaspberryTips and enjoy an ad-free reading experience. Get exclusive monthly video tutorials and many other benefits.
Learn moreFor this tutorial, we’ll use the source code, but Docker can also be another solution if you want to try it (docker pull NextCloud), but I didn’t test it.
NextCloud installation
Here are the main steps to install NextCloud on a Linux server:
Download your exclusive free PDF containing the most useful Linux commands to elevate your skills!
Download now
- Update the operating system and install the prerequisites.
- Download and extract the NextCloud archive.
- Create a new database and user for NextCloud.
- Complete the NextCloud configuration in the web interface.
Let’s learn how to do all these steps in detail.
Install your operating system
I recommend using a minimal edition of Debian to host a Nextcloud server, as it’s more stable, and you don’t need a desktop environment. But it will be the same steps with Ubuntu or any other Debian-based distribution.
So pick the one you prefer (or already have), make sure the server is connected to the network, enable SSH and do the system updates:sudo apt update
sudo apt upgrade
I’ll consider that you start from scratch, and don’t have a web server or database server installed yet. You may need to change a few things if you are following this tutorial on an existing server.
NextCloud prerequisites
Before installing NextCloud, there are a few prerequisites to have on your system.
NextCloud needs a web server with Apache, MySQL (MariaDB), and PHP
And it also needs a few PHP modules.
Use the following commands to install everything:sudo apt install apache2 mariadb-server libapache2-mod-php
sudo apt install php-gd php-json php-mysql php-curl php-mbstring php-intl php-imagick php-xml php-zip
Wait a few minutes for the installation to finish, and you’re now ready to install NextCloud.
Download NextCloud
You now need to download and extract the NextCloud archive:
- Go to the Apache web folder:
cd /var/www/html - Get the NextCloud link here:
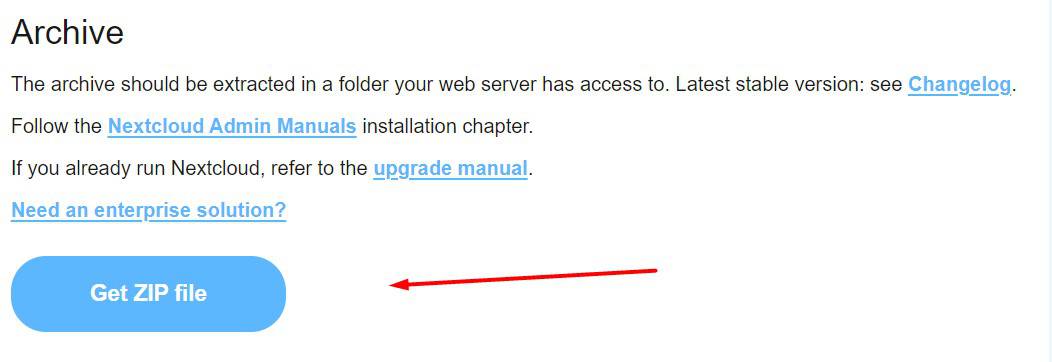
Remember to check the PHP requirements to make sure your current installation is compatible with the version you select. - Download the file with wget:
sudo wget https://download.nextcloud.com/server/releases/latest.zip - Extract the file with unzip:
sudo unzip nextcloud-15.0.8.zip
I’m showing you the zip file as it’s easier to extract, but you can also get the .tar.bz2 archive from the NextCloud website. - As we use root to extract files, we need to change the folder permissions to allow Apache to access it:
sudo chmod 750 nextcloud -R
sudo chown www-data:www-data nextcloud -R
NextCloud is almost ready to use, but first, we need to create a MySQL database to store its data.
If you’re new to the Linux command line, this article will give you the most important Linux commands to know, plus a free downloadable cheat sheet to keep handy.
MySQL configuration
After the MariaDB server installation, it creates a root user you can use only from the command line.
For NextCloud, I recommend creating a new user and a dedicated database:
- Connect to MySQL with root:
sudo mysql - Create the new user:
CREATE USER 'nextcloud' IDENTIFIED BY 'password';Replace “password” with a strong password. - Create the new database:
CREATE DATABASE nextcloud; - Give all permissions to the new user on this database:
GRANT ALL PRIVILEGES ON nextcloud.* TO ‘nextcloud’@localhost IDENTIFIED BY ‘password’;
Same thing here, just replace “password” with the previous password. - Save and exit.
FLUSH PRIVILEGES;
quit
The database is ready for the end of the NextCloud installation.
NextCloud configuration
You can now access the NextCloud configuration page and finish the setup:
- Open the following URL in your browser: https://IP/nextcloud.
Replace the “IP” with the server IP address.
You can generally use “ip a” to get it on most distributions: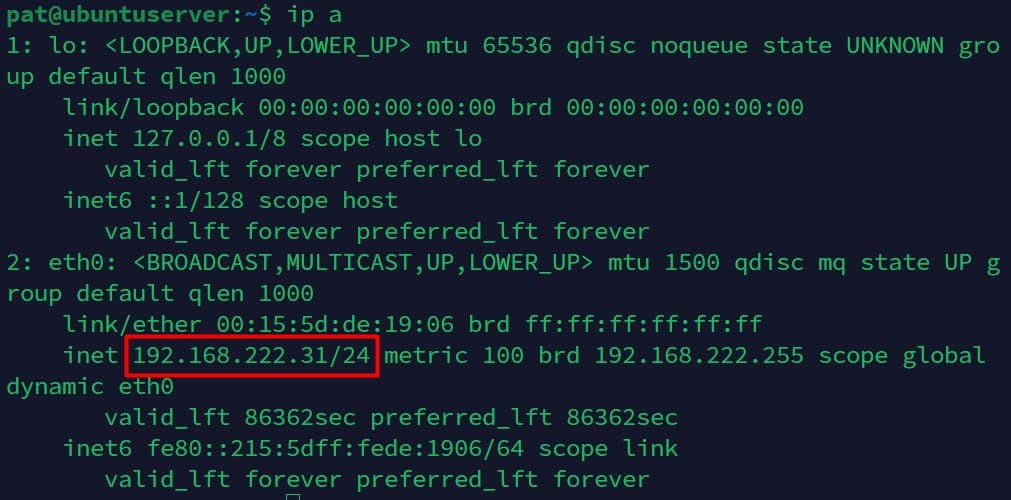
- A form like this shows up (first part):
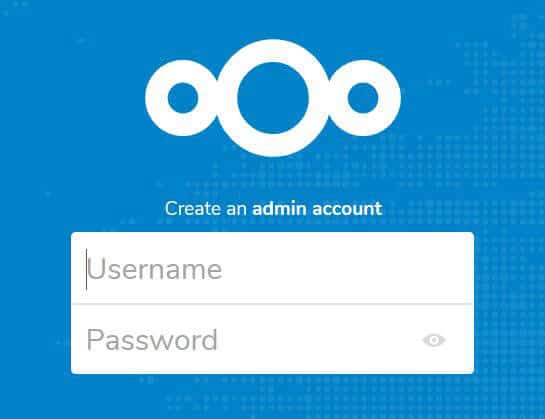
Choose a username and password for NextCloud. - The second part looks like this:
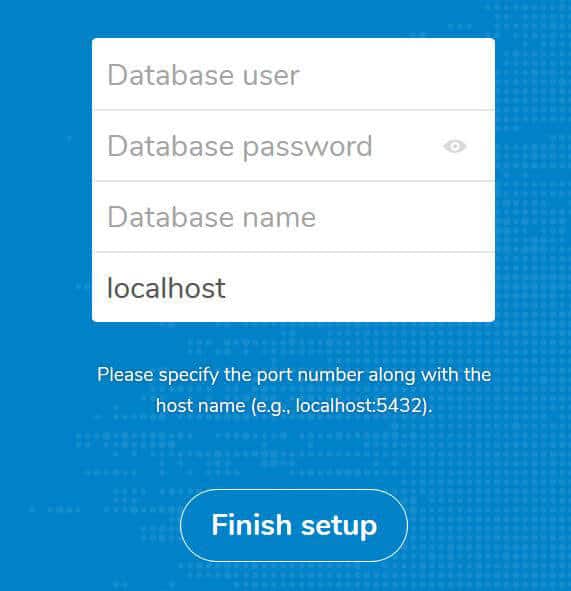
Enter the credentials we just created in MySQL:
– User: nextcloud
– Password: “password” (your password)
– Database: nextcloud
– Host: localhost - Then click “Finish setup” and wait a few minutes.
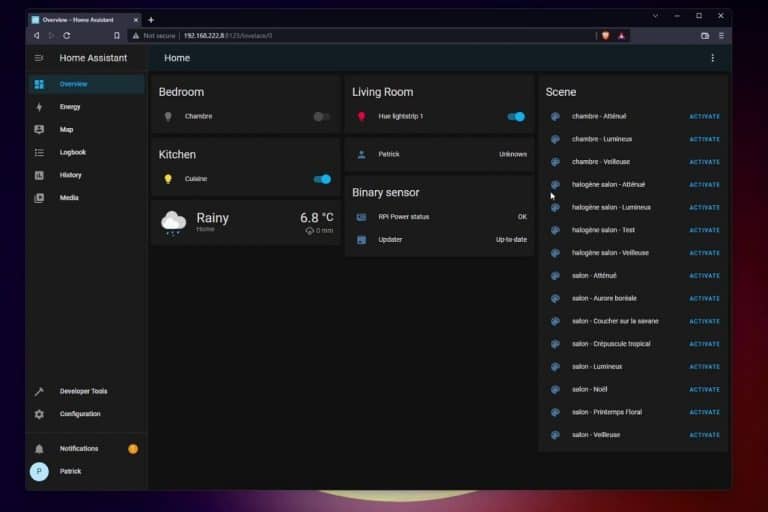
It’ll bring you directly to the NextCloud home page.
In the main menu you only get these icons:
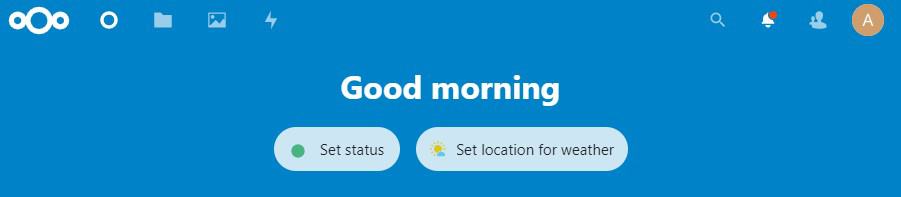
All the other apps can be enabled from the NextCloud app store (Calendar, Contacts, …).
Download your exclusive free PDF containing the most useful Linux commands to elevate your skills!
Download now
NextCloud usage
In this part, I’ll give you a little more detail about the NextCloud interface.
So you can quickly begin using it, and discover everything in a few minutes.
Download your exclusive free PDF containing the most useful Linux commands to elevate your skills!
Download now
Web interface
The main interface is intuitive, and you’ll probably find what you are looking for without more explanation.
As I mentioned previously, NextCloud uses apps to provide features, like on your phone.
In the top bar, you’ll find the main menu, to switch to another App.
Each app has a custom design, with or without a left menu to access more subsections.
In the following sections, I will introduce the three main submenus of the administration panel.
To access it, click on the icon at the extreme right in the top bar (your avatar, probably the first letter of the username for now).
In the menu, you’ll get mainly 3 options:
- Settings: configure everything on NextCloud, from your personal profile to the server configuration.
- Apps: see which apps are already installed, remove some or install new features.
- Users: NextCloud can manage multiple users to have personal storage for all the family members or employees.
I’ll introduce each of these three parts now.
Settings
In the “Settings” submenu, you can configure many things, with two categories:
- Personal configuration: the profile, security (two-factor authentication for example), themes, etc.
- Administration: with an administrator account, you can also configure things for all users like an email server for notifications, encryption, appearance (company logo for example), etc.
For each subcategory, you get an intuitive interface with often a short explanation about the page, so I don’t think you’ll need more from me.
If you have any questions about the configuration, you can check the NextCloud administrator manual, or ask your question in the community.
Apps
The second menu is more interesting, with the app catalog.
In the “Your apps” section, you can check in a few clicks which apps you are using and which ones are installed but disabled.
Then, the next entries are here to find and install new apps, with one submenu by category: Customization, Files, Games, Integration, etc.
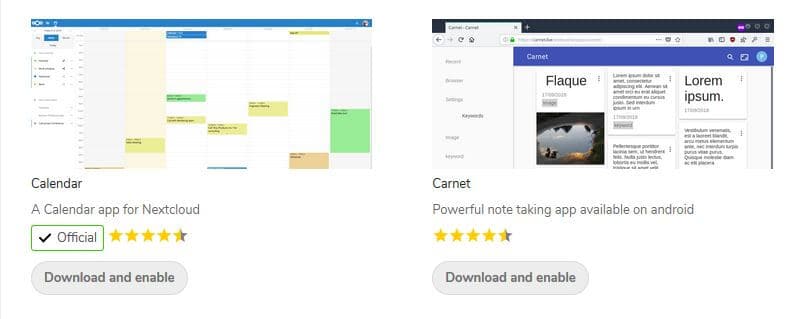
For each app, you can check directly if it’s an official app, and install it easily by clicking on “Download and enable”.
Generally, the new app will appear directly in the top bar of NextCloud.
Users
Finally, you can also manage users and groups on NextCloud.
In the “Users” menu, you can create as many users and groups as you need, and flag them as administrators or not.
Groups are useful in some apps.
For example, you can create a group “IT” and share a folder with anyone in the group from the “Files” app.
It’s also possible to import users from an LDAP or other sources like Linux users.
You’ll need to install the corresponding app to use these features.
Desktop apps
The web interface is not the only way to use NextCloud.
From the official website, you can download NextCloud for desktop.
It’s available for Windows, macOS, and Linux.
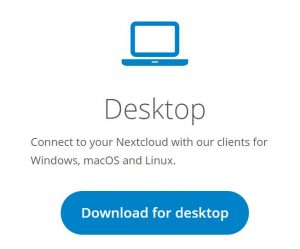
The goal of this desktop app is to synchronize your files between your computer and the NextCloud server (like with Dropbox for example).
During the installation, enter the server address (something like http://IP/nextcloud, or http://IP for NextcloudPi).
Then log into your account and grant access to the app.
The last step is to configure how the app handles synchronization:
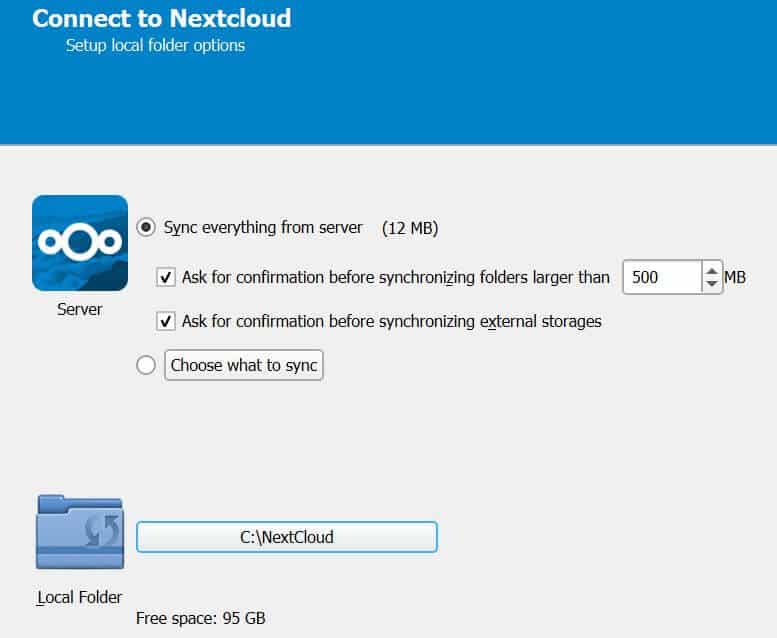
The first sync will start, and you’ll keep a NextCloud companion in the system tray to check the synchronization status.
As soon as you add a new file to your folder, NextCloud synchronizes it instantly.
Android and iOS apps
The same thing is available on your phone (Android and iOS).
It also provides a mobile-friendly interface to use NextCloud.
Here is the demo video provided by NextCloud for Android:
Remote access
If you are hosting NextCloud on a dedicated server, you can use the IP address directly from any device, but if you are hosting it at home, you may need a few additional steps to make it reachable from everywhere.
As it’s supposed to be a cloud server, you’ll probably want to forward a port on your Internet router to access the NextCloud server.
It’s possible with your domain name or a service like NoIP if you have a dynamic IP address (detailed tutorial here).
In this case, I highly recommend installing an SSL certificate (Let’s Encrypt) and probably using a two-factor authentication app to block brute-force attacks.
You’ll find the documentation about SSL and Apache configuration to do this in the Installation on Linux manual.
Backups
It’s not because your server is considered “in the cloud” that you can’t lose any data. So remember to make regular backups to another storage (a NAS, a USB disk, …).
Files are located in the NextCloud folder, the data subfolder.
For example, for the admin user, the default location is /var/www/html/nextcloud/data/admin/files/
So, make a backup of /var/www/html/nextcloud/data and you’ll be fine.
You can also make an entire backup of the NextCloud folder and the database, to have a chance to reinstall it the same way as it is now.
Download your exclusive free PDF containing the most useful Linux commands to elevate your skills!
Download now
If you are looking for exclusive tutorials, I post a new course each month, available for premium members only. Join the community to get access to all of them right now!
Additional Resources
Overwhelmed with Linux commands?
My e-book, “Master Linux Commands”, is your essential guide to mastering the terminal. Get practical tips, real-world examples, and a bonus cheat sheet to keep by your side.
Grab your copy now.
VIP Community
If you just want to hang out with me and other Linux fans, you can also join the community. I share exclusive tutorials and behind-the-scenes content there. Premium members can also visit the website without ads.
More details here.
Need help building something with Python?
Python is a great language to get started with programming on any Linux computer.
Learn the essentials, step-by-step, without losing time understanding useless concepts.
Get the e-book now.