How to Install and Configure OpenSUSE on Raspberry Pi?
OpenSUSE is a Linux distribution that has been part of Linux history since 2005 and now has an official release for Raspberry Pi. It’s different from everything else, so you might need help getting started. Let’s do that.
Two official images of openSUSE are available for the Raspberry Pi: “Leap” and “Tumbleweed”. The former is the stable release, while the latter is the rolling release. Each image can be flashed to an SD card and booted on a Raspberry Pi 4.
Seems simple, right? But you might get lost in the first steps as openSUSE is not Debian. This is why I will show you how to install and configure OpenSUSE step-by-step, as usual.
If you’re looking to quickly progress on Raspberry Pi, you can check out my e-book here. It’s a 30-day challenge where you learn one new thing every day until you become a Raspberry Pi expert. The first third of the book teaches you the basics, but the following chapters include projects you can try on your own.
Introducing openSUSE
Before installing it, let’s learn a few things about this system, which is less popular but always active.
I am also learning, as I don’t know this distribution well. I’ve tried it a few times over the years, but haven’t used it for an extended period. So, I will share what I have discovered, let me know in the community if something is incorrect.
Presentation
I wrote almost everything in the introduction, but openSUSE is not a new system. It’s been there for over 15 years.
The main goals of the development team are stability and flexibility.
Their development roadmap is very slow, so stability should be consistent. There is a minor update almost every year, and a major update maybe every 3 years. It’s perfect for your servers.
As I already introduced, there are two releases available:
- OpenSUSE Leap: the regular release, which follows the roadmap I introduced above.
- OpenSUSE Tumbleweed: the rolling release, which receives new updates constantly.
I don’t know if the comparison is correct, but it makes me think of the difference between Debian and Ubuntu in terms of the development cycle.
It's a free PDF guide containing every Raspberry Pi Linux command you should know!
Download now
Origins
Like RedHat and Fedora, SUSE and openSUSE are linked. OpenSUSE is the community version, based on SUSE Linux Enterprise, a paid product. Both originated in Slackware Linux, an ancient distribution (still alive too!).
If you are lost in all these Linux distributions, I love this schema on Wikipedia. Here is the branch we are looking to:
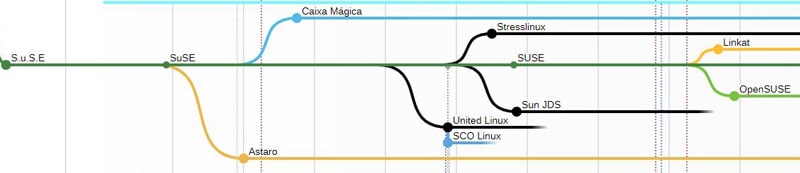
Most are not that popular, but Slackware, SUSE and OpenSUSE are well known.
Differences with Raspberry Pi OS
There are major differences with Raspberry Pi OS: Slackware and SUSE are on a different tree from Debian and Raspberry Pi OS if you look at the full diagram.

Join Our Community!
Connect, learn, and grow with other Raspberry Pi enthusiasts. Support RaspberryTips and enjoy an ad-free reading experience. Get exclusive monthly video tutorials and many other benefits.
Learn moreBut, we’ll install a desktop version, and even if there are a few differences, you’ll quickly find your way on this system. openSUSE is intuitive, even for beginners, and powerful enough to do anything you want.
The command line might be a different experience, even if you are used to it on Raspberry Pi OS. The basics are the same, but many tools are different. For example, there is no “apt” on openSUSE. We’ll get back to this at the end of this tutorial.
Raspberry Pi compatibility
While it’s great to have a Raspberry Pi image available, it doesn’t mean that this is the developers’ main focus. The main features work fine, but you may have some minor compatibility issues with the hardware.
For example, at the time of my last update, not all models are supported (and no mention of the Raspberry Pi 5 yet). Other models had some minor bugs with the audio or camera, and not all applications are available for openSUSE.
So try it, see if what you need works or not, and then decide if it’s a good fit. I’m not saying it’s perfect for everyone.
How To Install openSUSE on Raspberry Pi
1. Download
First, you need to download an image on the official website:
- Here is the official page on the openSUSE website about the Raspberry Pi.
- As I told you, there are two versions: Leap and Tumbleweed.
Depending on your goals, you can choose Tumbleweed for recent updates or Leap for increased stability. I’m using Leap for this tutorial.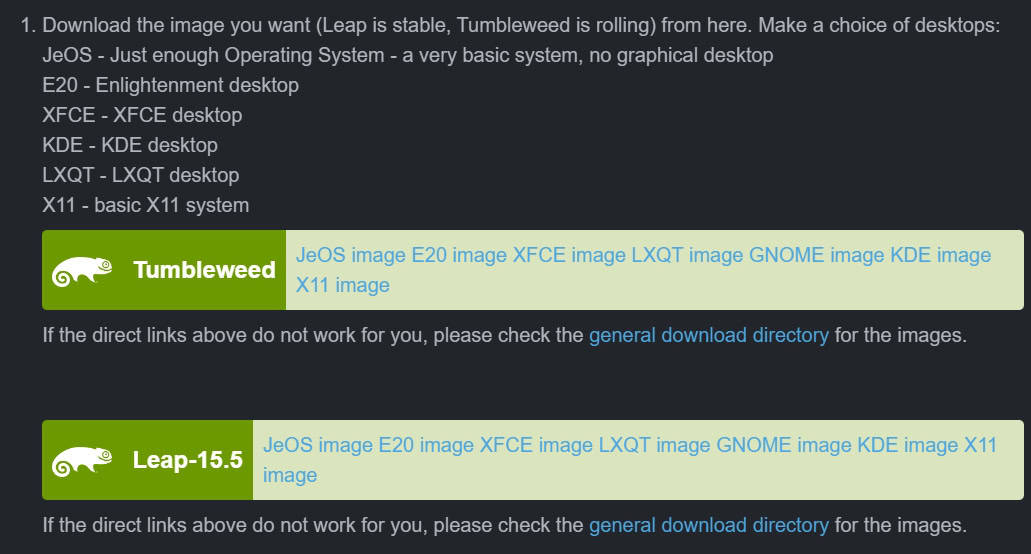
- Download the image corresponding to your Raspberry Pi model.
To be even more precise, I took this image to write this installation part of the tutorial:
openSUSE-Leap-15.5-ARM-XFCE-raspberrypi.aarch64.raw.xz
And I’m installing it on my Raspberry Pi 400.
2. Flash the image
Then, you need an SD card. A 32GB SanDisk Ultra should be enough if you don’t plan to keep loads of data on this system.
You can flash the image to your SD card with Raspberry Pi Imager. Here are the main steps:
- Download Raspberry Pi Imager here if you don’t have it yet.
And then install it onto your system. It’s free and works on any operating system (even from a Raspberry Pi directly). - Once opened, you can skip the model filter, and select the image you downloaded by clicking on the second button:
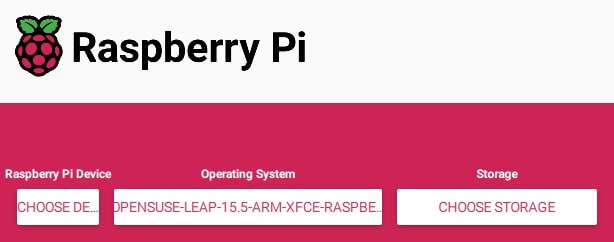
- Then insert your SD card into your computer (you might need a USB adapter like this one if you don’t have a slot on your computer).
- Click on “Choose Storage” and select the corresponding drive.
- Finally, click “Next” to copy the system files to your SD card.
You can skip the OS customization options, as it won’t work with openSUSE.
3. First boot with openSUSE
A few minutes later, the SD card is easy to use.
There are files on the SD card that you can edit before the first boot if necessary (like config.txt), but generally, you won’t need to.
It's a free PDF guide containing every Raspberry Pi Linux command you should know!
Download now
Just insert your SD card into your Raspberry Pi and start it.
The system will start, and ask you for a login.
The default credentials for openSUSE on Raspberry Pi are:
– login: root
– password: linux
On the first boot, the experience will be slightly different depending on the version and environment you downloaded. You may get a configuration wizard just after the login, or go directly to the desktop environment, as with XFCE:
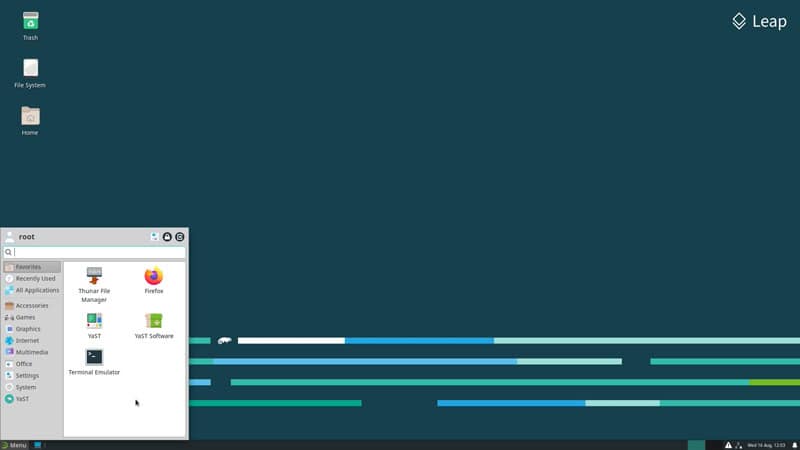
From there, you shouldn’t get too lost. You’ll probably need to configure your network, display, keyboard, or create new users. But thanks to its desktop environment, openSUSE is not that complicated to use.
System overview
Rather than going through each part of this system one by one, I’ll start by showing you what I liked about this system (with my beginner eye) and then list the things that I find less well done.
For this review, I’ll explain what I got with the E20 environment, which was new to me. Depending on which desktop environment you download, the experience may be slightly different. For example, while the tools and applications are the same with XFCE, the experience is more familiar.
Things I like
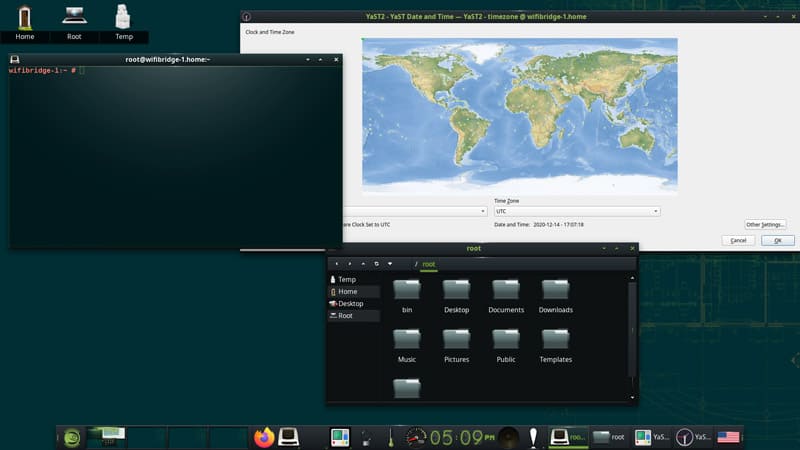
- The desktop design is great by default, I like it.
In the picture, you can see E20, but all are ready to use. A lot of work has been done to improve the default look of the applications (I love this light effect on the terminal). - The dock at the bottom of the screen is really useful and well done:

You’ll probably need to customize the default settings, but everything is there in case you need it:- The main menu: to start an app (you can also open it with a left click on the desktop).
- Multi-desktop is enabled by default, so the next icons are used to switch from one desktop to another.
- Favorite app icons.
- A few nice widgets for the basic information: temperature, CPU usage, hour, brightness, and sound settings.
- A shortcut to quickly switch from one keyboard configuration to another (useful at the beginning, not sure to keep it there after that).
- Finally, YaST will be the main configuration tool you’ll use for almost everything, and it works well.
You can access it from the main menu, Applications > System.
On the first start, you’ll need to wait while it generates its cache.
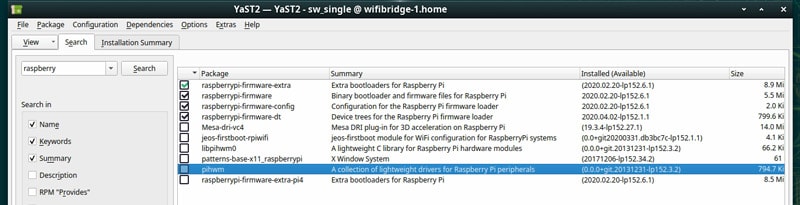
For example, you will use it to install new packages:- It’s very close to the Add / Remove software tool or Synaptic, with a search engine:
Or categories browsing:
There are other search options, like the one on Synaptic to access recommended software quickly.
- It’s very close to the Add / Remove software tool or Synaptic, with a search engine:
Things I don’t like
So basically, my first impressions were excellent.
The interface is nice, it seems intuitive, and I can easily install new apps even without knowing much about this system.
Cool! But I also found a few that were not so great:
- I don’t like the main menu so much. It’s not very well organized.
For example, there is a submenu named “Settings”, but it’s only for the desktop appearance.
The real options you might look for while opening this submenu are hidden in Applications > Other:
After clicking on one of them, YaST Control Center shows up: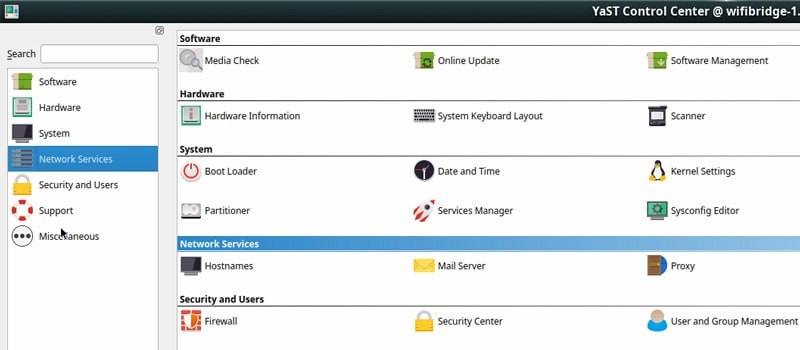
You’ll find everything to configure the system here.
By the way, you can also update it from there. Update now. You’ll need to do it twice the first time. - The second weakness, which is probably my fault, as I’m not used to this system: shortcuts.
As a beginner, we don’t know them, but we can still use them unintentionally.
For example, instead of moving a window, I resized it several times (it’s almost the same method), if you don’t click exactly on the window, you’ll resize it.
Another example: if you have a window in full-screen mode and want to close it by clicking on the cross (top right), you’ll probably switch to the desktop on the right if you go too far on the right.
As I told you, it’s probably possible to configure this, but it can be annoying in the beginning. - Another thing I noticed, is that there is no sound device detected after the installation.
So you can’t use the jack or HDMI output by default.
I suppose you can probably fix this, but I didn’t try.
It’s a bit disappointing for a system built for Raspberry Pi. - The last point is that there is almost nothing installed by default.
You’ll get Chromium AND Firefox (yes, they didn’t choose for you, so everyone will be happy ^^), with basics like GIMP.
Aside from these, you need to install anything else.
It can be a good thing, but if you are a beginner looking for a ready-to use system, Raspberry Pi OS with recommended software will be a better experience.
Have you noticed any other problems? Tell me in the community.
Bonus tips
Package management in the command line
If you want to try the command line, you’ll probably need the commands to manage applications on the system.
The basic command syntax is:zypper <command> [--COMMAND-OPTIONS] [ARGUMENTS]
Here are a few examples:
- Update command:
zypper updateSame thing as on Raspberry Pi OS, but it will also ask you to install the new updates directly.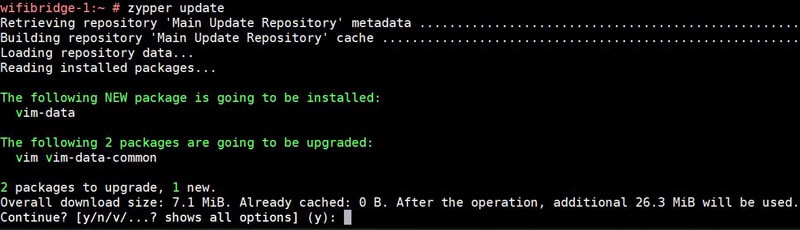
- Search command:
zypper search <string>Yep, it’s not complicated if you already know apt. - Install:
zypper install <package>Same thing, for example:zypper install MozillaThunderbird - And the same thing to uninstall an application:
zypper remove <package>A good one to try:zypper remove MozillaFirefox🙂
You can find all the installed packages with:zypper packages --installed-only
So it’s pretty easy to switch if you are used to apt.
Are you a bit lost in the Linux command line? Check this article first for the most important commands to remember and a free downloadable cheat sheet so you can have the commands at your fingertips.
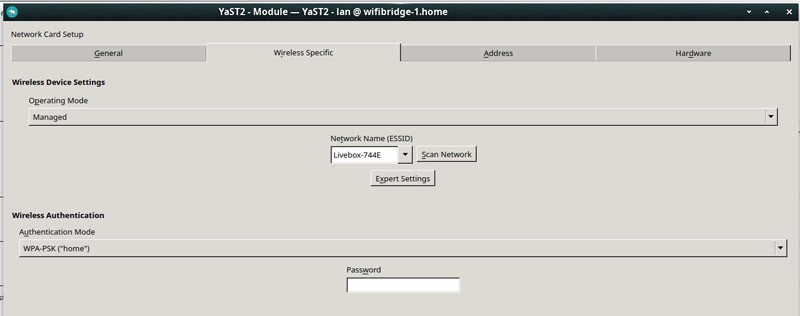
Wi-Fi / Bluetooth configuration
With XFCE, connecting to my Wi-Fi was very simple (click the network icon at the bottom right, near the clock).
But if you need to use the Wi-Fi as your main network connection for E20 (or just to set your network settings with Ethernet), change it in the control center.
It’s not the best experience, but it works:
However, I didn’t find a way to fix the Bluetooth issue. I found a few discussions with some hints, but nothing worked for me, so I can’t help you with this.
Fix the audio
Same thing for the audio output.
The jack port will not work on openSUSE with a Raspberry Pi 4, as it’s not supported yet.
This will probably be fixed in a future release, but there currently isn’t a solution.
By the way, the HDMI output wasn’t working for me either.
So I hope they will fix it at least once very soon. I’ll share the fix with you if I find one.
If you have a solution, even a workaround, let me know in the community.
It's a free PDF guide containing every Raspberry Pi Linux command you should know!
Download now
Video
It's a free PDF guide containing every Raspberry Pi Linux command you should know!
Download now
If you are looking for exclusive tutorials, I post a new course each month, available for premium members only. Join the community to get access to all of them right now!
Conclusion
That’s it for this openSUSE setup guide and quick overview.
To sum up, I find this distribution interesting, but there are a few things to fix and configure for the best experience. I hope they will continue to work for the Raspberry Pi, and add the missing drivers to make everything work correctly.
Did you try it? Any other feedback about it?
If you want to know my best recommendations for an operating system to try on Raspberry Pi, check this link to find the current ranking.
Hint: openSUSE is not yet in it.
Whenever you’re ready, here are other ways I can help you:
The RaspberryTips Community: If you want to hang out with me and other Raspberry Pi fans, you can join the community. I share exclusive tutorials and behind-the-scenes content there. Premium members can also visit the website without ads.
Master your Raspberry Pi in 30 days: If you are looking for the best tips to become an expert on Raspberry Pi, this book is for you. Learn useful Linux skills and practice multiple projects with step-by-step guides.
The Raspberry Pi Bootcamp: Understand everything about the Raspberry Pi, stop searching for help all the time, and finally enjoy completing your projects.
Master Python on Raspberry Pi: Create, understand, and improve any Python script for your Raspberry Pi. Learn the essentials step-by-step without losing time understanding useless concepts.
You can also find all my recommendations for tools and hardware on this page.