Installing OpenSSL on Ubuntu/Linux: A step-by-step guide
OpenSSL is almost a mandatory package on any computer these days. Most websites are accessed via HTTPS (with the lock icon), so OpenSSL is working in the background all the time, even if you don’t know it. In this article, we’ll take a closer look at installing and using it on Linux.
In most cases, OpenSSL is installed by default on all Linux distributions. It is required for basic web navigation and system updates, so a fresh Linux installation comes with it most of the time, and there is nothing to do.
Don’t worry, I’ll explain how to check if it’s already installed (and if it’s up-to-date), install it if needed and use the basic command lines.
How to install OpenSSL on Linux
As a general rule, OpenSSL is already installed on any new Linux distribution. It’s part of the essential packages installed before the first boot.
Let me explain how to install it if this is not the case on your system.
System requirements
Before going any further, make sure your Linux system is up and running, and connected to the Internet. We’ll have to download the OpenSSL package from the Internet, so the internet is mandatory.
You should also run a system update, to at least sync your local cache with the latest packages available on the repository. You can do this in a terminal or via SSH by typing:sudo apt update
If you’re new to the Linux command line, this article will give you the most important Linux commands to know, plus a free downloadable cheat sheet to keep handy.
Download your exclusive free PDF containing the most useful Linux commands to elevate your skills!
Download now
Check if OpenSSL is already installed
As mentioned earlier, OpenSSL is generally installed by default, so the first thing you can do is check if this is the case on your system. I have two solutions for you.
The easiest way, is to run the “openssl” command in a terminal:openssl version -a
If it’s installed, you’ll get something like:

In my screenshot, you can see that OpenSSL is installed (the command is recognized), and it gives you the installed version.
If you get something like “command not found”, then you don’t have it on your system, and need to follow the next sections of this article to install it.

Join Our Community!
Connect, learn, and grow with other Raspberry Pi enthusiasts. Support RaspberryTips and enjoy an ad-free reading experience. Get exclusive monthly video tutorials and many other benefits.
Learn moreAnother option would be to check if the package is installed with dpkg:sudo dpkg -l | grep sslThis command will also show you the related packages available on your system (like “libssl” for example).

Install OpenSSL via APT
OpenSSL is available in the default repository of all distributions, and can be installed on Debian-based systems with:sudo apt install openssl
All of the requirements will be installed automatically, so you just need to confirm the installation and wait a few minutes.
Once done, you can try again the previous command to make sure the installation is complete:openssl version -a
Install OpenSSL from source
The latest version of OpenSSL is available on their website, and can be installed manually on Linux. This can be useful when APT can’t be used or to get a more recent version.
Note: I removed OpenSSL from my system for the experiment and to give you the step-by-step process, but it’s probably not a good idea to do it on a production system. Many packages are dependent on it and won’t work anymore after uninstalling it.
Download your exclusive free PDF containing the most useful Linux commands to elevate your skills!
Download now
Here are the steps to install OpenSSL from source on Linux:
- Go to the Downloads page on the OpenSSL website.
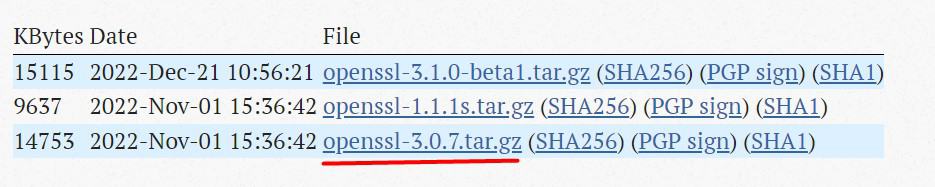
Copy the link to the version you want to install. In my example, I took the last option. - In a terminal on your system, use wget to download the package, for example:
wget https://www.openssl.org/source/openssl-3.0.7.tar.gzDon’t copy/paste my link, use the latest one available on the website.
Also, if you don’t have OpenSSL installed, you’ll probably get a certificate error, you can bypass it with:wget --no-check-certificate <url> - Once the archive is on the computer, you can extract the files with:
tar -zxvf openssl-3.0.7.tar.gzAnd move to the new folder:cd openssl-3.0.7 - Make sure you have the requirements to compile the files:
sudo apt install build-essential - And run these commands to do it:
./Configure
make
sudo make install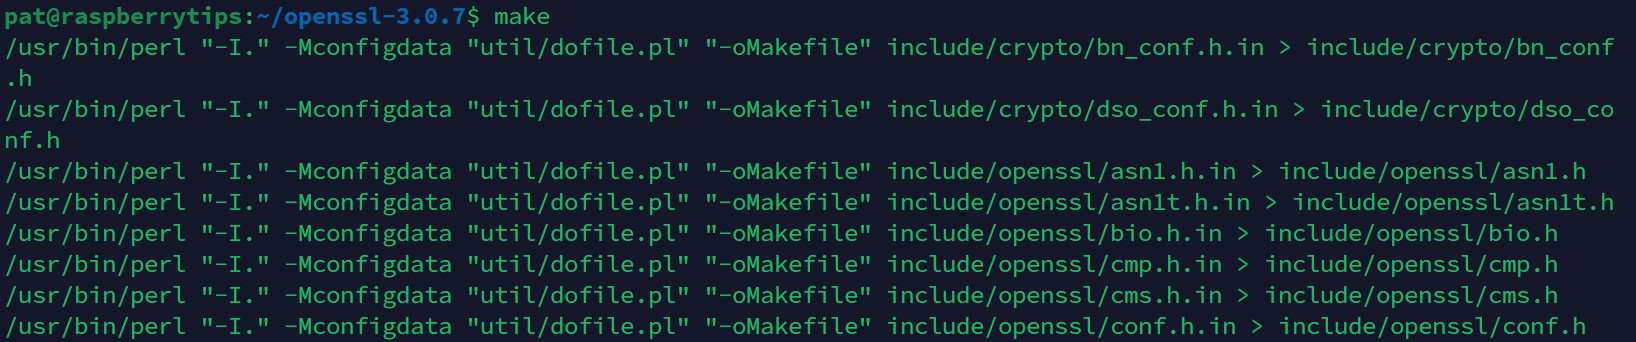
If everything goes as expected, you should now have the latest version of OpenSSL installed on your system. You can use the version command again to check:openssl version

As you can see, I now have the latest version on my system (3.0.7, vs 3.0.5 with APT on my previous screenshot).
Note: I’m giving you the quick guide in this tutorial, but if you need more details on how to install a tar.gz file on Ubuntu (or other archives formats), it’s probably better to click on this link for more guidance.
Download your exclusive free PDF containing the most useful Linux commands to elevate your skills!
Download now
How to use OpenSSL on Linux
Even if OpenSSL is an essential package on all Linux systems, using it in command lines is not straightforward at all. Let me give you a few examples just in case you want to play with it now that you have it installed.
Generate a new key
The first thing you’ll need is to generate a key for your system. It’s often done automatically in the background when you install specific services or applications, but you can try it yourself with a command like:openssl req -out pat.csr -newkey rsa:2048 -nodes -keyout raspberrytips.key
The file with the “.key” extension will be the new key, and the other file with the “.csr” extension stands for “Certificate Signing Request”. It will generate these two files, following the command parameters for the complexity (RSA 2048 in this case, which is standard currently).
If you need private and public keys in “.pem” format for an application, you’ll most likely do something like:openssl genrsa -des3 -out private_key.pem 2048
openssl rsa -in private_key.pem -outform PEM -pubout -out public_key.pem
Feel free to change the algorithm and complexity if needed.
Generate a self-signed certificate
You can also use almost the same command to generate a self-signed certificate. Some applications require it, and you may also need one for HTTPS connection on a trusted (local) network.
Here is a command you can use to generate a self-signed certificate with OpenSSL:openssl req -x509 -sha256 -days 365 -newkey rsa:2048 -keyout raspberrytips.key -out cert.crt
I give you these commands with example parameters, but feel free to check the documentation to change them if needed.
You can either use man:man opensslOr check the online documentation.
Verify an existing key or certificate
Another interesting command you can try is to check if a certificate (or a key) is still valid.
The “-check” option can do this.
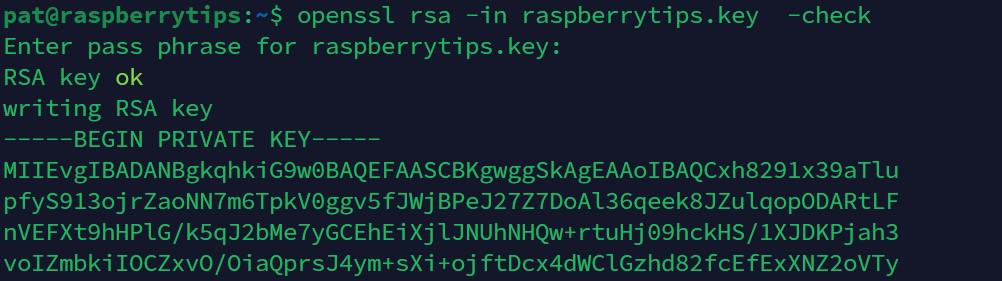
- For a key file (RSA), use:
openssl rsa -in raspberrytips.key -check - For a certificate (x509), use:
openssl x509 -in cert.crt -text -noout
Obviously, if you generated the files with other algorithms and options in the previous steps, you need to adjust the parameters there. But in most cases, it should provide the information you are looking for.
Encrypt and decrypt messages
OpenSSL can also be used to exchange encrypted messages between two computers.
It’s generally done in the background, but it’s also a fun experiment you can try if you have two computers to do this test:
- Follow the previous steps on each computer to generate public and private keys.
- Exchange public keys between the two computers.
- Create a text message on the first computer, and save it into a text file:
nano clear-message.txt - Encrypt it the text file with the public key of the recipient:
openssl rsautl -encrypt -inkey dest_pubkey.pem -pubin -in clear-message.txt -out encrypted-message.txt - Send the “encrypted-message.txt” file to the second computer.
- And on the second computer, use the private key to read it with:
openssl rsautl -decrypt -inkey yourprivatekey.pem -in encrypted-message.txt
As you can see, OpenSSL can do many things and is used all the times on our computer. Hopefully, most of the time it’s used in the background (HTTP, SSH, VPN, etc.) and we don’t need to know these commands, but I hope you learned a few things today.
If you want to discover more tips about Linux, this website is built for that, here are a few recommendations:
- Install Nextcloud on Debian: The Ultimate Guide
- 17 Security Tips From A Pro To Protect Your Linux Server
- How To Safely Install Bitwarden On Linux (Debian/Ubuntu)
Download your exclusive free PDF containing the most useful Linux commands to elevate your skills!
Download now
Reminder: Remember that all the members of my community get access to this website without ads, exclusive courses and much more. You can become part of this community for as little as $5 per month & get all the benefits immediately.
Additional Resources
Overwhelmed with Linux commands?
My e-book, “Master Linux Commands”, is your essential guide to mastering the terminal. Get practical tips, real-world examples, and a bonus cheat sheet to keep by your side.
Grab your copy now.
VIP Community
If you just want to hang out with me and other Linux fans, you can also join the community. I share exclusive tutorials and behind-the-scenes content there. Premium members can also visit the website without ads.
More details here.
Need help building something with Python?
Python is a great language to get started with programming on any Linux computer.
Learn the essentials, step-by-step, without losing time understanding useless concepts.
Get the e-book now.