

How to Join an AD Domain with your Raspberry Pi in 10 minutes
Joining an Active Directory domain from a Raspberry Pi, or a Linux computer in general, is not always easy. And I work in a company with Linux users and servers on an Active Directory domain, so I know what I’m talking about.
In this tutorial, I’ll show you how to join an AD domain with your Raspberry Pi in less than 10 minutes, with a step-by-step guide.
Here are the required steps to join an AD domain on Raspberry Pi:
- Install Raspberry Pi OS and do the system configuration and updates.
- Install the required services: Kerberos, Winbind and Samba.
- Configure them to join the active directory domain.
It probably isn’t straightforward for you, but I will show you exactly how to do it.
And basically, you just need to copy/paste and edit all the commands I give you.
If you’re looking to quickly progress on Raspberry Pi, you can check out my e-book here. It’s a 30-day challenge where you learn one new thing every day until you become a Raspberry Pi expert. The first third of the book teaches you the basics, but the following chapters include projects you can try on your own.
Prerequisites
What will you get?
In this tutorial, I’ll show you how to join an AD domain from your Raspberry Pi.
That is to say, you’ll have your Raspberry Pi in the Computers OU in your Active Directory.
From here, you can start to add other features, like creating a share for AD users (I’ll show you how) or logging in with your AD user name and password.
I think this is mainly for educational purposes, to learn how to do this for a Linux server.
But maybe you have concrete applications in mind.
Prerequisites
There aren’t a lot of prerequisites, but I recommend preparing:
- Your Domain controller name and IP address.
- A domain administrator login and password.
- Raspberry Pi OS (Lite or Desktop) installed on your Raspberry Pi (check my guide here).
- SSH access to copy and paste the commands and configuration files I’ll give you.
My configuration
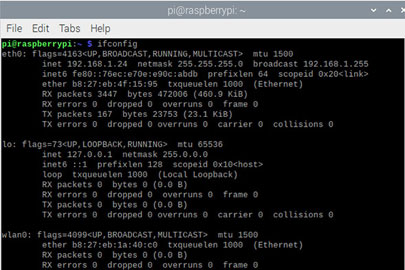
I’ll provide a lot of my configuration lines in this tutorial with my own network configuration.
So, to avoid disturbing you, here is my configuration:

Join Our Community!
Connect, learn, and grow with other Raspberry Pi enthusiasts. Support RaspberryTips and enjoy an ad-free reading experience. Get exclusive monthly video tutorials and many other benefits.
Learn more- My domain controller IP: 192.168.1.25.
- My domain controller name: adserver.
- My domain name: rpitips.local.
- My Raspberry Pi IP: 192.168.1.17.
- I completed this tutorial with my Raspberry Pi running on Raspberry Pi OS Lite 9.6 (Stretch).
Some packages I use later are not available in the latest RPI OS 64-bit, so I would recommend using Raspberry Pi OS Legacy in 32-bit when possible to avoid these issues.
There is probably a way with any distribution and any version, I just didn’t test them all.
In any configuration files and commands you’ll see after, you need to replace these values by your own.
Configure your Raspberry Pi
Before joining the domain, we need to make sure the Raspberry Pi is configured properly.
So let’s start with that part, before anything else.
It's a free PDF guide containing every Raspberry Pi Linux command you should know!
Download now
Basic configuration
I won’t repeat the basic stuff in this article, but you need to have Raspberry Pi OS installed, configured and updated. You can check my full Raspberry Pi OS guide here if you need any help with these steps.
In a nutshell, here is what I want you to check:
- You are connected to the Internet (Wi-Fi or Ethernet).
- Your system is up-to-date:
sudo apt update && sudo apt upgrade -y
- SSH is enabled so you can directly paste the commands and configuration files I provide in this article.
Read this article for more details about SSH on Raspberry Pi.
Once done, you can move forward, and follow the next steps related to the domain connection.
Time configuration
To connect your Raspberry Pi to a domain, you need to set up a time synchronization between the Raspberry Pi and the domain controller.
To do this, you need to install and start the NTP service.
- Install the NTP package:
sudo apt install ntp - After a few minutes, check that the current time is close to what you have on the domain controller:
date
If I remember well, Kerberos doesn’t allow AD connections if there is more than a 5-minute difference between the Raspberry Pi and the domain controller. Maybe it’s configurable, but anyway, this was an important step to complete.
If there is still a time difference between your Raspberry Pi and the AD domain, you probably need to tweak the NTP configuration. Read my full tutorial here, and use the AD server as your time server.
DNS configuration
The second thing to do is to configure the Raspberry Pi to use the domain controller as a DNS server.
To do this, you have three choices:
- Use the domain controller as your DHCP server and set itself as the DNS server.
- Change the DNS server on your current DHCP server to use the domain controller.
- Change the DNS server for the Raspberry Pi only (not the easiest way, but you have the procedure below).
If you just want to make a try, without breaking anything on your network, you can just change the DNS server on the Raspberry Pi to use the domain controller.
To do this, you can edit the /etc/resolv.conf file, but the DHCP client overwrites this file on boot.
So, it’s better to follow this procedure:
- Open the /etc/dhcpcd.conf file with nano:
sudo nano /etc/dhcpcd.conf - Add this line:
static domain_name_servers=192.168.1.25This is the IP address of my domain controller, replace it with yours.
- Save and exit (CTRL+O, CTRL+X).
- Reboot your Raspberry Pi:
sudo reboot - Check that your DNS is working:
ping raspberrypi.com
Are you a bit lost in the Linux command line? Check this article first for the most important commands to remember and a free downloadable cheat sheet so you can have the commands at your fingertips.
Packages installation
Before going further, there are a few packages we need to install:
- Kerberos: This package will manage the authentication process with the domain controller.
- Samba: Well-know for sharing folders, Samba is also useful for Windows compatibility on Linux systems.
- WinBind: This one is the gateway between Linux and Windows. It will make your domain accounts visible on Linux.
To install all these packages, use the command below: sudo apt install samba smbclient krb5-config krb5-user krb5-clients winbind libnss-winbind libpam-winbind
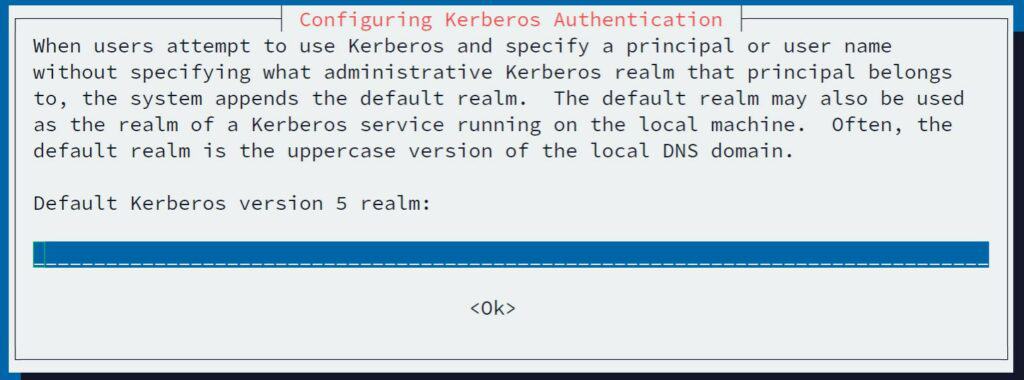
During the installation, Kerberos will ask you for the realm to configure.
Give your domain name, but it’s not mandatory, as we will edit the configuration file later.
After a few minutes, everything you need is now installed on your Raspberry Pi.
Let’s move to the configuration part.
Kerberos configuration
As I promised you, to do all of this in less than 10 minutes, I’ll give you the entire configuration file for each package.
I recommend starting by doing a backup of each original configuration.
The configuration file for Kerberos is /etc/krb5.conf.
- Create a copy of the original configuration file:
sudo mv /etc/krb5.conf /etc/krb5.conf.orig - Create a new file:
sudo nano /etc/krb5.conf - Paste these lines inside:
[libdefaults]
        default_realm = RPITIPS.LOCAL
        dns_lookup_realm = false
        dns_lookup_kdc = false
        ticket_lifetime = 24h
        renew_lifetime = 7d
        kdc_timesync = 1
        ccache_type = 4
        forwardable = true
        proxiable = true
        fcc-mit-ticketflags = true
[realms]
        RPITIPS.LOCAL = {
                kdc = 192.168.1.25:88
                admin_server = 192.168.1.25
                default_domain = RPITIPS.LOCAL
        }
[domain_realm]
        .RPITIPS.LOCAL = RPITIPS.LOCAL
        RPITIPS.LOCAL = RPITIPS.LOCAL
Replace all IP addresses and domain names with your own network configuration.
It's a free PDF guide containing every Raspberry Pi Linux command you should know!
Download now
I think I had some issues with my DNS server configuration on the test VM I created for this tutorial.
So I put IP addresses in the Kerberos configuration.
If you can, it’s better to replace them with the host name, that way if you change the DC IP address, you don’t need to come back here.
That’s all you need to do for the Kerberos configuration.
Samba configuration
For the samba configuration, it’s a similar procedure.
The configuration file is /etc/samba/smb.conf.
- Create a backup of the original file:
sudo mv /etc/samba/smb.conf /etc/samba/smb.conf.ori - Create a new file:
sudo nano /etc/samba/smb.conf - Paste these lines inside:
[global]
workgroup = rpitips
security = ads
realm = rpitips.local
password server = adserver.rpitips.local
domain logons = no
template homedir = /home/%D/%U
template shell = /bin/bash
winbind enum groups = yes
winbind enum users = yes
winbind use default domain = yes
domain master = no
local master = no
prefered master = no
os level = 0
idmap config *:backend = tdb
idmap config *:range = 11000-20000
idmap config rpitips.local:backend = rid
idmap config rpitips.local:range=10000000-19000000- Same thing, search and replace all rpitips and rpitips.local with your domain name.
adserver is the computer name for my DC controller, replace it by your DC name.
Nsswitch configuration
The last thing you can do is to configure nsswitch to use the domain.
It allows you to see the AD users and groups into the system.
- Open the configuration file:
sudo nano /etc/nsswitch.conf - Add “winbind” at the end of the two first lines (passwd and group).
- It should look like this:
# /etc/nsswitch.conf
#
# Example configuration of GNU Name Service Switch functionality.
# If you have the `glibc-doc-reference' and `info' packages installed, try:
# `info libc "Name Service Switch"' for information about this file.

passwd:         compat winbind
group:          compat winbind
shadow:         compat
gshadow:        files

hosts:          files mdns4_minimal [NOTFOUND=return] dns
networks:       files

protocols:      db files
services:       db files
ethers:         db files
rpc:            db files

netgroup:       nis
All the configuration is almost ready, you now need to join the domain.
Join the Active Directory domain
Join the domain
To join an AD domain on Linux, there are two steps:
- Create a token for Kerberos.
- Join the domain.
Let’s do this.
Kerberos initialization
So, the first thing is to check the Kerberos configuration and create a temporary token we’ll use later.
Use this command:kinit Administrator
Then enter the password of the domain administrator (you can use another account with administrative privileges if you want).
After a few seconds, the command ends without error (if not, there is an issue in your Kerberos or DNS configuration).
You can use klist to see the existing tokens:
# klist
Ticket cache: FILE:/tmp/krb5cc_0
Default principal: Administrator@RPITIPS.LOCAL

Valid starting     Expires            Service principal
03/02/19 15:55:00  04/02/19 01:55:00  krbtgt/RPITIPS.LOCAL@RPITIPS.LOCAL
        renew until 10/02/19 15:54:57
Please note, Kerberos deletes tickets when restarting the Raspberry Pi.
If you restart before the end of the installation, redo this command first.
Join the domain
You can now really join the domain with:net join -U Administrator
Again, it will ask your password and add your Raspberry Pi into the Active Directory computers list:

If it doesn’t work, check the /var/log/syslog file for any error message you have in the terminal.
The last thing to do is to reboot your Raspberry Pi to apply changes:sudo reboot
Checks
After the reboot, you should be able to see the domain users and groups with these commands:wbinfo -u
wbinfo -g
getent passwd
getent group
The wbinfo command displays what winbind has found in the Active Directory.
If it’s not working, you have connection issues with the LDAP directory.
Make sure that samba and winbind services are running.
The getent command depends on nsswitch.
If you don’t have the domain users and groups displayed at the end of the output, check your nsswitch.conf file.
Create a share
Once the Raspberry Pi is well-connected with the Active Directory domain, you can start to use the domain users in any project.
For example, you can create a share on the Raspberry Pi, accessible for the AD users.
- Create a new folder to share:
sudo mkdir /media/share - Edit the samba configuration file:
sudo nano /etc/samba/smb.conf - Paste these lines at the end:
[share]
path = /media/share/
read only = no - Then adjust the permission for the new share folder:
sudo chmod 660 /media/share
sudo chown Administrator /media/share
As you can see, it’s now possible to use the AD user “Administrator” directly in the chmod command.
And you can use any users or groups from the domain. - Restart samba to apply all changes:
sudo service smbd restart
To access this new share use your file explorer and browse to the Raspberry Pi.
For example, \\<IP> on Windows or if your computer is also in the domain, you can use \\RASPBERRYPI.
When your system asks for a login and password, use DOMAIN\Administrator and the domain password.
It's a free PDF guide containing every Raspberry Pi Linux command you should know!
Download now
Related questions
How to change the Raspberry Pi host name? If you need to add several Raspberry Pi in a domain name, you will have an issue with duplicate host names. To change the Raspberry Pi name, you need to edit the /etc/hostname file and change the value inside. Obviously, you need to do this before starting this procedure.
Is there a way to leave the domain? Yes, you can use the command “net leave -U Administrator” to leave the domain. After that, your Raspberry Pi will be removed from the Active Directory domain and you can uninstall all the packages (Kerberos, Samba, etc.).
It's a free PDF guide containing every Raspberry Pi Linux command you should know!
Download now
If you are looking for exclusive tutorials, I post a new course each month, available for premium members only. Join the community to get access to all of them right now!
Conclusion
That’s it, you now know how to add your Raspberry Pi into an Active Directory domain.
If you’re working on a network with an Active Directory, this tutorial was probably the first step.
Please let me know what kind of projects you’re working on.
And if the goal is to create a share for the AD users, this guide on how to turn your Raspberry Pi into a file server can probably help you.
Whenever you’re ready, here are other ways I can help you:
The RaspberryTips Community: If you want to hang out with me and other Raspberry Pi fans, you can join the community. I share exclusive tutorials and behind-the-scenes content there. Premium members can also visit the website without ads.
Master your Raspberry Pi in 30 days: If you are looking for the best tips to become an expert on Raspberry Pi, this book is for you. Learn useful Linux skills and practice multiple projects with step-by-step guides.
The Raspberry Pi Bootcamp: Understand everything about the Raspberry Pi, stop searching for help all the time, and finally enjoy completing your projects.
Master Python on Raspberry Pi: Create, understand, and improve any Python script for your Raspberry Pi. Learn the essentials step-by-step without losing time understanding useless concepts.
You can also find all my recommendations for tools and hardware on this page.


Thx for the Guide. Worked well for me.
Thanks Robert !
This worked for me, but how would I go about making it so I can log in using domain accounts?
followed the steps, however the samba settings did not work, i could not access the shared folder that I had created, either with a local user or as a domain user.
This did work and I am able to see the users on the domain, but I am not able login as any of the users. The screen just flashes and takes me back to the login screen.
For the first time I’ve managed (with a little Googling on top of this fantastic article) to join a Linux machine to my ageing Windows Server 2003 domain (yes you did read that correctly).
A very helpful and informative article. Many thanksRaspberryTips.
Nice
Thanks for your feedback 🙂
Hi Patrick,
Didnt do anything differently to the steps but the login only works for 24hrs after that I have to rejoin the domain
Nice article. I have successfully joined my raspberry pi 4 in active directory domain but whenever I try to log in as a domain user I got the error : “password incorrect”
Me too:
This did work and I am able to see the users on the domain, but I am not able login as any of the users. The screen just flashes and takes me back to the login screen.
Any guidance for this issue?
followed the steps and I was able to successfully join my domain, i can log in as a domain user, but the home folder is not created, and I can no longer log in as ‘pi’ user to run further sudo commands, and add a domain user to the sudo list
Hello,
Have you done something specific to be able to log in with a domain user?
I see many comments from people stuck at this
I don’t understand why the pi user doesn’t work anymore
Even with SSH?
Thanks Patrick, great easy to follow article. One question, please. I have set up a Pi with Raspbian and then followed your steps and joined my Windows Domain. then I installed Home Assistant in a Docker container following the steps located at https://www.home-assistant.io/hassio/installation/. However, when it completes I cannot log into Home Assistant at 192.168.xxx.xxx:8123. I have had no issues with this in the past. I am getting an error
This site can’t be reached
192.168.xxx.xxx refused to connect.
Is the domain controller somehow blocking this? Do I need something else setup?
Thanks,
Mike
Hi Michael,
I think there is no link with joining the domain
Unfortunately, I can’t help you with Home Assistant
i have to provide username and psw to connect to my company AD. followed this tutorial but with no luck. I get:
kinit: Cannot find KDC for realm “xxx.ro” while getting initial credentials
i do not know what to set up..
Hi,
Did you change the /etc/resolv.conf file to use your domain controller as DNS server? Does it work?
Thanks a lot for this. I have successfully integrated my Raspberry Pi into domain. However, I face one particular problem. When attempting to login to Raspberry using one of the AD accounts the user is immediately logged out again.
I was able to login using ssh but then I get the the message that chdir to home directory failed because the home directory could not be created.
This is consistent what I see, i.e. there are no home directory created for users under /home
Appreciate any help how to get this resolved
Just execute ‘pam-auth-update’ on command line and enable module for creating home directories.
Worked for me 😉