

How to use Raspberry Pi to monitor network? (Nagios)
Today I wanted to use my Raspberry Pi to monitor my network with Nagios.
But I was lost trying to find out what was the best option to do this.
I saw many how-to guides about NEMS, Nagios3 but nothing perfect with the latest Nagios version.
I’ll explain here what I found and how to do the same step by step.
Nagios requires a few prerequisites: Raspberry Pi OS, Apache and PHP.
Then Nagios Core and its plugins can be installed from source, by downloading the latest version on the official website.
After that, the configuration can start to add all the hosts and services to monitor.
Yes, Nagios from source is the best way to monitor your network on Raspberry Pi.
Nagios is like a failure detector, it will check one thing regularly (like every 5 minutes) and alert you when this check doesn’t work as expected.
In this post I’ll explain how to install Nagios on your Raspberry Pi to check your network status.
But I’ll start by listing all the ways to get Nagios I found on Internet and to show you why most of them are useless or unsuitable.
What is the best way to get Nagios on Pi?
I’ll start this post by explaining to you what I found to get Nagios quickly on the Raspberry Pi, and why they are bad options for you.
NagiosPi?
My first search showed me “NagiosPi”.
I was excited to see that Nagios created a specific version for the Raspberry Pi.
This is the main reason that led me to install it on my Pi.
But I was quickly cooled, seeing this is a side project, with no update since 2013.
This was not suitable for me, I know that Nagios releases new updates at least once a year, so I want something recent.
APT?
Next step, I looked into apt repository what I could get.
Did the guy from NagiosPi stopped his project because Raspbian added the Nagios package in apt?
Maybe, but I only find Nagios 3 in the apt sources, the latest version when I wrote this line was Nagios 4.4.6.
It could be the easiest way to get Nagios, but I want the latest version or not too far from it.

Join Our Community!
Connect, learn, and grow with other Raspberry Pi enthusiasts. Support RaspberryTips and enjoy an ad-free reading experience. Get exclusive monthly video tutorials and many other benefits.
Learn moreNEMS?
Next search, I found a pre-configured SD card with Nagios and a lot of monitoring tools.
This is the NEMS Linux project, NEMS stands for Nagios Enterprise Monitoring Server.
Seems interesting no?
It's a free PDF guide containing every Raspberry Pi Linux command you should know!
Download now
Yes, I tried it, but this was not suitable for Raspberry Pi.
Even when doing nothing, I have a lot of load, and couldn’t do anything without lag.
Maybe too many tools for the Raspberry Pi.

From sources?
The last option I was thinking about was to install Nagios manually from the sources.
But I thought this will be difficult and time-consuming to compile everything.
Hum … not so long finally, maybe 30min to get everything working with the latest version.
So for me, it’s really the best option I found, and I’ll now explain to you how to install it on your Raspberry Pi.
How to install Nagios on your Raspberry Pi
Install Raspberry Pi OS
First thing you need, is an operating system 🙂
Start with Raspbian, I think Raspbian Lite is perfect for this goal, but take the Desktop version if you prefer.
Here are the first steps you need to complete before going further:
- Install Raspbian on your Raspberry Pi (if you already have one installed it’s fine).
- Change the default password and set your preferences as you want (language, keyboard, IP, …).
- Enable SSH and configure it for auto-start.
- Verify that you can connect from your computer via SSH.
- Update your Pi:
sudo apt update
sudo apt upgrade
sudo reboot
That’s it, we are ready to start.
Downloads and prerequisites
Nagios is a web interface, so we need to install Apache and PHP:sudo apt install apache2 libapache2-mod-php
Then there are two things we need to download and install:
- Nagios Core: It’s the main part of the Nagios system.
- Nagios Plugins: This will add basic check commands to Nagios, so you’ll not have to create all the scripts yourself.
We need to download sources for them, check their websites for the latest version:
Nagios Core downloads
Nagios Plugins downloads
Finally, download archives with wget:cd ~mkdir Downloads
cd Downloads
wget https://assets.nagios.com/downloads/nagioscore/releases/nagios-4.4.6.tar.gz
wget http://nagios-plugins.org/download/nagios-plugins-2.3.3.tar.gz
Now we are ready to move to the installation process.
Install Nagios on Raspberry Pi
Create Nagios user and group
We need to create a specific user for Nagios, and a group for Nagios and Apache users (nagcmd):sudo useradd -m -s /bin/bash nagios
sudo groupadd nagcmd
sudo usermod -a -G nagcmd nagios
sudo usermod -a -G nagcmd www-data
Compile and install Nagios
Now we have to extract files from the archive, compile the sources and install Nagios on the Raspberry Pi:
- Move to the “Downloads” directory:
cd /home/pi/Downloads - Extract files from the archive downloaded before:
tar zxvf nagios-4.4.6.tar.gz - Don’t forget to change the version number if you download another one.
- Compile :
cd nagios-4.4.6/
./configure --with-command-group=nagcmd
make all
This could take a few minutes. - Install:
sudo make install
sudo make install-init
sudo make install-config
sudo make install-commandmode
This is the end of the Nagios core installation.
We now need to configure the Apache part to allow access to the Nagios page.
Configure Apache for Nagios
- Enable the CGI module for Apache:
sudo a2enmod cgi - Copy the Apache configuration to the Apache folder:
sudo cp sample-config/httpd.conf /etc/apache2/sites-enabled/nagios.conf - Create the first user for the web interface:
sudo htpasswd -c /usr/local/nagios/etc/htpasswd.users nagiosadmin - Restart Apache:
sudo service apache2 restart - Check if you have access to Nagios:
Go to http://<RASPBERRY IP>/nagios
(check this tutorial if you don’t know how to find the current IP address).
You should get something like this:
It’s normal, we’ll fix that now.
The Nagios installation is almost done, we just need to run the Nagios service.
Start the Nagios service
Nagios has a service running in background to launch a check at a predefined frequency (every 5min for example).
We need to start it to finish the installation:sudo service nagios start
It's a free PDF guide containing every Raspberry Pi Linux command you should know!
Download now
And to start Nagios automatically on boot:sudo ln -s /etc/init.d/nagios /etc/rcS.d/S99nagios
If you refresh the web interface, you should now see “Daemon running with PID XXX”.
Everything is fine with Nagios, we just want to add plugins now.
Install Nagios Plugins
Follow this procedure to install the Nagios plugins:
- Get back to the Downloads folder:
cd /home/pi/Downloads - Extract files from the archive:
tar zxvf nagios-plugins-2.3.3.tar.gz - Compile and install:
cd nagios-plugins-2.3.3/
./configure --with-nagios-user=nagios --with-nagios-group=nagios
make
sudo make install
All plugins are now available in the /usr/local/nagios/libexec/ folder and ready to use in Nagios.
You may need to restart Nagios to apply changes:sudo service nagios restart
How to configure Nagios to fit your needs?
Nagios vocabulary
Nagios uses a specific vocabulary to define each object in the configuration
So first, I have to be sure you know it:
- Command: a command is basically a script from the Nagios plugins folder, we define it in Nagios to use it later with parameters (ex: check_load is a command).
- Service: a service is a check that applies to one or more computers, and that uses a command to run a particular verification (ex: check if the load is above 10 on Raspberry Pi is a service).
- Host: a host is a computer, a server, anything with an IP address.
- Hostgroup: you can define a host group, like “Raspberry Pi”, and apply the same services to all the hosts inside this group.
We’ll now see how to configure each one in the Nagios configuration file.
For the example I’ll monitor my Raspberry Pi Zero from the Raspberry Pi where Nagios is installed.
Prepare the host
Nagios uses mainly SNMP to connect to other hosts and get all the information.
So we need to install SNMP on every new host before adding it in the configuration file.
This is not mandatory, it depends on which services you’ll create for this host.
Anyway, I’ll show you how to do it, so you have a complete tutorial.
In my case, I followed these steps on the Raspberry Pi Zero:
- Connect to the host via SSH.
- Install snmpd:
sudo apt install snmpd - Move to the configuration folder:
cd /etc/snmp - Remove (or backup) the snmpd.conf file:
sudo rm snmpd.conf - Create a new snmpd.conf file:
sudo nano snmpd.conf - Paste these lines into:
com2sec readonly default RASPBERRYTIPS
group MyROGroup v1 readonly
group MyROGroup v2c readonly
view all included .1 80
access MyROGroup "" any noauth exact all none none
sysName Pi Zero
Replace RASPBERRYTIPS by the community you want to use.
Replace sysName by your host name or description.
There are many options available in snmpd.conf, but for this test we don’t need more than that. Save and exit (CTRL+O, CTRL+X)
Restart snmpd
sudo service snmpd restart
We can now add this host in Nagios.
Add a host
- Go back to the Raspberry Pi hosting Nagios.
- Move to the objects configuration folder of Nagios:
cd /usr/local/nagios/etc/objects - Create a new file for your host, like pizero.cfg:
sudo nano pizero.cfg - Paste these lines into:
define host {
   use                     linux-server            ; Host group to use
   host_name               Pi Zero                 ; Name of this host
   alias                   pizero                  ; Alias
   address             192.168.1.18            ; IP Address
}
This is really a basic host definition, with the host name, alias and IP address.
We also add it to the Linux servers host group to inherit group-defined services if you add some later - Save and exit (CTRL+O, CTRL+X).
- Now we need to tell Nagios that we added a new file.
Add this line in /usr/local/nagios/etc/nagios.cfg (just under localhost.cfg will be perfect) .cfg_file=/usr/local/nagios/etc/objects/pizero.cfg - Restart Nagios:
sudo service nagios restart - Go back to the Nagios web interface, in the Hosts menu.
You should have a new line like this: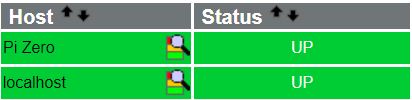
Nagios already monitors the ping response for our new host, but we want more.
So we need to add a service inside, but first we need to define the command to use.
Add a command
Previously in this tutorial you downloaded and installed Nagios plugins
Nagios plugins provide many commands to check the local host, but not so much for remote hosts.
You can also download many other commands on this website (specifically look for SNMP plugins).
For this example, I’ll monitor the time synchronization between my two Raspberry Pi.
To add a command in Nagios, follow these steps:
- Move to the plugins folders:
cd /usr/local/nagios/libexec - Run the command without parameters:
./check_ntp - Note the help message, and parameters you need to pass.
In my case, I got this error message:Usage: check_ntp -H <host> [-w <warn>] [-c <crit>] [-j <warn>] [-k <crit>] [-4|-6] [-v verbose]So, I know I have to specify the host IP in the -H argument.
And maybe a warning and critical threshold with -w and -c
Other options don’t seem relevant for me - Open the commands configuration file:
sudo nano /usr/local/nagios/etc/objects/commands.cfg - Check if your command is already inside and if not, you have to add it like this:
define command {
   command_name    check_ntp
   command_line    $USER1$/check_ntp -H $HOSTADDRESS$ -w $ARG1$ -c $ARG2$
} - Save, exit and restart Nagios:
sudo service nagios restart - Check that your command is now available in Nagios.
- Go to the web interface.
- Click on “Configuration” in the left menu.
- Choose “Commands” is the list and click “Continue”.
- You should now see “check-ntp” in the list (or any command you add) .
The command is now ready to be used for your host, but we need to create a new service to apply it.
Add a service
To create a new service, follow these steps:
- Open your host configuration file:
sudo nano /usr/local/nagios/etc/objects/pizero.cfg
Adapt the filename to what you have created before - Paste these lines:
define service {
   use                     local-service           ; Name of service template to use
   host_name               Pi Zero
   service_description     Time synchronization
   check_command           check-ntp!1!5
}
Don’t forget to adapt these lines to your previous configuration.
On the check_command line, we define all arguments, separated by exclamation points - Save and exit.
- Check your configuration:
sudo /usr/local/nagios/bin/nagios -v /usr/local/nagios/etc/nagios.cfg
This could be useful to know if you have configuration errors before restarting Nagios.
In my case, I wrote check_ntp instead of check-ntp 🙂 - Restart Nagios:
sudo service nagios restart
Now in the status detail from your host you should see the new service.

If you understood how to create a host, a command and a service, you are now ready to do anything in Nagios.
Feel free to download new plugins on Internet, or even code your plugins (it’s nothing more than a basic script to check something).
Video
It's a free PDF guide containing every Raspberry Pi Linux command you should know!
Download now
Related questions
Is it possible to create the configuration from the web interface? Unfortunately no, Nagios doesn’t provide a configuration tool in the Core version. But there are several configuration tools you could install. The one I often use is Thruk, I didn’t try it yet on Raspberry Pi, but you can download it here if you want.
Is it possible to monitor Windows or other hosts? Yes. You could monitor anything on the network. SNMP is also available for Windows and most of the network equipments (router, switch, home automation device, …). As you can create your check commands, everything is possible.
It's a free PDF guide containing every Raspberry Pi Linux command you should know!
Download now
Reminder: Remember that all the members of my community get access to this website without ads, exclusive courses and much more. You can become part of this community for as little as $5 per month & get all the benefits immediately.
Conclusion
That’s it, you know how to install and configure a Nagios server on your Raspberry Pi to monitor your network or anything you want.
With this tutorial, you get the latest Nagios version, with no excessive load average (currently 0.00 on my Pi ^^).
Once Nagios is installed, it’s not really different from any Nagios server on Linux.
So feel free to check Linux tutorials for advanced configuration.
And if you want to create easy-to-read graphs with the data generated in Nagios, take a look at how to install Grafana on your Raspberry Pi.
Update: I recently tested Zabbix on Raspberry Pi, that looks a bit more intuitive to get started. For a small network, it’s probably a suitable alternative (I have less experience with it, but it seems great).
Whenever you’re ready, here are other ways I can help you:
The RaspberryTips Community: If you want to hang out with me and other Raspberry Pi fans, you can join the community. I share exclusive tutorials and behind-the-scenes content there. Premium members can also visit the website without ads.
Master your Raspberry Pi in 30 days: If you are looking for the best tips to become an expert on Raspberry Pi, this book is for you. Learn useful Linux skills and practice multiple projects with step-by-step guides.
The Raspberry Pi Bootcamp: Understand everything about the Raspberry Pi, stop searching for help all the time, and finally enjoy completing your projects.
Master Python on Raspberry Pi: Create, understand, and improve any Python script for your Raspberry Pi. Learn the essentials step-by-step without losing time understanding useless concepts.
You can also find all my recommendations for tools and hardware on this page.


Getting the following error while opening http:///nagios
Nagios Core
<frame src="” name=”main” frameborder=”0″ style=””>
Nagios Core
http://www.nagios.org
Copyright © 2010- Nagios Core Development Team and Community Contributors.
Copyright © 1999-2010 Ethan Galstad
Note: These pages require a browser which supports frames
Hi dabance,
This message doesn’t help
Can you paste the exact error message? Or a screenshot maybe?
Thanks
Thank you for the excellent guide.
Sadly, I’m having trouble installing the nagios plugins because a whole bunch of pre-requisites are missing.
From the nagios install webpage, there are a bunch of yum packages (which the raspberry pi doesn’t have):
https://support.nagios.com/kb/article/nagios-core-installing-nagios-core-from-source-96.html#Debian
eg.
yum install -y gcc glibc glibc-common make gettext automake autoconf wget openssl-devel net-snmp net-snmp-utils
yum install -y perl-Net-SNMP
Looks like I need to find some equivalents for apt-get…
I just needed to install gettext:
apt-get install gettext
… splendid! Thanks again 🙂
Hi,
When attempting to do the following step:
sudo cp sample-config/httpd.conf /etc/apache2/sites-enabled/nagios.conf
I get the following error:
cp: cannot stat ‘sample-config/httpd.conf’: No such file or directory
Which step creates this file? Or should it have been on my system already? I am on a Raspberry Pi 3 B+
Hi Tommie,
I don’t know exactly, I think it should be in the Nagios package or archive
But not a big deal, if it’s not working directly without configuration, you can use this one as an example : https://github.com/ageric/nagios/blob/master/sample-config/httpd.conf.in
Hello Thank you for the guide,
I am having trouble runnning Nagios.
I don’t have installed plug-in because before that, when I am accessing to my Nagios web page.
It says : Nagios Core Not running,
I check the status of nagios service and nothing special appears :
● nagios4.service – LSB: nagios host/service/network monitoring and management system
Loaded: loaded (/etc/init.d/nagios4; generated)
Active: active (running) since Mon 2019-07-29 19:15:26 CEST; 13min ago
Docs: man:systemd-sysv-generator(8)
Process: 2388 ExecStart=/etc/init.d/nagios4 start (code=exited, status=0/SUCCESS)
Tasks: 8 (limit: 2200)
Memory: 3.1M
CGroup: /system.slice/nagios4.service
├─2418 /usr/sbin/nagios4 -d /etc/nagios4/nagios.cfg
├─2419 /usr/sbin/nagios4 –worker /var/lib/nagios4/rw/nagios.qh
├─2420 /usr/sbin/nagios4 –worker /var/lib/nagios4/rw/nagios.qh
├─2421 /usr/sbin/nagios4 –worker /var/lib/nagios4/rw/nagios.qh
├─2422 /usr/sbin/nagios4 –worker /var/lib/nagios4/rw/nagios.qh
├─2423 /usr/sbin/nagios4 –worker /var/lib/nagios4/rw/nagios.qh
├─2424 /usr/sbin/nagios4 –worker /var/lib/nagios4/rw/nagios.qh
└─2428 /usr/sbin/nagios4 -d /etc/nagios4/nagios.cfg
Thanks for the help
Hello,
Do you have an error when you start the service?
Or can you check the log file?
I think it’s in /var/log/syslog
Hello,
Thanks for the fast reply,
I have find this in the log file regarding Nagios :
Jul 29 21:19:09 raspberrypi nagios4[4410]: Starting nagios4 monitoring daemon: nagios4.
Jul 29 21:19:09 raspberrypi nagios4: Nagios 4.3.4 starting… (PID=4440)
Jul 29 21:19:09 raspberrypi nagios4: Local time is Mon Jul 29 21:19:09 CEST 2019
Jul 29 21:19:09 raspberrypi nagios4: LOG VERSION: 2.0
Jul 29 21:19:09 raspberrypi nagios4: qh: Socket ‘/var/lib/nagios4/rw/nagios.qh’ successfully initialized
Jul 29 21:19:09 raspberrypi nagios4: qh: core query handler registered
Jul 29 21:19:09 raspberrypi nagios4: nerd: Channel hostchecks registered successfully
Jul 29 21:19:09 raspberrypi nagios4: nerd: Channel servicechecks registered successfully
Jul 29 21:19:09 raspberrypi nagios4: nerd: Channel opathchecks registered successfully
Jul 29 21:19:09 raspberrypi nagios4: nerd: Fully initialized and ready to rock!
Jul 29 21:19:09 raspberrypi nagios4: wproc: Successfully registered manager as @wproc with query handler
Jul 29 21:19:09 raspberrypi nagios4: wproc: Registry request: name=Core Worker 4442;pid=4442
Jul 29 21:19:09 raspberrypi nagios4: wproc: Registry request: name=Core Worker 4443;pid=4443
Jul 29 21:19:09 raspberrypi systemd[1]: Started LSB: nagios host/service/network monitoring and management system.
Jul 29 21:19:09 raspberrypi nagios4: wproc: Registry request: name=Core Worker 4446;pid=4446
Jul 29 21:19:09 raspberrypi nagios4: wproc: Registry request: name=Core Worker 4441;pid=4441
Jul 29 21:19:09 raspberrypi nagios4: wproc: Registry request: name=Core Worker 4444;pid=4444
Jul 29 21:19:09 raspberrypi nagios4: wproc: Registry request: name=Core Worker 4445;pid=4445
Jul 29 21:19:09 raspberrypi nagios4: Successfully launched command file worker with pid 4450
I also tried this :
sudo nagios4 restart
output :
Nagios Core 4.3.4
Copyright (c) 2009-present Nagios Core Development Team and Community Contributors
Copyright (c) 1999-2009 Ethan Galstad
Last Modified: 2017-08-24
License: GPL
Website: https://www.nagios.org
Error: Cannot open main configuration file ‘/usr/local/nagios/etc/objects/restart
But I think that’s normal, there is no “restart” file in this folder
Hi,
There is no error in your log file, so I don’t know what the problem could be
Good commands to manage the nagios service are:
sudo service nagios startsudo service nagios stopsudo service nagios restartYou can also try
sudo journalctl -xeto see the last errorsThe step to make the Nagios service start automatically did not work for me.
sudo ln -s /etc/init.d/nagios /etc/rcS.d/S99nagios
It creates the link, but nagios does not start on boot.
This nagios support article worked for me:
https://support.nagios.com/forum/viewtopic.php?f=7&t=34604
Thanks for the tips Bob!
Hello, I followed you tutorial and it is really good. Had some problems but figured it out. Can you help me with installing Nagios network analyzer on raspbian? Nagios server is already up and working. Can I manually put NAA or not?
Hi Zvonimir,
Thanks for your feedback
I’m sorry I didn’t test it, I don’t know if it can work on Raspbian
But you can try the official documentation here : https://assets.nagios.com/downloads/nagios-network-analyzer/docs/Network_Analyzer_Manual_Installation_Instructions.pdf
Let us know if you have an answer 🙂
Good luck
Hello again, NNA is not working on Raspbian.. Tried few different releases and none work. It is not officially supported. Really don’t know how to get this done. Maybe any other way to get nagios analyze some network data? Wrote alot of stuff about Nagios and this project and don’t want to abandon it but thinking about shifting to wireshark
Hi
Is it easy to make this a docker container?
or is it a overkill?
This was an incredible walkthrough! I did have one issue which I figured out. I was attempting to install Nagios Core 4.4.5 and “sudo ln -s /etc/init.d/nagios /etc/rcS.d/S99nagios” didn’t work for me because there was nothing in init.d at all! I googled it a bit and figured out that I needed to instead run “sudo systemctl enable nagios.service” and now my device successfully loads the nagios service at startup. Thanks so much.
Hi Farhad,
Thanks for the tip
Hi, I got to the section to add a host to monitor and both the localhost and my host that I was adding are showing as down.
I get this error status when I dig a little further:
(No output on stdout) stderr: execvp(/usr/local/nagios/libexec/check_ping, …) failed. errno is 2: No such file or directory
Any ideas?
Hello,
Make sure that the script you try to use exist in this folder (check_ping in libexec)
But I think it’s one of the default scripts
Used an old Pi2 that I had set up as a LAMP server using Ubuntu 18.04. I had to add sudo make install-daemoninit during install to get the service to start at bootup. Other than that, instructions worked great. Thank you Patrick!
Hi Drew,
Thanks for your feedback!
Hi, I am having an issue with adding the host. Everything is fine until I type “sudo service nagios restart” as it throws up the following error:
“Job for nagios.service failed because the control process exited with error code.
See “systemctl status nagios.service” and “journalctl -xe” for details.”
Once I’ve typed “systemctl status nagios.service”
It shows the following:
● nagios.service – Nagios Core 4.4.5
Loaded: loaded (/lib/systemd/system/nagios.service; enabled; vendor preset: enabled)
Active: failed (Result: exit-code) since Tue 2020-03-31 16:40:19 BST; 55s ago
Docs: https://www.nagios.org/documentation
Process: 26901 ExecStartPre=/usr/local/nagios/bin/nagios -v /usr/local/nagios/etc/nagios.cfg (code=exited, status=1/FAILURE)
Process: 26902 ExecStopPost=/bin/rm -f /usr/local/nagios/var/rw/nagios.cmd (code=exited, status=0/SUCCESS)
Mar 31 16:40:19 raspberrypi nagios[26901]: ***> One or more problems was encountered while processing the config files…
Mar 31 16:40:19 raspberrypi nagios[26901]: Check your configuration file(s) to ensure that they contain valid
Mar 31 16:40:19 raspberrypi nagios[26901]: directives and data definitions. If you are upgrading from a previous
Mar 31 16:40:19 raspberrypi nagios[26901]: version of Nagios, you should be aware that some variables/definitions
Mar 31 16:40:19 raspberrypi nagios[26901]: may have been removed or modified in this version. Make sure to read
Mar 31 16:40:19 raspberrypi nagios[26901]: the HTML documentation regarding the config files, as well as the
Mar 31 16:40:19 raspberrypi nagios[26901]: ‘Whats New’ section to find out what has changed.
Mar 31 16:40:19 raspberrypi systemd[1]: nagios.service: Control process exited, code=exited, status=1/FAILURE
Mar 31 16:40:19 raspberrypi systemd[1]: nagios.service: Failed with result ‘exit-code’.
Mar 31 16:40:19 raspberrypi systemd[1]: Failed to start Nagios Core 4.4.5.
Hi Philip,
Yes, it’s common as soon as there is a little issue with your configuration
You can get more details with:
sudo /usr/local/nagios/bin/nagios -v /usr/local/nagios/etc/nagios.cfgFor anyone doing this in 2020, the latest version as of Aug 2019 is 4.4.5
https://assets.nagios.com/downloads/nagioscore/releases/nagios-4.4.5.tar.gz
https://nagios-plugins.org/download/nagios-plugins-2.3.3.tar.gz
Change Log: https://www.nagios.org/projects/nagios-core/history/4x/
Thanks 🙂
Hi, this all worked great until i tried to add a host. No errors at all came up, but still only the local host showing
Could it be because the Pi Zero is connected wireless through mesh access point and the Pi 3 running Nagios is wired?
I’ve tries restarting both services but still not being registered
Thanks
I’m having the same issue. I followed the walkthrough and added hosts but I only get localhost. Not sure what I’m doing wrong.
I’ve actually resolved this issue. The problem was that I had renamed the template/group named from linux_server to something else and Nagios was getting confused. Not sure how to add new group named…
I am having a different issue however – when I reboot by Pi, Nagios will not startup automatically.
https://assets.nagios.com/downloads/nagioscore/releases/nagios-4.4.6.tar.gz
https://nagios-plugins.org/download/nagios-plugins-2.3.3.tar.gz
New to Linux. During the Apache Configuration I get “htpasswd: cannot create file /usr/local/nagios/etc/htpasswd.users” at the command:
sudo htpasswd -c /usr/local/nagios/etc/htpasswd.users nagiosadmin
I don’t think I’ve missed anything?
Hum … does the folder /usr/local/nagios/etc/ exist?
Hi I have a problem in the configuration of the apache in this step
sudo cp sample-config/httpd.conf /etc/apache2/sites-enabled/nagios.conf
after that it appears:
cp: cannot start ‘sample-config/httpd.conf’ :no such file or directory
HI,
Do you have this error on starting Apache? or when you try to copy the file?
Are your sure to be in the correct folder? (does the file exists?)
I figured it out thank you for helping
Really helpful guide
No problem, good news!
Using this tutorial (with a few modifications) I’ve successfully installed Nagios 4.4.6 on PiZero with DietPi (since I don’t have the “w” version I’ve used a USB network card for LAN) connection.
Install and configure DietPi – DietPi instruction on official website
Connect to Pi using SSH (root user will be used during install so there is no need for “sudo” if connecting with other user you must add sudo or use “sudo su”) :
[code]
apt update && apt upgrade
apt install apache2 libapache2-mod-php gettext build-essential
mkdir DW_Nagios && cd DW_Nagios
wget https://assets.nagios.com/downloads/nagioscore/releases/nagios-4.4.6.tar.gz && wget https://nagios-plugins.org/download/nagios-plugins-2.3.3.tar.gz
useradd -m -s /bin/bash nagios && groupadd nagcmd && sudo usermod -a -G nagcmd nagios && sudo usermod -a -G nagcmd www-data
tar zxvf nagios-4.4.6.tar.gz
cd nagios-4.4.6/
./configure –with-command-group=nagcmd
make all
make install
make install-init
make install-config
make install-commandmode
a2enmod cgi
cp sample-config/httpd.conf /etc/apache2/sites-enabled/nagios.conf
htpasswd -c /usr/local/nagios/etc/htpasswd.users nagiosadmin
service apache2 restart
service nagios start
ln -s /etc/init.d/nagios /etc/rcS.d/S99nagios
cd ..
tar zxvf nagios-plugins-2.3.3.tar.gz
cd nagios-plugins-2.3.3
./configure –with-nagios-user=nagios –with-nagios-group=nagios
make
make install
[/code]
After that had some issue with nagios service, the following resolve it:
[code]
Create this nagios.service file
# vi /etc/systemd/system/nagios.service
[Unit]
Description=Nagios
BindTo=network.target
[Install]
WantedBy=multi-user.target
[Service]
User=nagios
Group=nagios
Type=simple
ExecStart=/usr/local/nagios/bin/nagios /usr/local/nagios/etc/nagios.cfg
# systemctl enable /etc/systemd/system/nagios.service
# systemctl start nagios
# systemctl status nagios
After that you need to restart the Nagios Service.
# /etc/init.d/nagios restart
That’s it you should now be able to access Nagios WEBUI.
[/code]
Everything worked without issues (usually i had to search for some dependency that was missing from DietPi due to it being such a slimmed down OS).
Thanks for the article and all the useful comments.
P.S. Although I had issues posting this comment, getting message : ERROR: Sorry, human verification failed. but no chaptcha was displayed
Wow, dunno what happened to the formatting of my previous message.
Anyway, if someone is using DietPy and wonder why mail notifications are not working is because you need to install some packages :
– apt install mailutils sendmail
After installing them you can run a simple test from terminal using :
mail -s “This is the subject” email@domain.com <<< 'This is the message'
Now i still had a small issue since the binary were installed in /usr/bin and nagios was looking for them in /bin, there are two solutions :
– modify the commands in commands.cfg file
– make a sim-link using : ln -s /usr/bin/mail /bin/
Thanks
Hi, when attempting to Check if I have access to Nagios using http:///nagios), it says “No such file or directory”. Do I need to run this on a web browser using the rapsberry pi or in the command line terminal?
Hello Patrick,
This is a great tutorial did you do a youtube video for this yet? If not you should, this is a great tutorial for nagios on a Raspberry Pi. I believe you covered everythign except how to configure notifications. I have been trying to find an excellent tutorial for that and I cannot. Do you have any experience with notifications? If so please share with us. I actually have nagios working in a Docker Container and it works great just trying to figure out 2 things before I release the tutorial on my website. Thank you so much for your hard work I do appreciate it so much.
Hi Michael,
Yes, there is a YouTube video (one of my first so not the best one, but it should work).
I’ve added it in this article.
For the notifications, I’m just using the default email notifications, and I also have some of them configured with Pushbullet (to get them on my phone).
It should work easily once the system email configured.