Getting Started With Nginx on Raspberry Pi (Full Guide)
Nginx is primarily a web server, but can also be used as a proxy server. It’s free, open-source and often in direct competition with Apache to build web applications. As a web developer, I’m more used to Apache, but Nginx is known to be almost 3 times faster and lighter, which is great for a Raspberry Pi. Let’s see how to get it on your Pi.
The main package for Nginx is available in the default Raspberry Pi repository, so it can be installed with apt directly: “sudo apt install nginx”. The web files can then be created under /var/www/html and the configuration is made in /etc/nginx.
Don’t worry, I’ll explain everything in details if you need a more step-by-step approach to this. Let’s start with an introduction, to make sure you understand what is Nginx and when to use it.
If you’re looking to quickly progress on Raspberry Pi, you can check out my e-book here. It’s a 30-day challenge where you learn one new thing every day until you become a Raspberry Pi expert. The first third of the book teaches you the basics, but the following chapters include projects you can try on your own.
What is Nginx and why it is used?
nginx [engine x] is an HTTP and reverse proxy server, a mail proxy server, and a generic TCP/UDP proxy server, originally written by Igor Sysoev.
Nginx website
As we are Raspberry Pi users, we’ll generally use Nginx in two cases: for a web server or a web proxy. Let’s take a few seconds to explain both usages.
Web server
A web server is simply an app installed on a server, to answer HTTP (or HTTPS) requests. If you type the Raspberry Pi IP address in a web browser directly after the system installation, you’ll get an error. Nginx is the piece of software you need to make your Pi answer this request.
If you already used Apache or even a Python web server, it’s the same idea.

Join Our Community!
Connect, learn, and grow with other Raspberry Pi enthusiasts. Support RaspberryTips and enjoy an ad-free reading experience. Get exclusive monthly video tutorials and many other benefits.
Learn moreNginx is known to use less memory and resources while performing 2.5 times faster than Apache overall. Nginx can also handle a high volume of connections.
This make it the perfect choice for high traffic websites (Netflix is using it for example), or low resources servers (like a Raspberry Pi!).
It's a free PDF guide containing every Raspberry Pi Linux command you should know!
Download now
Helping you to install it on your Raspberry Pi is my main goal today, we’ll get to it in the next part. But first, let’s talk a bit about the web proxy usage.
Web proxy
A web proxy also answer web requests, but it generally acts as a gateway between the user on the Internet and another app. For example, Nginx can answer requests on port 80 and redirect it to your Plex server, Torrent web interface or Webmin. These apps that are listening on a different port by default.
At work, we had a Rocket Chat server listening on a random port (3000 I think), but when we type the IP address without the port, Nginx was answering the request and displayed the Rocket Chat page automatically. This is great to share the URL with other users.
Obviously, a web proxy is not only used for convenience, but also for increased security, better performances, logging purposes or even load balancing (you can distribute the requests to multiple servers).
Getting started with Nginx on Raspberry Pi
Can a Raspberry Pi run Nginx?
Nginx can be installed on Raspberry Pi with APT. The Nginx package available in the default repository and is well-supported on Raspberry Pi.
By the way, it’s a good idea to use it as a web server on Raspberry Pi, as it’s generally lighter and faster than other alternatives (like Apache).
Note: If you run Ubuntu on your Raspberry Pi, you might want to check this tutorial instead: Nginx on Ubuntu: The Ultimate Setup Guide for Your Web Server
How to install Nginx on a Raspberry Pi
Installing Nginx on a Raspberry Pi is straightforward:
- Open a terminal
- Make sure your APT lists are up-to-date with:
sudo apt update - Then install Nginx with:
sudo apt install nginx
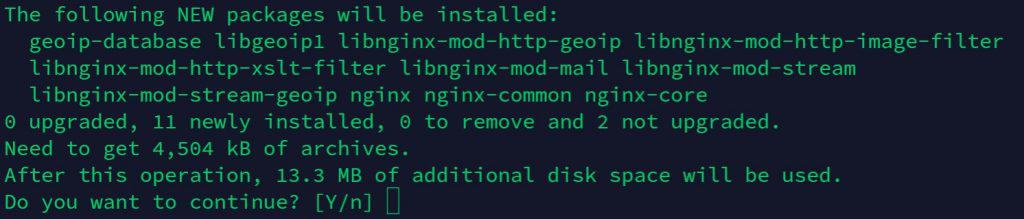
A few seconds later, Nginx is installed on your device, and you can already start using it.
First steps with Nginx on Raspberry Pi
To check if everything was installed correctly, start by visiting http://IP, replacing “IP” with your Raspberry Pi IP address.
You can check my article on how to find your Raspberry Pi IP address if you don’t know it.
In your web browser, you should get something like that:
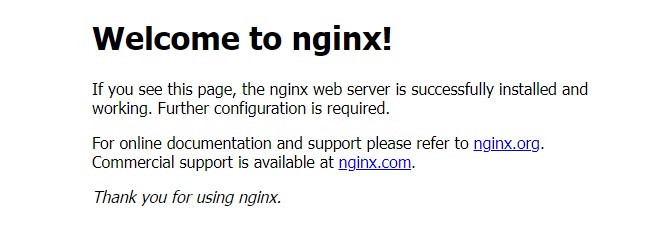
It means Nginx is installed and the web service properly started.
The default page location is /var/www/html/index.nginx-debian.html.
You can edit it or remove it and start from scratch.
Your web files need to be saved under /var/www/html to be accessible from a web browser. Use index.html as the main page to be shown when accessing http://IP.
It's a free PDF guide containing every Raspberry Pi Linux command you should know!
Download now
If you need to change anything in the default Nginx configuration, you can edit the main configuration file with:sudo nano /etc/nginx/nginx.conf
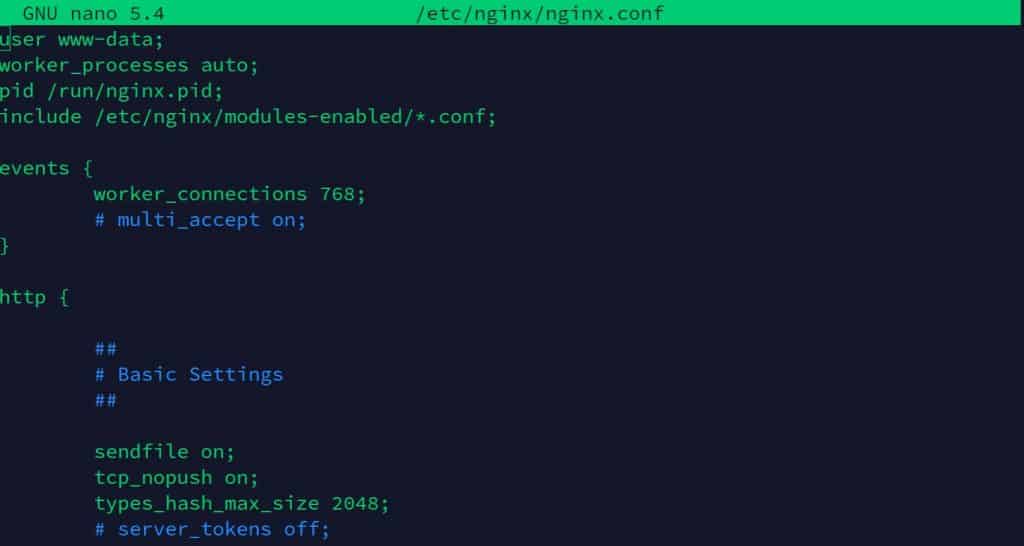
And as with Apache, there are two subfolders there to tweak the configuration for each website or app hosted on your Raspberry Pi:/etc/nginx/sites-enabled/
/etc/nginx/sites-available/
We’ll get back to this later to allow PHP code in our web files.
You can find the official documentation on their website if you need further explanation.
It's a free PDF guide containing every Raspberry Pi Linux command you should know!
Download now
Upgrade your Nginx server to support PHP and MySQL
For some basic projects, maybe HTML files are enough. But in most cases, you will need to use PHP code and a MySQL database. This is not straightforward when you are doing this for the first time, so I’ll guide you with this too. It will also help to better understand the Nginx configuration.
Note: I have a video lesson available for the community members, where I explain everything to host a website at home. It’s built with Apache instead of Nginx, but most of the steps are the same. You can join here and watch it directly if you are interested (with 10+ other lessons for Raspberry Pi and many other benefits).
PHP installation
PHP is used to add dynamic content into your web pages. For example, this website use the same HTML template for all blog posts, and the blog post content is dynamic, using PHP to display the tutorial you are looking for (depending on the URL).
You can enable PHP on your Nginx server by following this procedure:
- First, you need to install PHP on your system:
sudo apt install php-fpmPHP-FPM is a better choice than the usual PHP mod for performances. And it works particularly well with Nginx. - Then you have to tell Nginx to accept PHP code and extension (index.php for example).
- Edit the default configuration file:
sudo nano /etc/nginx/sites-enabled/default - Add index.php to the list of index files:
index index.php index.html index.htm index.nginx-debian.html;
- Uncomment the lines about PHP in the same configuration file:
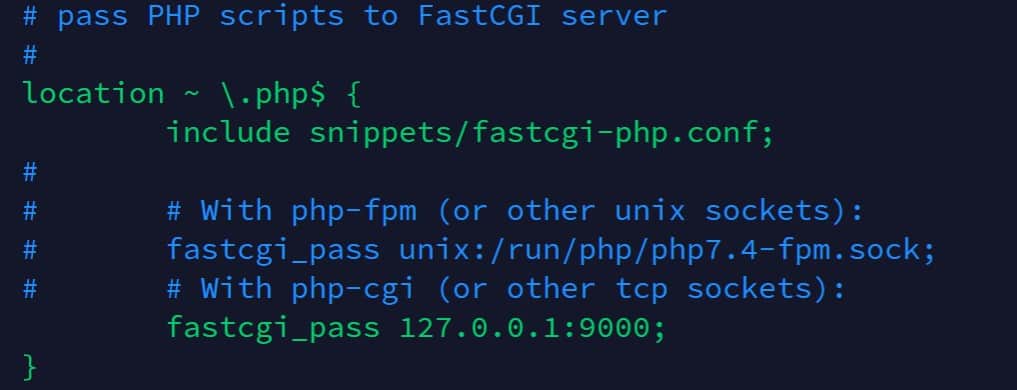
The configuration is already there in the default configuration file, you just need to remove the ‘#’ symbol at the beginning of these four lines. - Save and exit (CTRL+O, CTRL+X)
- Edit the default configuration file:
- Restart Nginx to apply the changes:
sudo service nginx restart
You can now create a test php file under /var/ww/html and check if it’s working correctly.
Here is a simple example:
<?php
phpinfo();
?>
Put these lines in a file (test.php, for example), and access it via your web browser (http://IP/test.php).
If everything is set up correctly, you should get something like that:
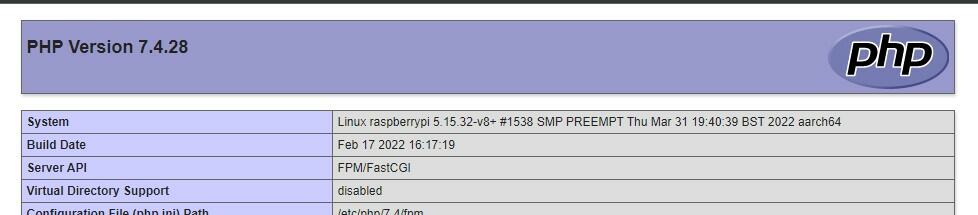
You can now use PHP code in any web page.
MySQL installation
A MySQL server is often used with PHP to store data on the server. If I take the same example as with PHP, the tutorials written on this website are all stored in a database. When you access a specific URL, PHP will do a request to the MySQL server to find the corresponding text to display.
To use MySQL with Nginx, you first need to install a MySQL server on your Raspberry Pi. I have a full guide about this, so I’ll let you click on the link and follow the other tutorial first. I will only focus here on how to user MySQL functions with PHP on a Nginx server.
The process is the same as with another web server, you just need to install one PHP module:sudo apt install php-mysql
Once done, you can now use MySQL functions in your code. Check this tutorial on W3Schools if you don’t know how to do this.
MySQL is not your only option, you can find the best database servers for Raspberry Pi here, and use it with Nginx. But MySQL/MariaDB is often the default choice for a web server.
It's a free PDF guide containing every Raspberry Pi Linux command you should know!
Download now
Want to chat with other Raspberry Pi enthusiasts? Join the community, share your current projects and ask for help directly in the forums.
FAQ
Apache vs Nginx: which one is better on Raspberry Pi?
Overall, Nginx offers better performances and can handle more simultaneous connections than Apache.
On small projects, I would recommend using the one you are the most familiar with. But if you use a Raspberry Pi with less than 512M of RAM or a single-core CPU (Pi Zero or older ones, for example), testing Nginx might be a good idea. Same thing with bigger projects, with many requests at the same time.
I tend to prefer Apache because I’m used to it, but in theory Nginx is often a better choice.
Can I run Python code with Nginx?
By default, Nginx doesn’t know how to run Python scripts. As for PHP, using fastgci_pass in the default configuration is required to use Python code on your Nginx server.
Another way could be to start a Python web server on another port, and use the Nginx proxy feature to redirect HTTP requests to this port. I’m not sure however is Nginx is really useful in this case, you can just use the Python web server directly.
If your new website is important, like with real traffic from remote users (not only you), it’s probably a good idea to put something in place to monitor it. You can read my article on the topic here: The Definitive Guide To Monitor A Website On Raspberry Pi
Whenever you’re ready, here are other ways I can help you:
The RaspberryTips Community: If you want to hang out with me and other Raspberry Pi fans, you can join the community. I share exclusive tutorials and behind-the-scenes content there. Premium members can also visit the website without ads.
Master your Raspberry Pi in 30 days: If you are looking for the best tips to become an expert on Raspberry Pi, this book is for you. Learn useful Linux skills and practice multiple projects with step-by-step guides.
The Raspberry Pi Bootcamp: Understand everything about the Raspberry Pi, stop searching for help all the time, and finally enjoy completing your projects.
Master Python on Raspberry Pi: Create, understand, and improve any Python script for your Raspberry Pi. Learn the essentials step-by-step without losing time understanding useless concepts.
You can also find all my recommendations for tools and hardware on this page.