Python: Send Emails From Your Raspberry Pi (no server)
Sending emails with Python from a Raspberry Pi can be useful for many projects. Unfortunately, it’s a client/server protocol, with authentication and security required, which means it’s not that easy to use. In this article, I’ll answer your questions and give you a function you can use in all your Python projects.
Python can use an external SMTP server to send emails from a Raspberry Pi. SSL and smtplib are the two libraries required, in addition to an email account for the sender (like Gmail).
Let’s start with a bit of theory, and prerequisites before typing any line of code, and then I’ll show you the easiest way to send an email in your Python scripts.
By the way, if you get overwhelmed as soon as Python is required for a project, I recommend checking out my e-book “Master Python on Raspberry Pi“. It will guide you step-by-step to learn the essential concepts (and only the essential concepts) required to achieve any project in the future. Raspberry Pi without Python is like a car without an engine, you miss all the fun parts. Get 10% off by downloading it today!
It's a free PDF guide containing every Raspberry Pi Linux command you should know!
Download now
Can you send emails with Python from a Raspberry Pi?
With access to an SMTP server (hosted on the Raspberry Pi directly or an external server), Python can be used to send emails. An SSL connection is established with the server to send the email to the recipient.
A bit of theory
Like with any programming language, emails are really useful. On Raspberry Pi, you’ll most likely use them for debugging purposes, so it can be a bit “quick and dirty”, but it doesn’t mean there’s a magical solution.

Join Our Community!
Connect, learn, and grow with other Raspberry Pi enthusiasts. Support RaspberryTips and enjoy an ad-free reading experience. Get exclusive monthly video tutorials and many other benefits.
Learn moreI used to code in PHP for a long time, and PHP relies on one simple function (mail) that you can use in one line to send an email in text format. No server connection, no login/password, and no email formatting.
If like me, you always mix the languages syntax, download my cheat sheet for Python here!
Download now
It takes the host server configuration directly, which is great to add debug messages in all applications hosted on the same server.
Well, in Python, there is nothing like that, you have to first create it by yourself. I’ll show you how.
But to summarize, here are the main steps:
- Create a connection with the email server (parameters: URL and port).
- Sign in to the server (username and password).
- Send an email once authenticated (recipient, email subject and body).
Prerequisites to send emails with Python
Before going any further, you’ll need a few prerequisites:
- A Raspberry Pi with Raspberry Pi OS installed: It’s not mandatory. You can follow this tutorial with any device or operating system, it’s just convenient with Raspberry Pi OS as everything is already installed. If needed, you can read my tutorial on how to install Raspberry Pi OS here.
I’ll only use the libraries “smtplib” and “ssl”, so you may need to install them if you don’t use Raspberry Pi OS, but aside from that, it should be similar. - An SMTP server: The easiest method is to use the email server from your personal email address.
You probably have a Gmail account that you can use here, but any provider should work if SMTP is allowed.
You can also use a local email server installed on the Raspberry Pi. I have the entire procedure on this website to set this up, but it’s a big project, and it’s not required to send emails in Python.
Whatever you use, try to find the server IP address or hostname (like “smtp.gmail.com”) and the port you can use to send an email (ex: “465” with Gmail). - An SMTP user account and password: SMTP requires authentication with a login and password, so make sure you have them, as you’ll use them in your code.
Warning: With Gmail, you can’t use your master password directly, you need to create an application password first. It will generate a different password, that you’ll only use in your Python code. You can create one from your Google account, see the box below for more details.
Generate an application password with Gmail
- Go to your Google Account, under Security (link here).
- Under “Signing in to Google”, click on “App passwords”.
You may need to log in to verify your account. - Then, you get a form where you can generate a new password.
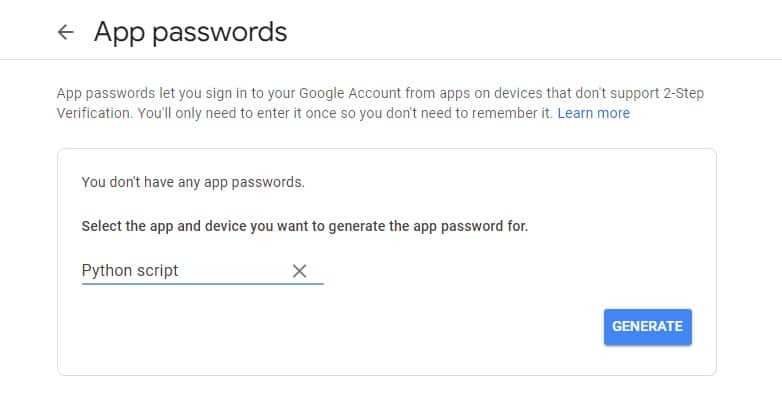
Select “Custom” and type a name to remember it was for your Python project. - It will give you a new password, keep it safe somewhere, as we’ll use it in the next part.
It's a free PDF guide containing every Raspberry Pi Linux command you should know!
Download now
If you are looking for exclusive tutorials, I post a new course each month, available for premium members only. Join the community to get access to all of them right now!
How to send an email with Python?
I’ll start by explaining how to write a simple script with the only goal to send a text email, and then show you how to improve it from there.
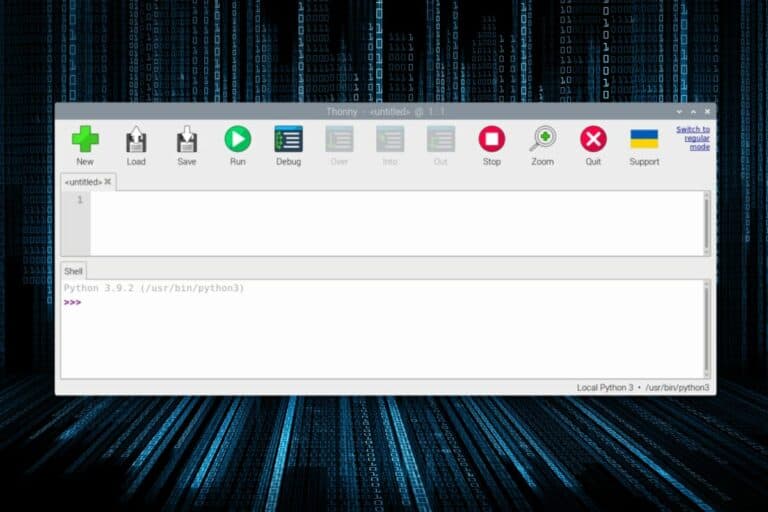
Open your favorite Python editor (here are my favorites for a Raspberry Pi), and follow the steps to write your script.
The first script to send an email in Python
Libraries
As always, the first lines of any Python project list the libraries we’ll use in our code.
As already mentioned, we only need two in this case:
- Create a new Python file within your text editor.
- Add these lines at the beginning:
import smtplib
import ssl - Save the file.
Name it with a “.py” extension, for example: “send_email.py”. - You can try to run it to make sure the libraries are available on your system.
If there is no error, you can move to the next step.
Initialization
Next, we’ll create all the variables with the email server configuration.
We took notes of the email server URL, port and credentials previously, we need all of them in our script.
Under the libraries, add these lines:
#Your SMTP server
host = "smtp.gmail.com"
port = 465

#Your credentials
login = "you@gmail.com"
password = "the-app-password"
This is what you need for a Gmail account with an app password.
Update the login and password values, and change the SMTP server section if you use another provider.
You can run the script again to make sure there is no syntax error, but it won’t do anything for now.
Build the email
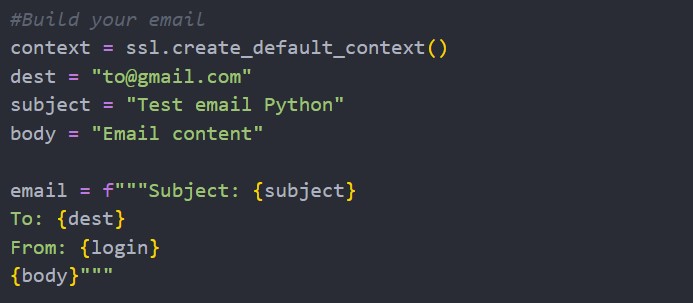
For the next step, we need to create an object for the SSL connection and define a few more variables like the email content and the recipient.
Once again, add these lines at the end of your existing script:
#Build your email
context = ssl.create_default_context()
to = "recipient@gmail.com"
subject = "Test email Python"
body = "Email content"

email = f"""Subject: {subject}
To: {to}
From: {login}
{body}"""
The first part is pretty straightforward. It’s just the typical way to use the SSL library. We’ll use the context variable later. Then, I string variables with my email content (recipient, subject and email body).
Edit the “to” variable with an email address from you for the tests. Try to use a different email than the sender if possible (depending on your provider, you may not receive emails from yourself).
If like me, you always mix the languages syntax, download my cheat sheet for Python here!
Download now
In the second part, we create a multi-line variable, as we’ll send it in one block in the next addition.
It’s a weird syntax that I have never seen before learning Python, but the idea is just to concatenate everything in one paragraph.
The variables between braces {} will be replaced by their value defined above, generating a static text like that after compilation:
Subject: Test email Python
To: recipient@gmail.com
From: you@gmail.com
Email content
Run the script again to make sure you don’t have any syntax errors, as it’s easy to make a mistake at this point.
Send it
We now have defined everything we need, and can use the smtplib library to do the hard work for us.
Add these lines at the end of your script:
#Send email
with smtplib.SMTP_SSL(host, port, context=context) as server:
        server.login(login, password)
        server.sendmail(login, to, email)
Save the script and run it. It should work this time.
With most editors, you have a button to run your Python code, but if needed, you can always test it from a terminal with:python send_email.py
The entire script looks like:
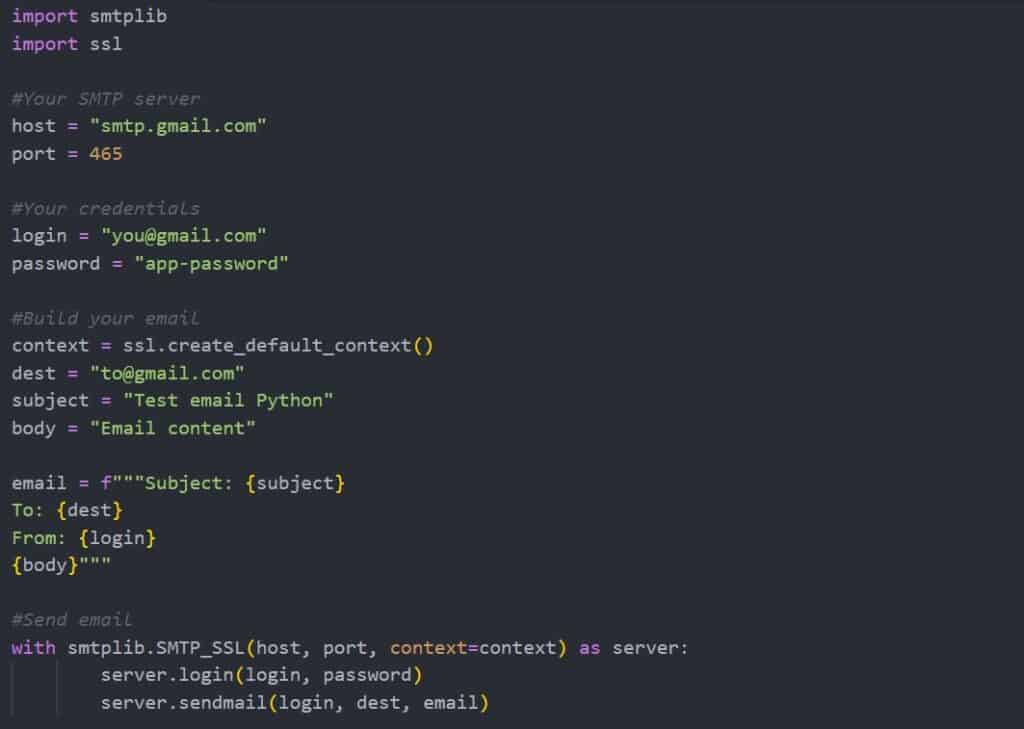
Here is my code if you want to copy/paste it entirely:
import smtplib
import ssl

#Your SMTP server
host = "smtp.gmail.com"
port = 465

#Your credentials
login = "you@gmail.com"
password = "app-password"

#Build your email
context = ssl.create_default_context()
dest = "to@gmail.com"
subject = "Test email Python"
body = "Email content"

email = f"""Subject: {subject}
To: {dest}
From: {login}
{body}"""

#Send email
with smtplib.SMTP_SSL(host, port, context=context) as server:
        server.login(login, password)
        server.sendmail(login, dest, email)
Upgrade: Create a reusable function
Once you have successfully sent your first email, I recommend turning this script into a function that you can use anywhere in your project, with only one line instead of 20.
A function is an essential element of any programming language, that can take parameters, and once defined, be called directly. It avoids having to use the same lines all over your code.
In Python, the keyword “def” allows you to create a new function.
My updated code looks like this:
import smtplib
import ssl

def send_simple_email(to, subject, body):
    #Your SMTP server
    host = "smtp.gmail.com"
    port = 465

    #Your credentials
    login = "you@gmail.com"
    password = "app-password"

    #Build your email
    context = ssl.create_default_context()

    email = f"""Subject: {subject}
To: {to}
From: {login}
{body}"""

    #Send email
    with smtplib.SMTP_SSL(host, port, context=context) as server:
        server.login(login, password)
        server.sendmail(login, dest, email)


#Your code
send_simple_email("to@gmail.com","Hello there","How are you doing?")
So, we have a first big block with the function definition, and then we can simply use it in one line.
This screenshot might be clearer to understand:
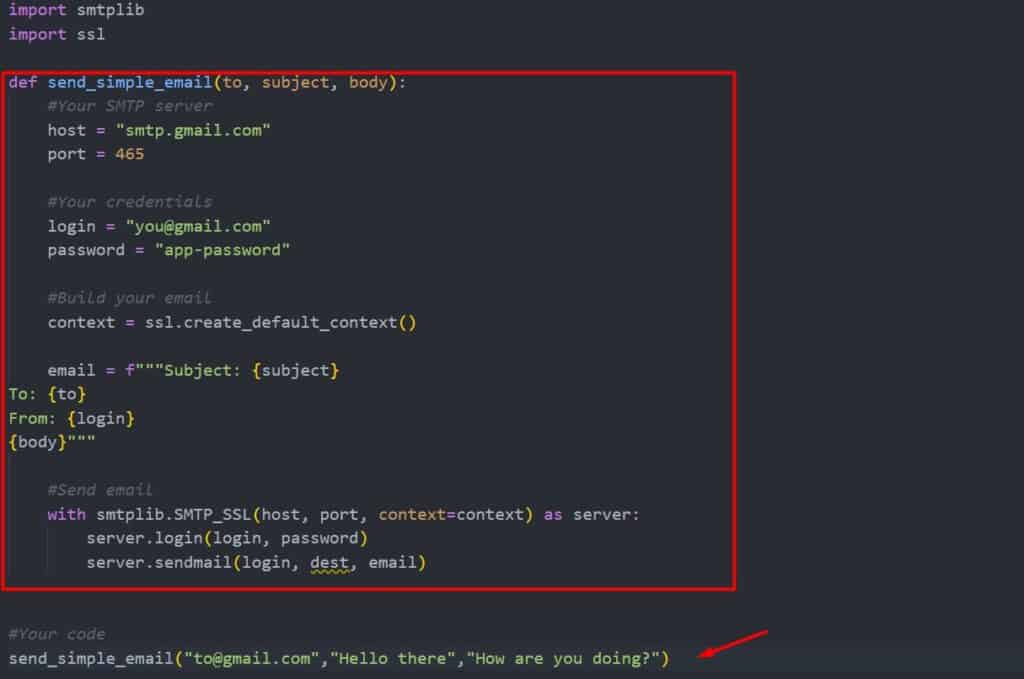
In the big red square, we define the function “send_simple_email” with 3 parameters: recipient, subject and content.
Then, you’ll only use the last line each time you need to send an email.
If you are more advanced with Python, there are other ways to do this to keep your main script as short as possible, like creating a class or using a separate file, but if you are new to this, it’s already better than the previous version.
The other benefit is that if you need to change the SMTP server or credentials, you only have to change it once (inside the function).
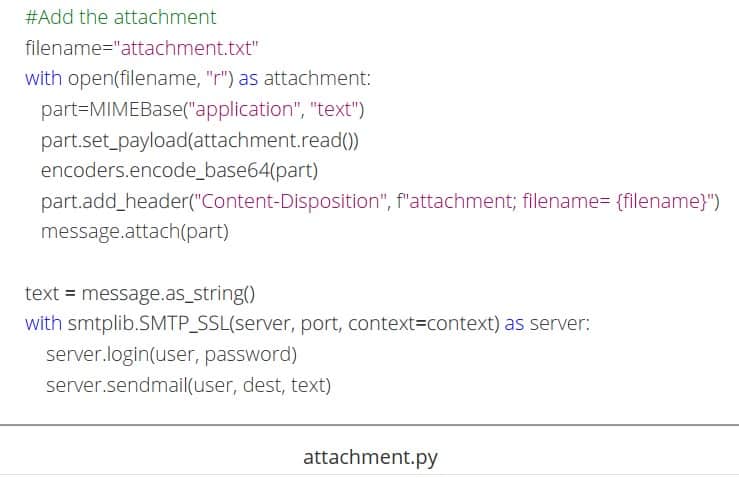
How to add attachments to your Python emails
Sending attachments in Python is a bit more complicated. Instead of using a text variable for the email content, a MIME object has to be built. MIME stands for “Multipurpose Internet Mail Extension” and requires other Python libraries.
I won’t give all the details here, as it could be a dedicated tutorial, but I explain everything in my book (“Master Python on Raspberry Pi“), with code examples.
To summarize, you’ll need to:
- Use the email library, which allows you to create a MIME attachment.
- Keep using smtplib and SSL for the connection to the SMTP server.
- Load your attachment file into a MIME part object.
- Convert the MIME part into a text message, and send it the same way as previously.
Anyway, I hope this article answered your original question(s) about sending emails with Python.
Knowing that you can now use this new skill with fascinating Python projects, here are a few examples:
- 15 Fun Raspberry Pi Projects to Experiment with Python
- The 11 Best Raspberry Pi Robots Kits for Beginners
- Get Started The Right Way With OpenCV On Raspberry Pi
Whenever you’re ready, here are other ways I can help you:
The RaspberryTips Community: If you want to hang out with me and other Raspberry Pi fans, you can join the community. I share exclusive tutorials and behind-the-scenes content there. Premium members can also visit the website without ads.
Master your Raspberry Pi in 30 days: If you are looking for the best tips to become an expert on Raspberry Pi, this book is for you. Learn useful Linux skills and practice multiple projects with step-by-step guides.
The Raspberry Pi Bootcamp: Understand everything about the Raspberry Pi, stop searching for help all the time, and finally enjoy completing your projects.
Master Python on Raspberry Pi: Create, understand, and improve any Python script for your Raspberry Pi. Learn the essentials step-by-step without losing time understanding useless concepts.
You can also find all my recommendations for tools and hardware on this page.