

Passive Cooling for Raspberry Pi – Is It Enough?
Before the release of the Raspberry Pi 4 in 2019, cooling wasn’t a major concern for us. However, recent models are more powerful and using some kind of cooling system is increasingly recommended. But do you really need a fan, or can passive cooling be enough for you?
Overall, heatsinks or a passive case can generally replace fans to keep a Raspberry Pi cool. Fans are noisy and a bit overkill, while passive cooling solutions are generally sufficient and won’t make any noise.
In this guide, I’ll explain what I mean when I talk about passive cooling, the different solutions available, and whether or not it’s right for you.
If you’re looking to quickly progress on Raspberry Pi, you can check out my e-book here. It’s a 30-day challenge where you learn one new thing every day until you become a Raspberry Pi expert. The first third of the book teaches you the basics, but the following chapters include projects you can try on your own.
Passive cooling introduction
Let’s start with a quick introduction to make sure we’re all on the same page when it comes to passive cooling.
What is passive cooling?
Passive cooling is a common solution for keeping a computer’s temperature in the ideal range without using a fan. It generally works with a piece of metal placed on top of the CPU or GPU to dissipate heat (heat sinks).
In a desktop computer, it typically looks like this:

Join Our Community!
Connect, learn, and grow with other Raspberry Pi enthusiasts. Support RaspberryTips and enjoy an ad-free reading experience. Get exclusive monthly video tutorials and many other benefits.
Learn more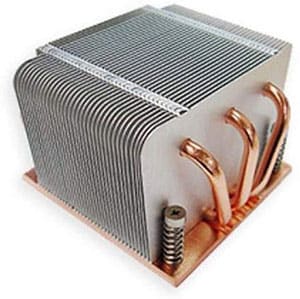
(source: Amazon)
(source: Amazon)
Of course, it’s not that big for a Raspberry Pi, but you can still find solutions using the same idea.
If you are lost in all these new words and abbreviations, request my free Raspberry Pi glossary here (PDF format)!
Download now
Will passive cooling be enough?
Overall, passive cooling is a good enough solution for entry-level processors in computers used for typical office tasks and web browsing.
In my last desktop computer, I had a completely passive solution for cooling, and it worked perfectly. The only limitation was that when I played for a few hours, the system could not stay at an optimal temperature, but at least it was quiet when I was working.
That’s why it’s important to take the time to think about what hardware you’re going to use and what you’re going to do with it. That’s the purpose of this article, to show you the different solutions and help you find the right one for you and your device.
Solutions
To summarize, there are basically four ways to keep your Raspberry Pi at the right temperature:
- By using only small heat sinks on the key components.
You can find my tutorial on how to install them on Raspberry Pi 3B+ here. - By using a passive cooling case, as we’ll see in this post.
- By using a passive case + a fan (in case of overheating).
The Pironman I tested here is the typical example, the fan only runs when needed (you can even configure when). On the Raspberry Pi 5, you also have the active cooler that does the same thing. - Or just using fans to cool everything.
That’s the typical setup you’ll use with cheap cases.
We’ll discuss the pros and cons of these solutions in the next section.
Passive cooling solutions
Available products
You can find many passive cooling solutions for Raspberry Pi 4 on the Internet. Since the heat of the device was the main issue at its release, many manufacturers have worked on this to offer the best product (passive, active and giant fans).
I have also read many good reviews about the Flirc Case and the Argon Neo if you want to give a try (links to Amazon).
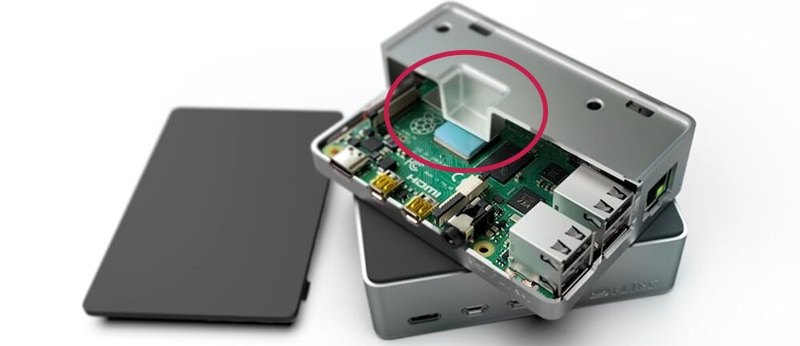
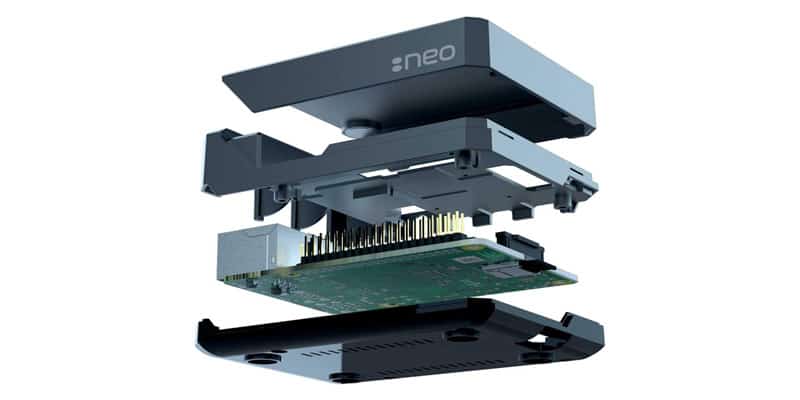
You can read my reviews about the Flirc Case and the Argon Neo by clicking on the links. Both are good, I give you the results of my tests in these articles.
My choice for this test
But for this test, my final choice was on the Geekworm metal case on Amazon.
It was the only one available when the Raspberry Pi 4 was released, so I bought it immediately and will use it as an example to prove my point here.
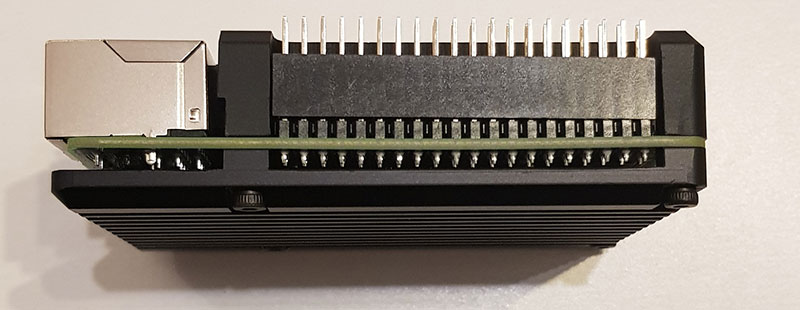
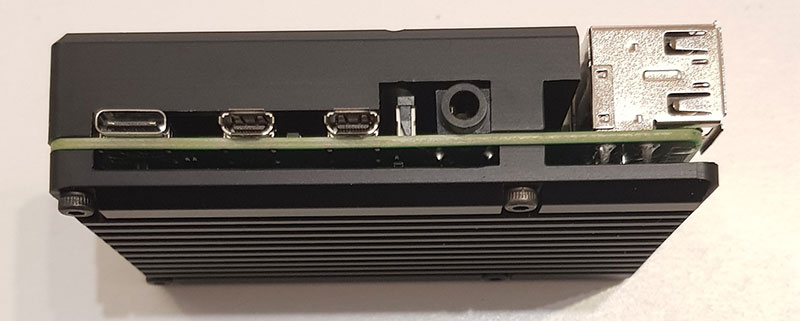
This product uses two aluminum plates to cool the Raspberry Pi (above and below the board). And the good news is that the GPIO remains accessible without opening or removing the case. Here is what it looks like:

You also keep access to the other ports, like the camera. You can even extend the GPIO pins to use a HAT without removing the case:
This product looks perfect on paper, and I’m eager to see how it performs in a stress test.
If you are lost in all these new words and abbreviations, request my free Raspberry Pi glossary here (PDF format)!
Download now
Passive cooling: stress test results
The idea of a stress test is to run the Raspberry Pi at 100% of its capacity for a while and see how the temperature changes. This is the ultimate test to see if the cooling solution is efficient enough.
But let’s start by assembling the passive case I used for this experiment.
Package & installation
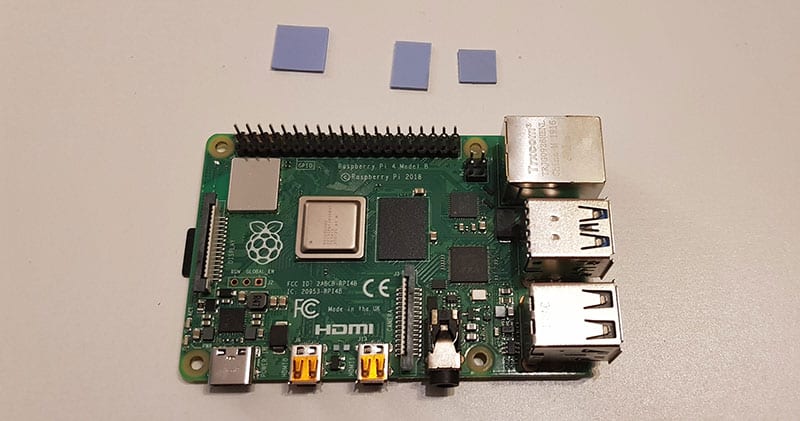
The package of my passive case contains everything you need:
- Two passive plates
- 2x GPIO extenders
- 3x thermal tapes
- 4x screws
- A Torx wrench to assemble everything

A paper manual is included, but the installation is pretty intuitive:
- Take your Raspberry Pi and the three thermal tapes:
- Put them on each corresponding component:
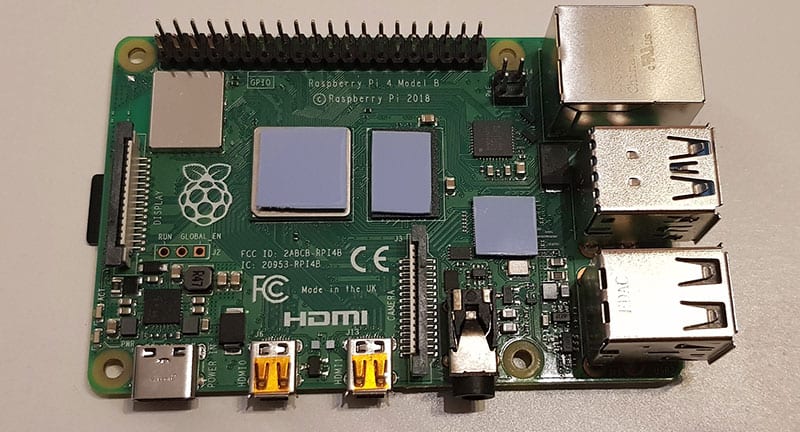
It doesn’t stick very well, but it’s enough to do the job. - Place your Raspberry Pi on the bottom case cover.
- Then, put the top case cover on it.
- And finally install the 4 screws .
That’s it, your passive case is ready to use
Test protocol
I will use the same test protocol as in my Ice Tower review, so you can compare the results with my current case and the Ice Tower:
- Leave the Raspberry Pi off for 15 minutes to make sure it’s cool.
- Boot the Raspberry Pi with Raspberry Pi OS (desktop, full version, no app running).
- Start the script for the experiment, as soon as possible after the boot.
The test is running during 3 minutes with all CPU at 100%. - Note the results (temperature) and share them with you.
Let’s do this!
Test results
Previous experiments & hypothesis
Before looking at the results and graphic, let’s do a quick reminder about the expectations we might have. As I told you previously, I have already made this kind of test of the past, when reviewing the ICE Tower.
Here is what I got last time:
- No cooling system: The idle temperature is about 45 °C and increase quickly to 70 °C after a 3 minute stress test.
- Heat sinks: Almost the same results, with 2 to 5 degrees under the previous value.
- Basic fan: Idle temperature near 35 °C, and the maximum stay under 60 °C.
- Ice tower: Always under 40 °C.
My expectations here are to get almost the same result as with a fan. So, I could keep the case as my primary one, and enjoy a silent operation. But let’s see what happens 🙂
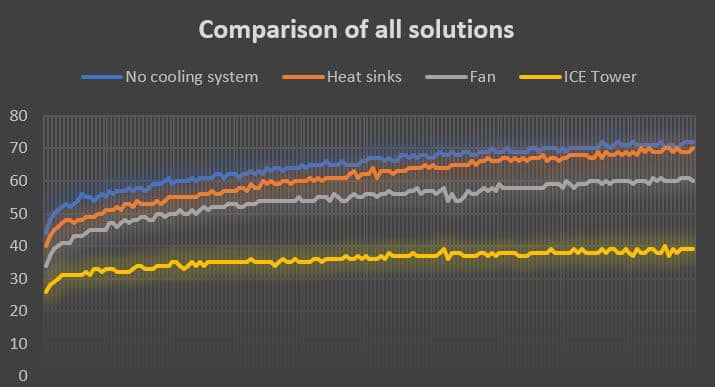
Passive case results
Ok, so there is only one result on this graph: Degrees Celsius on the Y-axis, and time in seconds in the X-axis.

Wow!
This passive case results are very close to those I got with the ICE Tower.
This is way beyond my expectations. 🙂
The temperature stays below 45°C throughout the test, with an idle temperature as low as 31°C. After 3 minutes, the temperature starts to rise slowly, reaching 50°C after 5 minutes. I didn’t let it run longer, but if you have a constant load on your Pi, this might not be the best option (or choose the fan alternative below).
Note: I’m not sure if we can compare these results with the passive case results, as there has been the Raspberry Pi OS “thermal” update between the two reviews. I didn’t test everything again, but I only get a 5 °C difference without fan. So, these results in themselves are excellent
It's a free PDF guide containing every Raspberry Pi Linux command you should know!
Download now
Where to buy it?
As often, I bought mine on Amazon, so you can probably do the same thing.
The case is pretty cheap (close to other basic models),you can check the price here on Amazon.
On the same page, there is an alternative with fans if the passive case is not enough for you: Here is the direct link to it.
Please let me know in the community if you have tried it and have other opinions.
It's a free PDF guide containing every Raspberry Pi Linux command you should know!
Download now
Want to chat with other Raspberry Pi enthusiasts? Join the community, share your current projects and ask for help directly in the forums.
Conclusion
That’s it, this is the end of this review, I hope you enjoyed it.
In summary, this passive case is perfect for cooling the Raspberry Pi 4, and I highly recommend using a passive cooling solution. If you use your Pi as a retro gaming console or media center, you’ll love it.
If you are looking for other reviews (for more intense usage maybe), leave a comment in the community with the stuff you are looking for, and I will see if I can test it in a next post. For now, you can already check these tests:
- Raspberry Pi 4 Cooling: Seeed Studio ICE Tower Review
- Flirc Case Review: Is it Really the Best? (6 Months Usage)
- Argon NEO: Honest Review After 1 Month Usage
Whenever you’re ready, here are other ways I can help you:
The RaspberryTips Community: If you want to hang out with me and other Raspberry Pi fans, you can join the community. I share exclusive tutorials and behind-the-scenes content there. Premium members can also visit the website without ads.
Master your Raspberry Pi in 30 days: If you are looking for the best tips to become an expert on Raspberry Pi, this book is for you. Learn useful Linux skills and practice multiple projects with step-by-step guides.
The Raspberry Pi Bootcamp: Understand everything about the Raspberry Pi, stop searching for help all the time, and finally enjoy completing your projects.
Master Python on Raspberry Pi: Create, understand, and improve any Python script for your Raspberry Pi. Learn the essentials step-by-step without losing time understanding useless concepts.
You can also find all my recommendations for tools and hardware on this page.


I am surprised to hear your coment about noise from the fan. I have to pick my PI 4 up and hold it near my ear to hear my fan, otherwise it is only the light on the fan that shows it is running!
“Fanshim”
Hi Chris,
It probably depends on the case you use, but mine was pretty noisy
We have a new cooling solution for Raspberry Pi. Having the HAT form factor, the Smart-fan uses only the I2C pins and passes through all the GPIO pins for your use. The fan has a 32-bit processor and a step-up power supply which converts the 5V to 12V. The processor uses PWM to modulate the fan, spinning it just enough to maintain the CPU temperature. It is very quiet and never uses more energy than needed. Currently on Kickstarter,
https://www.kickstarter.com/projects/279405789/smart-fan-ideal-cooling-solution-for-raspberry-pi/
What are your results regarding the WiFi performance after the installation of the kit? It is known that a metal case reduces significantly the WiFi signal.
I don’t remember, but I think it should be ok. The case is not completely closed.
There are some gaps all around, for the GPIO pins and camera.
Should be way better than the Flirc Case for example.