Raspberry Pi: EVICIV 10.1″ Touchscreen Review (With pictures)
I’m always on the hunt for good accessories to go with my Raspberry Pi. Finding a good screen for regular but intermittent use is not as easy as it seems. I don’t want a large computer monitor on my desk to only use it a few hours a week, but I don’t want something too small that I can’t use. And there are also different features and price ranges depending on the brand, quality, and other factors.
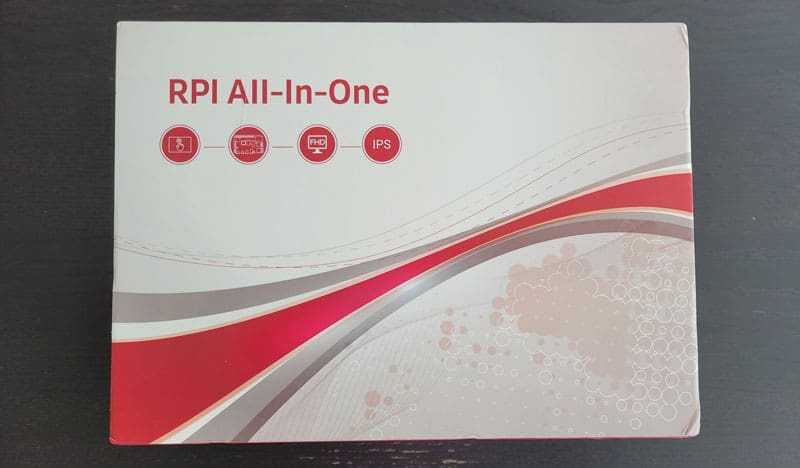
Anyway, in this article I’ll review a new challenger: the 10.1″ Touchscreen from EVICIV, that you can find on Amazon for less than $200. It’s an all-in-one monitor, meaning you can use it as a standard monitor or put your Raspberry Pi inside the case on the back to keep your desk cleaner (less cables).
The all-in-one monitor I review today is available on Amazon if you are already interested.
On paper, it seems like a good middle ground between two products that I’ve already tested and that I’ll refer to a few times in this article:
- The SunFounder 7″ Touchscreen: A traditional screen for the Raspberry Pi, which does not have a case and is smaller than the screen I tested today, but by much.
- The RasPad 3: A high-end product from SunFounder. The difference with the one tested in this article is that the RasPad has a battery, so it’s closer to a tablet than the one I’m testing today.
Anyway, let’s dive in the review. If you are looking for a new monitor for your Raspberry Pi, I will try to answer all your questions in this article.
Note: To be transparent, EVICIV sent me this product for free, to test it and write a review. But I’m free to share with you my honest opinion about it. Just know that I didn’t pay for it, which possibly can play a role in my impressions.
Features
The 10.1″ Touchscreen from EVICIV is not a basic product, so it’s great for a Raspberry Pi or even for other devices. Here are the main features to take into consideration:
- 10.1″ monitor, with a 60Hz refresh rate.
- Touchscreen: Capacitive touch with 10 points touch (so you can do the same moves as on your smartphone: scrolle, swipe, zoom, etc.).
- Several resolutions available: 1024×600, 1280×800, 1366×768 and 1920×1200.
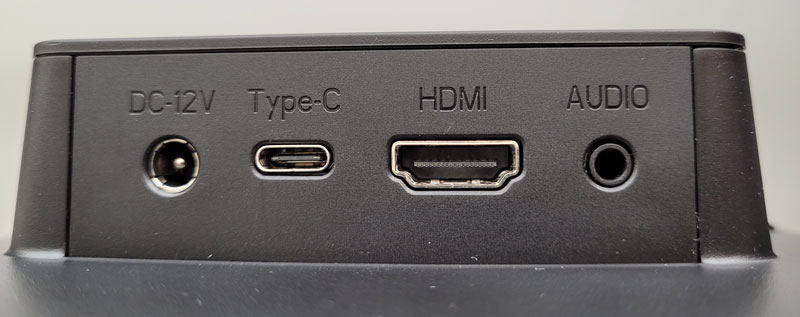
- Input: HDMI, USB-C.
Yes, you can plug a computer, another Raspberry Pi or even your smartphone to this screen. - Output: 3.5 mm audio jack
- Integrated speakers.
- Adjustable stand (wall mount is possible too).
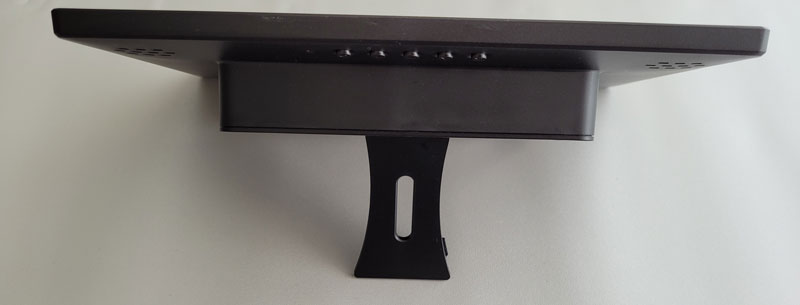
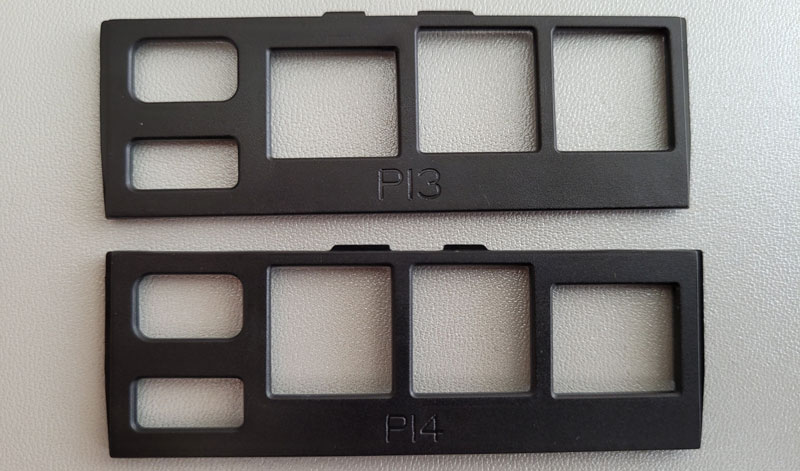
And obviously, there is the case behind the screen where you can embed your Raspberry Pi. It’s compatible with the Raspberry Pi 3 and 4. Two side panels are included to fit with your Raspberry ports on one side. The other side is reserved for the screen ports (HDMI, USB-C, power and audio jack).
Pricing
I don’t like writing about prices because they often change, so I’ll let you check the current price on Amazon to get an idea.
If you are lost in all these new words and abbreviations, request my free Raspberry Pi glossary here (PDF format)!
Download now
But as a whole, I find the pricing accurate. It’s priced in between the two products I gave as a reference in the introduction. It’s cheaper than the RasPad (but no battery) and more expensive than the Sunfounder 7″ (but bigger and with a case, so not really comparable).
I’m not saying it’s cheap and I understand that it might be too expensive for some of you, as it’s the same price as a computer screen. But it includes features that I think explain the price, like the touchscreen and the case for your Pi.
It’s your decision to make, but I don’t see any major concerns initially with the price of this product. Let’s move forward and see how it goes after the delivery.

Join Our Community!
Connect, learn, and grow with other Raspberry Pi enthusiasts. Support RaspberryTips and enjoy an ad-free reading experience. Get exclusive monthly video tutorials and many other benefits.
Learn moreUnboxing and assembly
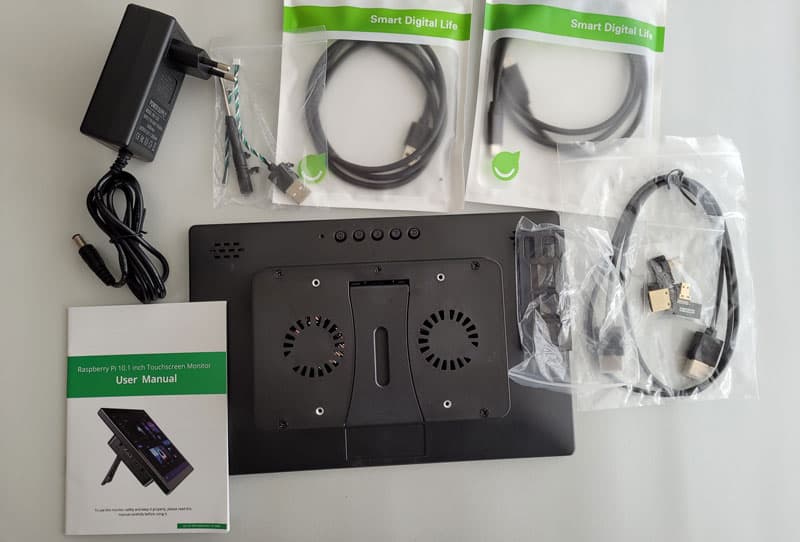
The product comes with everything you need to use it (except the Raspberry Pi, obviously):
- The screen.
- The power supply.
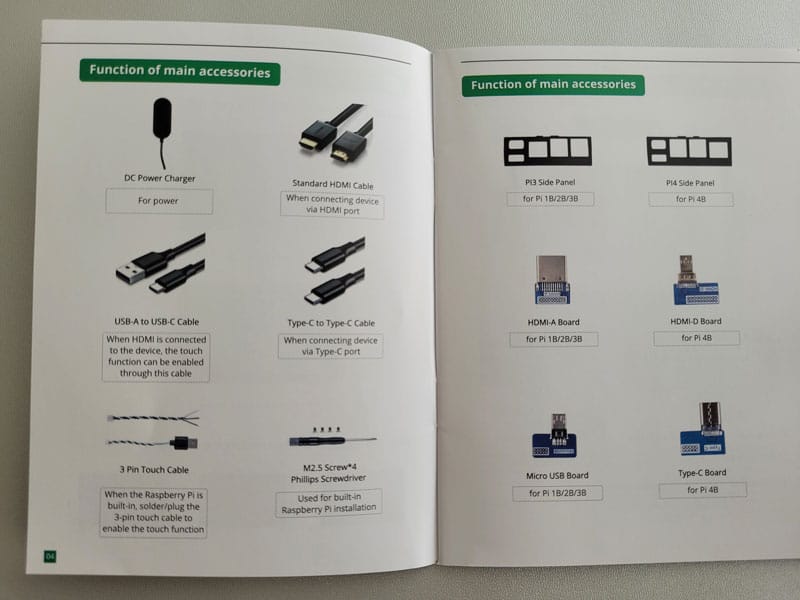
- A few cables: USB to USB-C, USB-C/USB-C, HDMI/HDMI.
- A user manual.
- The two side panels (for Raspberry Pi 3 or 4).
- The tiny USB cable on the top left is for the touchscreen. You’ll plug the USB side on the Raspberry Pi and the other side inside the case. You can also solder the other cable if you prefer. We’ll talk about this later.
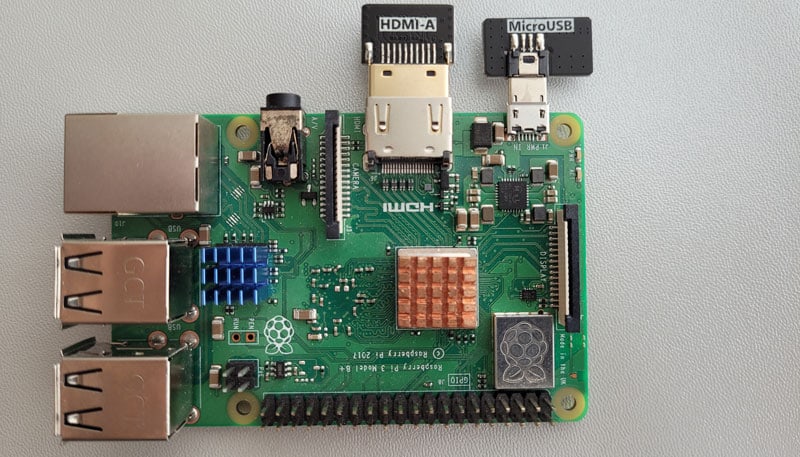
- There are a few plugs to connect the Raspberry Pi output to the monitor (HDMI, Micro-HDMI, USB-C and Micro-USB). It’s a smart way to make the case compatible with Raspberry Pi 3 and 4. I’ll show you some pictures.
- A screwdriver.
That’s it. So, you have the user manual to help you with the first steps. It’s in color and pretty well done. I would have loved something more straightforward, but I understand that there are several ways to use the screen, so it’s normal.
If you just want to use it as a screen for a Raspberry Pi or another device that you keep outside, you have nothing to do, just plug your device into the HDMI input, and it’s done. But if you want to put a Raspberry Pi inside, you’ll need to follow the instructions.
Basically, the steps are not as complicated as it might seem at first glance:
- Remove the back panel to access the case.
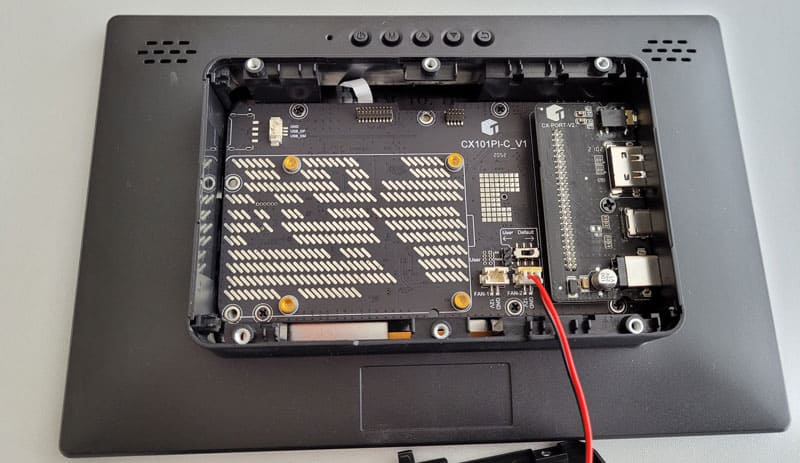
- Replace the plain side panel (on the left in the previous picture) with the one corresponding to your Raspberry Pi model.
- Plug the adapters corresponding to your Raspberry Pi for display output and power input.
- Use the screws to fix everything, don’t forget to plug the USB cable for the touchscreen feature.
Gently push down on the adapters to connect them to the main board.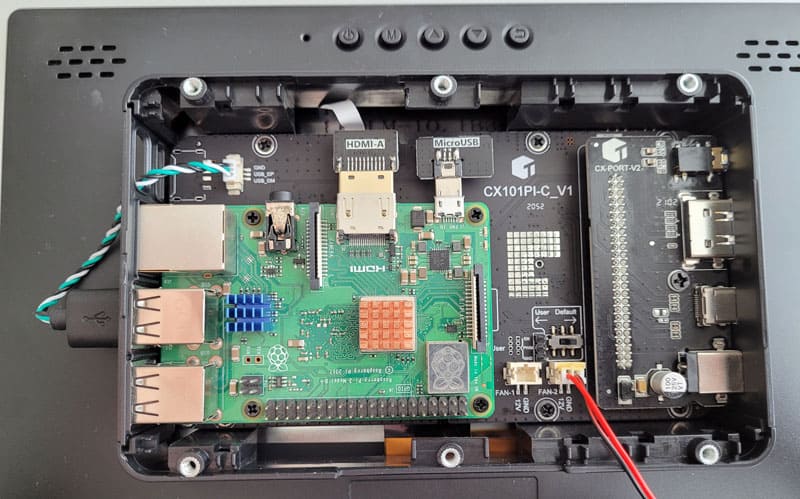
- Then you can close the case, and you are ready to go.
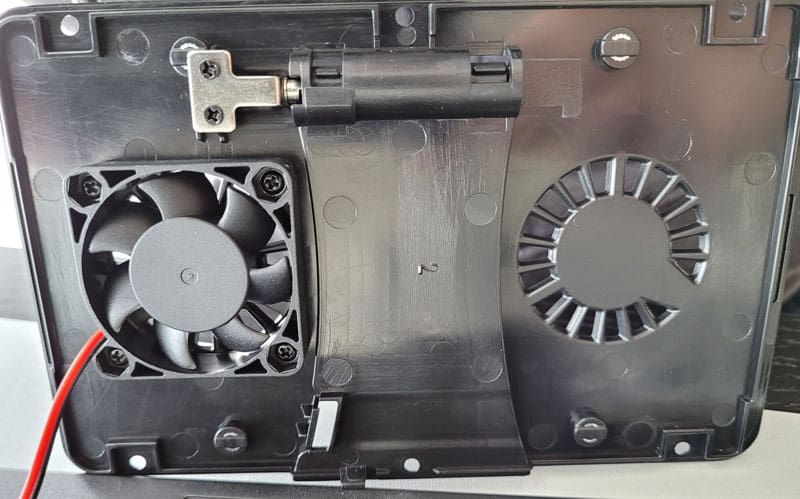
The red cable you see at the bottom right is for the fan. Yes, like the RasPad 3, there is a noisy fan in the case to cool everything correctly. As we’ll see later, the main usage for this case is for something running 24/24, so it’s probably a good idea to keep the fan.
As a whole, the assembly is pretty good. The main difference with the RasPad is that you’ll use the Raspberry Pi ports directly (the RasPad uses a motherboard that you plug everything into, and this motherboard has external ports). Both systems have pros & cons, so it’s not a big deal.
The USB cable for the touchscreen that goes outside the case is not pretty, but you don’t really see it once the screen is on its stand. The alternative is to solder a cable on the GPIO pins. I’m not ready to leave my Raspberry Pi 3B+ inside this monitor forever, so I didn’t do it, but it’s possible.
The smartest among you will probably have noticed a major issue with this product (I wasn’t smart enough, I didn’t pay attention to it until closing everything):
- The SD card slot is in the middle of the case, you don’t have any access to it once the Raspberry Pi fixed.
- The camera port and GPIO pins can’t be used while the Raspberry Pi is inside the case.
So if you put a Raspberry Pi inside this monitor, that’s pretty definitive. You can’t change the SD card, and they want you to solder a cable to your Pi. It seems a great product for a dashboard, digital signage in retail, or something like that, but not really a good fit for someone like me that tests something new every day. Or at least I shouldn’t put my Raspberry Pi in it to just use it as a monitor.
If you are lost in all these new words and abbreviations, request my free Raspberry Pi glossary here (PDF format)!
Download now
Note: The audio jack of the Raspberry Pi is not connected to the jack output of the screen, but it works. I suppose the screen redirects the sound coming from the HDMI connection to the jack output.
So, we start to see two scenarios: either using it as a normal screen, with the HDMI input, or using it with a Raspberry Pi inside, to display something 24/24 or at least something where you never change the SD card and don’t need GPIO/camera.
We’ll now take a look at more details of these two cases.
Using it as a screen
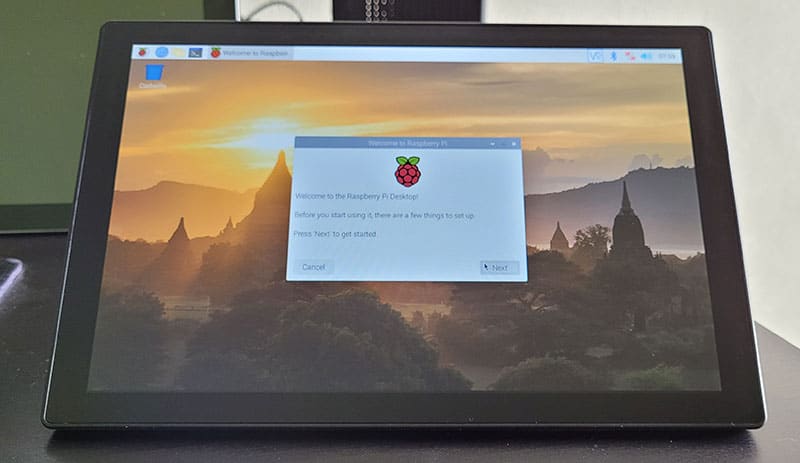
The first thing you can do is to use it as a simple screen. You won’t lose time with the assembly, you can just plug your HDMI cable on the side, and you are reading to go.
Once plugged, the screen should switch automatically to display your Raspberry Pi operating system, but there is a menu on the screen that you can use to choose between three sources: HDMI-IN, HDMI-RPI, and USB-C.
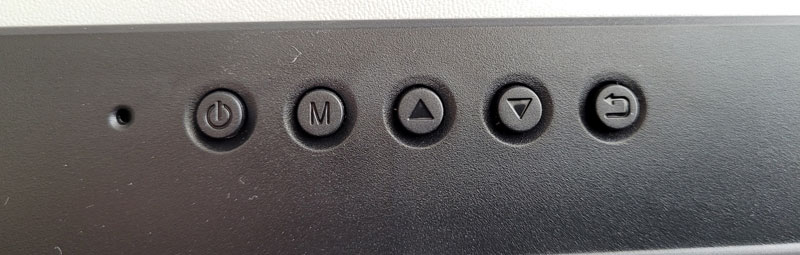
That’s the button on the right of this picture. You’ll use the up and down arrows to choose the source you want. The button with an “M” is here to change the main settings like on any screen (luminosity, contrast, etc.).
Two remarks about this usage scenario:
- The fan inside the case will run even if you don’t have a Raspberry Pi inside. You can unplug it if you want, but it’s on by default, so you have a bit of noise when you turn on the screen.
- You need to use the USB-A/USB-C cable to use it as a touchscreen.
I think that it works pretty well. You have your Raspberry Pi outside, in another case (like the Argon Neo), with access to everything (GPIO, SD card, camera, etc.). I would just shut down the fan, and I’m fine with it. It’s a better solution for me than the SunFounder 7″ I tested previously, 10″ is a way better size for a screen.
You can probably find cheaper options if you don’t need the touch feature, but as a whole, this screen is well priced.
Great comment from Theo about the fan:
The fan can be controlled by the settings in the menu (M-button) of the display itself. No need to disconnect or remove the fan if just used as a monitor:
- Press M to open the menu
- Press Up/Down arrow to go to the Display-settings and press M to enter this option
- Press Up/Down arrow to go to the Fan-settings and press M to enter this option
- Press Up/Down arrow to set it to On or Off and save it by pressing M
- Press 2 times on the Return button to exit the menu
Using the case
The second case is to use it like a case (sorry …). No seriously, that’s the natural way to use it as it’s built for it. Put your Raspberry Pi on the back of the screen as explained in the assembly part, and you are ready to go:
The main issue you have to keep in mind is that reinstalling the system won’t be easy, as you have to disassemble everything to change the SD card. But I can see several projects where it could be a good fit:
- Digital signage: This is the first thing that comes to mind, I just have no idea if a screen of that size can be useful. Maybe to take orders in a restaurant or do a satisfaction poll? You can use a tool like Screenly to do this.
- Retro-gaming: Once you have found the best gaming operating system and put all your games on it, you don’t really need to change the SD card.
- A static tablet: I mostly use my iPad to watch videos. I could install Android on a Raspberry Pi and use this screen to watch any of the media services (Netflix, Prime videos, etc.).
- Magic mirror: I already told you this in my RasPad 3 review, but you don’t really need a “mirror” to use the magic mirror software. I can see a screen like this as a great dashboard with your calendar, tasks and reminders (read my detailed article about it here).
- Desktop usage or media center: maybe the screen is a bit small for this, but for kids or limited use it might work.
I’m sure there are plenty of options, but it’s a shame that they didn’t put an SD card slot that you can access on the side, it would have been perfect. Anyway, let’s take a moment to list the pros and cons of this product.
It's a free PDF guide containing every Raspberry Pi Linux command you should know!
Download now
Pros & cons
| Pros | Cons |
|---|---|
| Well-sized monitor, 10″ is perfect. | No direct access to the SD card. |
| Multi-fonctions: external screen or “tablet” (no battery). | No access to the GPIO/Camera ports. |
| Good packaging, user manual, and all the cables included. | Noisy fan, even when used as a screen. |
| Well-priced. | |
| Decent finish, easy to use and assemble. |
As a whole, it’s a good product, I just think they missed some convenient features, or maybe I’m just not their ideal customer. Anyway, I will still continue to use this screen on a daily basis, as it’s the best one I have. The Sunfounder 7″ is too small for me, and the RasPad 3 has other issues that annoy me from time to time. I’ll just use it as an external screen and unplug the fan because I switch my SD cards (or Pi model) almost every day.
It's a free PDF guide containing every Raspberry Pi Linux command you should know!
Download now
If you are looking for exclusive tutorials, I post a new course each month, available for premium members only. Join the community to get access to all of them right now!
Is this screen a good fit for you?
To sum up, this screen is a good fit for you if:
- You alway use the same SD card and want a compact solution with a monobloc case/screen. Just one power cable and everything is set up. The fan noise is not an issue, or you don’t use it 24/24 and can unplug it.
- You just want a good touchscreen, and will plug your Raspberry Pi (or another device) to the HDMI port. You can use the USB-C port for the touchscreen.

Ready to place your order? You can find this screen on Amazon.
If you want a tablet, with a battery, the RasPad will be a better option, perfect for kids to watch their favorites cartoons.
Whenever you’re ready, here are other ways I can help you:
The RaspberryTips Community: If you want to hang out with me and other Raspberry Pi fans, you can join the community. I share exclusive tutorials and behind-the-scenes content there. Premium members can also visit the website without ads.
Master your Raspberry Pi in 30 days: If you are looking for the best tips to become an expert on Raspberry Pi, this book is for you. Learn useful Linux skills and practice multiple projects with step-by-step guides.
The Raspberry Pi Bootcamp: Understand everything about the Raspberry Pi, stop searching for help all the time, and finally enjoy completing your projects.
Master Python on Raspberry Pi: Create, understand, and improve any Python script for your Raspberry Pi. Learn the essentials step-by-step without losing time understanding useless concepts.
You can also find all my recommendations for tools and hardware on this page.