15 Raspberry Pi Network Projects for Home and Office Use
You can use a Raspberry Pi for almost anything these days, but network projects are generally my favorite. These projects can be quite useful, most don’t require any extra hardware, and the initial setup is generally pretty easy. Also, I’ve been a network administrator for years, so I guess I’m not necessarily objective here.
Anyway, if you are looking for inspiration for projects you can quickly try at home or on a larger network, here are 15 ideas for you. For each idea listed, I link to my step-by-step tutorials to guide you through the installation.
If you’re looking to quickly progress on Raspberry Pi, you can check out my e-book here. It’s a 30-day challenge where you learn one new thing every day until you become a Raspberry Pi expert. The first third of the book teaches you the basics, but the following chapters include projects you can try on your own.
Smart home assistant
Using a Raspberry Pi as a home assistant is a popular project for any Raspberry Pi owner. It’s popular because once connected to all your smart devices, it makes the Raspberry Pi really useful in your home setup (which is not the case with all projects).
Home Assistant is probably the best option if you want to try this, it will automatically detect all your smart devices, and you can configure them directly from a web interface:

But it’s not the only one (HOOBS is another one).
Also, I have Python Hue light and there is an API to interact with them directly with Python (or any other language). So, if you’re looking for a challenge, programming your smart devices might be an interesting project.
In my book (“Master Python on Raspberry Pi“), I explain in detail how I programmed mine to turn on and off automatically based on the sunset and sunrise times, but you can check the link below for a short tutorial to get you started.
Related articles:
- Getting Started With Home Assistant on Raspberry Pi (2 ways)
- Raspberry Pi: How to control lights at home? (Philips Hue)
- Install HOOBS on Your Raspberry Pi in 10 Minutes or Less
Network-wide ad blocker
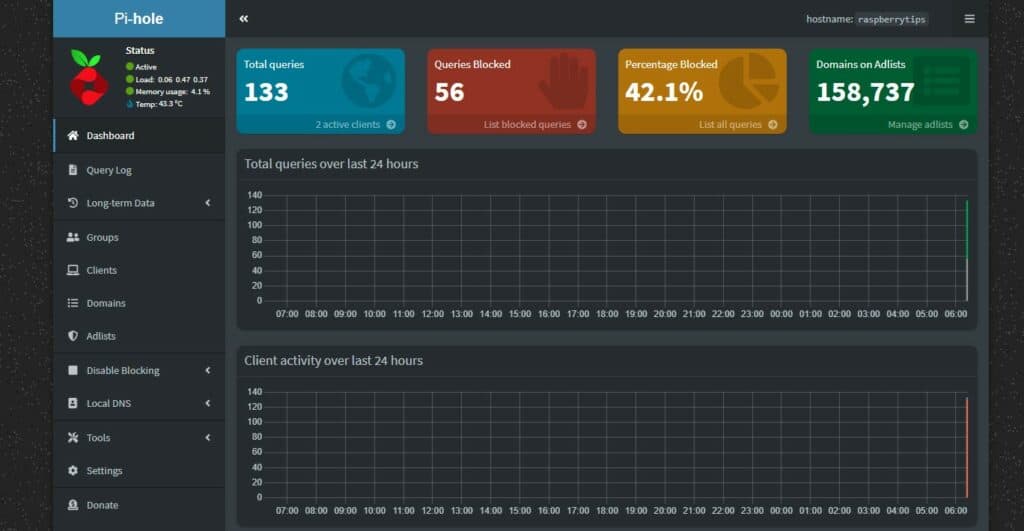
Using the Raspberry Pi as an ad blocker is also quite interesting. It’s not complicated and it’s pretty useful. The goal is to run software on the Raspberry Pi that will block all ads on all devices connected to your network.
The idea is to replace your current DNS server (your Internet router in general), with the Raspberry Pi. And on the Raspberry Pi, you have a web interface to configure and monitor everything.
Two services are available to do this: Pi-Hole and AdGuard Home. In both cases, the installation is straightforward (they have scripts that do everything for you), but you can find my step-by-step tutorials below if needed.
Related articles:
- Getting Started With AdGuard Home On Raspberry Pi (vs Pi-Hole)
- Install Pi-Hole on Raspberry Pi (Free Ad Blocker in 15 min)
Host a small website
A Raspberry Pi is perfect enough to host a website (I host pretty popular websites on servers with less RAM/CPU than a Raspberry Pi 4).
Whether you would like to learn web development, test some web applications (WordPress, PHPMyAdmin, etc.) or create a few pages for your personal usage, doing this on your Raspberry Pi is fine, you don’t need more.
If you are lost in all these new words and abbreviations, request my free Raspberry Pi glossary here (PDF format)!
Download now
It’s even possible to host a public website at home if you follow the best practices to make it work (firewall configuration) and keep it safe. If you want to try this, I have a video course available for community members where I explain everything you need to do this (including firewall configuration, port forwarding and SSL certificates).
Related articles:
- Getting Started With Nginx on Raspberry Pi (Full Guide)
- Step-by-step Guide to Install WordPress on a Raspberry Pi
- Set Up a LAMP Web Server On A Raspberry Pi
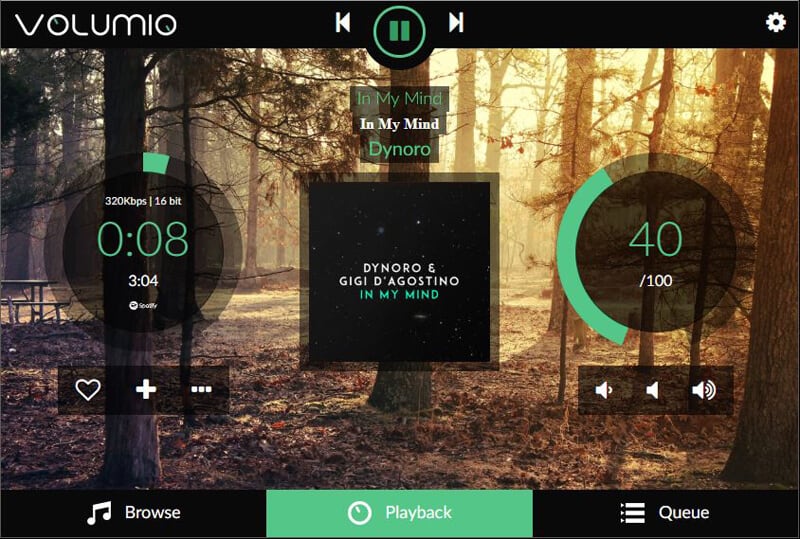
Media center
What I call a media center is simply a nice interface that allows you to watch movies or listen to music on your Raspberry Pi. It’s generally built to work on a TV, it’s like turning an old TV into a smart one. Volumio is one example (for music), and it looks like this:
Another popular application for this is Kodi. It works on Raspberry Pi OS, but if your goal is to use it on a TV, you’ll most likely install OSMC or LibreElec instead. These are tiny Linux distributions, created only to run Kodi (so it starts automatically).
Once Kodi is installed, you can play local files (music or videos), but you can also install plugins to connect to most streaming providers (Netflix, Prime Video, etc.). It’s not necessarily a “network project”, depending on how you set it up, but I find it fits pretty well in this list anyway.
Related articles:

Join Our Community!
Connect, learn, and grow with other Raspberry Pi enthusiasts. Support RaspberryTips and enjoy an ad-free reading experience. Get exclusive monthly video tutorials and many other benefits.
Learn more- The 3 Best Ways to Use Spotify on Your Raspberry Pi
- The Ultimate Guide to Install Kodi on Raspberry Pi (OSMC)
- OSMC vs LibreElec: What’s the Best Media Center System?
- How to watch Netflix and other streaming services on Kodi?
File server
A file server can be pretty useful to share files among several devices, or for backup purposes. But traditional NAS are pretty expensive (I have this one, for example, and disks are not even included).
A Raspberry Pi can do a decent job as a cheap replacement (if you can get a Pi at its normal price). It doesn’t come with as much security, but for a backup or to share photos/videos it’s fine.
There are basically three ways to use a Raspberry Pi as a web server:
- Install Samba and configure it manually: it’s a common Linux service, but the installation and configuration can be challenging for beginners (all in command lines).
- Use an app like OpenMediaVault: rely on Samba in the background, but provides a web interface to configure and monitor everything.
- Try NextCloud: It’s also a web interface, but the goal is to have something like Dropbox or Google Drive, accessible from everywhere. There are also tons of add-ons you can install for collaborative tasks (calendar, tasks & passwords manager, etc.).
Luckily for you, I have tutorials for all these solutions, so check the links below to try the one you’re interested in.
Related articles:
- How to turn a Raspberry Pi into a file server?
- Getting Started with OpenMediaVault on Raspberry Pi
- Installing NextCloud on Your Raspberry Pi (2 ways)
There is also a video lesson available inside the community, where I explain everything to host a file server at home on your Raspberry Pi. First with the easiest option (OpenMediaVault) and then with the traditional way (Samba).
Security camera
All Raspberry Pi models come with a camera slot where you can plug in a camera module (and you can also use a USB camera). It allows us to build many fun projects based on it (most robot kits use a camera, for example).
As we stay focused on network projects for this list, I think using a Raspberry Pi as a security camera is an excellent idea. Yep, some hardware is required (you need a camera!), but it’s way cheaper than a commercial security camera.
There are different ways to do this. ZoneMinder is probably the most user-friendly solution (link below) but you can also use tools like “motion” for a lighter option. Start by following the camera installation tutorial below, and add the apps you want from there.
Related articles:
- Install a Camera on your Raspberry Pi: The Ultimate Guide
- 11 Cool Projects Ideas for the Raspberry Pi Camera Module
- How to Install ZoneMinder on Raspberry Pi? (Surveillance Monitor)
- How to Install MotionEye on Raspberry Pi (Video Surveillance)
DNS server
I already talked about DNS servers earlier, with the ad-blocker solution. But even if your goal is not to block all ads on your network, using a Raspberry Pi as your main DNS server (or forwarder) comes with many benefits:
- Speed up your Internet browsing: each time the request goes to the next DNS server, there is additional time to wait. With a DNS server on your network, using a caching system, most of the requests can be answered directly.
- Keep your browsing safe: When you use your provider’s DNS servers or the Google ones, you are allowing them to know any website you visit on the Internet. By keeping control of the DNS service, you keep this private (most of the time).
- Stability: Even with using well-known DNS servers, you can lose your Internet connection if the servers you’re using are down or too slow. By having DNS servers on your network, you also keep control of this.
- Custom records: With a DNS server at home you can create your records in the DNS server. For example, if I want to redirect kodi.me.local to my media center Raspberry Pi, it’s possible.
I explain the different solutions available in the link below if you want to give it a try.
Related article:
Password manager
Do you use a password manager? Are you not worried about all the security breaches they face regularly? An alternative is to host your own password manager, on your own network, so you keep your hands on the passwords all the time.
If you are lost in all these new words and abbreviations, request my free Raspberry Pi glossary here (PDF format)!
Download now
Bitwarden can be installed on a Raspberry Pi by using a docker container named Vaultwarden. Using Bitwarden this way is safe if you use HTTPS, port redirection, or a VPN and create backups of the Raspberry Pi.
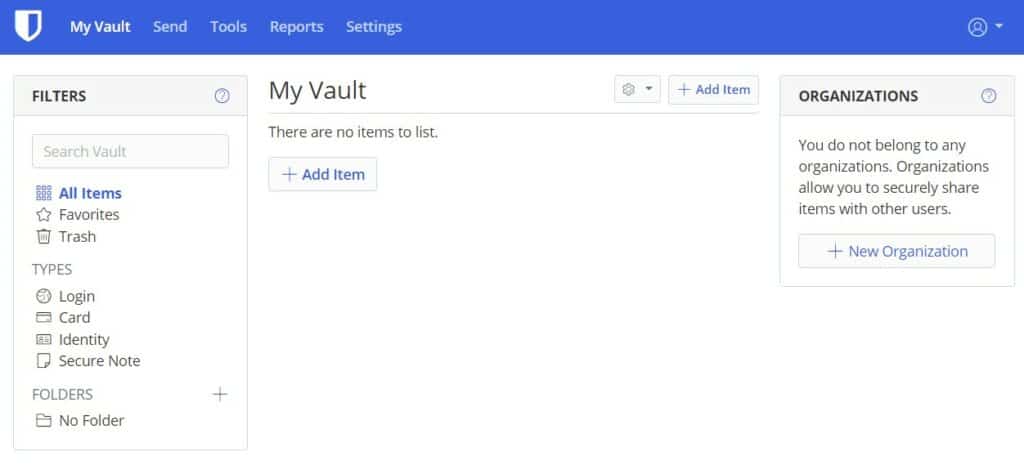
You’ll get a web interface to see your passwords, but most of the time it’s transparent – you’ll just use it through an extension on your web browser. It will save new ones automatically, and fill login forms for you.
Related article:
VPN server
A VPN is a secure connection between two points, generally between two networks. You may know VPN clients (NordVPN, ExpressVPN, etc.) but it’s not the idea here. The goal of this project is to create your own VPN server, so you can connect to your network from anywhere in the world.
There are two main solutions to do this: OpenVPN and WireGuard. Both can be installed quickly on the Raspberry Pi with a script, and free clients are available for all operating systems (including your smartphone).
If you try many projects on this list, this is a great way to keep access to them safely while you are travelling. For example, you can check your security camera or home assistant dashboard via the VPN connection.
Related articles:
- Raspberry Pi: OpenVPN vs WireGuard, which one is the best?
- The Easiest Way to Install OpenVPN Server on Raspberry Pi
Need more guidance? A video course is available for members of the RaspberryTips community, with the step-by-step process to set up the server and the clients (access from there).
Game server
The Raspberry Pi is not necessarily built for gaming (even if it’s very popular for retro gaming), but some models (especially the Raspberry Pi 4/400) are decent solutions to host a game server.
I’m a big fan of Minecraft and managed a public server in the past, so I tried it on my Raspberry Pi, and it works pretty well.
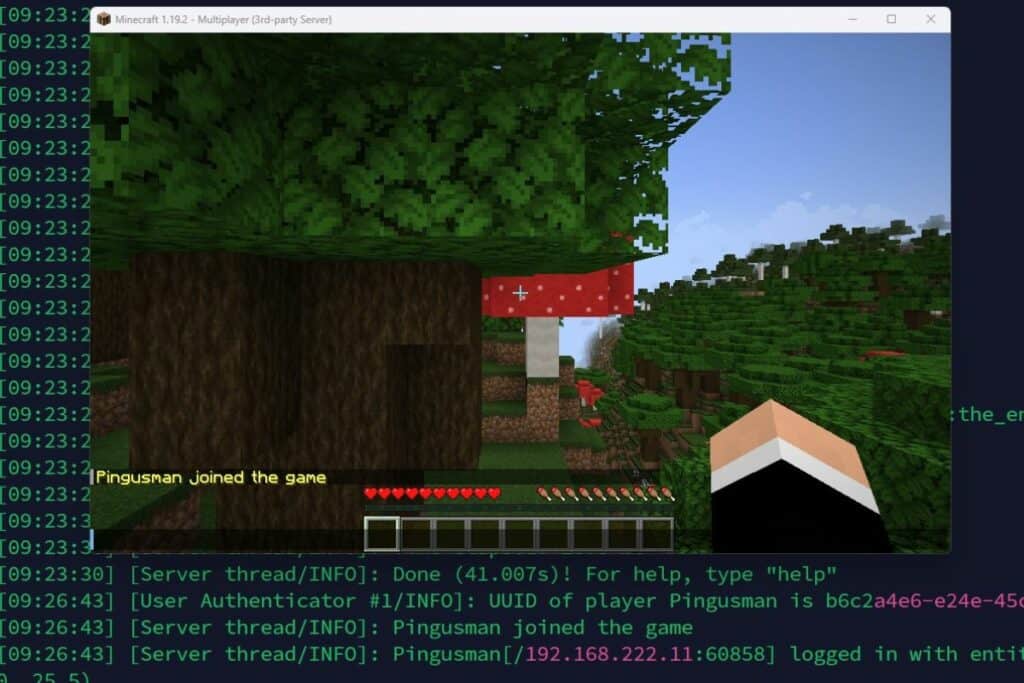
If you want to play with your family or friends on a small server, it’s a decent alternative to paid hosts. Check the link below for the step-by-step installation procedure (it’s a bit long, but not too complicated).
Related article:
Firewall & router
The Raspberry Pi only has one Ethernet port, so it’s not possible to create a firewall with two RJ45 interfaces. But there is a Wi-Fi interface that can be used for one side (LAN for example). And you can also try this with a USB to Ethernet adapter.
Unfortunately, most modern firewall apps are not available for the Raspberry Pi architecture, so your options will be limited if you want to try this.
I still have a few solutions for you in the links below. The first one uses mostly the command lines (iptables & hostapd), but you can also try OpenWrt if you want a web interface.
Related articles:
- How to use Raspberry Pi as a Wireless Router with Firewall?
- OpenWrt on Raspberry Pi: Use your Pi as a router (Tutorial)
- Can pfSense run on Raspberry Pi? (and better alternatives)
- Step-by-Step Guide: Configuring a Firewall on Raspberry Pi
- Turn Your Raspberry Pi into an Access Point (Full Guide)
Print server
Tiny project idea, but one that can be pretty useful: turn an old USB printer into a wireless printer with a Raspberry Pi.
The idea is to plug it into the Raspberry Pi, install the printer on it and share it with any computer on the network. The Raspberry Pi can stay up and running all the time, so you can print from your main computer without having to plug the printer into it each time.
If you have several devices (or family members), you’ll love it. You can find the installation tutorial below, sharing the printer is only one box to check during the configuration.
Related article:
DHCP server
One example of a network project a Raspberry Pi can be used for is as a critical node on your network, such as a DHCP server. The goal of a DHCP server is to assign IP addresses to all devices on the network.
A Raspberry Pi can be used as a DHCP server by installing Raspberry Pi OS and the package DNSMasq. Then there is some quick configuration to do, to set a static IP address for the Raspberry Pi and configure the DHCP range for the other devices on the network.
Generally, you have an Internet router at home that already acts as a DHCP server, so most of the time there’s no need to use anything else for this. But it can be an interesting project, to experiment with this network concept or for real use with specific network requirements.
Related articles:
It's a free PDF guide containing every Raspberry Pi Linux command you should know!
Download now
Development & test server
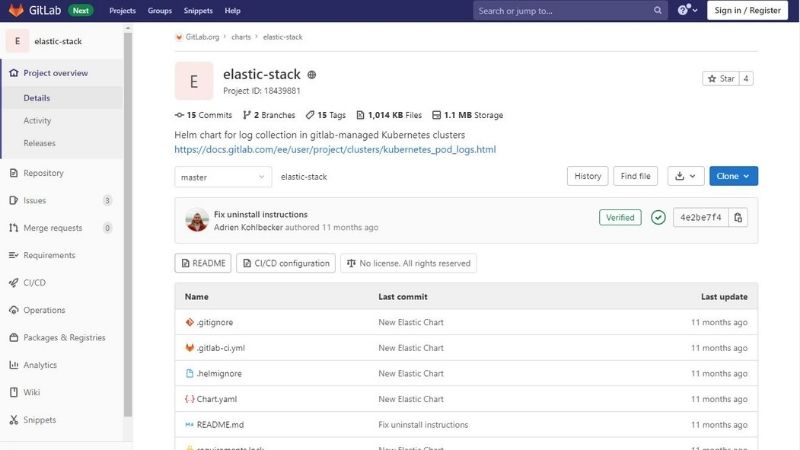
If you’re a developer (or one in the making), you may rely on some apps in the cloud for your projects. Maybe you use GitHub or GitLab, or other tools.
Remember that most solutions are available for Linux servers, and some of them can be self-hosted on your Raspberry Pi at home, so you keep 100% control of your data. I won’t say it’s ideal for anyone, but in some cases, it can be a suitable option (and it’s free).
For example, I have tutorials on how to install Jenkins and GitLab on your Raspberry Pi (links below).
You could also try to run virtual machines on your Raspberry Pi if you need to run tests on different environments. It’s not perfect yet, but if you don’t have a traditional server for this, and don’t want to use several computers, it might be something to try.
Related articles:
- How to install Jenkins server on your Raspberry Pi?
- How to install GitLab on your Raspberry Pi?
- Getting started with Proxmox on Raspberry Pi (Virtualization server)
- How to Install VMWare ESXi on a Raspberry Pi? (Step by step)
It's a free PDF guide containing every Raspberry Pi Linux command you should know!
Download now
Reminder: Remember that all the members of my community get access to this website without ads, exclusive courses and much more. You can become part of this community for as little as $5 per month & get all the benefits immediately.
Email server
There are many projects that require the ability to send emails, but most email platforms are more and more exigent and don’t allow us to use their SMTP services as easily as before (mostly to prevent spam).
Hosting an email server at home can also be a project on its own, even if I don’t necessarily recommend it, aside from learning or testing purposes (if the Pi is powered off, you don’t receive emails anymore).
Anyway, if you would like to learn more about all the components of a complete email server, I have a big tutorial for you below. It’s long and complicated, but you’ll probably learn a lot along the way, so it’s a great network project I had to include it in this list.
Related article:
Whenever you’re ready, here are other ways I can help you:
The RaspberryTips Community: If you want to hang out with me and other Raspberry Pi fans, you can join the community. I share exclusive tutorials and behind-the-scenes content there. Premium members can also visit the website without ads.
Master your Raspberry Pi in 30 days: If you are looking for the best tips to become an expert on Raspberry Pi, this book is for you. Learn useful Linux skills and practice multiple projects with step-by-step guides.
The Raspberry Pi Bootcamp: Understand everything about the Raspberry Pi, stop searching for help all the time, and finally enjoy completing your projects.
Master Python on Raspberry Pi: Create, understand, and improve any Python script for your Raspberry Pi. Learn the essentials step-by-step without losing time understanding useless concepts.
You can also find all my recommendations for tools and hardware on this page.