
Intermediate Level Resources
Once you start to make some real progress in your learning, you can experiment new things. Nothing fancy for now, but more exciting than learning how to install Raspbian or access your Raspberry Pi.
You may also consider investing some money in your Raspberry, now that you know you like it. From now, you can consider better alternatives to your beginner stuff, to do more or save you some time.

On this page, I give you a few examples of what you can look at now. These are mainly tools that I use and appreciate.
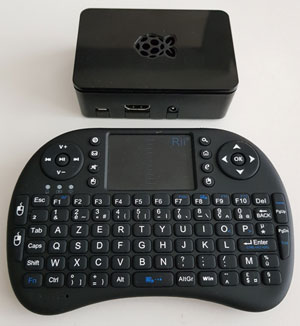
Bluetooth Keyboard
My recommendation: When you start with Raspberry Pi, you may use an old keyboard and mouse that you probably already have at home. But it takes space and there are wires on your desk. I prefer to optimize this and use a compact Bluetooth keyboard. I bought mine with my first Raspberry Pi, and I’m still using it each time I start a new project or write a tutorial.
Strong points: There is a USB adapter in the package, it works on any operating system I have tried until now. You can store it anywhere when you don’t need it and the autonomy is awesome (I probably charge it every 3-6 months, and I use it a lot!)
Alternative: If you use your Raspberry Pi as your personal computer (or have a dedicated space for it), a standard keyboard and mouse are probably a better option. The Raspberry Pi Foundation has one (link to Amazon) but for almost the same price, you can get a wireless pack on Amazon.
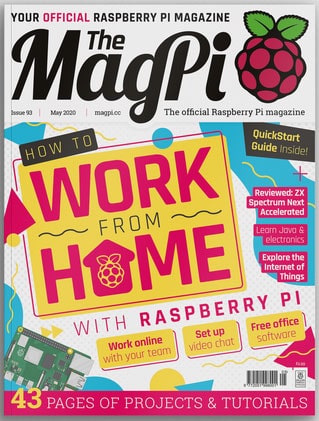
The MagPi Magazine
My recommendation: MagPi is the official Raspberry Pi magazine. You’ll find many new ideas, projects & tips in it that you probably don’t know yet. It’s a good way to learn new things (or at least to discover them before trying). It’s released monthly and generally up-to-date with new technologies or the news in general.
Strong points: You can buy a print version of it (or subscribe to receive it each month), but you can also download it for free (as a PDF).
Alternative: As an alternative to reading dozens magazines, you can also save some time by reading my book “Master your Raspberry in 30 days”. It’s available on this page, and the idea is to guide you through a step-by-step process, with one new chapter each day. It’s worth it even if you already know the basics.
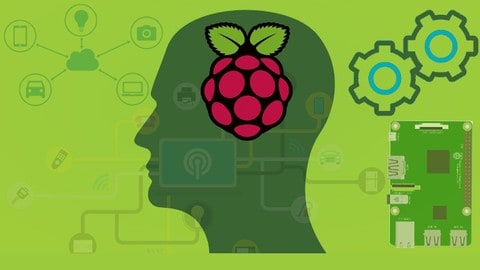
The Ultimate Guide to Raspberry Pi
My recommendation: Reading is cool, watching is even better 🙂
If you prefer watching courses rather than reading books or magazines, this course is the best offer available at your current level. Dig a bit deeper to learn new skills.
Strong points: The course mostly includes intermediate projects, from remote desktop to building an Amazon Echo. And the best way to learn is to try them yourself!
Alternative: Many courses are available on Udemy, if this one is not for you, you’ll probably find the perfect one on the website. As it depends on your level, but also on your interests, I can’t guess for you 🙂
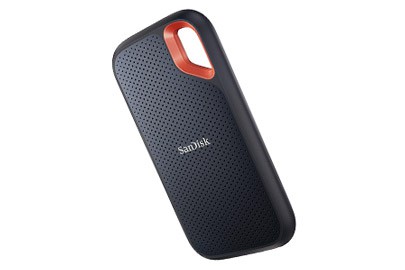
SSD Disk
My recommendation: Using an SD card is fine for most project, but you can now use a USB drive to boot your Raspberry Pi. So, if you try to use your Raspberry Pi as your main computer, or for a project where the disk space matters, I highly recommended using an SD drive.
Strong points: The model I recommend is not the cheaper, but its performances are awesome, it’s built it in a solid waterproof case and the USB cable is included. Also, it’s the SanDisk brand, so you know I like it for this reason 🙂
Alternative: If you are on a budget, you can find alternatives with lower storage capacity and pricing, it’ll not compete with the SanDisk model, but it would be better than your SD card. Get some suggestions here (link to Amazon) for the cheapest models available right now.
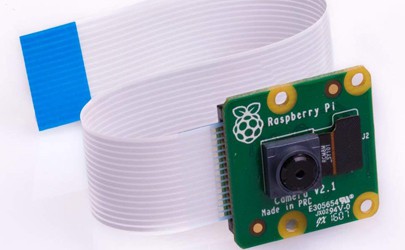
Raspberry Pi Camera
My recommendation: As soon as I bought my first Raspberry Pi camera, many projects were opened to me. A camera may seem a useless gadget, but you’ll learn so many things with it. You can use it as a security camera, to create timelapse or even a baby monitor (You can check a list of projects ideas here)
Strong points: This model in particular is built by the Raspberry Pi foundation, so obviously, it’s compatible, but you’ll also find the same characteristics as the Raspberry Pi: only what you need in a cheap product.
Alternative: If you want to get further, the Raspberry Pi Foundation released a new set of cameras in 2020 to improve the features of this one. They are almost professional cameras now! You can find everything here (link to Pi-Supply).
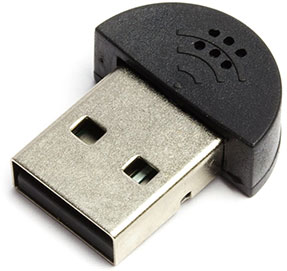
Raspberry Pi USB Microphone
My recommendation: A microphone is also a good investment, there are many projects that you can build with it (smart assistant for example). Depending on what you want to do, you can absolutely start with this cheap microphone to try how it works. I use it personally for most of my tutorials.
Alternative: Ok, at this price, it’s not exactly the best quality you can expect. What I have found is that for voice recognition projects (Alexa for example), it doesn’t work very well. In this case, I recommend upgrading to a conference microphone (link to Amazon) or even a dedicated HAT (I have this one on Amazon).
GPIO Pins Resources
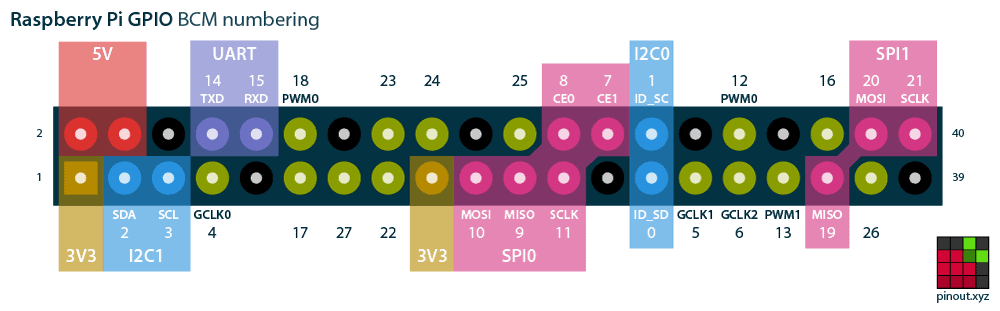
My recommendation: When you start playing with the GPIO pins on Raspberry Pi, knowing which one to use for each cable can be overwhelming. Pinout.xyz is a free website that gives you a clear and interactive overview on how to use each GPIO pin (Power, ground, port number, etc.)
Alternative: Even if the website is useful for beginners, there are better solutions available if you start using GPIO pins regularly. For example, this breakout kit on SunFounder. Stop counting the ports on the picture, just plug the wire directly at the right place 🙂
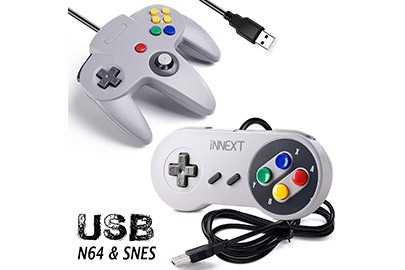
Game Controllers
My recommendation: While playing with Retropie, you’ll quickly discover that using another controller doesn’t give the best experience. This pack includes 2 controllers: N64 and NES.
Strong points: I noticed that the N64 controller is probably the most useful. Enjoying N64 games with a NES controller is impossible, you need to manage camera and movement separately
Alternative 1: If you don’t want several controllers, I recently tried the 8bitdo SF30 Pro Controller (Amazon), and it’s an excellent one, a vintage look with all the modern features, so compatible with any console. I will do a review soon for more details.
Alternative 2: If you prefer the PlayStation controller (or if you play more often PlayStation games), you can also get a cheap PS controller alternative (Amazon).
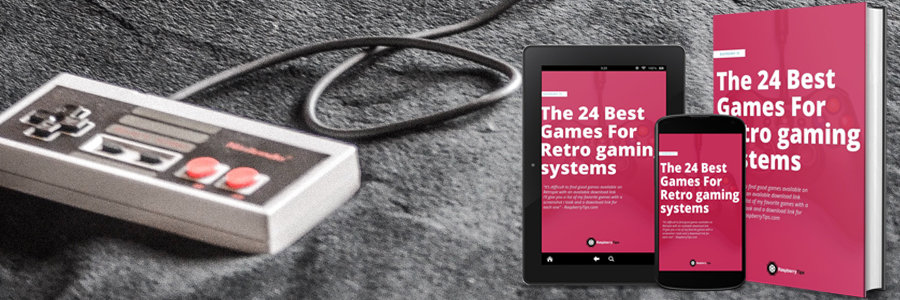
PDF: Best Retropie Games
My recommendation: Here is a list of my favorite 24 games that you can download and play on Retropie, Recalbox or Lakka. For each game, you’ll get a description and a screenshot.
Strong points: This free PDF includes direct links to download games.
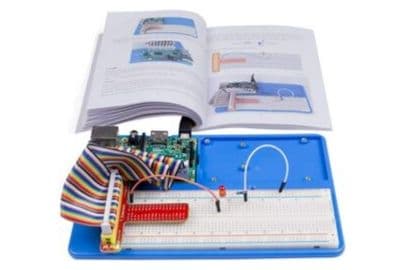
Complete Breadboard Kit
My recommendation: As soon as you’re ready to go further with the GPIO pins, a complete kit is a good choice. You can keep your Raspberry Pi circuit on a plate, plug everything in, put it away and continue at the same point the next day.
Strong points: This kit includes everything you need: plate, breadboard, extension board, wires and LED. There are several models available if you need more or less things, depending on what you already have.
I have this one, and I’m happy with it (even if I don’t use it so often^^)
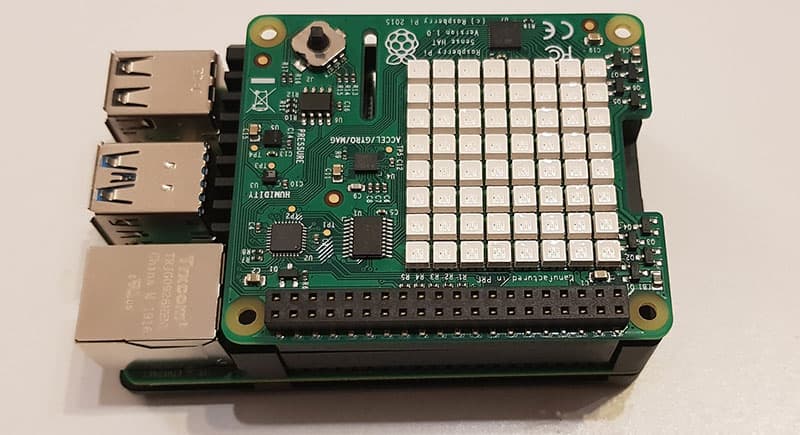
Sense Hat
My recommendation: If you want to start playing with the Raspberry Pi expansions, the Sense Hat is probably a good start. It’s plug and play and adds many sensors + a LED Matrix to display colors, texts and pictures as you want (my tutorial is here for more details).
Strong points: This HAT is made by the Raspberry Pi Foundation, so it assures a perfect compatibility with any model.
Alternative: There are many other HATs you can try on Raspberry Pi. The choice highly depends on your interests and goals. I have a complete list of the best HATs available here if you want to discover more of them.
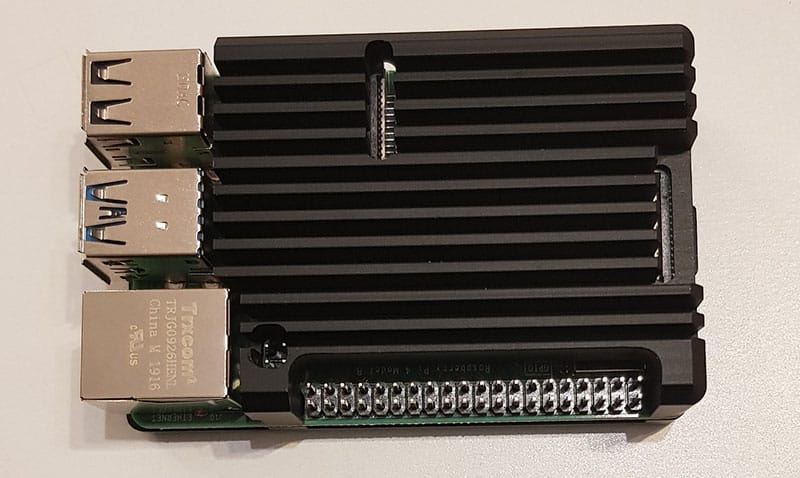
Passive Case
My recommendation: When you start using your Raspberry Pi more frequently and longer on new projects, it’s a good idea to upgrade your case with a better one. This model is a passive case (=no fan), so it’s absolutely silent and keeps you Raspberry Pi 4 cool.
Strong points: In fact, I wrote an entire review about this one, even comparing it with other solutions. You can read the post here!
Alternative: If you are not ready to buy a new case, heat sinks are the first option you can consider. It helps and it’s cheap. But if you load your CPU or leave the Pi on all the time, it’s probably not enough (direct link to Amazon).
Need more?
Check the other pages below
Note: This post contains affiliate links. If you use them, I’ll get a small commission.
The commission comes at no additional cost to you.
RaspberryTips is a participant in the Amazon Associates and other companies affiliate programs.
I recommend these products because I use them myself and I know them.
This is simply a list of what I use and love