
How to use a PS4 controller on Retropie? (the easy way)
The PS4 controller from Sony (DualShock 4) is a masterpiece of technology and game comfort.
And if you already have one, I understand why you want to use it on Retropie.
Today, I’ll show you how to install it and enjoy the pleasure of retro gaming with a high-tech controller.
The PS4 controller from Sony can be used with Retropie in three different ways:
– USB connection.
– wireless (with the Sony USB adapter).
– or via Bluetooth directly.
While the USB cable usage is straightforward, the Bluetooth part could be tough to understand.
There is a specific procedure to follow, and I’ll show you how in this post. I’ll browse through the three methods, from the simplest to the more difficult one.
If you don’t have the controller yet, or would like other ones to play with friends, you can find it on Amazon for example. You don’t need a PS4 to enjoy its ultimate controller 🙂
Use the PS4 controller with a USB cable
As I said in the introduction, the installation with a USB cable is the easiest one
You just need to use it like any controller:

Join Our Community!
Connect, learn, and grow with other Raspberry Pi enthusiasts. Support RaspberryTips and enjoy an ad-free reading experience. Get exclusive monthly video tutorials and many other benefits.
Get a list of my 24 favorites games (with links) to play on Retropie, Recalbox or Lakka
Download now
- Start with the Raspberry Pi turned off.
- Plug the PS4 controller to a USB port with the cable.
- Boot the Raspberry Pi and wait for the Retropie configuration menu.
- When the controller configuration wizard appears, hold any key to start the configuration.

- Then hit each key as asked, to create the controller configuration.
- Finally, click “OK”, the PS4 controller is ready to use.
You can start to enjoy your PS4 controller easily using the cable.
But it’s not the most comfortable, I know you want to use it wirelessly :).
By the way, if you are entirely new to Retropie, you should probably start by reading my beginner’s guide to Retropie here. You’ll learn all the steps to get started correctly.
Use the PS4 controller with the official USB adapter
Sony released a USB stick to connect easily your PS4 controller to a PC or a MAC.
And it also works on Raspberry Pi.
As the Bluetooth method we’ll see later is pretty complicated, and will not work in all cases, this may be a suitable alternative if you have one or can buy one (check the price on Amazon).
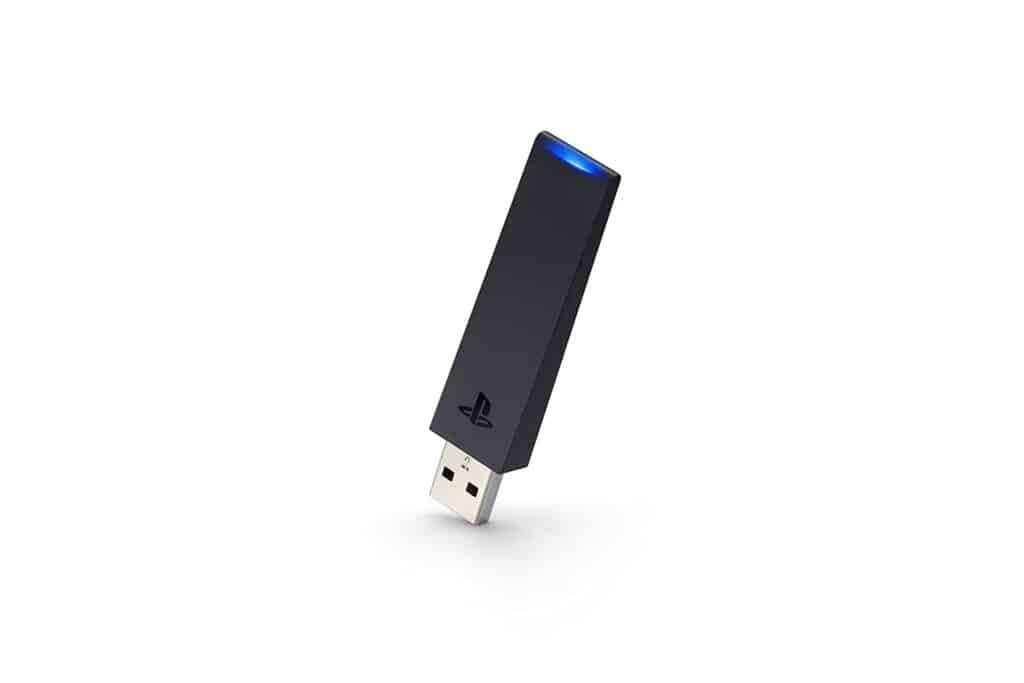
With this adapter, you’ll be able to use your controller on any machine: PC, Mac, Raspberry Pi and of course PS4. Cheaper alternatives may work, but this one will avoid any bugs, drivers problems and headaches 🙂
Once you have it, follow this procedure to make it work in Retropie:
- Plug the USB adapter on a free Raspberry Pi port.
- As soon as you connect it, it should start to blink.
This means that it’s searching for a device. - Push the USB adapter a few seconds to put it in pairing mode.
The light should now blink faster.
The USB adapter is ready. - On the controller, press and hold the “Share” and “PS” key.
The controller also enters pairing mode. - A few seconds later, both should display a static light, they are now paired.
Then follow the configuration wizard to assign each key to a different control.
It was rather easy, but you need to have an additional accessory, or even spend some money to invest in the USB adapter.
Get a list of my 24 favorites games (with links) to play on Retropie, Recalbox or Lakka
Download now
If you prefer, you can try the last association method: regular Bluetooth (check the next paragraph for this).
Install PS4 controller via Bluetooth
The last solution I have for you is to connect your PS4 controller to your Raspberry Pi using Bluetooth only, without any USB stick.
On most Raspberry Pi models, you have a built-in Bluetooth card, so you don’t need anything else.
But you need to know that this will not work with all PlayStation 4 controllers.
In the Retropie documentation, they are not sure why, but they say that recent controllers seems to not work in Bluetooth whereas the “old” ones works fine. Anyway, if you don’t have a Sony USB stick currently, you can try this procedure and see what happens:
- Start with the Raspberry Pi turned off (it’s not mandatory, but it’s easier for me to explain).
- You need to have a keyboard plugged (here is the one I use).
- Then boot your Raspberry Pi.
- When Retropie asks you for the controller configuration, use the keyboard.
Choose a key for each action, and remember at least what you selected for the navigation arrows, the start button and the A button.
Once done, you can at least browse in the Retropie menus. We’ll use the configuration tools to pair the PS4 controller:
- Go to Retropie configuration
- Then in Retropie Setup.
- Choose the Configuration / tools menu.
- You should find a Bluetooth section in the next menu, click on it.
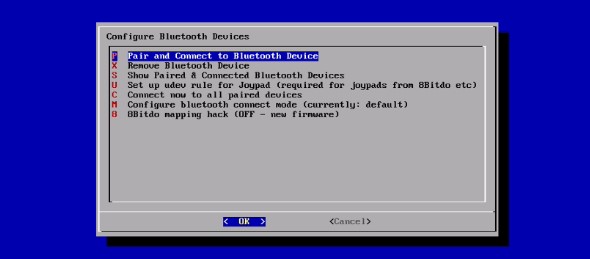
- Click on “Pair and Connect to Bluetooth Device“.
- The wizard turns into “Searching” mode.
- Simultaneously, turn your PS4 controller into “Pairing” mode.
Press and hold the “Share” and “PS” button.
The PS4 controller light starts to blink fast. - After a few seconds, the Bluetooth wizard shows you all available devices.
Select the PS4 controller in the list (for me, it’s named “Wireless controller”). - Choose the first option for the security mode (“DisplayYesNo” for me).
- You should get a success message like “Successfully registered and connected to <MACADDRESS>”.
- That’s it. Exit the Retropie Setup menu and go back to the home menu.
- In the home menu, click on your Start button to open the main menu.
- Scroll down to select “Configure Input” and confirm you want to do this.
- Then configure the PS4 controller by holding a button pressed 3 seconds.
Follow the wizard to configure each action and submit with “OK”.
You can now use your PlayStation 4 controller with the wireless mode!
If you have any issue after this procedure, like keys not working correctly, even in the Retropie menu, your controller may not be compatible with the Bluetooth mode.
You need to go back to the previous section, and buy a USB adapter (Amazon link here), or you won’t be able to use this controller with your Raspberry Pi.
Related Questions
Is it possible to use a PS3 controller instead? Yes, it’s possible to use a PS3 controller. With a USB cable, it should work directly. But for wireless mode, you may need to install an additional drive (ps3controller in Retropie Setup > Manage drivers). Then follow the same Bluetooth association, but in the Configuration / Tools > ps3controller menu.
Why is my right analog stick not working on N64 games? Like me, you don’t remember well the original N64 controller 🙂 The Nintendo controller had only one analog stick doing everything (move and camera), so you don’t need your right stick, even if you are used to playing with it for the camera.
It's a free PDF guide containing every Raspberry Pi Linux command you should know!
Download now
Recommended hardware for Retropie power users
- Retropie SD card: Save time and play directly to any game you want with this giant SD card, preloaded with over 100k games
- Raspberry Pi 4: Retropie is now available for Raspberry Pi 4, and it’s excellent. Why would you stay on a slower device?
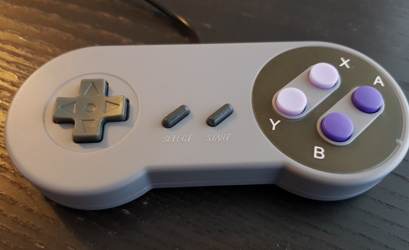
- 8bitdo controller: This is currently the best controller for retro gaming on Raspberry Pi. All the latest technologies in a retro design. But for N64 games specially, you can use the Nintendo version here.
- SSD drive: if you have thousands of games and want to improve performances, a SSD will help you a lot, check this one from SanDisk on Amazon.
It's a free PDF guide containing every Raspberry Pi Linux command you should know!
Download now
If you are looking for exclusive tutorials, I post a new course each month, available for premium members only. Join the community to get access to all of them right now!
Conclusion
That’s it, you can now use your PlayStation controller (3 or 4) on your Retropie system.
You can then play old games with the comfort and the technology from a high-tech controller.
If you want to use other controllers, there is a documentation page on the Retropie GitHub wiki for a lot of them: click here and check the bottom of the right menu.
There is a “Controller” submenu with all compatible controllers.
You are now ready to enjoy your Retropie setup even more, don’t miss my other articles on the same topic:
- 13 Tips About Retropie That Will Impress Your Friends
- Best Themes for Retropie in 2022 – Top 15
- Best Retro-Gaming OS: Retropie vs Recalbox vs Batocera vs Lakka
Whenever you’re ready, here are other ways I can help you:
The RaspberryTips Community: If you want to hang out with me and other Raspberry Pi fans, you can join the community. I share exclusive tutorials and behind-the-scenes content there. Premium members can also visit the website without ads.
Master your Raspberry Pi in 30 days: If you are looking for the best tips to become an expert on Raspberry Pi, this book is for you. Learn useful Linux skills and practice multiple projects with step-by-step guides.
The Raspberry Pi Bootcamp: Understand everything about the Raspberry Pi, stop searching for help all the time, and finally enjoy completing your projects.
Master Python on Raspberry Pi: Create, understand, and improve any Python script for your Raspberry Pi. Learn the essentials step-by-step without losing time understanding useless concepts.
You can also find all my recommendations for tools and hardware on this page.

Nice Blog, I like an addicted gamer and I love to use some ps4 accessories.
Thanks, good luck with your shop 🙂
There are more tips for a bluetooth setup. If it doesn’t work as it is described here, you should check https://retropie.org.uk/docs/PS4-Controller/