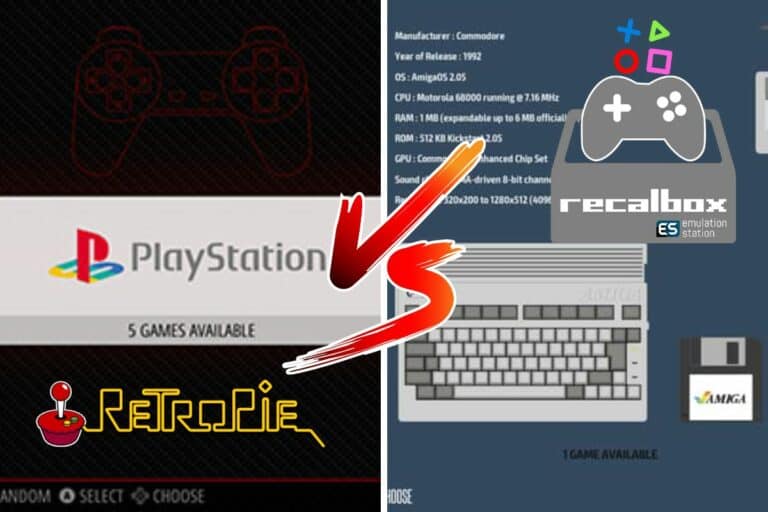
How to Scrape Retropie Games? (Auto & manual)
Scraping games is a fancy way of saying collecting metadata, specifically the cover art, for your games in Retropie. It’s not done automatically by default, and it rarely works the first time you try it manually. In this post, I’ll show you how to solve this problem for good.
Scrapers services are available by default in RetroPie’s Start menu. They can be used to download cover images for installed games. It’s also possible to manually add custom images for the other games.
In this post, I’ll start with the automatic way to do this, as it’s the easiest solution. Then I’ll show you how to do it manually if the first way doesn’t work or if you want to add a custom image.
If you’re looking to quickly progress on Raspberry Pi, you can check out my e-book here. It’s a 30-day challenge where you learn one new thing every day until you become a Raspberry Pi expert. The first third of the book teaches you the basics, but the following chapters include projects you can try on your own.
Automatically scrape on Retropie
Introduction
You probably found it in the menu, but as you may have noticed, the default scraper does not work (at least it never works for me). This is the first problem you might have.
So, I will show you how to do this successfully
Get a list of my 24 favorites games (with links) to play on Retropie, Recalbox or Lakka
Download now
Use the default scrapers
By default, two scrape sources are available:
- TheGamesDB
- ScreenScraper
The first one never works for me, so the first thing you can try is to use ScreenScraper:

Join Our Community!
Connect, learn, and grow with other Raspberry Pi enthusiasts. Support RaspberryTips and enjoy an ad-free reading experience. Get exclusive monthly video tutorials and many other benefits.
Learn more- From the main menu, click on the “Start” button
- Enter the “Scraper” submenu (press “A”).
- Change the “Scrape From” field to “ScreenScraper“:
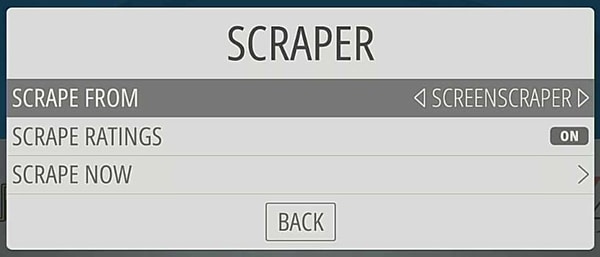
- Then click on “Scrape Now“.
- Now you need to configure 3 things:
- Filter: Select if you want to search for missing images or all games.
- Systems: Same thing for the systems you use.
- User decides on conflicts.
- Once ready, click on “Start” to process.
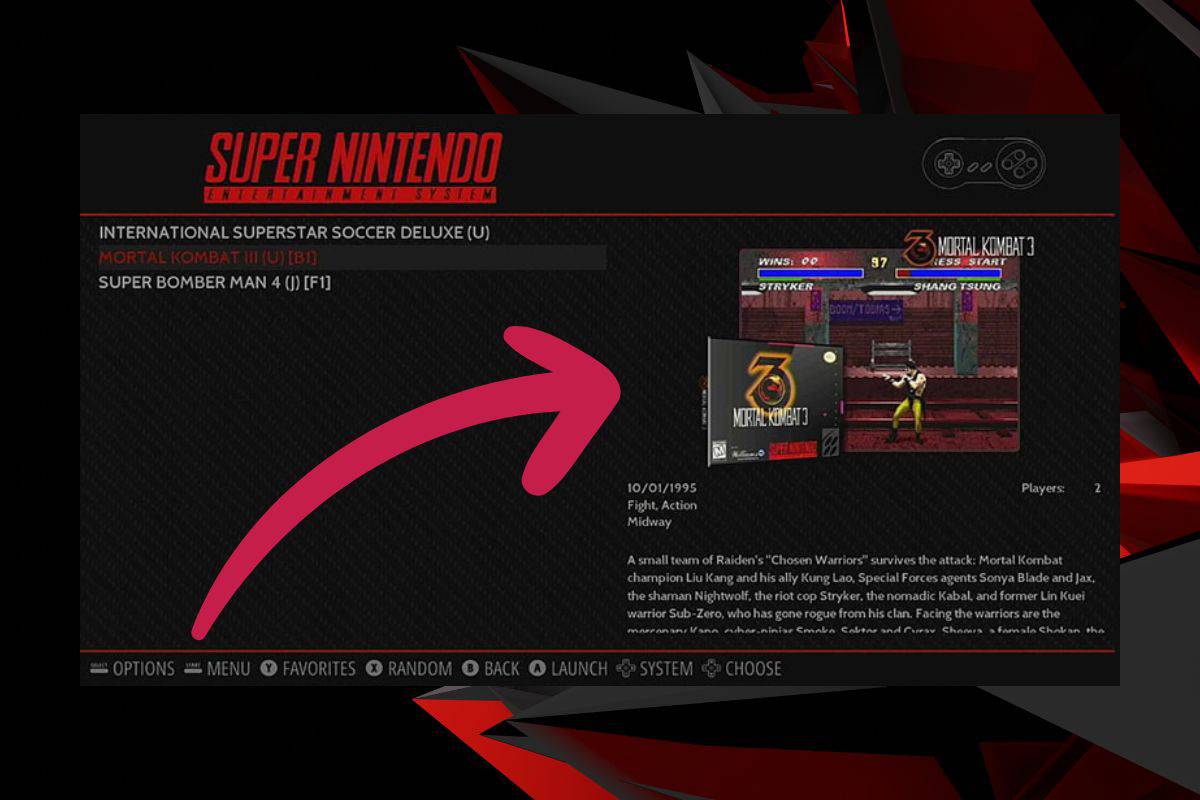
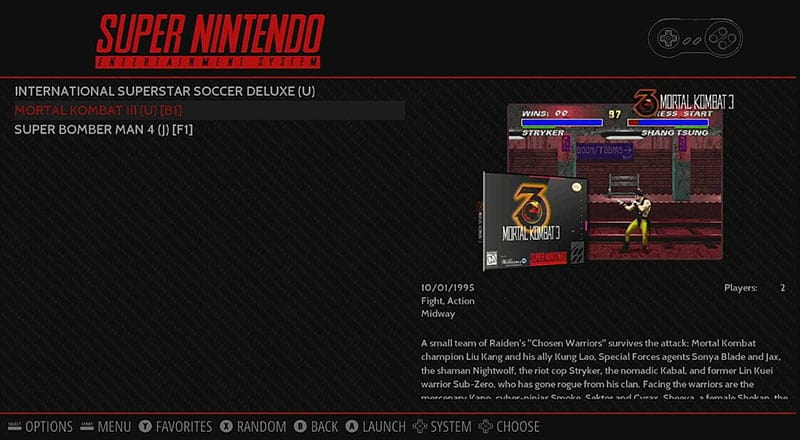
- For each game, the tool will display the corresponding information like this:
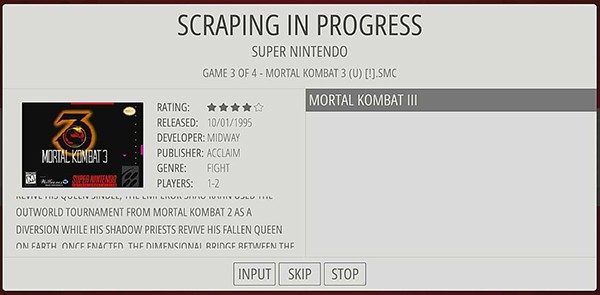
- If the result is ok for you, press A to download it.
If there is no result, or you don’t want to use it, click on “Skip“. - You can also click on “Input” to change the game name.
Or “Stop” to close the scraping process.
That’s it for Screenscraper.
For the most popular games, you will automatically get everything you need.
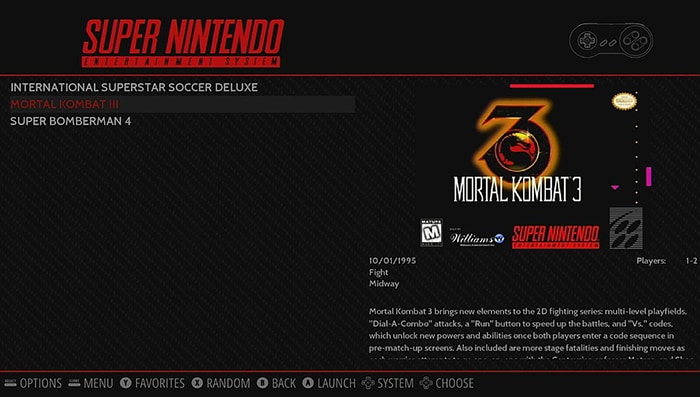
Once done, the game will look like this with the default theme:
Or install another scraper
Another solution (still automatic) is to install other scraper sources.
You can find them in the Retropie setup menu.
My favorite is Skyscraper, here is how to install it:
- Go to the Retropie options.
- Click on Retropie Setup
- Start by updating the Retropie-Setup script.
- Then go to Manage Packages > Manage optional packages.
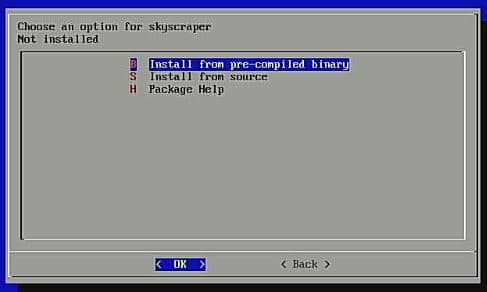
- Find “skyscraper” in the list (near the end), and install it from binary (Press A or Enter twice):
- After a few seconds/minutes, the package is installed.
Get back to the main menu (ESC or B).
Now, the process for using Skyscraper is a bit different, as there is no integration with EmulationStation.
Here is what you need to do:
Get a list of my 24 favorites games (with links) to play on Retropie, Recalbox or Lakka
Download now
- Quit EmulationStation.
Press Start > Quit > Quit EmulationStation. - You now have access to command lines.
You can also use SSH if you prefer. - Type the following command:
sudo ./RetroPie-Setup/retropie_setup.sh
The same windows as for the installation shows up. - Go to Configuration / Tools > Skyscraper.
You get a configuration menu like this: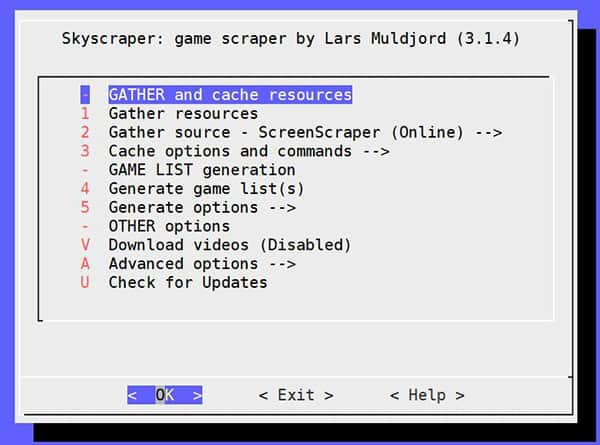
- From here you can configure everything you want.
Then click on “Gather resources” to start the process.
Pick the systems you want to scrape and click OK. - If you see game descriptions on your screen, that’s good news.
But you won’t be able to choose if you want to keep the current information or overwrite it. - You can now exit this tool and reboot your Raspberry Pi:
sudo reboot
Are you a bit lost in the Linux command line? Check this article first for the most important commands to remember and a free downloadable cheat sheet so you can have the commands at your fingertips.
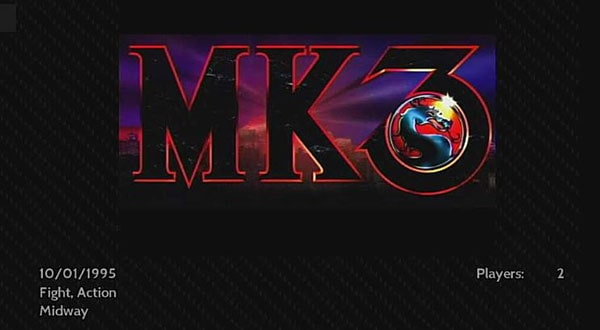
After the reboot, you will see in Emulationstation the new information.
Here is the same example with Mortal Kombat:
As you can see, the picture is not the same, it’s often better quality with this service.
It's a free PDF guide containing every Raspberry Pi Linux command you should know!
Download now
Manually scrape on Retropie
Ok, so maybe you already knew how to do this automatically, but you were not happy with the result. Or maybe you want to use custom images.
Here is how to scrape manually on Retropie:
- Connect to your Raspberry Pi by using SFTP.
You can do this with FileZilla or WinSCP.
Check this post if you don’t know how to do this (once connected, continue here). - Go to the Emulation Station folder in the home directory (.emulationstation).
- Then go to downloaded_media folder and pick a console.
Pictures are in the screenshots folder.
So, for example, the full remote path might be:/opt/retropie/configs/all/emulationstation/downloaded_media/snes/screenshots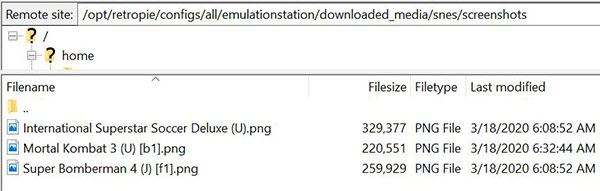
I can see here the 3 pictures corresponding to my games for the Nintendo SNES.
Now, you have two cases:
- Update an image (if you don’t like the automatic one):
- Download the current picture (Right-click > Download with Filezilla).
- Open it with your favorite image editor, and change everything you want.
- Upload it with the same name and same extension (.png) in this folder.
- Create an image for another game:
- Create a new empty picture in your editor.
The size of my screenshots are 640×480, so use the same. - Save it with the same name as the ROM file, with a PNG format (transparency allowed).
- Upload it in the corresponding screenshots folder.
- Create a new empty picture in your editor.
Here is an example with a custom image for the same game again:
It's a free PDF guide containing every Raspberry Pi Linux command you should know!
Download now
Want to chat with other Raspberry Pi enthusiasts? Join the community, share your current projects and ask for help directly in the forums.
Conclusion
That’s it, I hope this was useful for you, and that you finally find out how to use a scraper effectively (both automatic and manual solutions).
There are other sources available, consider reading the official wiki on Github, or search in Google for “retropie scraper sources”.
If you want to go a bit further and improve Retropie’s default interface, I highly recommend checking out the best themes for Retropie in this other article. And if you are new to Retropie, I suggest you check out these related posts:
Whenever you’re ready, here are other ways I can help you:
The RaspberryTips Community: If you want to hang out with me and other Raspberry Pi fans, you can join the community. I share exclusive tutorials and behind-the-scenes content there. Premium members can also visit the website without ads.
Master your Raspberry Pi in 30 days: If you are looking for the best tips to become an expert on Raspberry Pi, this book is for you. Learn useful Linux skills and practice multiple projects with step-by-step guides.
The Raspberry Pi Bootcamp: Understand everything about the Raspberry Pi, stop searching for help all the time, and finally enjoy completing your projects.
Master Python on Raspberry Pi: Create, understand, and improve any Python script for your Raspberry Pi. Learn the essentials step-by-step without losing time understanding useless concepts.
You can also find all my recommendations for tools and hardware on this page.