
Raspberry Pi Cooling: Seeed Studio ICE Tower Review
Cooling a Raspberry Pi properly can be really useful for demanding projects, but we see all kinds of advice online. From no cooling to the ultimate water-cooling solutions. In this article, I’m testing one of the ultimate solutions (which isn’t that expensive or inconvenient) and discussing the real benefits you can expect from it.
In short, the ICE Tower is a giant fan, similar to what you might find in a gaming PC. Since the latest Raspberry Pi models can overheat under heavy load without cooling, the ICE Tower is an interesting alternative to heat sinks and fans.
I’ll start with a detailed introduction of this product, show you the results I got, and then compare them to the usual cooling systems we generally use on Raspberry Pi (fans, passive case, heatsinks or nothing).
If you’re looking to quickly progress on Raspberry Pi, you can check out my e-book here. It’s a 30-day challenge where you learn one new thing every day until you become a Raspberry Pi expert. The first third of the book teaches you the basics, but the following chapters include projects you can try on your own.
Seeed Studio ICE Tower presentation
Seeed Studio presentation
Seeed is the IoT hardware enabler, providing services over 10 years that empower makers to realize their projects and products. Seeed offers a wide array of hardware platforms and sensor modules ready to be integrated with existing IoT platforms and one-stop PCB manufacturing and Prototype PCB Assembly.
Seeed Studio provides a wide selection of electronic parts including Arduino, Raspberry Pi and many development board platforms. Especially the Grove System helps engineers and makers avoid jumper wire problems. Seeed Studio has developed more than 280 Grove modules covering a wide range of applications that can fulfill a variety of needs.
For us, there are two main interesting things in their works:
- They have an e-commerce website where you can order Raspberry Pi and many accessories for your projects: SeeedStudio.com.
- They have a hub where you can find many project ideas, the website is here.
ICE Tower pictures and assembly
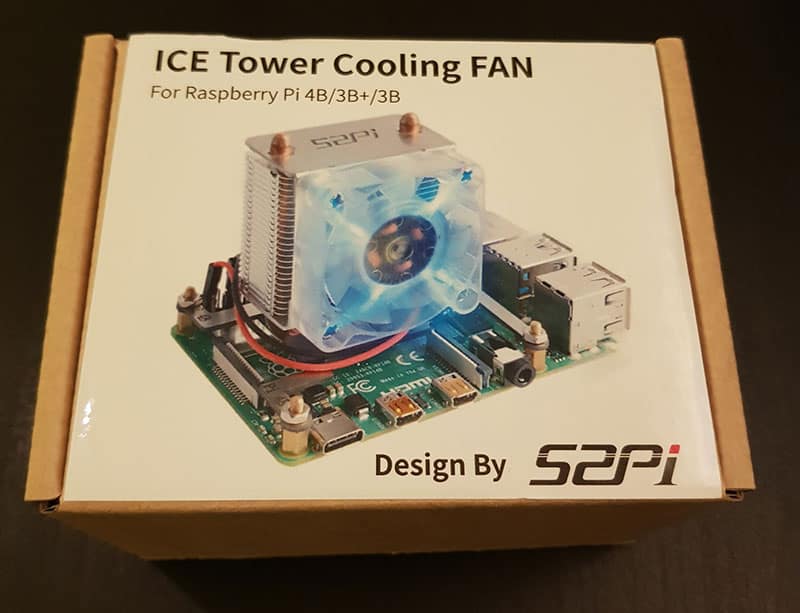
The ICE Tower is shipped in a kit.
Here is what you’ll get inside the box:
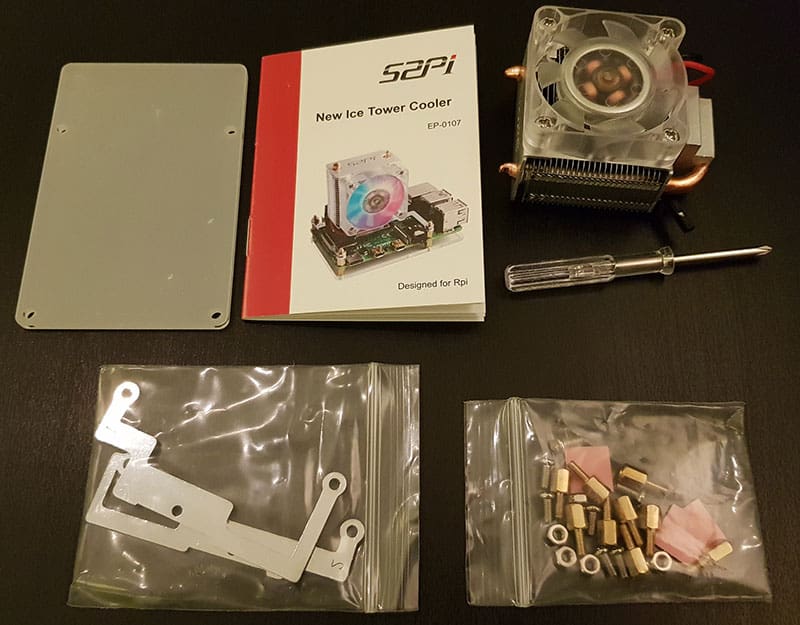
You’ll have anything you need to install it on your Raspberry Pi, including the instruction manual and a screwdriver.
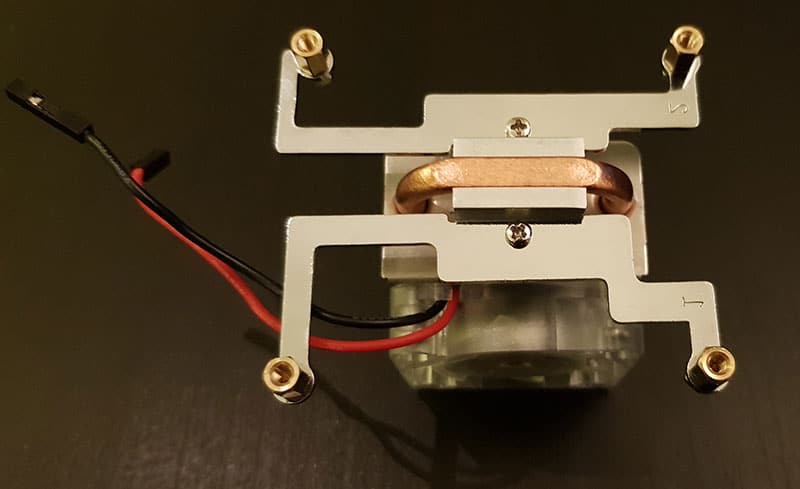
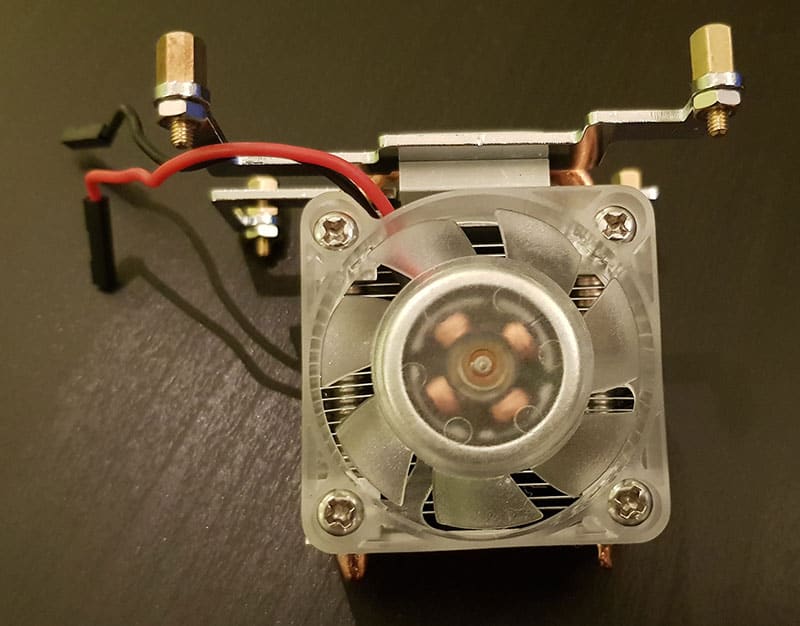
First, you have to assemble the fan support with the provided parts, like this:
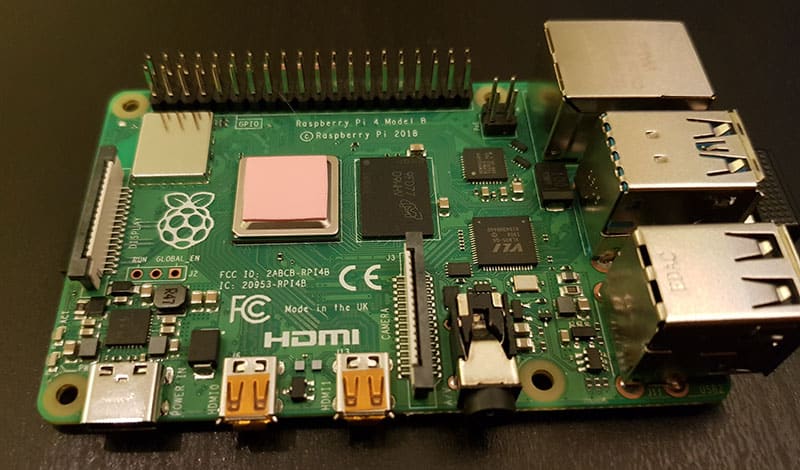
The second step is to prepare the Raspberry Pi.
You need to place the thermal conductive on the CPU (several pieces are included in the pack).
Then, you can fix the fan by placing the support on the Raspberry Pi holes.
Like this:
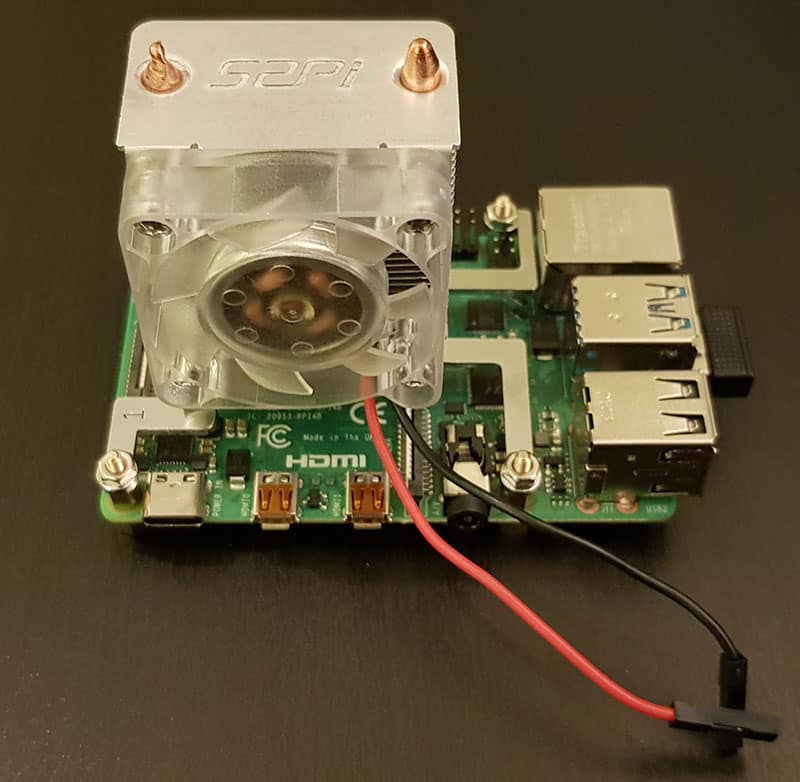
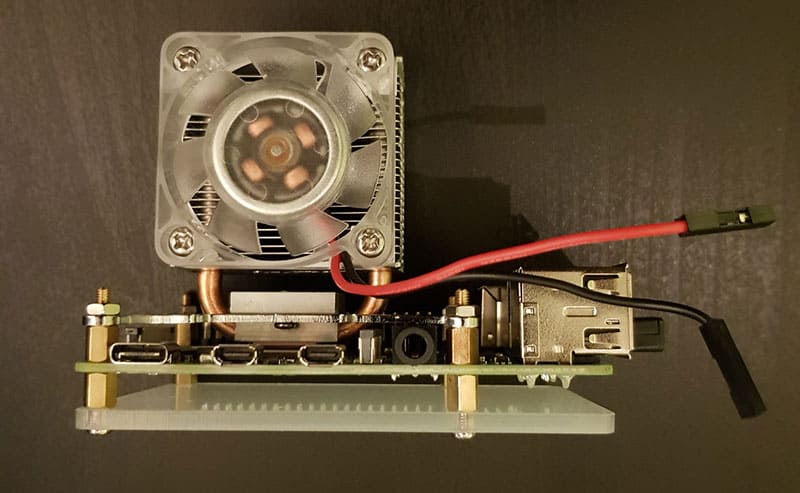
You can then screw it, and finally, there is a plate to put under the Raspberry Pi to fix everything correctly.
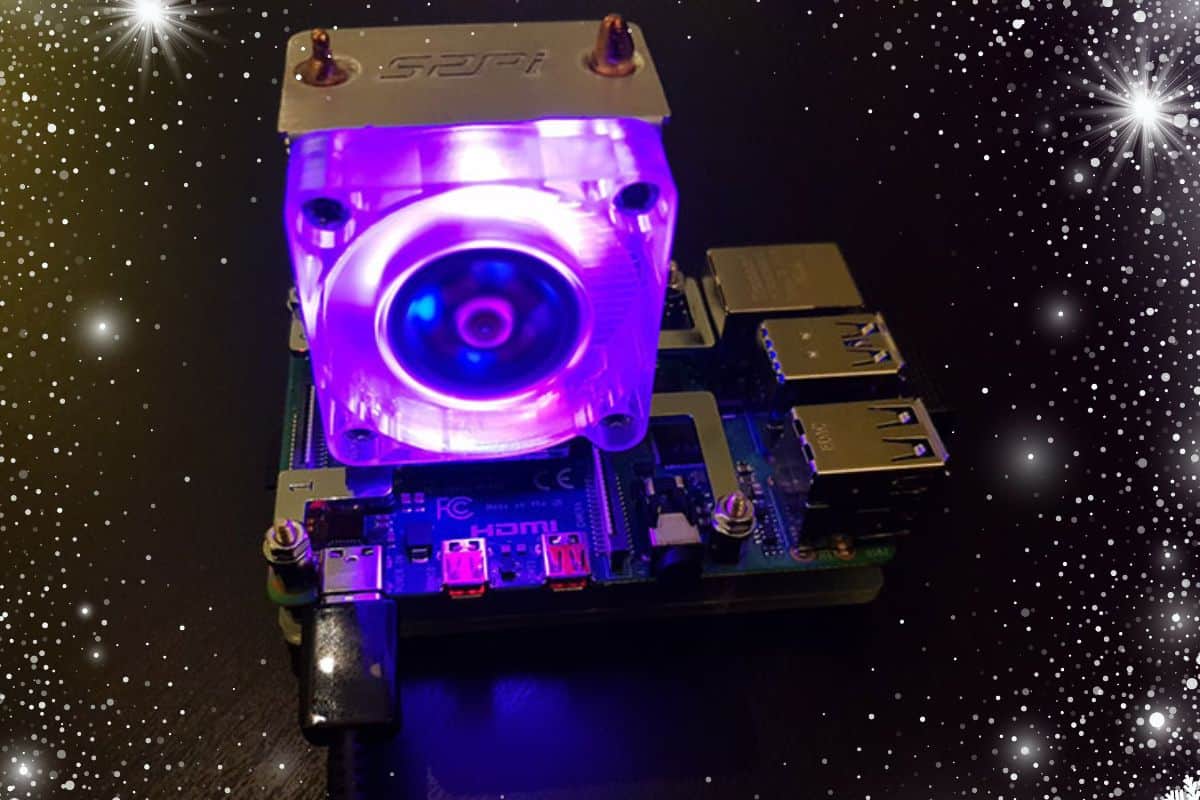
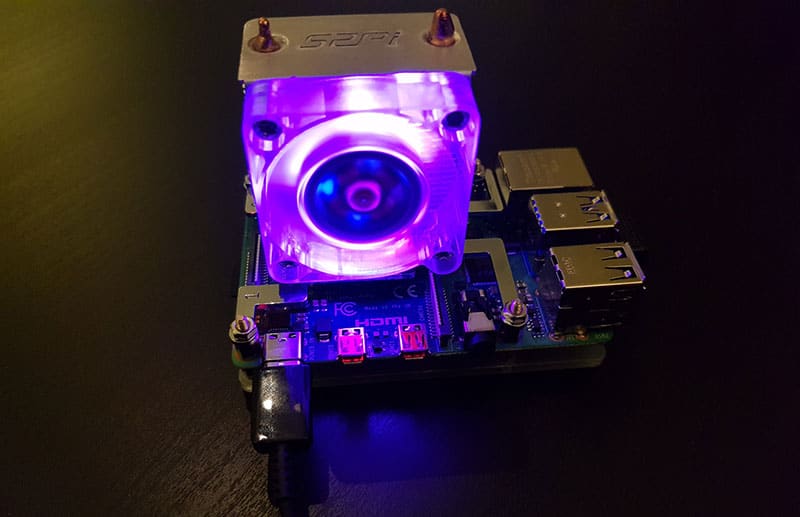
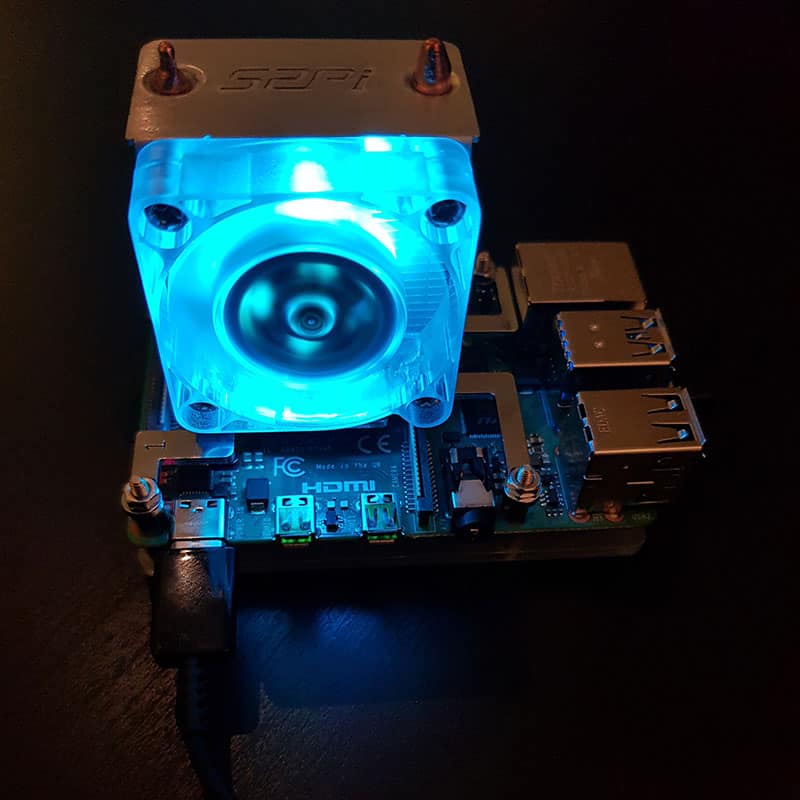
And here is the “blink blink” effect in action.
If you are lost in all these new words and abbreviations, request my free Raspberry Pi glossary here (PDF format)!
Download now
ICE Tower specifications
I will quote here the specifications given on the official website, nothing else:
- Support Raspberry Pi 4 Model B/ Raspberry Pi 3 Model B /Raspberry Pi 3 Model B+.
- DC 5V Power in (Can be powered by the Raspberry Pi).
- Ice Tower Structure.
- 5 mm copper tube.
- Super heat dissipation.
- Rated power 0.4W @5V, 0.08A.
And here are the dimensions of the Ice Tower:
- Height: 58 mm
- Width: 41 mm
- Depth: 35 mm
There is a picture on the website if this is not clear enough (link in the next paragraph).
Where to find the ICE Tower?
If you are interested, you can find this product on the SeeedStudio website.
There are two versions available:
- The “Blink Blink” version, is the one I have, with flashy colors lighting your cooling system.
- The standard version, without any light.
The price is the same for both versions ($19.90 during writing).
Note: Products are shipped from China, expect a delivery in about 3 weeks for most of the countries with standard delivery, but it depends on the country and the shipping options you select in your cart.
You can check all the updated conditions here.

Join Our Community!
Connect, learn, and grow with other Raspberry Pi enthusiasts. Support RaspberryTips and enjoy an ad-free reading experience. Get exclusive monthly video tutorials and many other benefits.
Learn moreAn alternative can be found on Amazon (here is the link), but I didn’t test this one, so I can’t guarantee it’s the exact same product. I only tested the version sold by SeeedStudio.
What can we expect?
Before going into the benchmarks, we can already read what the official site is saying about the performance of this product.
The promise we have on the website when buying the product is that it can “reduce the temperature of the Raspberry Pi from 80 °C to 40 °C” (with overclocking).
I will not try the following benchmark with overclocking, but at least we can expect to stay under 40 °C. And, it’s already a big challenge as it’s approximately the temperature of my Raspberry Pi 4 processor when idle.
It's a free PDF guide containing every Raspberry Pi Linux command you should know!
Download now
Benchmarks and data
My approach today is not only to make a review of one product but to have a clear overview of the situation for the Raspberry Pi 4. As always, I will try to give you the most useful information I can on this topic.
Test protocol
Even though I’m not a worldwide company with an experimental lab, I will try to give you the best results I can. So I have followed the same protocol for each test:
- Keeping the Raspberry Pi off for 15min.
- Booting the Raspberry Pi with Raspbian Desktop (full version).
Nothing running. - Starting a script for the experiment, as soon as possible after the boot.
The test is running for 3 minutes with all CPU at 100%. - Take note of the results (temperature) and share them with you.
I’m not an expert in benchmarking, and you may have better options to do this test, but I chose to use the “stress” package to increase the CPU load and the temperature.
It’s a basic test, I’m stressing the processor and I see how the cooling system works to keep it cool during this time. It should be enough to evaluate the cooling system’s efficiency.
Case 1: Raspberry Pi 4 without cooling
Scenario
For this first case, I’m using a fresh new Raspberry Pi 4 4GB, without a case, fan or even heat sinks. Just the single board, at room temperature (around 22 °C).
Results
Here are the results I got during the 3-minute test.
I give you them in a graphic form to make them more readable.
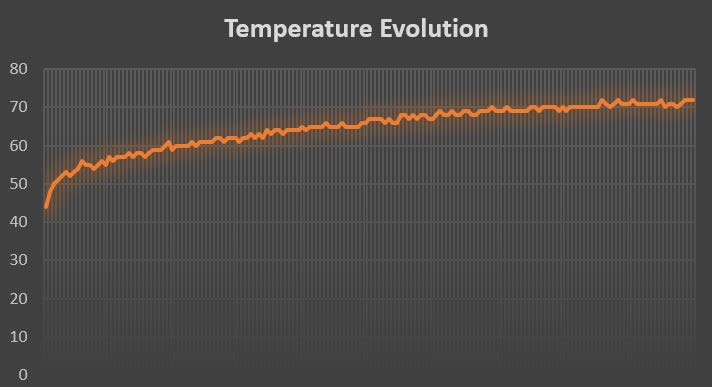
So the temperature is around 45 °C when idle, and increases slowly and regularly.
As a reminder, note that the Raspberry Pi will start to reduce the performance around 85 °C. No doubt that you’ll reach this point quickly if you use it with a high load without any cooling system.
Analysis
The graphic is explicit. It’s probably a bad idea to keep your Raspberry Pi 4 like this if you are regularly running high-consuming tasks.
If you are lost in all these new words and abbreviations, request my free Raspberry Pi glossary here (PDF format)!
Download now
It may be OK for a device with no charge most of the time, but even for a basic setup, I would not take the risk.
Case 2: Raspberry Pi 4 with heat sinks
Scenario
In this second case, I’m adding a small change to the first one, I just stick heat sinks on the Raspberry Pi hot parts (CPU, RAM, Network card) and check the changes in the results.
Results
Same SD card, same script, same protocol.
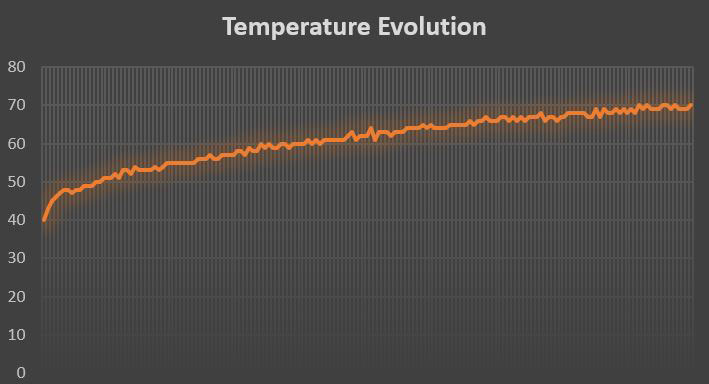
As in the previous case, here is the graphic corresponding to a 3-min test with heat sinks.
Analysis
Heat sinks are a passive solution, often recommended, to keep the main parts of your device cooler.
It looks like this:
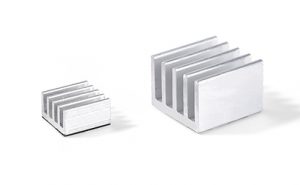
The specific form of these pieces can help to evacuate the heat.
But in this case, with a high load during 3min, it doesn’t seem to help so much.
The idle temperature is lower (40°), and the maximum temperature is also slightly lower, but the graph is almost the same.
It may take a little more time, but the processor will probably hit the 85 °C.
I think that heat sinks are a good solution if the heat has enough time to evacuate during idle time, but with a continuous high load, it doesn’t help.
Case 3: Raspberry Pi 4 with a fan on the case
Scenario
The title is explicit here, but just a small precision.
I only have one case for Raspberry Pi (it’s this one on Amazon).
As you can see in the picture, it’s not a close case, so the heat can go outside easily.
And I added a second precision: this test was made without heat sinks.
The results will probably be slightly different with them (wind created by the fan can help the heat to escape from the heat sinks).
Results
As usual, here is the graph form for the results I got in this test:
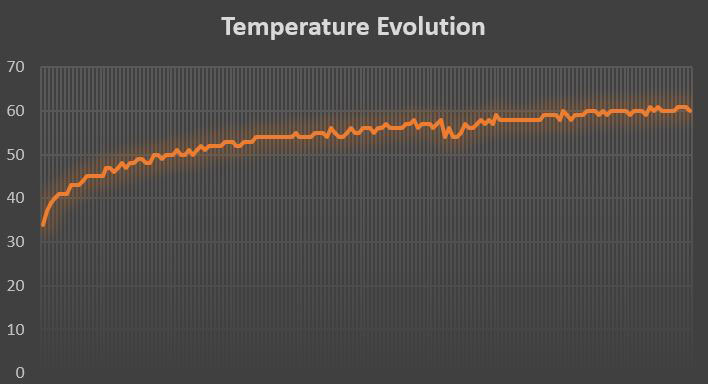
Once again, note that the temperature at the start point is lower than previously.
The fan does good work to keep the processor at a lower temperature when idle.
The same thing during the load period, the maximum temperature is lower from 10 °C compared to the two first tests, and the increase is slower.
Analysis
A case with a fan seems to be the first good solution to protect your system from overheating.
I have also noted that the temperature will decrease faster after the load period, so it’s an excellent solution if you don’t keep your CPU at 100% all the time.
Case 4: Raspberry Pi 4 with ICE Tower
Scenario
For this last case, we’ll see how the ICE Tower from Seeed Studio manages to compete with the other alternatives.
I have followed the instructions to assemble the Ice Tower to my Raspberry Pi (as you have seen in the pictures). The box includes a little guide, easy to follow, I had no problem assembling this in a few minutes.
Results
And for this last case, same thing, here is the graph with the results:
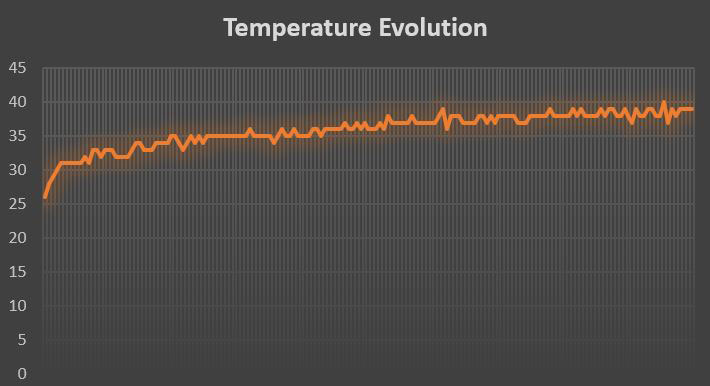
The temperature in idle is near 25 °C, and doesn’t go over 40 °C (as expected).
Analysis
As you can see on the graphic, the results here are self-explicit.
ICE Tower delivers on its promises and seems to be much better than all the other solutions we generally use to keep your Raspberry Pi cold.
You can note that the graph starts at 25 °C whereas the others are around 40 °C when idle. So the idle temperature is low with this system.
I can also tell you that the temperature will quickly decrease to something around 30 °C after the heavy load period.
I could not test many other competing systems before that, but I am still very satisfied with the results obtained with the ICE Tower. That’s why I strongly recommend it
I also want to add a quick note about the noise. I was a little afraid that this giant system would be very noisy, when in fact it makes less noise than the previous scenario with a fan in the case. So the noise is not an issue with the ICE Tower.
All cases comparative
Results
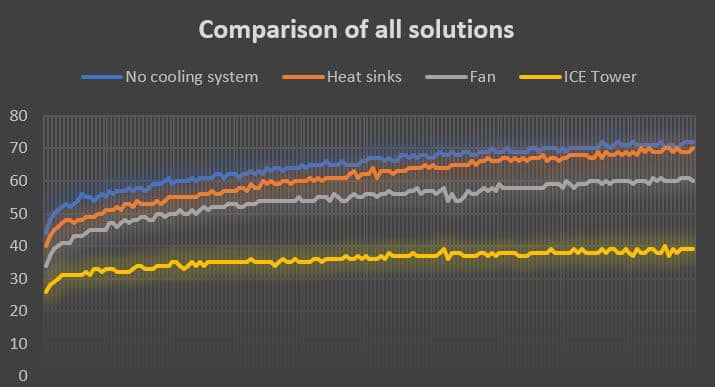
For a better understanding at a glance, here is the graphic with all the results on the same chart. So you can compare all the solutions easily.
Analysis
Finally, we have seen that with or without heat sinks doesn’t make a big change in a continuous high load period.
The fan gets better results, but it’s mainly useful if you have regular short idle time to cool everything quickly.
And finally, the ICE Tower is much better than the other solutions, with a maximal temperature under 40 °C (close to the idle temperature with other systems).
Budget
Before concluding, let’s take a look at the budget.
It’s easy to get better systems with more money, so we need to compare the prices of the four solutions to have a better analysis:
- No cooling system: $0
- Heat sinks: $4.99 (Amazon)
- Case with a fan: $8.99 (Amazon)
- SeeedStudio ICE Tower: $19.90 (SeeedStudio)
Yes the ICE Tower is a bit more expensive than the other solutions. But none of the other solutions can give you the same results. So, you have to make a choice knowing that.
I think it highly depends on the usage of your Raspberry Pi. If you plan to use your Raspberry Pi for crypto-mining or desktop usage, the ICE Tower is probably a good solution to consider.
It's a free PDF guide containing every Raspberry Pi Linux command you should know!
Download now
Reminder: Remember that all the members of my community get access to this website without ads, exclusive courses and much more. You can become part of this community for as little as $5 per month & get all the benefits immediately.
Conclusion
And that’s it, here is the end of this review. I hope you like it and that it’s useful for you. Even if you don’t plan to buy this product soon, you have here a complete comparison of basic cooling systems that you can consider for your Raspberry Pi.
If you feel this solution is a bit too much for your use, here are other products I tested, that might be worth giving a try, and related articles on this topic:
- Does Your Raspberry Pi Need Heatsinks? The definitive answer
- Argon NEO: Honest Review After 1 Month Usage
- What’s The Best Raspberry Pi 4 Case For You? (I Tested Them All)
Whenever you’re ready, here are other ways I can help you:
The RaspberryTips Community: If you want to hang out with me and other Raspberry Pi fans, you can join the community. I share exclusive tutorials and behind-the-scenes content there. Premium members can also visit the website without ads.
Master your Raspberry Pi in 30 days: If you are looking for the best tips to become an expert on Raspberry Pi, this book is for you. Learn useful Linux skills and practice multiple projects with step-by-step guides.
The Raspberry Pi Bootcamp: Understand everything about the Raspberry Pi, stop searching for help all the time, and finally enjoy completing your projects.
Master Python on Raspberry Pi: Create, understand, and improve any Python script for your Raspberry Pi. Learn the essentials step-by-step without losing time understanding useless concepts.
You can also find all my recommendations for tools and hardware on this page.


Great article. I have been thinking about the cooler but one problem comes up and that is how to connect “Hats.” I have two hats on the pi right now. One can come off as it would be replace by the cooler. The other is to control servos. I also have the “Tee Cobbler” connected. One idea is to figure out the pins on the cobbler and match it to the servo drive hat or get a set of 40 pin right angle connectors and have the GPIO pins come off at a right angle. So far just toying with different ideas and maybe someone has come up with a solution.
Thanks for listening and keep the articles coming.
Gordon
Good article and an interessting solution by seedStudio! I have my rasp 3B+ running 24/7 with scripts which sometimes need approx. 10 hours to finish. Especially in Summer you reach 80 degree celcius very fast. What i am worried about is the noise but as you wrote it is even lower than a small Fan in the housing – most certainly because the big fan can run slower and get the same airflow.
All in all an interessting product – thank you for pointing this out!
Hi Sebastian,
Thanks for your feedback
Let me know if you try it on your Raspberry Pi 3B+