SunFounder Pironman Honest Review: Who is it for? (RPI4 case)
Are you looking for the ultimate case for your Raspberry Pi 4? This review might be interesting for you. I’ve tested many cases for my Raspberry Pis, and, on paper, the SunFounder Pironman checks all the boxes: design, cooling, SSD slot, etc. I had the chance to try it in the past few weeks, and I will share my true experience with you in this article.
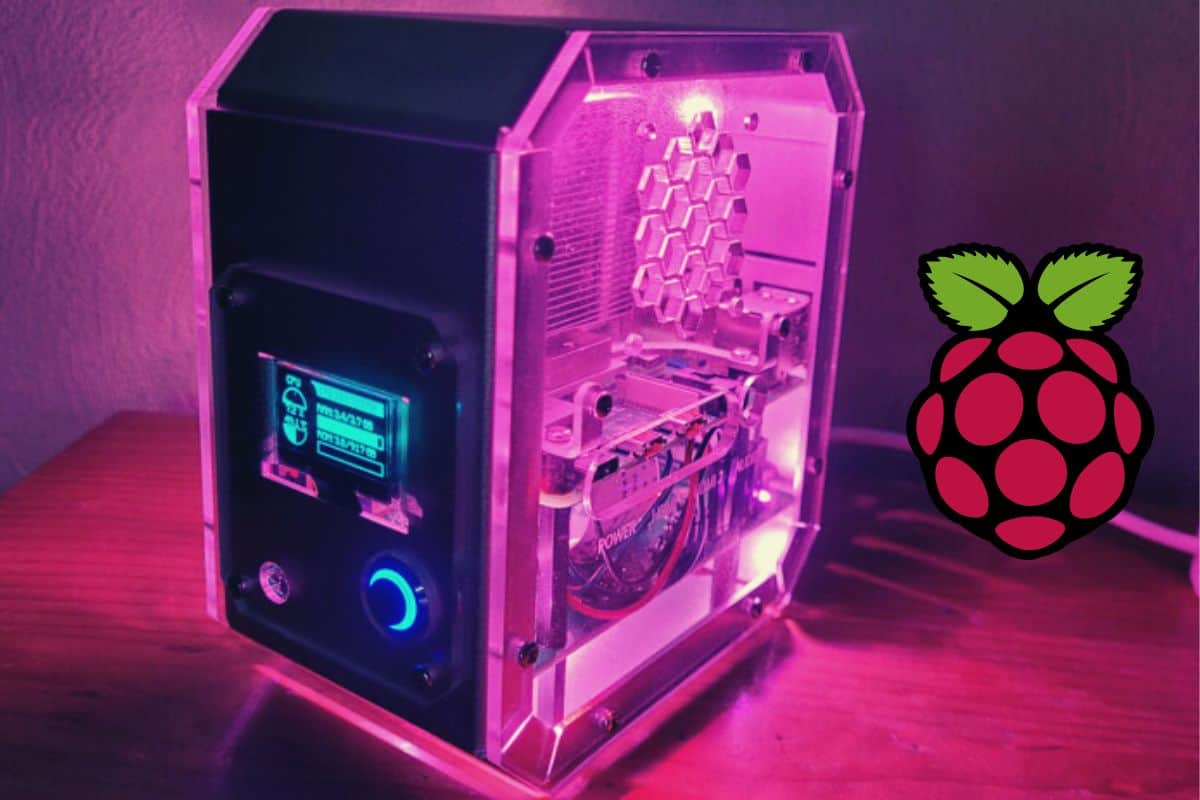
The SunFounder Pironman is a high-end case for Raspberry Pi 4. It’s built in aluminum with transparent panels on both sides (with LEDs inside). A slot for an M.2 SATA SSD is present, as well as a giant heat sink with a fan to keep the Raspberry Pi cool in all situations.
Let’s dive deeper in this review, starting with the specifications and then checking my impressions of it after a few weeks of using it 24/7.
Note: To be transparent, SunFounder sent me this product for free to test it and write a review. I’ll share my honest opinion in this article, but I also want to tell you this upfront.
SunFounder Pironman overview
First impressions
When I first read their product page about the Pironman, I was truly interested. It seemed like the perfect case we have been waiting for.
I’ve tested many cases in the past (you can read my comparison here), and thinking of all the issues I experienced, it looked like Pironman fixed them all:
- There is a slot to add an SSD inside the case (M.2 SATA).
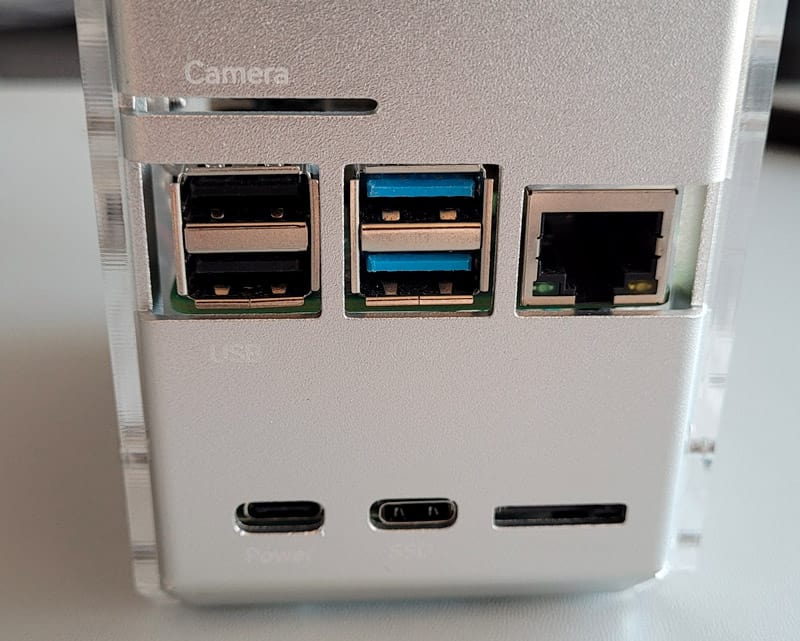
- The SD card slot remains accessible, as well as the GPIO pins.
- There is a hole for the camera ribbon if needed.
- A power button is always a cool addition.
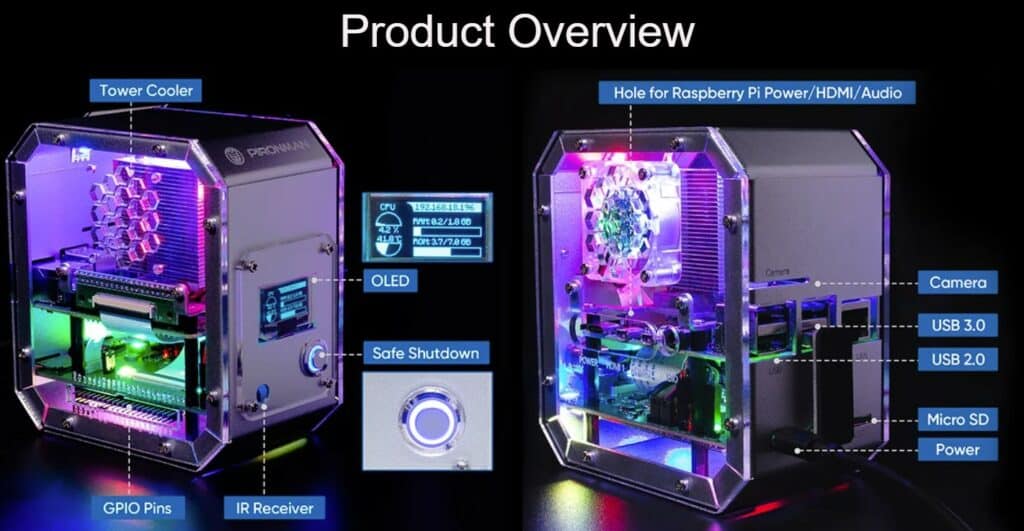
- They even added bonus features like an OLED screen on the front of it and an IR receiver.
- And overall, the design is great, with the aluminum style and the LEDs inside.
So yes, I was excited to test it for you as soon as possible.
Pricing
I saw the product page before they set the product price, so I was disappointed when I finally saw it. All these extra features come at a cost of $79 at the time I’m writing this review. It’s probably the most expensive case on the market.
Even the Argon One M.2, which seems to be the closest option if you need an M.2 SSD slot and a fan, is under $50.
Sure, it’s not the same design at all, but if you don’t care about the look of your case, you won’t necessarily choose the SunFounder product.
Aside from the Argon One, my other cases cost less than $20 (like the Neo which is still one of my favorites for everyday use), so that’s something to consider upfront: the SunFounder Pironman is expensive (check the current price here). Tons of features, but you pay the price.

Join Our Community!
Connect, learn, and grow with other Raspberry Pi enthusiasts. Support RaspberryTips and enjoy an ad-free reading experience. Get exclusive monthly video tutorials and many other benefits.
Learn moreCooling system
The cooling system included in the Pironman is similar to the Ice Tower, which is probably the best option available to keep a Raspberry Pi cool in any situation, even with overclocking and permanent high CPU usage.
There is a giant heat sink on top of the CPU, with a fan that can be controlled to cool it down when needed (you can adjust the maximum temperature). Basically, if you decide to keep the Raspberry Pi CPU temperature under a temperature (let’s say 60 °C), it will never go over it.
If you are lost in all these new words and abbreviations, request my free Raspberry Pi glossary here (PDF format)!
Download now
I will show you the results in my review, it’s pretty impressive compared to my previous tests.
I have a review of the ICE Tower here if you want to know what I’m talking about. The price for this cooling system is already between $15 and $20 if you buy it separately, so it’s something to consider in the Pironman price.
Other features
As mentioned previously, the Pironman also comes with additional features, that you won’t necessarily find on other cases. These features are not mandatory for most users, but it’s a nice addition if you want to have the “ultimate case”.
For example, there is a screen on the front of the case that displays the IP address, CPU, RAM and disk usage. You can configure it to be on or off. Having the IP address on it when it boots is a good idea, so you don’t need to use commands or a network scanner to find it (and you’ll know directly if there is a network issue).
I didn’t test the IR receiver, but it’s there if you need it. I guess it’s useful for Kodi or Home Assistant. Looks like I’ll need to get a controller to test this in my future reviews, as new products seem to include it (like the Banana Pi M5 I tested recently).
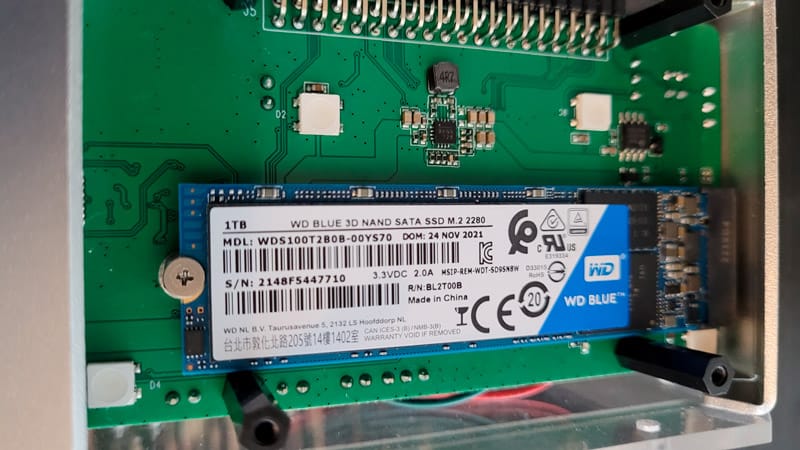
The M2 SATA SSD goes at the bottom of the case, on the expansion board (check the pictures in my review). Anyway, enough theory, let’s see the box contents and how it works in real usage!
You can see all the specifications on their product page if you need further details.
It's a free PDF guide containing every Raspberry Pi Linux command you should know!
Download now
SunFounder Pironman review
Unboxing
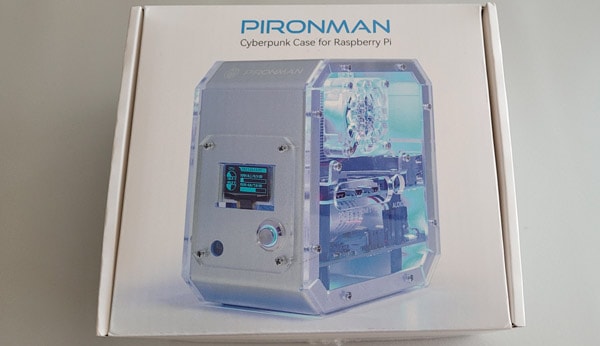
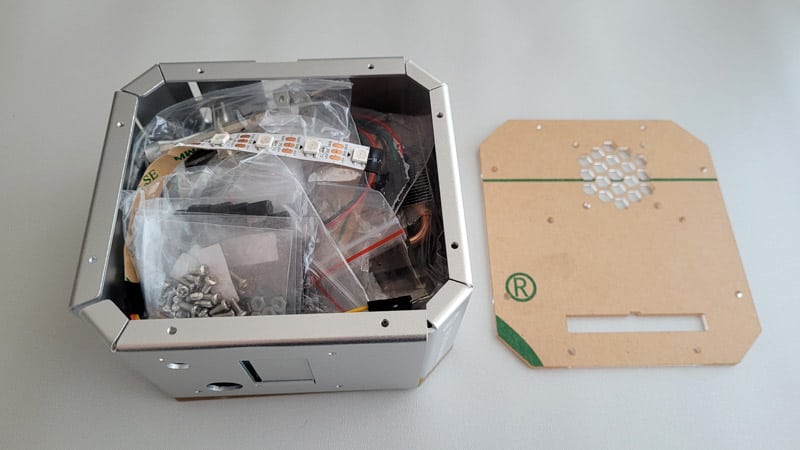
Here is the box I got in the mail. When you open it, it looks like the assembly is almost done, but… nope.
It’s just organized like this for the transport, but you’ll need to disassemble it first, and then reassemble it from scratch.
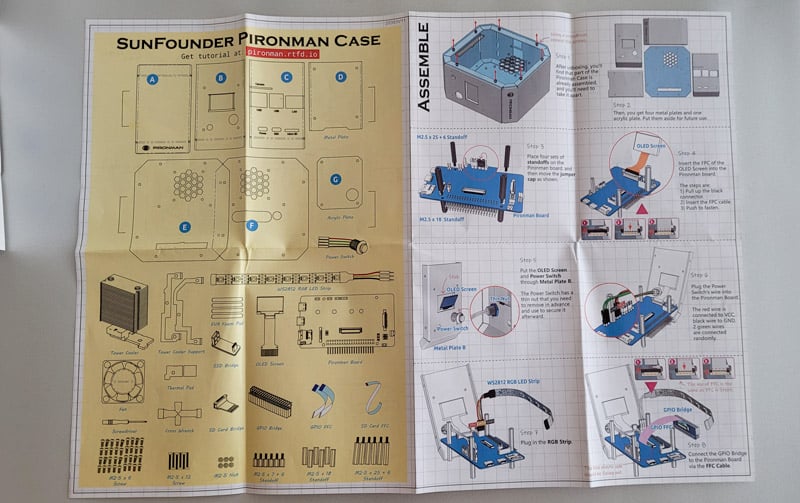
As with all SunFounder products, you get a big format assembly guide, in color, showing all the steps.
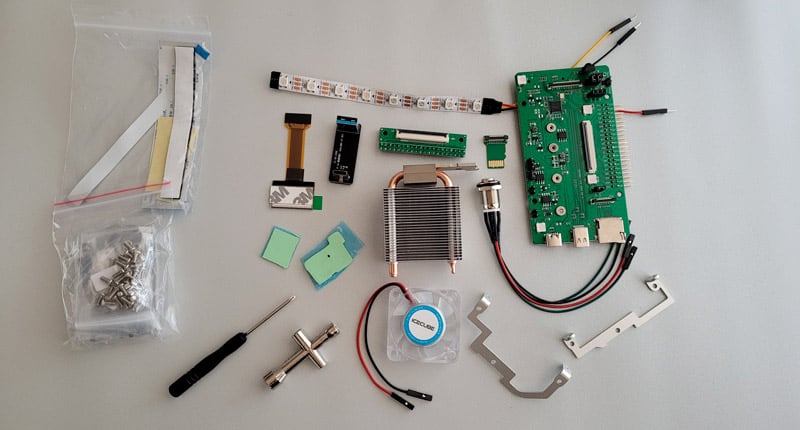
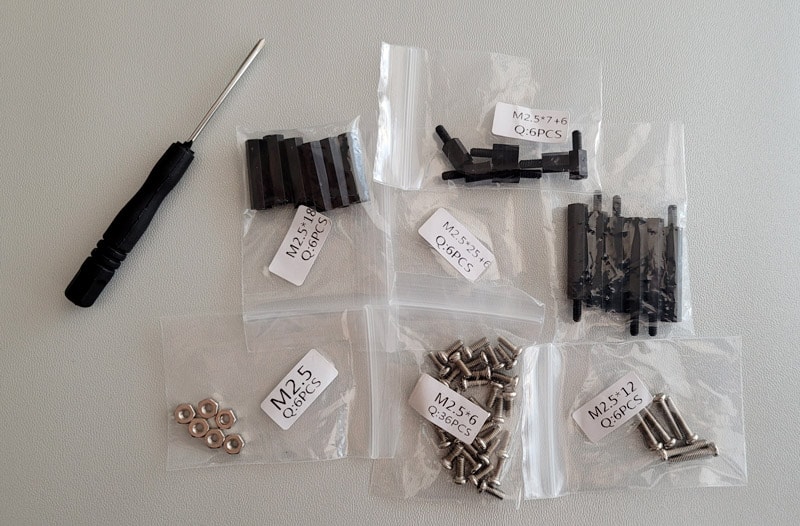
Aside from the Raspberry Pi 4 and the SSD, everything is included: fan, heat sink, button, wires, screws and even a screwdriver and a cross wrench.
The manual is similar to every product made by SunFounder (like the PiCar-X I tested here).
I like their manuals, it’s in color, with details about each step. They tell you exactly which screws or nuts to use (the exact reference), which avoids a ton of confusion when they are similar.
Assembly
I wasn’t expecting that the assembly would take that long when I decided to test it. It took me at least one hour to follow all the steps. I’m prepared for this when I buy a robot kit, not necessarily for a case. But now you know what to expect :-).
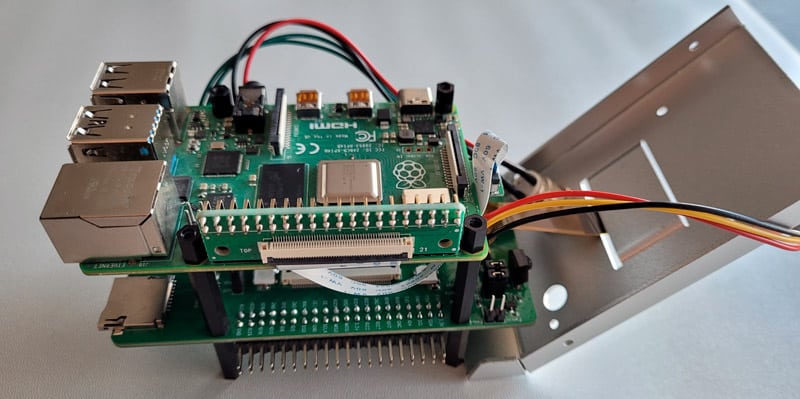
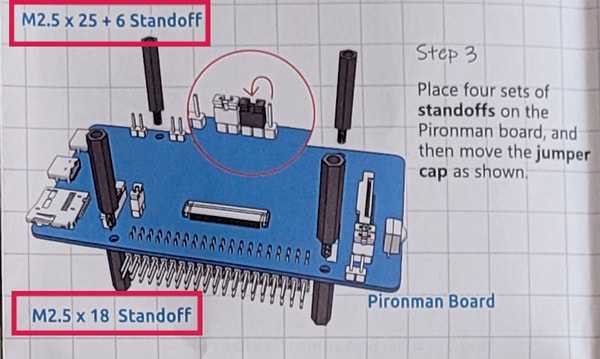
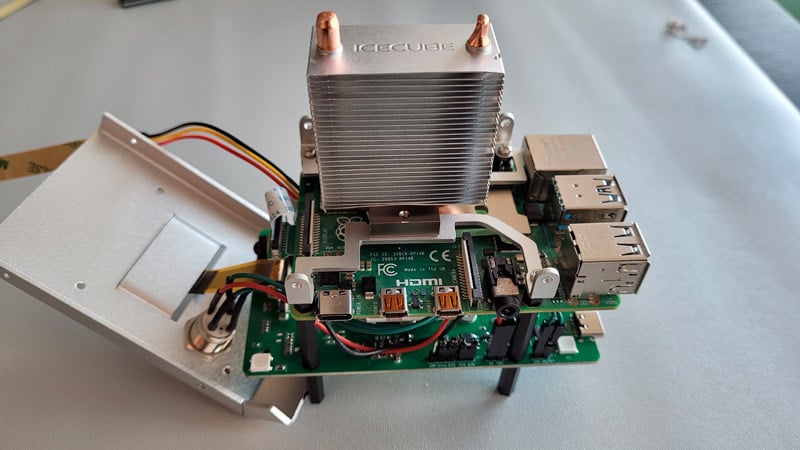
In fact, the process is really close to the steps you follow for a robot. You start with the Pironman board, plug all the wires, the Raspberry Pi and the heat sink, and then you have to close the surrounding case.
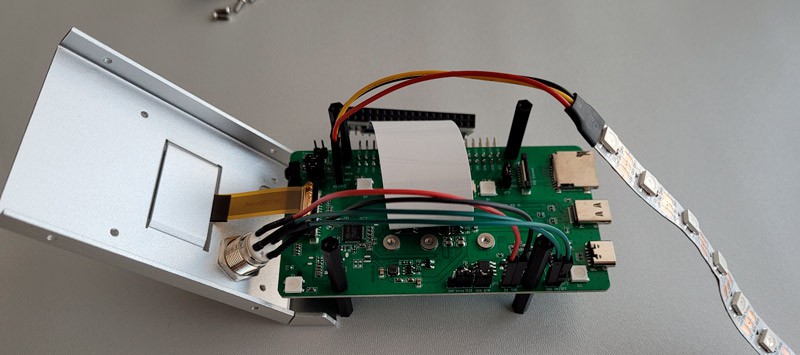
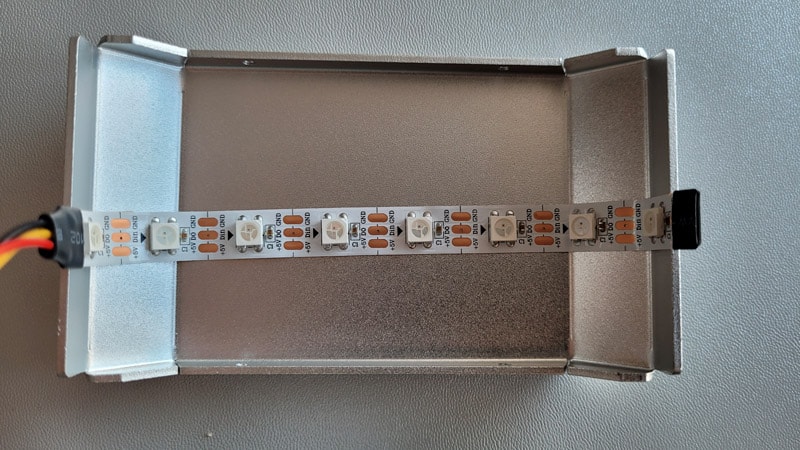
Each cable and button you have seen in the previous picture needs to be plugged in according to the manual (power button, LED strip, OLED screen, GPIO, SD card slot, etc.). The assembly is not that complicated, but it’s long, and some instructions were not clear.
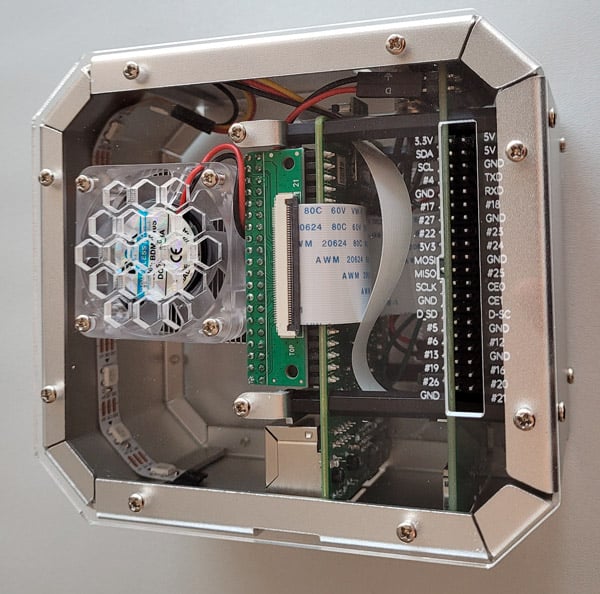
They could probably improve the manual to make it easier. For example, they tell you to plug the power button into the VCC pin, but there is no VCC pin on the board (it’s named 5V). Or they say the GPIO ribbon can be plugged the same way as the OLED screen, but not exactly, and the cable orientation is not clear enough (more on this later).
Also, the manual doesn’t mention the SSD slot at all, so I completely forgot to plug it in before the end of the assembly. It goes at the bottom of the case, you can access it by removing the bottom panel. You don’t have to unscrew everything, but it’s not straightforward either. An external USB bridge is included to power it from a Raspberry Pi USB 3.0 port.
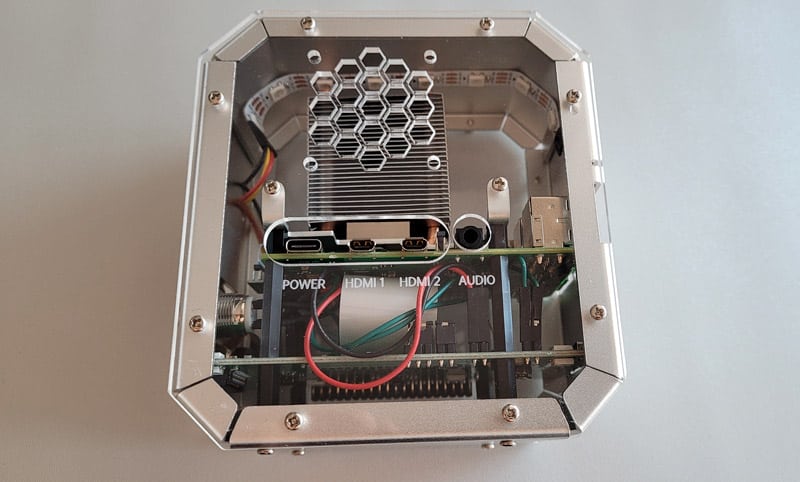
The case is made of four aluminum panels that are screwed together with two crystal panels on both sides. It’s a ton of screws for a Raspberry Pi case, but ultimately, it looks great, and you can be proud of yourself.
Well, at least, if you are better than me, the whole thing should work after that.
When I powered mine, it didn’t start. Plugging the power supply to the Raspberry Pi directly worked (but no LED/OLED/Power button), but nothing when plugged into the Pironman board.
If you are lost in all these new words and abbreviations, request my free Raspberry Pi glossary here (PDF format)!
Download now
I tried to contact their support, but it was Friday, and they don’t answer on weekends. So, the next day, I disassembled everything and tried to find out what was wrong. Well, my GPIO ribbon was plugged backwards. So, after flipping it, the connection between the board and the Raspberry Pi was OK and everything worked correctly.
I guess they should add some tests during the assembly, to make sure everything is plugged in correctly. Wasting 15 min to put all the screws around the case to discover that you missed one tiny step is a bit of a shame.
Configuration
On the first boot, almost nothing will work. This is normal, so don’t worry.
The Raspberry Pi will boot on the SD card or SSD slot, and you need to install the Pironman service to make everything work as expected.
I also missed this in their manual, as they explain the assembly but nothing else. Then I saw the online tutorial URL on it and visited the page. That’s when I understood that it was normal and that I need their application to make it work as expected.
The installation is not complicated, you just need to change a few lines in your config.txt file:
- Open the configuration file with:
sudo nano /boot/config.txt - And add these lines at the end:
dtoverlay=gpio-poweroff,gpio_pin=26,active_low=0
dtoverlay=gpio-ir,gpio_pin=13 - Save, exit and reboot.
Then, you can download the Pironman program and install it with a few commands:git clone https://github.com/sunfounder/pironman.git
cd pironman
sudo python3 install.py
If everything is correctly plugged in, everything should be on after that (LED, OLED screen, etc.) with the default configuration.
You can edit the configuration file, or use the command line to change your configuration.
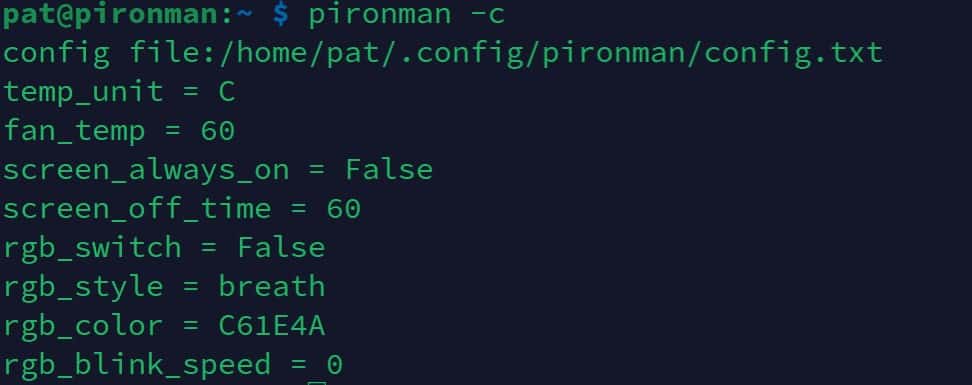
- See the current configuration:
pironman -c - Change the LED strip color:
pironman -rc <color>The color code is in hexadecimal format, use a tool like this one to help you. - Change the temperature threshold:
pironman -f <temperature> - View all possible command options:
pironman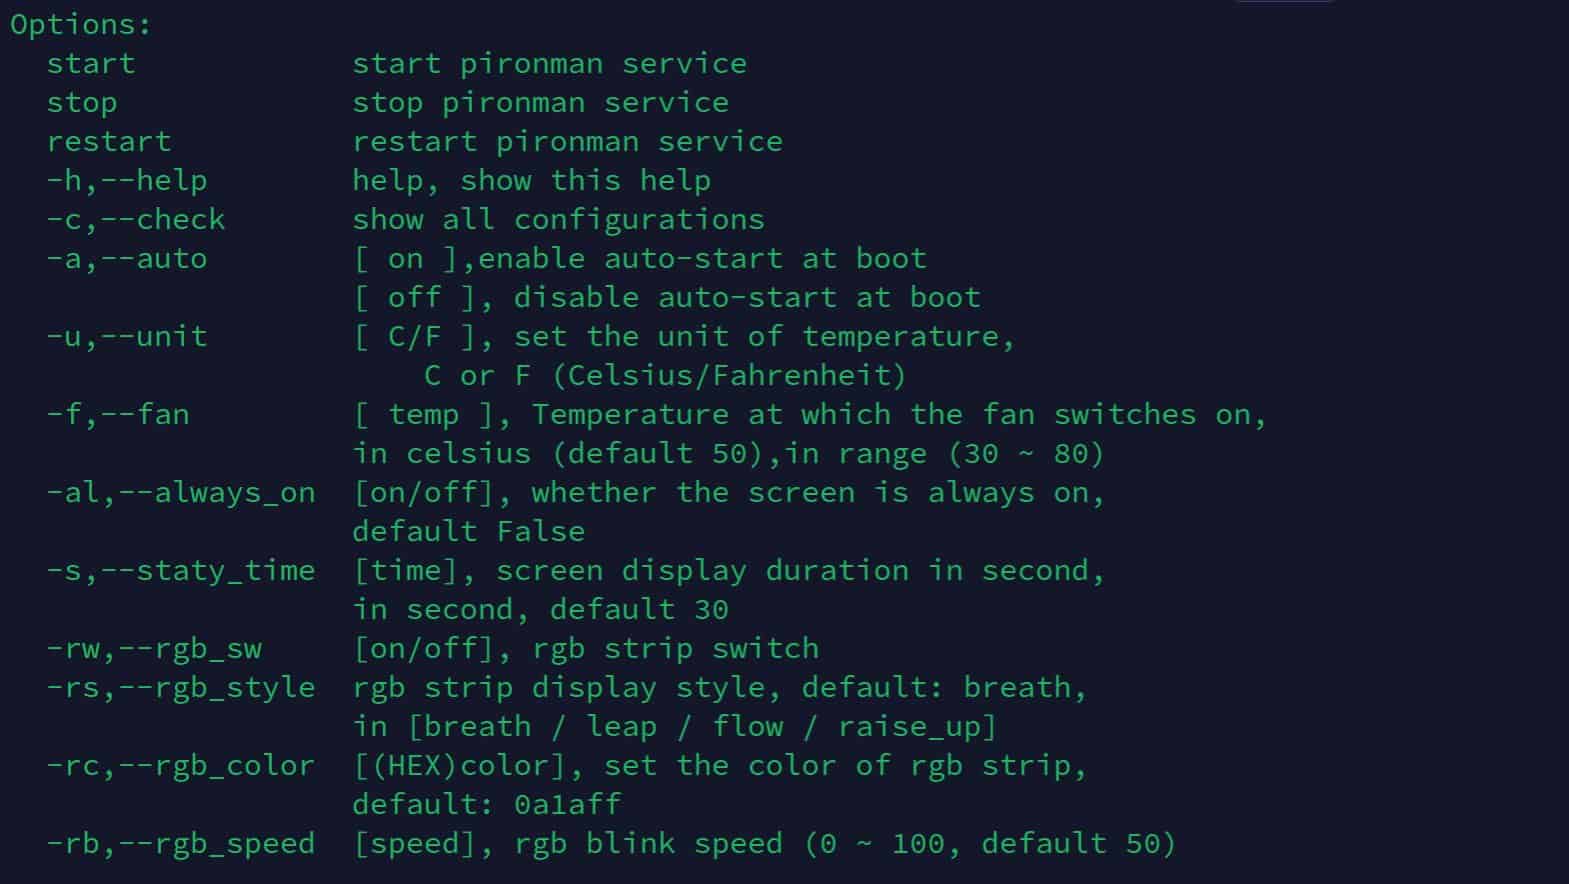
An app with a graphic interface could have been a great addition, as their target audience is probably more desktop users than programmers, but it’s not that complicated to use.
Cooling results
The first thing I like to test with a new case, and how it handles CPU temperature when the system is stressed for a long time. I mostly use passive cases, so it’s really important to do this test.
Well, the Pironman comes with a giant heat sink, that already does an impressive job, but after a certain threshold, you can choose to start the fan in order to stay under a certain temperature.
With the default settings, the fan starts when the CPU goes above 50 °C. And as you can see on this first graph, it basically never goes way above that.

This was a 10-minute test with all four CPUs running at 100%. The heat sink was enough to keep the Raspberry Pi under 50 °C for the first half, and then the fan started to run for short bursts after that, which was sufficient to stay around 50 °C for the end of the test.
When you compare these results to all my other cases, there is no competition.
Passive cases will slow down the CPU temperature increase, but can’t keep it stable for a long period, it will always go up.
The only one that comes close is the Argon One with the fan enabled, but the Pironman had better results in this test.

As a reminder, the Raspberry Pi CPU will start to throttle above 80 °C. So, while it’s essential to keep it under this threshold all the time, having it running at 50 °C versus 60 °C doesn’t have a major impact on performance and lifespan.
And most of the time, you won’t use it at 100% on all four CPUs for long periods. I just mention this if you are doing some crazy stuff with your Raspberry Pi, but in most cases, any of these cases should be good enough.
Fan noise
At first, I was disappointed with the fan noise. As soon as it started, it was really noisy and not natural (a bit like a metallic noise). On the product page, Sunfounder emphasizes that the fan is almost silent, with a noise level around 22 decibels.
My experience was really worse, so I told them. They were very receptive, we exchanged some videos of their result and mine, and they concluded it was an issue with my fan. They sent me a new one to test it, and good news: it was way better with the replacement fan.
Obviously, it’s not as silent as with passive cooling, but the noise level is way lower now. You can hear when the fan is running, but that’s all, not disturbing at all. Good point for this and the support team :-).
For your information, I let the Pironman run in my office for the last few days, running several services on it (AdGuard, Minecraft server, etc.) and configuring the fan to start at 60° C instead of 50° C. It never started, so most likely it won’t run that often.
You only need it for intensive usage, and it’s very efficient to keep the Raspberry Pi under your temperature threshold, that’s all we ask for.
Summary: If you find that your fan is too noisy, contact the Sunfounder support, just in case, maybe I wasn’t the only one with this issue.
Wi-Fi signal
I had some doubts about the impact of this case on the Wi-Fi signal, but after doing some additional tests, it looks like it’s not an issue.
Sometimes, aluminum cases will block the Wi-Fi signal, and slow down your network speed (it was an issue with the Flirc case for example). I got a good Internet connection and Wi-Fi speed with this case:

It's a free PDF guide containing every Raspberry Pi Linux command you should know!
Download now
Want to chat with other Raspberry Pi enthusiasts? Join the community, share your current projects and ask for help directly in the forums.
Pironman in a nutshell
Pros & cons
| Pros | Cons |
|---|---|
| Overall design. | Assembly time (around 1 hour). Instructions could be improved. |
| M.2 SSD slot. | A bit expensive. |
| Efficient temperature control. | |
| Nice features (LED, OLED, power button, etc.). | |
| Customizable settings (LED, fan, etc.). |
Overall, I’m delighted with this product. Once the assembly is done and everything is working, it’s really enjoyable. And, I like the lights in my office :-).

Who is it for?
The SunFounder Pironman is a great product for desktop usage, home servers and media centers. It’s more expensive than most alternatives, but it comes with everything you may dream of.
It’s probably not the ideal case if you do a lot of electronic or camera projects. Like, if you have to spend 20 min to plug in the camera or if you need to use HATs, I would rather use the Argon Neo or something similar.
But for a static setup, that you do once and leave alone on your desk, it’s an excellent choice.
The SSD slot allows you to host servers that require reliable, faster or bigger storage space (like a file server).
Interested?
Get your Pironman on the official website.
You can also find it here on Amazon.
Alternatives
If you don’t have the budget for this case, or if you often switch from one project to another, you can find all my recommendations for the best alternatives in this article: What’s The Best Raspberry Pi 4 Case For You? (I Tested Them All).
Personally, I now use the Pironman as a 24/7 running station with Raspberry Pi OS Desktop on it and will keep using the Argon Neo for my daily tests when I write tutorials on RaspberryTips and can’t do it on the Pironman.
Whenever you’re ready, here are other ways I can help you:
The RaspberryTips Community: If you want to hang out with me and other Raspberry Pi fans, you can join the community. I share exclusive tutorials and behind-the-scenes content there. Premium members can also visit the website without ads.
Master your Raspberry Pi in 30 days: If you are looking for the best tips to become an expert on Raspberry Pi, this book is for you. Learn useful Linux skills and practice multiple projects with step-by-step guides.
The Raspberry Pi Bootcamp: Understand everything about the Raspberry Pi, stop searching for help all the time, and finally enjoy completing your projects.
Master Python on Raspberry Pi: Create, understand, and improve any Python script for your Raspberry Pi. Learn the essentials step-by-step without losing time understanding useless concepts.
You can also find all my recommendations for tools and hardware on this page.