Beginner’s Guide: Getting Started with Thonny on Raspberry Pi
If you’re new to programming and looking to get started with Python on a Raspberry Pi, Thonny IDE is a great choice. In fact, even as a seasoned developer, I tend to use it regularly for simple Python projects. I find it easier to stay focused on your code than on more powerful solutions.
Thonny is a beginner-friendly Python code editor that comes pre-installed on Raspberry Pi OS. The interface is clean and simple, and the built-in Python interpreter means that we can start coding right away without having to install anything else.
In this article, I’ll walk you through the steps you need to take to get started with Thonny on your Raspberry Pi. By the end of this guide, you’ll be able to use Thonny like a pro, and use all the advanced features that come with it (and are often unknown because they are hidden so they don’t scare beginners ^^).
By the way, if you get overwhelmed as soon as Python is required for a project, I recommend checking out my e-book “Master Python on Raspberry Pi“. It will guide you step-by-step to learn the essential concepts (and only the essential concepts) required to achieve any project in the future. Raspberry Pi without Python is like a car without an engine, you miss all the fun parts. Get 10% off by downloading it today!
Setting up Thonny on Raspberry Pi
Raspberry Pi OS
If you use Raspberry Pi OS with a desktop environment, you already have Thonny installed on your system.
It’s a default application that comes with both versions (the full version, “with recommended software” but also the desktop edition). Check my Raspberry Pi OS guide here if you need more details.
You can find Thonny under programming in the main menu.
If you don’t see it, maybe you removed it manually, check the following instructions to reinstall it on your system.
Other distributions
Thonny is a free Python IDE, available on all platforms and systems. So, it’s pretty easy to install it on your Raspberry Pi, whatever operating system you use. It’s even available on Windows and Mac if you want to try it on your computer.
On most Linux distributions, you can use your package manager to install it:
- On any Debian-based distributions (like Ubuntu):
sudo apt install thonny - On Fedora and Red Hat-based distributions:
sudo dnf install thonny
And if it doesn’t work, you can try other options (not tested):

Join Our Community!
Connect, learn, and grow with other Raspberry Pi enthusiasts. Support RaspberryTips and enjoy an ad-free reading experience. Get exclusive monthly video tutorials and many other benefits.
Learn more- You can also try Snap or Flatpak if it’s not available in your default repositories:
sudo snap install thonny-ide
flatpak install org.thonny.Thonny - There is also a script available for other cases:
bash <(wget -O - https://thonny.org/installer-for-linux)Check their GitHub project for more details.
So, whatever your case may be, it shouldn’t be difficult to install Thonny on your Raspberry Pi. And I guess 90% of you already have it, so let’s move into an introduction about the user interface.
Overview of the Thonny user interface
The goal of the Raspberry Pi (and the system, too) is to be accessible to young students. The whole idea is to help them learn how to code with an inexpensive device and an intuitive interface (full story here).
If like me, you always mix the languages syntax, download my cheat sheet for Python here!
Download now
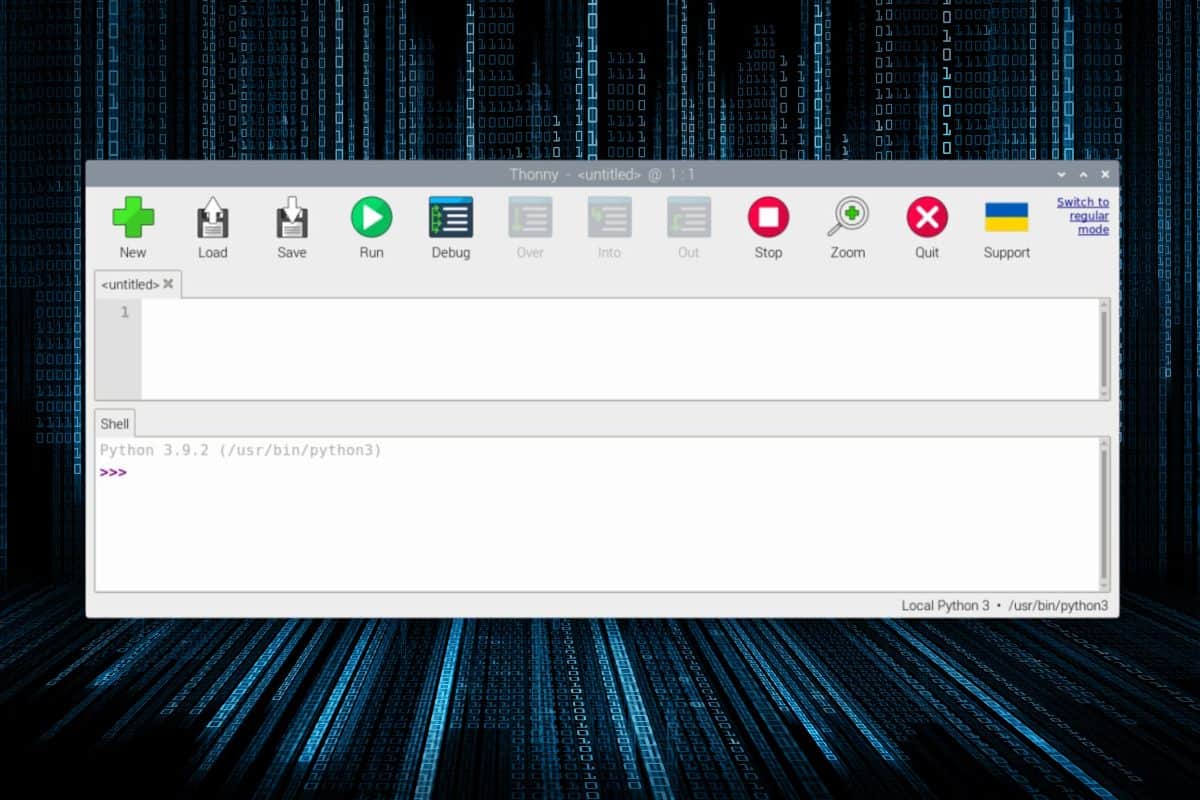
By default, Thonny is set up on Raspberry Pi OS with a minimalist interface, looking like this:
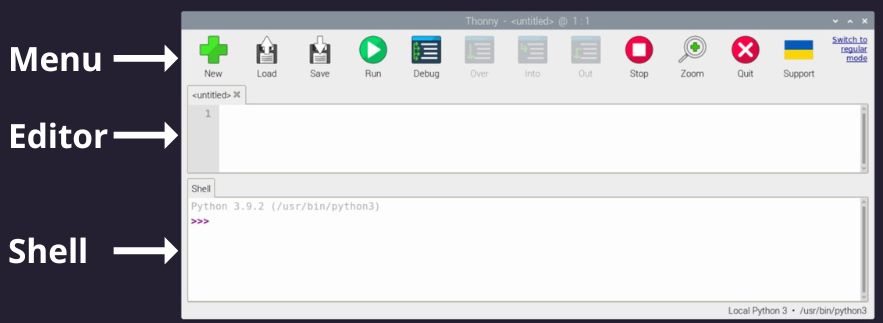
Top menu
At the top of the window, you have one row with big buttons, for the main actions you can use with Thonny: create a new file, save, run your code, etc.
No complicated menus and submenus, when you code for the first time, you don’t need anything fancy. But don’t worry, we’ll see that it’s possible to switch to a more traditional mode, with all the options at hand.
Editor
The editor window, just below the top menu, is where you will write your Python code.
By default, it provides syntax highlighting, and there are other helpful features you can enable, as we’ll see later.
You can have several files open in different tabs. You can right-click on this section of the window to get access to a few “advanced” features. More about this later.
Shell
Finally, the shell window at the bottom of the window, is where you’ll see the result of your script, or can run Python commands directly.
It’s only for Python commands, you can’t use it for traditional Linux commands.
And if you need to clear the history, you can do this with a right-click.
It's a free PDF guide containing every Raspberry Pi Linux command you should know!
Download now
Writing your first Python script with Thonny
The goal of this article is not to teach you how to write Python scripts, but if it’s your first time with Thonny, you might also be pretty new to Python. So, here is a quick summary of how you can write Python code in Thonny.
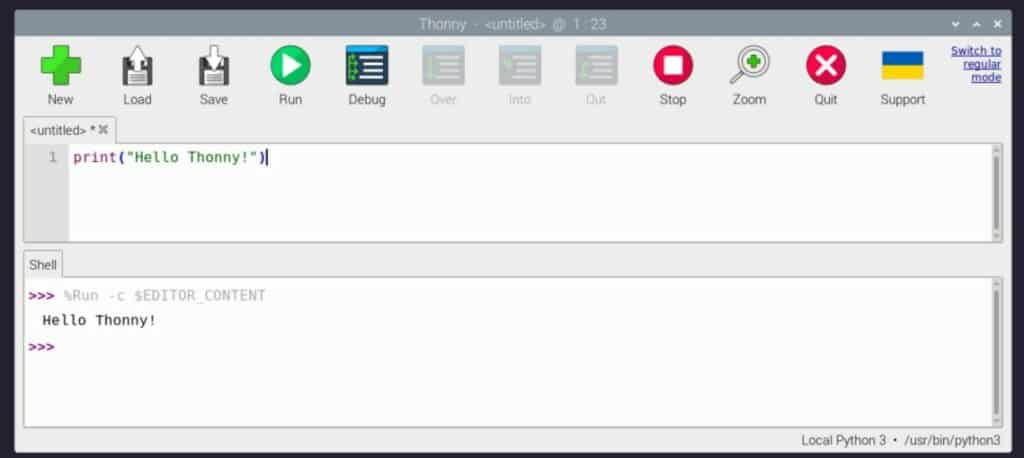
- Start by writing your Python code in the editor section of the interface.
For a quick test, you can just copy & paste this line:print("Hello Thonny!") - Click on the “Save” button in the menu bar, and save the file with a “.py” extension.
For example: “test.py”. - Then, click on “Run” to test your script.
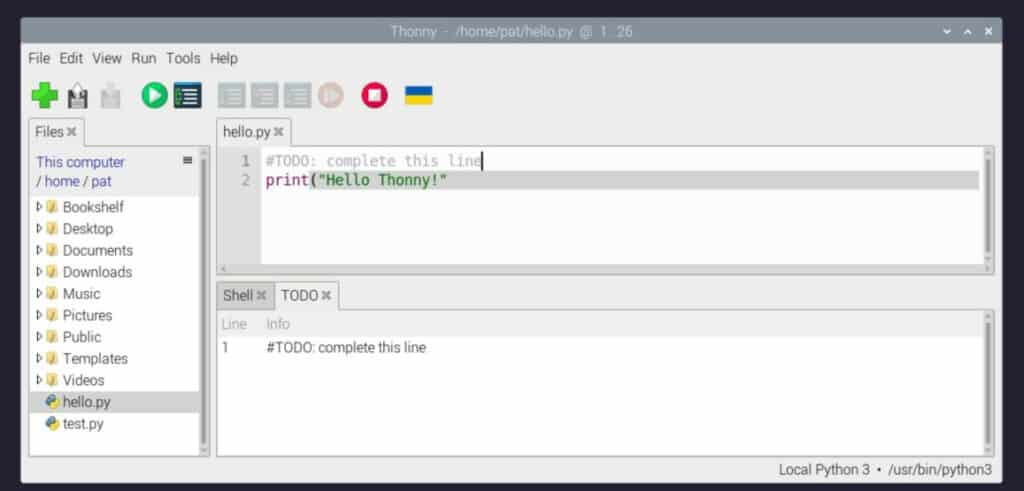
When you run a script, you’ll see the result in the Shell just below:
If you made a mistake in your code, it will also show up in the Shell, with the related Python error (as if you were running it with a command line).
It's a free PDF guide containing every Raspberry Pi Linux command you should know!
Download now
Reminder: Remember that all the members of my community get access to this website without ads, exclusive courses and much more. You can become part of this community for as little as $5 per month & get all the benefits immediately.
Advanced features of Thonny
Even if Thonny has a minimalist interface by default, with most features hidden from new users, it doesn’t mean it’s a weak editor. Once you’re a bit more advanced with Python, and don’t fear a more complete interface, I recommend switching to the regular mode and enjoying all the built-in features.
Customize Thonny interface
You don’t have to stay with this childish interface forever. Once in regular mode, you’ll have access to all the options to customize the Thonny interface to your liking.
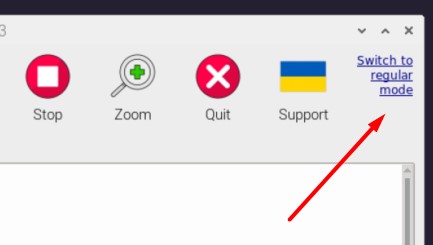
Switch to regular mode
If you have the top bar with the big buttons (which is the default style on Raspberry Pi OS), you can switch to a more traditional layout by clicking on “Switch to regular mode” in the top-right corner:
You need to restart the application to update the interface.
Once done, it should look like this:
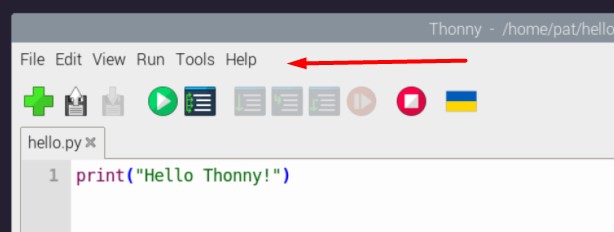
You still have the top bar with the same buttons, but they are much smaller. More importantly, you get access to the full menu, with all the options we’ll need to take advantage of all the features.
Change theme
By default, (on Raspberry Pi OS at least), Thonny uses the same style as the whole desktop environment theme (which is not my favorite, as explained here). But you can now change that easily:
If like me, you always mix the languages syntax, download my cheat sheet for Python here!
Download now
- Now that you have access to the full menu, go to Tools > Options.
- Click on the “Theme & Font” tab.
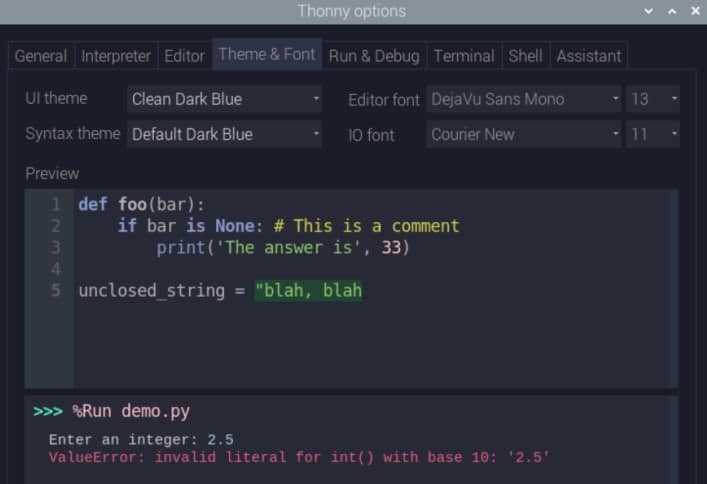
- You’ll see a few options where you can choose a different theme for the interface, the code highlighting and also pick a custom font for the editor and the shell (or just change their size).
The configuration looks like this, with the “Clean Dark Blue” theme already applied:
You also need to restart Thonny to get the new theme applied entirely. Here is what it looks like after changing it:
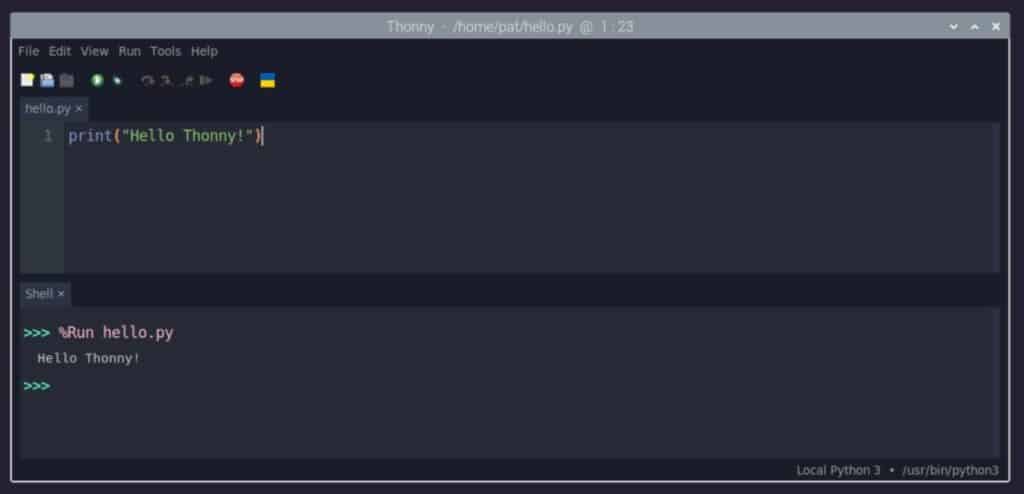
It is no longer a childish interface, it’s very close to what you can get with a traditional code IDE like Visual Studio Code, Sublime Text or whatever. And I’ll show you other interesting features that I discovered while researching this article, so you might not know them either.
Code completion
Thonny has a code completion feature built-in by default.
It doesn’t work the same as the other editors I use, so I didn’t know it was available directly.
The goal of a code completion feature is to help you find a function name, by suggesting what seems the most likely depending on your code. It basically looks like this:
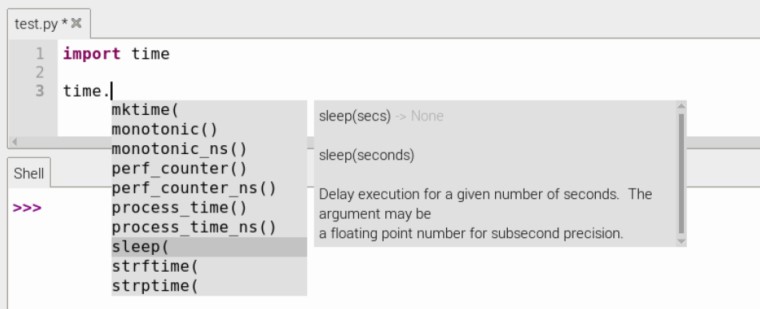
Thonny knows I’m looking for a function from the “time” module, so it shows me a list of all of them, with a short description of what each one does.
For most code editors, this is automatic and the editor will suggest all the possibilities to you. With Thonny, you have to ask for help when you need it :-). Press “CTRL+SPACE” to get this tooltip to show up.
There is also something similar if you need help with the function’s parameters.
Pressing “CTRL+SHIFT+SPACE” while calling any method with parameters will show a different tooltip:
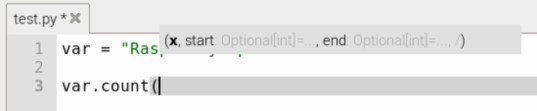
In this example, I can see that the count() method on a string has three parameters in this order: x (the substring), start and end. The last two are optional. It can be a time saver when you work with libraries you’re not used to.
Code analysis
Thonny also comes with some interesting code analysis features that are especially useful for beginners.
When you get an error while running your script, or during the debug process, you’ll get the raw Python error in the shell. This is classic, nothing exceptional here.
But you can also enable the assistant (under View in the menu, if it’s not enabled by default) and get some additional help from it:
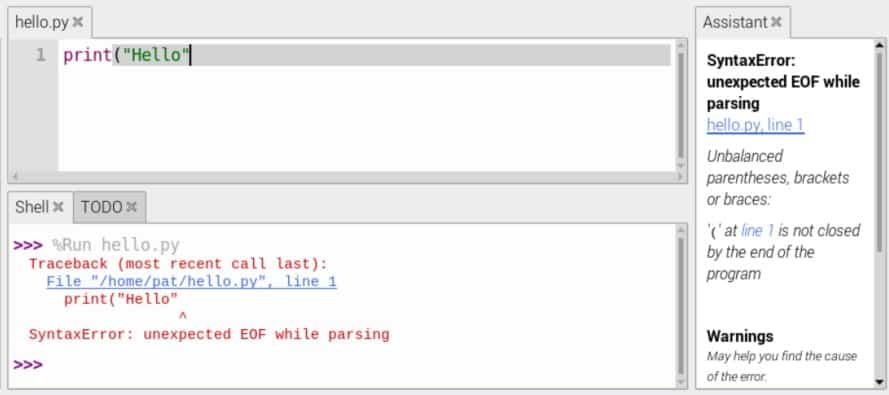
In this example, “unexpected EOF while parsing” is not very helpful. If you are an advanced programmer, you’ll quickly understand what’s going on, but for beginners (or if you have no idea), the assistant explains more clearly that I have an issue with missing parentheses.
The assistant can also give useful tips even when your code is working:
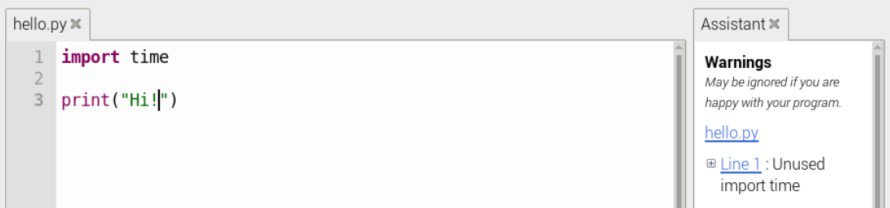
In this case, I’m importing a module (“time”) that I don’t use at all in my script. It’s obvious in this example, but with longer scripts, it can be useful.
Thonny can suggest many other things to improve your project, so it might be a good idea to enable this tool from time to time.
Thonny keyboard shortcuts
Thonny comes with many useful keyboard shortcuts that can help you work faster and more efficiently.
In addition to the classical shortcuts I won’t list here (CTRL+C, CTRL+V, CTRL+A, etc.), here are a few interesting ones:
| Keyboard shortcut | Action |
|---|---|
| CTRL + R | Run the current script |
| TAB | Indent selected lines |
| SHIFT + TAB | Dedent selected lines |
| CTRL + 3 | Comment selected lines |
| ALT + 4 | Uncomment selected lines |
| CTRL + G | Go (to specified line) |
| CTRL + SPACE | Suggest auto-complete |
| CTRL + SHIFT + SPACE | Show parameter info |
| CTRL + L | Clear shell |
Optional views
As for the assistant, there are many views available that are not enabled by default, to keep the interface as clean as possible.
But if you are used to a more traditional editor, you’ll probably want to enable a few of them. You can find the list in the menu, under “View”.
For example, the “Files” view will display the file explorer on the side. You can also enable the “TODO” view to list all the TODO comments from your code in one window or enable the “Variable” view to have a summary of the variables you use.
Manage plugins and extensions
When you code in Python, you’re always using external libraries, from the PIP repository for example. Thonny has a nice feature built-in to manage them.
You can browse and install these plugins from the “Tools” menu by clicking on “Manage Plugins”. From there, you can search for plugins, install them, and manage their settings:
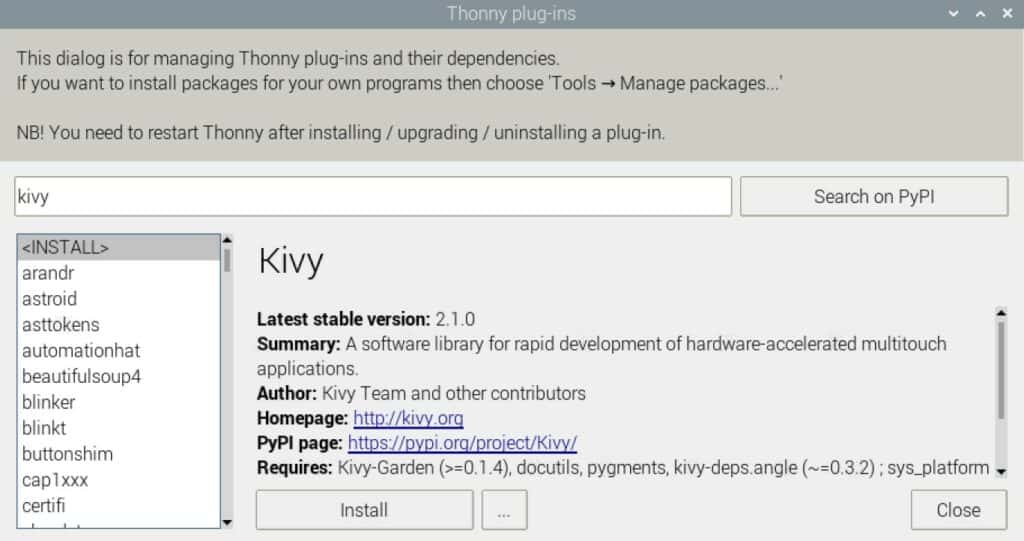
In one click, you can install most modules from PyPi without having to type any command line.
Switch Python version
Finally, one last thing I want to say about the Thonny options is that you can easily switch the Python version used from the “Interpreter” tab:
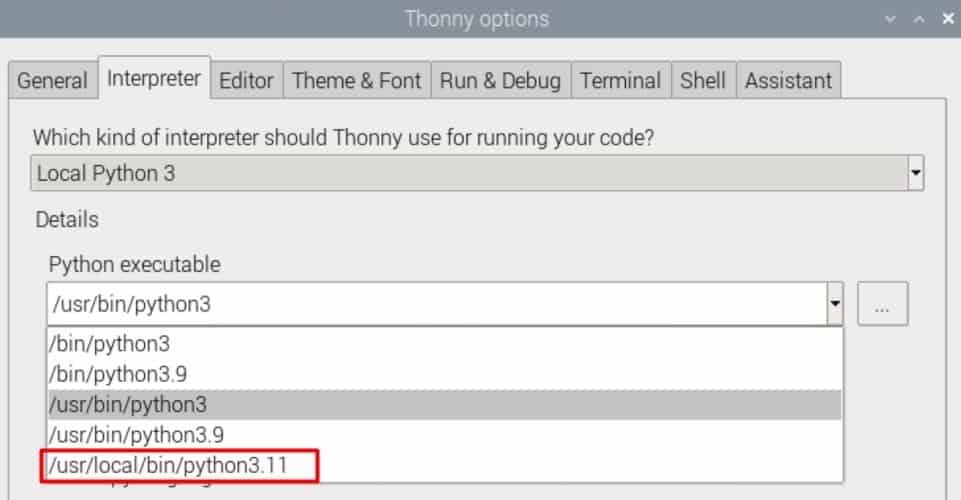
It was particularly useful on old Raspberry Pi OS versions when they were Python 2 and 3 installed by default. But even now, if you installed a more recent Python version manually, you can use this to switch to it for your project.
I hope this guide was useful, and that you discovered a few interesting features about Thonny you didn’t know about. If you want to know more about Python, I have plenty of tutorials on this website. Feel free to check them to learn even more:
- Getting Started With Python Games On Raspberry Pi (Pygame)
- Python on Raspberry Pi: The Top 5 Libraries for Every Developer
- Should You Learn Linux or Python first?
Whenever you’re ready, here are other ways I can help you:
The RaspberryTips Community: If you want to hang out with me and other Raspberry Pi fans, you can join the community. I share exclusive tutorials and behind-the-scenes content there. Premium members can also visit the website without ads.
Master your Raspberry Pi in 30 days: If you are looking for the best tips to become an expert on Raspberry Pi, this book is for you. Learn useful Linux skills and practice multiple projects with step-by-step guides.
The Raspberry Pi Bootcamp: Understand everything about the Raspberry Pi, stop searching for help all the time, and finally enjoy completing your projects.
Master Python on Raspberry Pi: Create, understand, and improve any Python script for your Raspberry Pi. Learn the essentials step-by-step without losing time understanding useless concepts.
You can also find all my recommendations for tools and hardware on this page.