
How Do I Know if My Raspberry Pi Camera is Working?
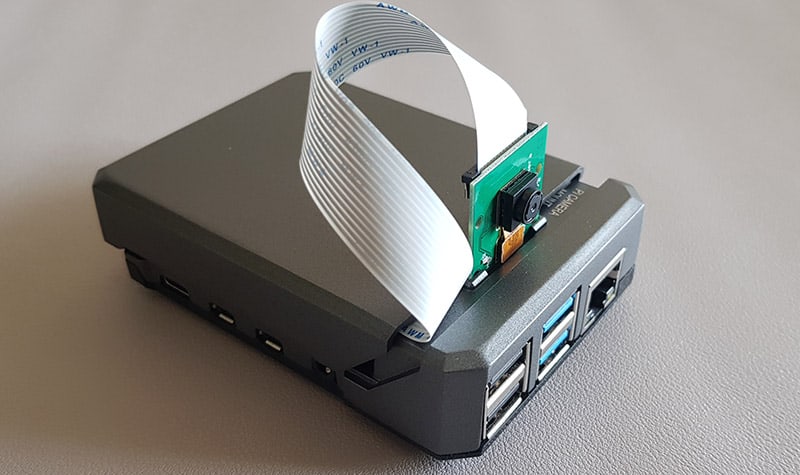
When you get your shiny new Raspberry Pi camera installed, the first thing you’ll want to do is take a test image to ensure it works. I’ll walk you through the basics, but if you need more details on getting the camera installed, check out this article on camera basics.
To check that your camera is working:
- Open a terminal window.
- Make note of the current directory so you know where to look for the image.
- Enter the command:
libcamera-still -o test.jpg - You should see a preview window pop up for about 5 seconds.
If all goes well, you’ll find the image in the current directory, you’ll be able to open it and you’re all set to start taking pictures. If that doesn’t work, or if you get an error message, read on to find out how to troubleshoot your camera installation.
If you’re looking to quickly progress on Raspberry Pi, you can check out my e-book here. It’s a 30-day challenge where you learn one new thing every day until you become a Raspberry Pi expert. The first third of the book teaches you the basics, but the following chapters include projects you can try on your own.
Software Settings to Check to Use the Camera Module on Raspberry Pi
Is The Camera Enabled?
The first thing to do is to make sure that the camera interface is enabled in the Raspberry Pi configuration file. This can be done from either the desktop version or the command line.
Note: On the latest Raspberry Pi OS versions, the camera port is enabled by default. The configuration option I show you in the next paragraph is not present, so you can just skip this part if you are in this case.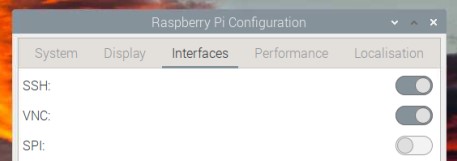

Join Our Community!
Connect, learn, and grow with other Raspberry Pi enthusiasts. Support RaspberryTips and enjoy an ad-free reading experience. Get exclusive monthly video tutorials and many other benefits.
It's a free PDF guide containing every Raspberry Pi Linux command you should know!
Download now
Desktop Version:
If you are using the Desktop version, you can quickly check this in the Raspberry Pi Configuration tool:
- From the menu, choose Preferences.
- Choose the Interfaces tab.
- The very first item is Camera.
Make sure “Enable” is checked: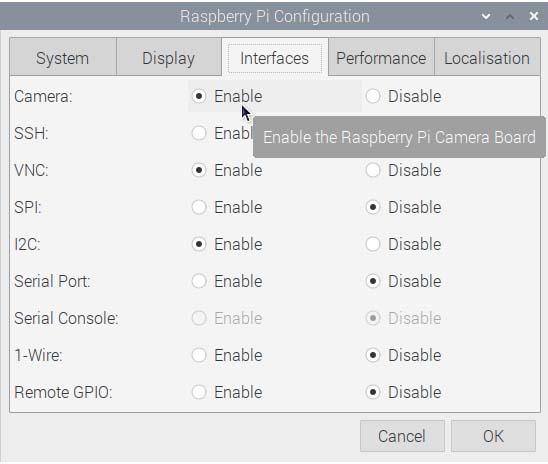
I have also read that it may be helpful to enable the I2C interface while you’re here. If it was not previously enabled, you will need to reboot for the setting to take effect.
Command Line:
The same thing can be done with Raspi-config if you are on a Lite version:
- Open the Terminal.
- Enter:
sudo raspi-config - Choose Interface Options:
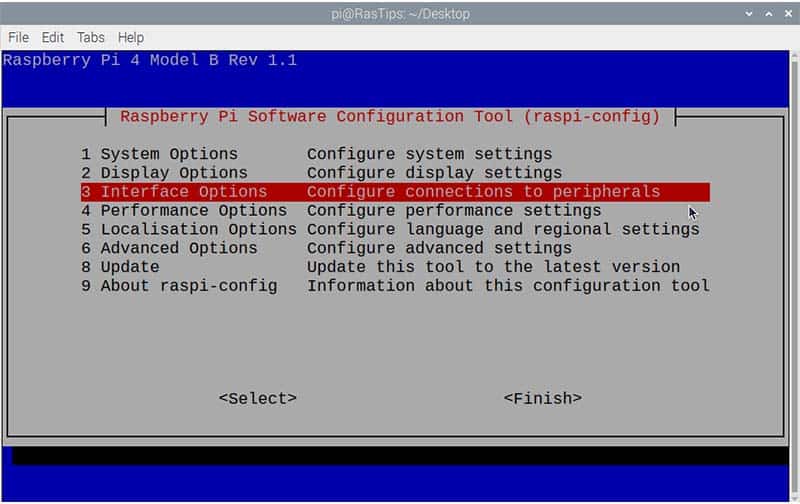
- Choose Camera:
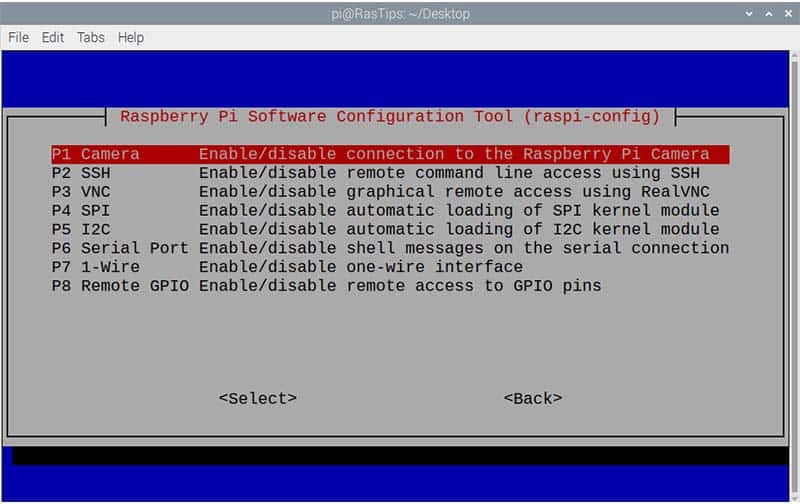
- Select Yes that you’d like the camera interface enabled:
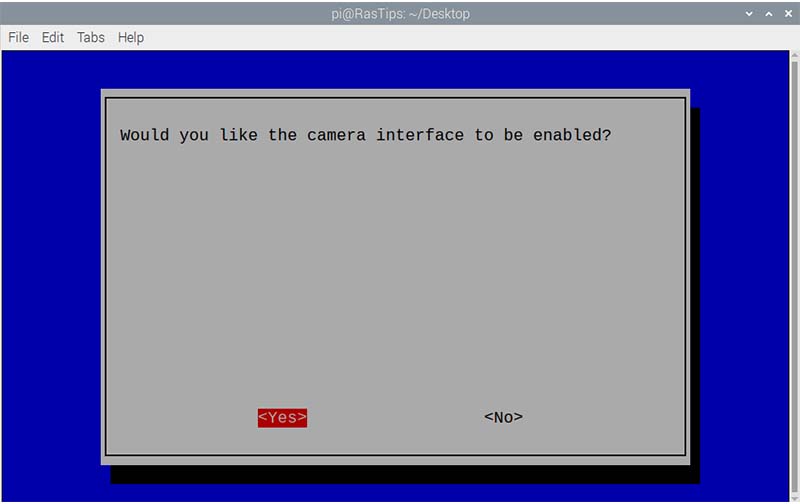
- Reboot if prompted.
Note: As for the graphical configuration, this option is no longer available on the latest Raspberry Pi OS versions. The camera is enabled by default. You’ll find a way to revert to the “Legacy Camera” support instead, but it’s not required unless you are using some old Python code with it (more details about this here).
Are you a bit lost in the Linux command line? Check this article first for the most important commands to remember and a free downloadable cheat sheet so you can have the commands at your fingertips.
Is Your Camera Detected Correctly?
In theory, that’s all that should be required for the software part, as everything else is built into Raspberry Pi OS. There is a command that you can run from the terminal that will tell you if the camera is being seen by the operating system.
- Launch Terminal.
- Enter:
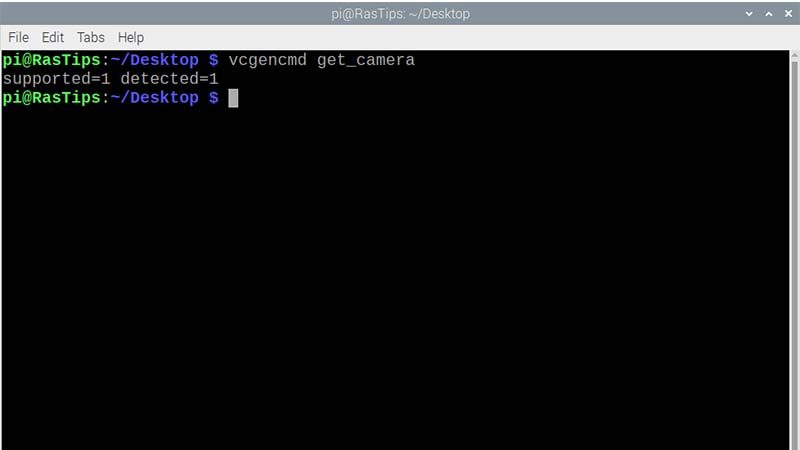
vcgencmd get_camera
You should get back supported=1, detected=1, indicating that the camera is detected and supported by the operating system. If you get detected=0, then the camera is not being seen by the operating system.
Checking the Hardware Installation for the Raspberry Pi Camera
If the software isn’t what’s causing the issue, it’s time to consider whether there’s a hardware issue. Most camera issues seem to be related to not quite getting a good connection to the Pi.
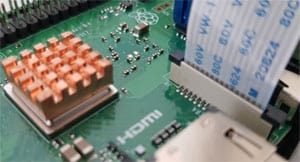
Let’s start with the camera connection at the Raspberry Pi end. If you open the plastic slide and release the cable, make sure that the metal connections at the end of the cable are facing the HDMI port on the Pi motherboard. Or another way to put it is to make sure that the metal ends face away from the plastic slide lock.
While you have the cable loose, make sure there isn’t plastic film on the metal tabs from shipping and that the contacts are clean. If you’re unsure, you can use the eraser of a pencil to gently clean them, or a soft cloth (don’t use anything that is wet).
It's a free PDF guide containing every Raspberry Pi Linux command you should know!
Download now
The slide lock should go all the way back into position, the cable should be straight across and the metal tabs should not be visible. I find that I need to take a screwdriver and push gently at each end of the slide locks to get it to go all the way back down. Be careful that the cable does not shift position in this process.
Once that’s back in place, give it another try to see if it did the trick. If so, great, you’re all set. If not, let’s check the other end of the cable on the camera. It’s also removable with the same type of connector (you can change the cables to get longer or shorter ones if needed).
The process is the same at the camera end as it was for the Pi end. Just make sure it goes back in with the metal ends facing away from the plastic clip.
Once that’s done, give it another try. If that doesn’t work, we have about exhausted the hardware troubleshooting we can do. There is a rare possibility that you have a bad camera module, but we’ll check the software first!
Is It Possible to Have a Bad Camera Module?
As a general rule, it’s very rare to get a bad camera module, but it can happen. To know for sure, you need to check the software and hardware settings, and you can also test on another Raspberry Pi.
Before you give up completely, if you have another Pi available, you might try hooking the camera to that Pi and see if anything is different. That might tell you that you have a problem with the connector on the Pi rather than the camera module.
If the camera doesn’t work on the second Pi, then you almost certainly have a bad camera module. The next test is to try another module. I had this experience with a new HQ camera recently, so I know it does happen.
How to Fix Blurry Images with the Camera Module
If you happen to have a Raspberry Pi camera version 2.0, you may find that your camera works, but the images are blurry, particularly if you are trying to photograph outdoor scenes. This is a fairly well-documented issue of fixed-focus cameras.
When camera 2.0 was released, the Raspberry Pi foundation made the decision to have the focus set at about 1 to 2 meters, rather than at infinity, which most fixed focus cameras are set to. This works great if you are using the camera for portraits, but quickly became a problem for everyone else.
A camera set to infinity will have things a little bit soft as they get closer to the lens, but most things, unless extremely close, will be recognizable. As you get past about 3 to 5 meters, everything is in sharp focus. This is how the Pi camera module version 1.0 was set.
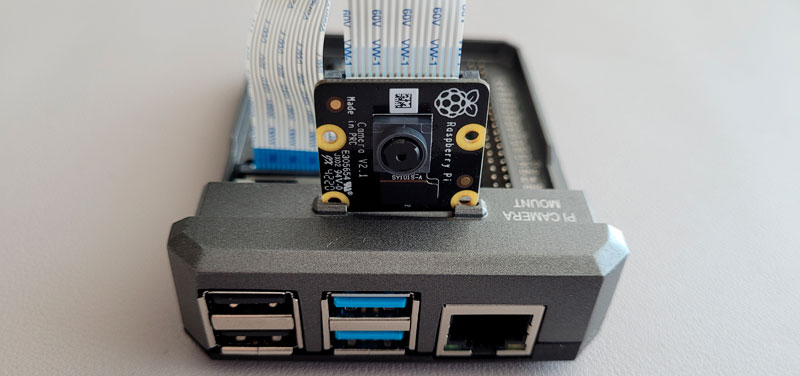
The 2.0 camera got a lot of complaints about this issue, and the 2.1 camera module went back to the infinity focus. The problem is that there are a lot of resellers with an inventory of 2.0 cameras still being sold. The good news is that there is a fix, but it is uncertain if this will void your warranty (proceed at your own risk).
There is a focus ring on the 2.0 camera module, it’s just glued in place. The fix is to get a pair of fine pliers or strong tweezers and gently rotate the focus ring. You’ll need enough pressure at first to overcome the glue, but it should be relatively easy to move after that.
Make small movements and then take another picture to test… eventually, you’ll find the best place for your scene.
It's a free PDF guide containing every Raspberry Pi Linux command you should know!
Download now
Troubleshooting guide for the Camera Module on Raspberry Pi
| Problem | Resolution |
| No Image | Check the Configuration of the Raspberry Pi Preferences. Check the Connections to the Raspberry Pi Camera and Raspberry Pi Computer. |
Error Message when running libcamera-still -o test.jpg | Try the command:vcgencmd get_camera If you get: supported=0, detected=0then check the software settings and the hardware connections. If you get:: supported=1, detected=1then the camera module is working. Recheck the command you entered to take the picture, or you may have a bad sensor. On old Raspberry Pi OS versions, use “raspistill -o test.jpg” instead. |
| Blurry Image | If you have the Raspberry Pi Camera module 2.0, and you are trying to focus on something further away than 2 meters, you may need to adjust the focus ring. If you have the HQ camera, there are several adjustments for focus, depending on the lenses you’re using. Check the back focus and the lens focus to see if you can clear it up. If you have any other module, unless you are trying to take pictures too close, check for a plastic film on the sensor. Be VERY careful as you can damage the sensor. |
It's a free PDF guide containing every Raspberry Pi Linux command you should know!
Download now
If you are looking for exclusive tutorials, I post a new course each month, available for premium members only. Join the community to get access to all of them right now!
Conclusion
The Raspberry Pi camera can be great fun once you get it working, but it can cause a lot of frustration in the meantime. Stick with the process and, hopefully, you’ll get your problem resolved soon and be on your way.
If you resolved your issue by reading this article, you can now try many fun projects with your camera module, click on the link to find my favorites.
Whenever you’re ready, here are other ways I can help you:
The RaspberryTips Community: If you want to hang out with me and other Raspberry Pi fans, you can join the community. I share exclusive tutorials and behind-the-scenes content there. Premium members can also visit the website without ads.
Master your Raspberry Pi in 30 days: If you are looking for the best tips to become an expert on Raspberry Pi, this book is for you. Learn useful Linux skills and practice multiple projects with step-by-step guides.
The Raspberry Pi Bootcamp: Understand everything about the Raspberry Pi, stop searching for help all the time, and finally enjoy completing your projects.
Master Python on Raspberry Pi: Create, understand, and improve any Python script for your Raspberry Pi. Learn the essentials step-by-step without losing time understanding useless concepts.
You can also find all my recommendations for tools and hardware on this page.


Hi, in my case, it is showing me I1 legacy camera instead of Pi camera. But I enabled it and the camera is detected. However when I tried to run to take picture using libcamera-jpeg -o test.jpg it gave me an error “the system appears to be configured for the legacy camera stack”, I tried with many suggestions in the Internet but I could not solve this problem yet. Could you please help.
I am using raspberry pi 4 Model B and pi camera.
I think you need to use raspistill when the legacy camera is enabled.
But it’s a bit messy to use the camera commands on the latest version, not sure if I’m up-to-date with the latest recommendations.