Getting Started With XRDP On Raspberry Pi (Remote access)
They are many ways to control a Raspberry Pi remotely from another computer. VNC is often the default choice as it’s installed by default on Raspberry Pi OS, but XRDP is another solution I particularly like. In this article, I will introduce you to XRDP, and show you how to get started with it in a few seconds.
RDP stands for “Remote Desktop Protocol”, and allows a user to get access to the full desktop environment from another computer. The RDP server (xrdp) can be installed on any Debian distribution with APT, and the client is often pre-installed on most computers (Windows, Linux, and macOS).
I’ll start with a brief introduction about this protocol (feel free to skip it if you already know it), and then I’ll show you how to install it on Raspberry Pi OS, and finally, how to connect to it from any computer.
If you’re looking to quickly progress on Raspberry Pi, you can check out my e-book here. It’s a 30-day challenge where you learn one new thing every day until you become a Raspberry Pi expert. The first third of the book teaches you the basics, but the following chapters include projects you can try on your own.
Introduction to XRDP
Let’s clarify the abbreviations before going further, to make sure we are on the same page.
What is RDP?
RDP is the original protocol, created by Microsoft to provide any user access to the graphical interface from another computer. RDP stands for “Remote Desktop Protocol”, and was formerly known as TSE (“Terminal Server”).
I don’t know if it’s still used often in companies, but when I started working as a system administrator, it was almost the standard in big companies. There was a big server with all the applications installed on it, and each user had a thin client to access it.
The users didn’t have a traditional computer, just something cheap and not powerful that could only access the remote server via RDP. Everything was on the server, no local files. Companies were saving administrators’ time (and maybe money, even if there are important license fees with anything from Microsoft).
Anyway, the idea is great. I was using it every day as a system administrator to manage the company’s servers. But it’s a Microsoft product, so how does it relate to our Raspberry Pi?
What is XRDP?
XRDP is the free and open-source equivalent of the RDP protocol for Linux users and servers. It’s available on most distributions and there are no license fees.
That’s what we’ll use in this tutorial. It’s available in the default repository on Raspberry Pi OS. And even if you aren’t using the official distribution, it’s probably available too.
It works exactly the same way. You can use the same clients, so if you have a Windows computer, the client is already installed and it’s the same as a Windows server.
If you are lost in all these new words and abbreviations, request my free Raspberry Pi glossary here (PDF format)!
Download now
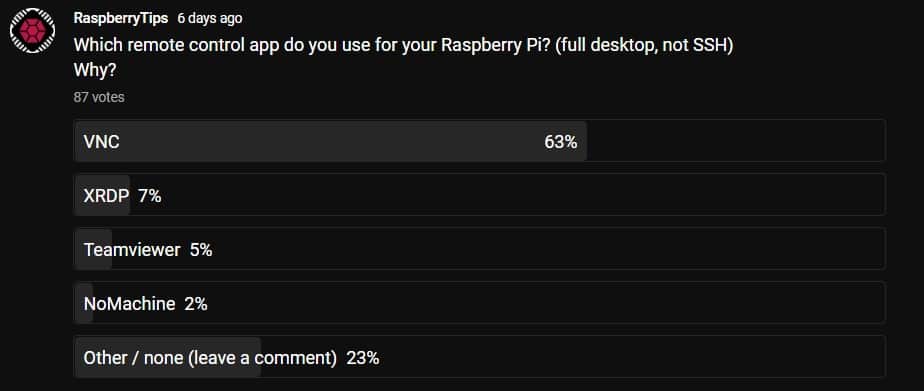
I did a survey on my YouTube channel, and it seems that most people use VNC. Even if VNC is installed by default, it has some downsides, as we’ll see later. So, you might need to consider both solutions depending on your needs.
Anyway, if you want to try it, I also have a complete guide on how to use VNC on Raspberry Pi on this website.
How to install XRDP on Raspberry Pi
Here are the required steps to install XRDP on Raspberry Pi:
- Install the server package with APT (xrdp).
- Get the Raspberry Pi IP address.
- Create a dedicated user account.
Let’s learn how to do this on Raspberry Pi OS.
XRDP installation
XRDP is available in the default Raspberry Pi OS repository, so the installation is straightforward:
- Open a terminal (or SSH connection).
- Update the APT packages list:
sudo apt update - Install the XRDP package:
sudo apt install xrdp
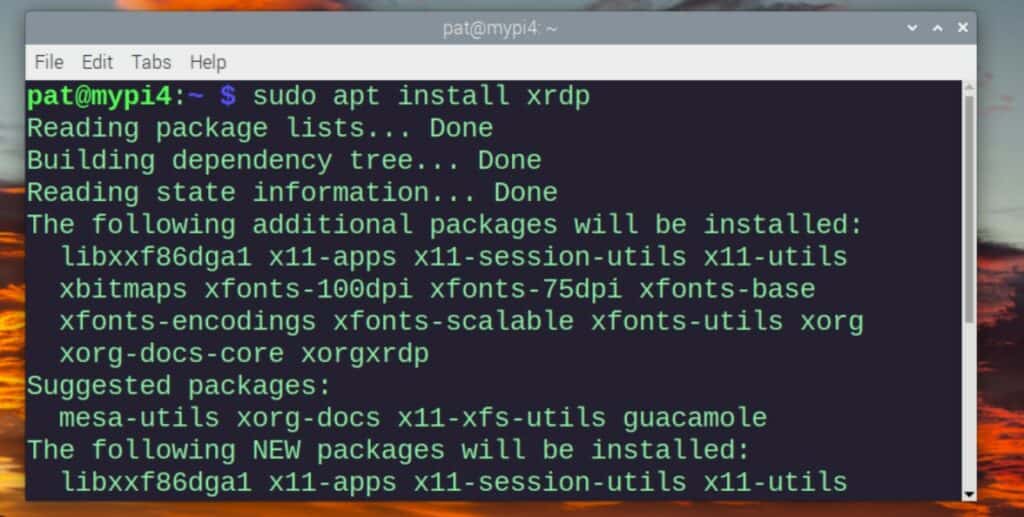
That’s it. If needed, you can manage the corresponding service with:sudo service xrdp <action>Where action can be “start”, “stop”, “status” or “restart”.
But it will start automatically on boot, so you shouldn’t need this.
Join Our Community!
Connect, learn, and grow with other Raspberry Pi enthusiasts. Support RaspberryTips and enjoy an ad-free reading experience. Get exclusive monthly video tutorials and many other benefits.
Learn more
Using a terminal is the fastest way, but you can do the same thing with “Add/Remove software” if you want. Just look for “xrdp” in this tool and install the corresponding package.
Are you a bit lost in the Linux command line? Check this article first for the most important commands to remember and a free downloadable cheat sheet so you can have the commands at your fingertips.
Get the Raspberry Pi IP address
XRDP is installed, but there are two additional steps before we can start using it. First, we need to know the Raspberry Pi IP address. It’s the identifier of the Raspberry Pi on the network.
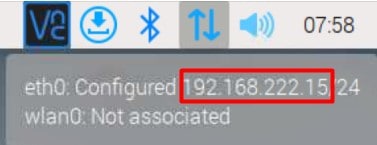
If you are not familiar with this, I have a complete tutorial here. But basically, as you have a desktop environment, the easiest way will be to hover your mouse over the network icon in the top-right corner to get it directly.
If you are not using Raspberry Pi OS, it’s probably in the network settings, or you can use a command line too:ip a
And find the IP address in the output:

Create a new user account
Since Raspberry Pi OS Bullseye, you can no longer use the default account to connect via RDP (for security reasons, I guess). I thought it was possible to use it while disabling auto-login, but it didn’t work during my tests, so I recommend creating a new account, dedicated to XRDP.
From a terminal, you can create a new user with:sudo adduser <name>

It will ask for the user information, including the password.
If you need special permissions for this user (you probably need “sudo” at least), you can read my tutorial on how to manage users on Raspberry Pi. It will explain everything in detail, so I won’t repeat all of it here.
That’s it, the Raspberry Pi part is done, we can switch to your computer to see how to use RDP from there.
If you are lost in all these new words and abbreviations, request my free Raspberry Pi glossary here (PDF format)!
Download now
It's a free PDF guide containing every Raspberry Pi Linux command you should know!
Download now
How to use RDP from your computer
In most cases, an RDP client is already available on your computer (or easy to install). It’s different on each operating system: Windows users can use the default RDP client, Linux users can install Remmina, and Microsoft as an app in the app store for Mac users.
Windows
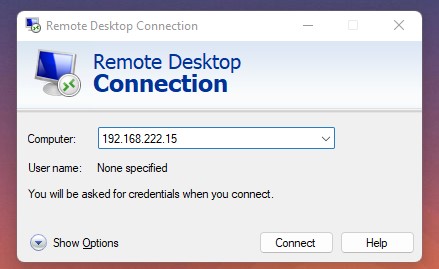
On Windows, there is nothing to do, the Remote Desktop Connection app is already installed (whatever version you have). Just look for “rdp” in the start menu (check the “Accessories” subfolder on older versions).
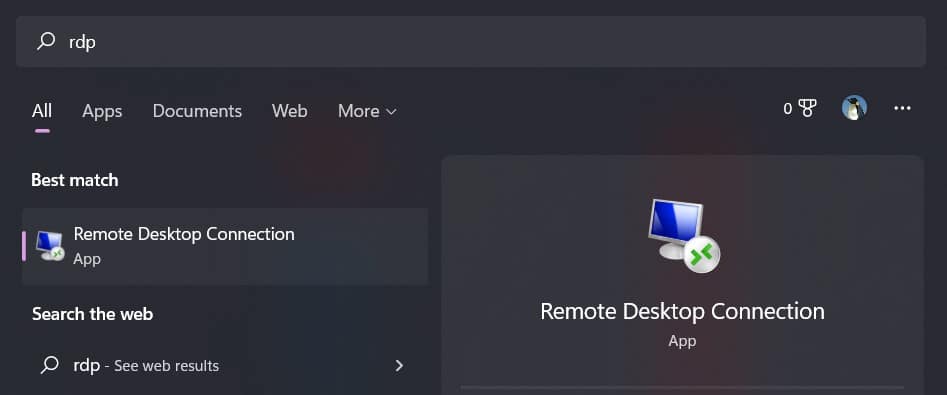
A window like this will show up, where you need to enter the Raspberry IP address you noted earlier:
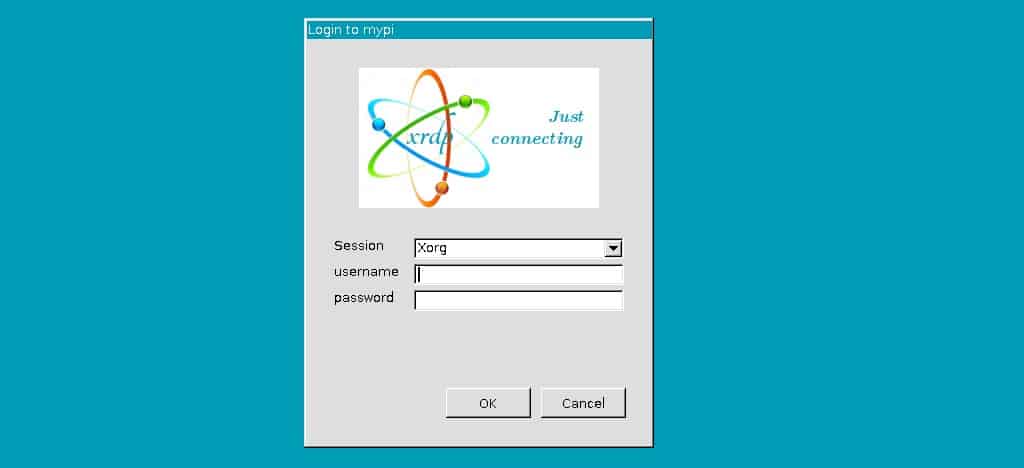
Then, you can log in with the new user account we created (don’t use the default user, it won’t work):
That’s it, you should get access to the full desktop environment of the Raspberry Pi after that.
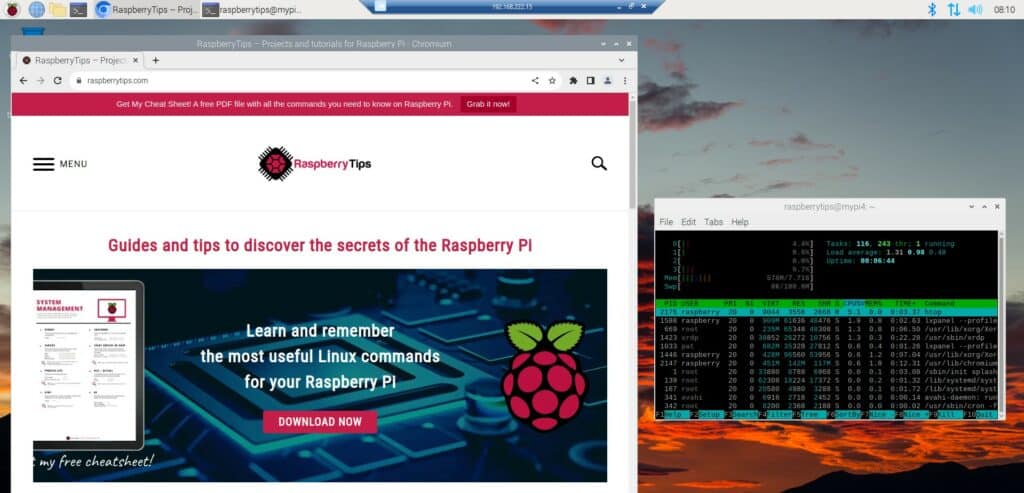
It’s not like VNC where you interact on the same screen as on the Raspberry Pi monitor. It’s a different, separate session. But you can do everything from there.
Linux
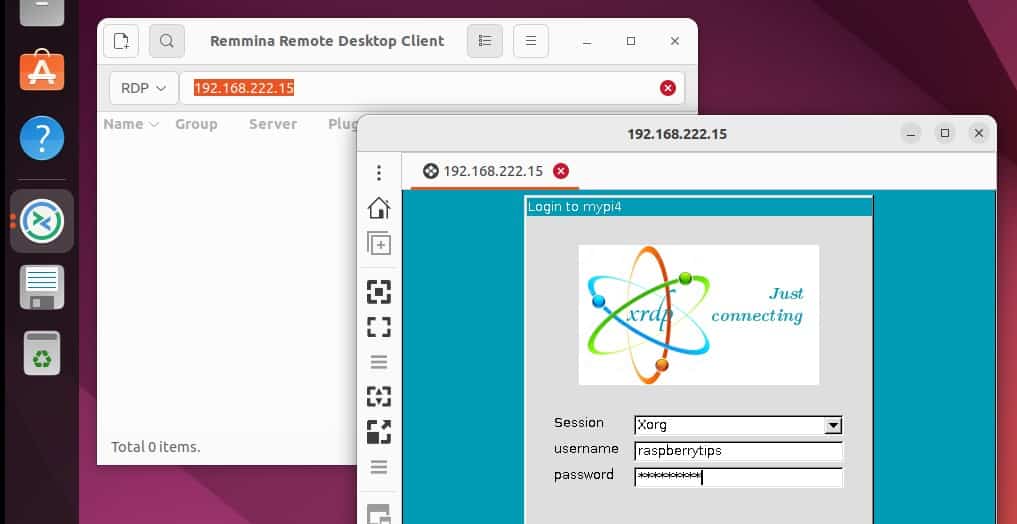
On Linux, it depends on which distribution you use. One tool I like is named “Remmina”. It works with XRDP but also with VNC and other protocols, so it’s great to have one app for everything.
It might be pre-installed, but if it’s not the case on your system, you can generally find it in the default repository. So, for example, on Debian-based systems:sudo apt install remmina
Or use the “app store” if you have one, for example on Ubuntu you can find it in Ubuntu Software:

Once installed, it’s the same idea as on Windows. Just type the Raspberry Pi IP address and log in:
Mac
I don’t own a Mac, so I didn’t test it, but it looks like several RDP clients are available in the app store.
For example, download “Microsoft Remote Desktop” from the App Store, and connect to your Raspberry Pi by specifying its IP address (follow the same procedure as for Windows users once the app is installed).
You can also use RDP from an iPad or a smartphone, but it isn’t really convenient (I would rather use this).
It's a free PDF guide containing every Raspberry Pi Linux command you should know!
Download now
If you are looking for exclusive tutorials, I post a new course each month, available for premium members only. Join the community to get access to all of them right now!
Related questions
I hope this tutorial helped you, but if you still have some questions, here are a few more answers.
Is using RDP better than VNC?
VNC and RDP are different protocols, for different uses. VNC is great for technical support, as it controls the current session, while XRDP opens a new session on the remote computer.
RDP is generally used to manage a remote server. If you are the only one to use a Raspberry Pi, running 24/7 at home, it’s a great option.
Is RDP faster than VNC?
As a general rule, RDP (Remote Desktop Protocol) is more functional and slightly faster than VNC.
But keep in mind the previous answer, as RDP is not necessarily the ultimate solution. If you need to see what’s on the Raspberry Pi monitor, VNC could be a better option.
Is RDP safer than VNC?
Remote Desktop Protocol is safer than VNC because RDP supports 3 levels of encryption, securing the entire connection, while VNC is not encrypted by default.
In both cases, you can play with the options to get a similar result, but the default options are safer with RDP.
It is safe to use RDP over the Internet?
RDP sessions shouldn’t be accessible from the Internet, it’s not safe at all. If access from a remote location is required, a VPN should be configured between the two networks.
You can easily set up a VPN server on Raspberry Pi, so I would consider it if you need remote access from everywhere. Install the WireGuard or OpenVPN server on the Raspberry Pi, and the corresponding client on your computer, and you are safe. It’s not that complicated.
Related article: Raspberry Pi: OpenVPN vs WireGuard, which one is the best?
What are good RDP alternatives?
On Raspberry Pi, VNC, Teamviewer, and NoMachine are good alternatives to RDP. Each of them has different strengths and weaknesses, so make sure to learn more about them before picking one.
I have a complete article here, introducing them all and explaining how to install them:
5 Ways to Remote Desktop on Raspberry Pi (Windows/Linux/Mac)
If you don’t need a desktop environment, using SSH is probably the safest and easiest method by the way.
Whenever you’re ready, here are other ways I can help you:
The RaspberryTips Community: If you want to hang out with me and other Raspberry Pi fans, you can join the community. I share exclusive tutorials and behind-the-scenes content there. Premium members can also visit the website without ads.
Master your Raspberry Pi in 30 days: If you are looking for the best tips to become an expert on Raspberry Pi, this book is for you. Learn useful Linux skills and practice multiple projects with step-by-step guides.
The Raspberry Pi Bootcamp: Understand everything about the Raspberry Pi, stop searching for help all the time, and finally enjoy completing your projects.
Master Python on Raspberry Pi: Create, understand, and improve any Python script for your Raspberry Pi. Learn the essentials step-by-step without losing time understanding useless concepts.
You can also find all my recommendations for tools and hardware on this page.


