Installing & Configuring Plex on Ubuntu Server (Easy Guide)
Installing Plex Media Server is like hosting your own streaming service at home and getting access to everything from anywhere. The key feature is that you get access to your media libraries from a nice interface, on any device. And if you already have Ubuntu running somewhere, the setup process is not too complicated.
Plex Media Server can be installed on Ubuntu Server by adding a custom repository to the package manager and then using APT to install the required services. Once the server is installed and connected to your Plex account, all local files can be shared with the web interface.
In this step-by-step tutorial, I will walk you through the installation process, basic configuration, and how to access your server from any device.
Step-by-Step Installation Guide
I tested this tutorial for you on a virtual machine running Ubuntu Server. It should be pretty similar to most Linux distributions and hardware. Just remember that the server needs to be running to get access to your file from anywhere.
Here are the main steps to install Plex on Ubuntu Server:
- Install Ubuntu Server and make sure it’s connected to the Internet and up-to-date.
- Add the Plex repository to the package manager (APT).
- Install the Plex Media Server package.
- Do the initial configuration via the web interface.
Let’s do this.
Prerequisites
The main prerequisite is to have something you can consider as a server. It can be your Linux computer, but it means you have to turn it on each time you want to watch your media files from another device.
If possible, it’s better to have Plex running on a server. In fact, it can even be a Raspberry Pi running 24/7 in your home (I have a tutorial for this).
But if you’re reading this, you probably already have Ubuntu Server up and running somewhere, and are ready to move on to the installation process. Before doing so, just make sure you have SSH access to your server and run these commands to upgrade the system:sudo apt update && sudo apt upgrade -y
Download your exclusive free PDF containing the most useful Linux commands to elevate your skills!
Download now
If you’re new to the Linux command line, this article will give you the most important Linux commands to know, plus a free downloadable cheat sheet to keep handy.
Adding the Plex Media Server repository on Ubuntu
Once connected to your server, here are the commands to include the Plex repository as a source for the APT package manager:
- Open a terminal, and copy/paste these two commands:
echo deb https://downloads.plex.tv/repo/deb public main | sudo tee /etc/apt/sources.list.d/plexmediaserver.list

curl https://downloads.plex.tv/plex-keys/PlexSign.key | sudo apt-key add -
- Run an APT update to add the new repository to the sources for your packages:
sudo apt update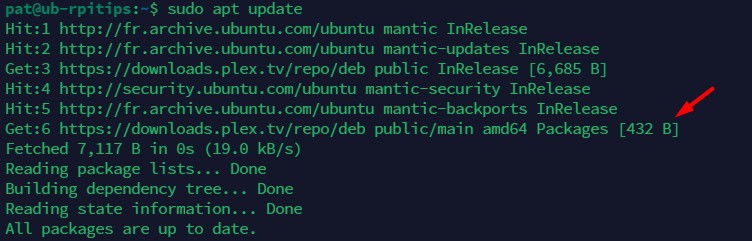
That’s it, the repository is now available, and we can use it to install the main package.
Note: It’s possible to download and install a DEB file manually instead, but I find it better to add this repository to APT, so you get the software update automatically.

Join Our Community!
Connect, learn, and grow with other Raspberry Pi enthusiasts. Support RaspberryTips and enjoy an ad-free reading experience. Get exclusive monthly video tutorials and many other benefits.
Learn moreInstalling Plex Media Server
Now that the repository is available via APT, installing the main package for Plex Media Server can be done with:sudo apt install plexmediaserver
Any missing dependencies will be installed automatically, no need to worry about anything else. The process should go smoothly at this point.
First access to the web interface
During my tests, the service started automatically, and the web interface should be accessible right away. You can access it via your web browser, by following this URL syntax:http://<IP_ADDRESS>:32400/web
If you don’t know it yet, the IP address of your Ubuntu server can be found quickly with:ip a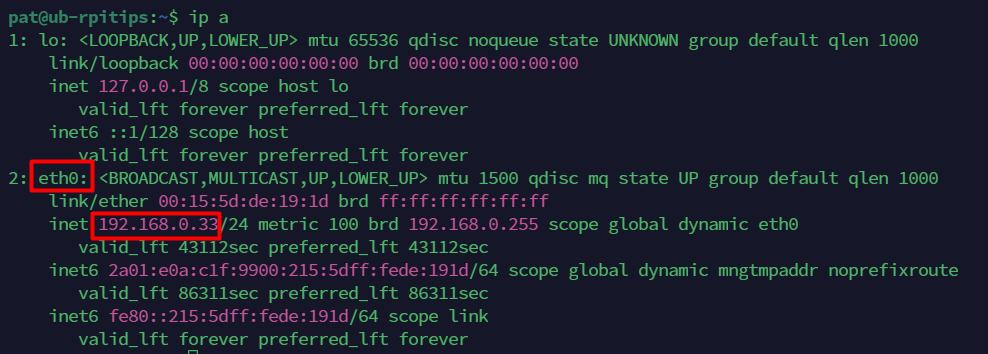
Or check this article for other methods to find the current IP address on Linux.
Once the page opens, you’ll be redirected to a login form directly on the Plex TV website:
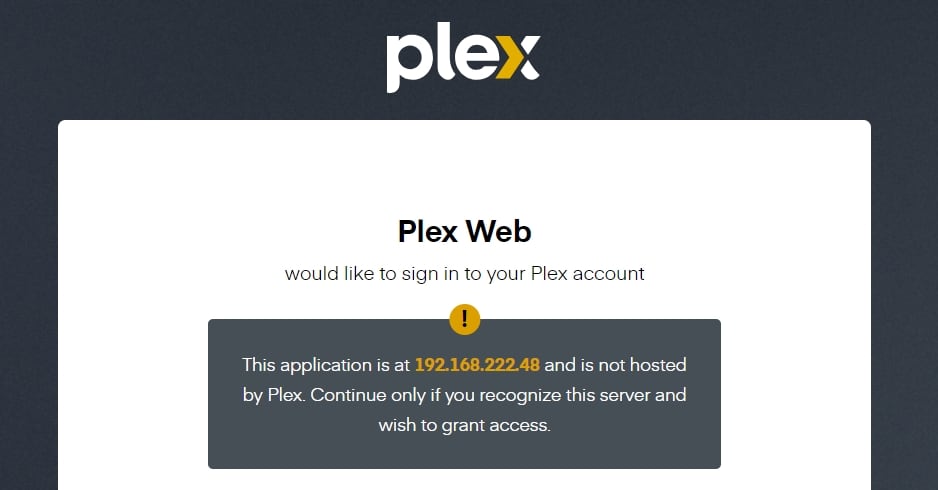
Log in (or create a free account) and check the next part for the initial configuration of Plex.
Plex will encourage you to get a paid account, but remember that everything I show in this tutorial can be done with a free account. There is no need to pay anything at this point.
Note: If the web interface doesn’t work, you may need to check the service status. It should start automatically, but you can verify it with:sudo systemctl status plexmediaserver
Download your exclusive free PDF containing the most useful Linux commands to elevate your skills!
Download now
Plex Media Server configuration
You have already completed the most complicated part. All of the following steps are now done via the web interface, so it should be pretty straightforward.
Basic configuration
Once logged in, you’ll quickly get access to a “Server Setup” screen, where you can complete the initial configuration:
- Start by naming your new server (the current hostname is the default, but you can name it as you like).
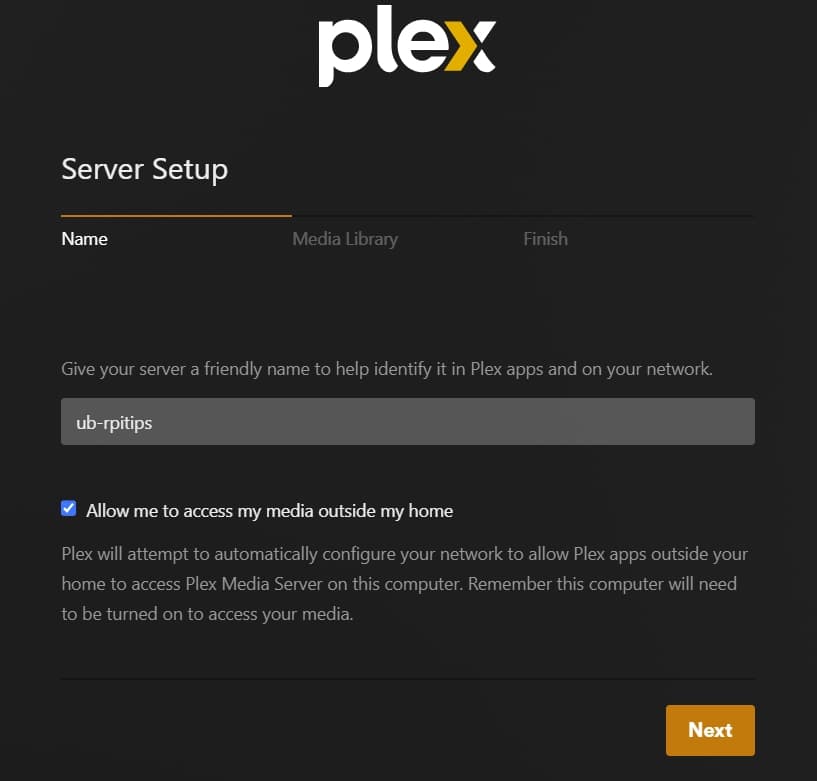
It’s also possible to disable access to your media from outside the LAN. - You can then configure the additional media library you want to connect to your server.
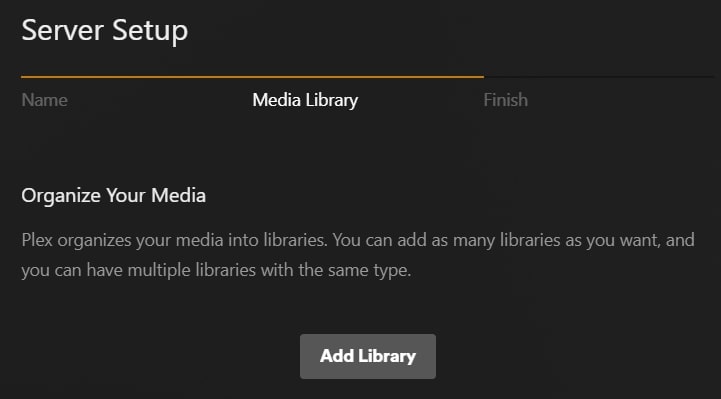
It can be local files, a NAS on the same network or anything else.
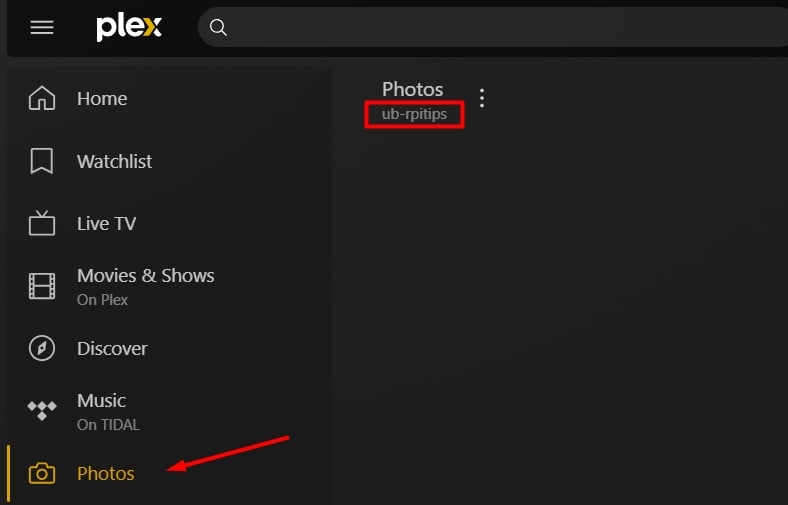
For each new library, you’ll be asked to select a library type (movies, music, photos, etc.) and a name: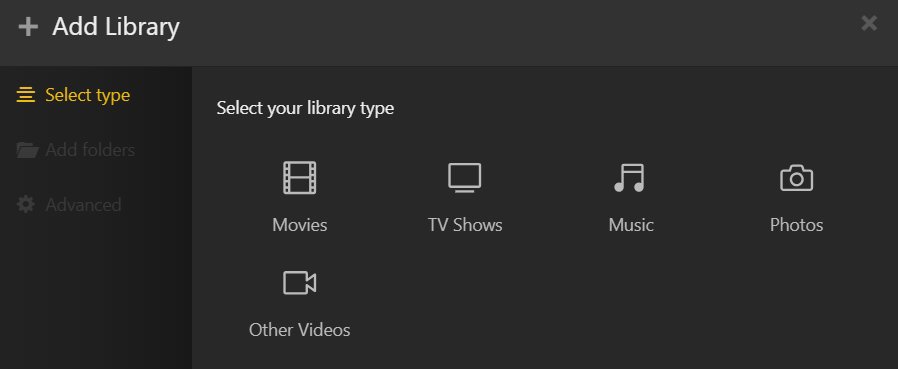
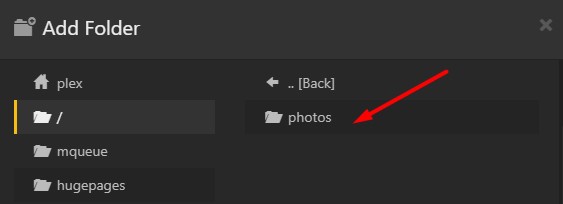
Then you’ll select to media folder location for this library: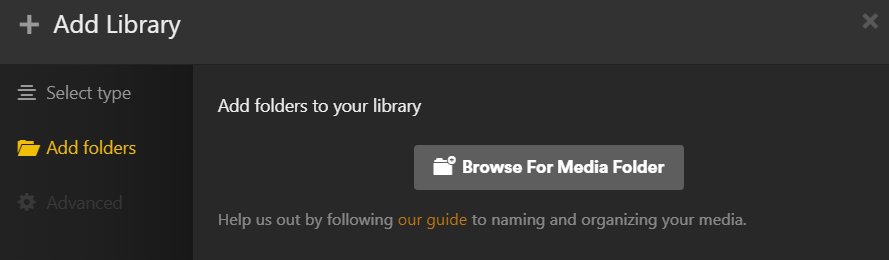
You can check the advanced options if needed, but the default settings are fine in most cases.
Note: I’ll cover libraries in the next section. Don’t spend too much time on this, as there’s a good chance it won’t work on your first try. You can even skip this step for now and make sure to read it at the end of this tutorial carefully. - Once you’re done with the libraries, you can click on “Next” and complete the initial configuration.
Don’t worry, you can change everything later from the web interface. This is just a starting point.
Once this wizard is complete, you’ll get access to the full Plex interface, including the libraries you just added, which are stored on your Ubuntu server or other local devices.
Properly adding media libraries
Now, maybe I should have explained this before, but when you add your first library during the installation wizard, there is a high chance you will get a message like this once you click on it, even if your folder is full:
That’s not explained during the installation, but the Plex service is run by a different user, who must have access to the folder and files in order to show them in Plex.
That seems logical, but it involves a few steps to get this right:
- Don’t use folders under /home for your media libraries. Files under it are protected, and it’s better to leave it this way.
- Create a new folder if needed. Maybe it’s something like /opt/photos or whatever.
As long as it’s not protected under the home directory of your main user, it should be fine.
For example:sudo mkdir /opt/photos - Add the permissions to the “plex” user for this new folder.
A lazy solution is to give access to everyone with:sudo chmod 777 /opt/photosBut you can be more strict and only give access to “plex” and your user for example. - Move the files you want to share in Plex to this folder, for example:
mv /home/pat/*.jpg /opt/photosOr something similar.
Once your files are stored in a directory that you and Plex have access to, adding these files to the Plex interface is pretty straightforward:
- Open the Plex web interface.
- In the left menu, click on “More” and hover on your server name.
- Then click the “+” icon to add a new library.
You get the same wizard again, where you can select the media type, give it a name and select the folder. - Then browse or type the file’s location (/opt/photos in my example).
- Click on “Add Library” to complete this step.
It will add a new entry below your server name, with the library you just created. And you’ll get access to the files that you put in the corresponding folder:
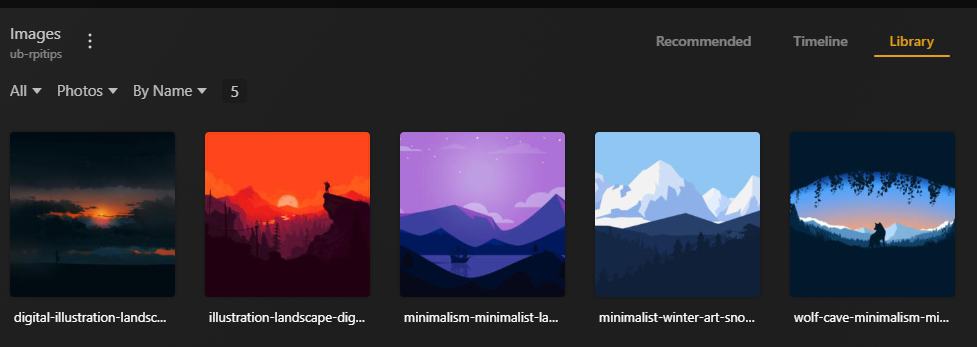
What’s nice is that you have now access to these files from everywhere, on any device, as soon as you log in to your Plex account. In the next part, I’ll show you how to access your account from any computer, smartphone or tablet.
Feel free to remove the libraries you added during the initial setup if they don’t work because of file permissions.
Download your exclusive free PDF containing the most useful Linux commands to elevate your skills!
Download now
Install Plex player on other devices
With the Plex Media Server set up, your account established, and your local media files integrated into the interface, you’re ready to access the Plex service from anywhere in the world.
I tested it on my computer and smartphone, and it works very well. Here is how to do the same thing depending on the device you use.
On a computer: Windows / Linux / macOS
The simplest way to access Plex from a computer is to go to the Plex web app at plex.tv and sign in.
Once you’re logged in, you’ll be taken to your Plex account, and your server will be available in the left menu. If it doesn’t show up, just click on “More” to find it.
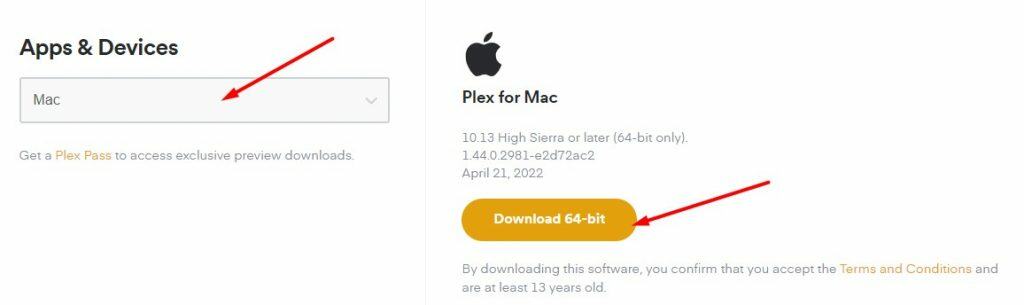
For Windows and Mac users, the Plex player can also be installed on your computer.
Go to this page, select your operating system and download the corresponding file from there.
Smartphones and tablets (Android / iOS)
Plex is also available as an app for your smartphone. It’s easy to find on the app store, whether you have an Android or an iPhone.
The interface is similar to the web app and desktop apps, with almost the same features. If you have a Plex Pass, you can even link your local files to your account.
Smart TVs and consoles
Plex isn’t just confined to computers and smartphones; it’s also available on a wide range of devices, including smart TVs, game consoles, and even virtual reality headsets.
You can use Plex with the Amazon Fire TV, Chromecast or Android TV (which can run on another Raspberry Pi by the way, as explained in this article).
Download your exclusive free PDF containing the most useful Linux commands to elevate your skills!
Download now
If you are looking for exclusive tutorials, I post a new course each month, available for premium members only. Join the community to get access to all of them right now!
Additional Resources
Overwhelmed with Linux commands?
My e-book, “Master Linux Commands”, is your essential guide to mastering the terminal. Get practical tips, real-world examples, and a bonus cheat sheet to keep by your side.
Grab your copy now.
VIP Community
If you just want to hang out with me and other Linux fans, you can also join the community. I share exclusive tutorials and behind-the-scenes content there. Premium members can also visit the website without ads.
More details here.
Need help building something with Python?
Python is a great language to get started with programming on any Linux computer.
Learn the essentials, step-by-step, without losing time understanding useless concepts.
Get the e-book now.