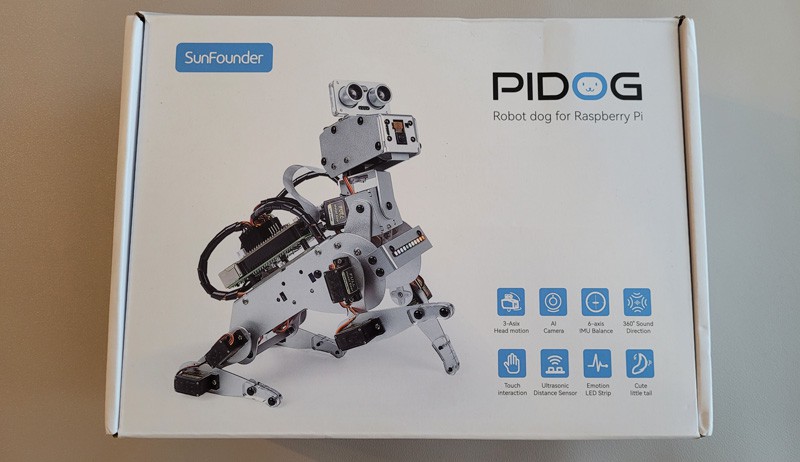
I Tested the SunFounder PiDog Robot Kit: My Honest Review
SunFounder’s PiDog is a new high-end robot kit that is powered by a Raspberry Pi and packed with sensors and features. Kids love it, and you’ll probably love it too. If you’re interested in Raspberry Pi, programming, technology in general, and maybe even a Lego fan, you should read what I have to say.
I’ve had a chance to play with it for a few weeks, so I’ll share my opinion of the kit with you to give you a better understanding of what it is and decide if it’s the right choice for you.
Disclosure: SunFounder sent me this product for free to test it and write a review. I’ll give you my honest opinion in this article, but I also want to tell you this upfront.
Feature Overview
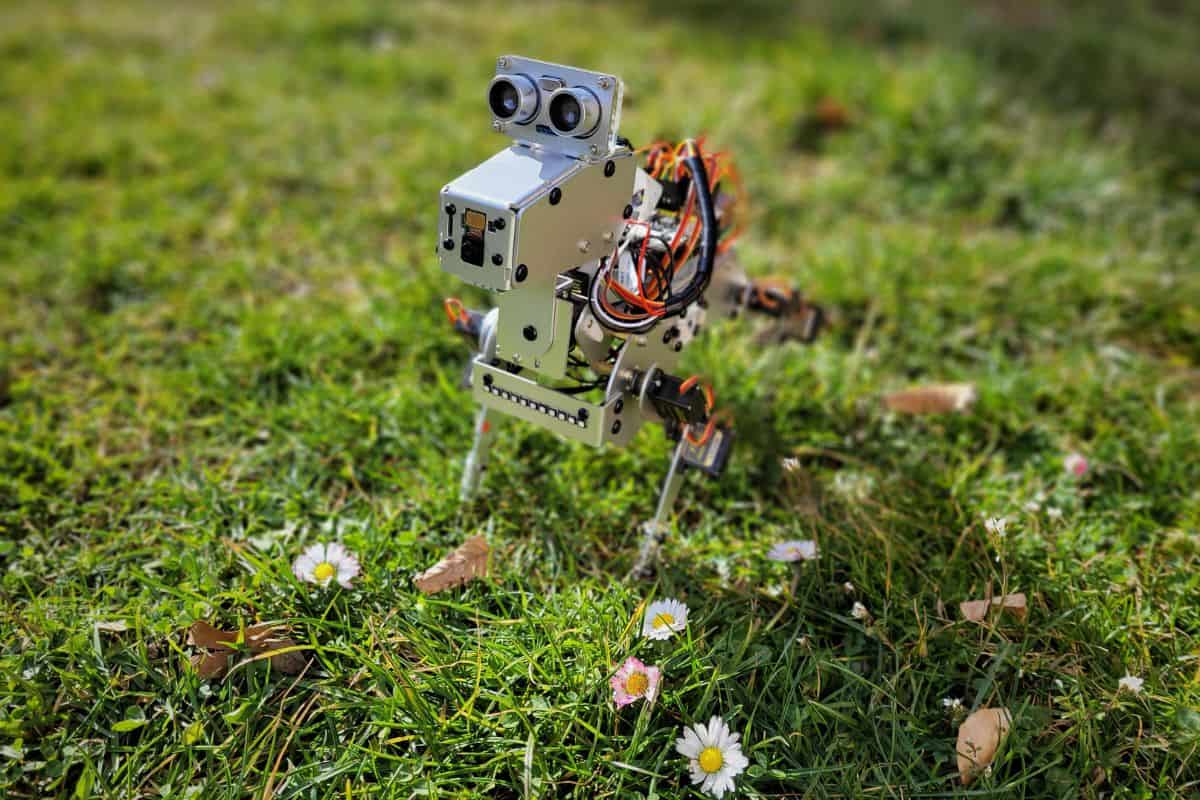
The SunFounder PiDog is a fun robot kit that looks and acts like a real little dog. It’s fully articulated, so the dog can walk, move its head and tail, analyze its environment, and react like a pet.
To make all of this possible, the PiDog comes with a long list of sensors. The main sensors are:
- Ultrasonic module (to measure the distance to close objects, such as walls).
- Camera module (to see through the dog’s eyes).
- Touch module (to detect your touch and react accordingly).
- Sound direction module (to find out where the sound is coming from).
- Gyroscope and accelerometer (to detect movement and orientation).
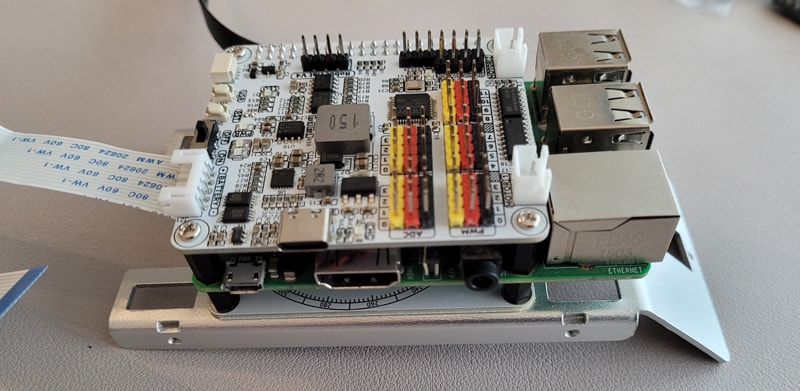
Then you have 12 servos connected to the Raspberry Pi via the Robot HAT to make it move as close to a pet dog as possible, a speaker and an RGB LED on the front (to show the dog’s emotions).
It can be powered by a Raspberry Pi 4, 3B+, 3B, or Zero W. The battery is included (great point, it’s rarely the case), but the Raspberry Pi itself is not in the standard package (check the product page for a combo that includes one).
At the time of writing, the standard kit is priced at $179, which makes it a high-end robot kit. It’s a fair price considering all the features and sensors that are built in, but keep in mind that it isn’t a cheap product when deciding whether or not to go for it.
Assembling the PiDog robot kit
The PiDog robot kit is not a toy you can play with when you get your package. Like most Raspberry Pi robot kits, it comes in tiny pieces, and you’ll need to assemble everything.
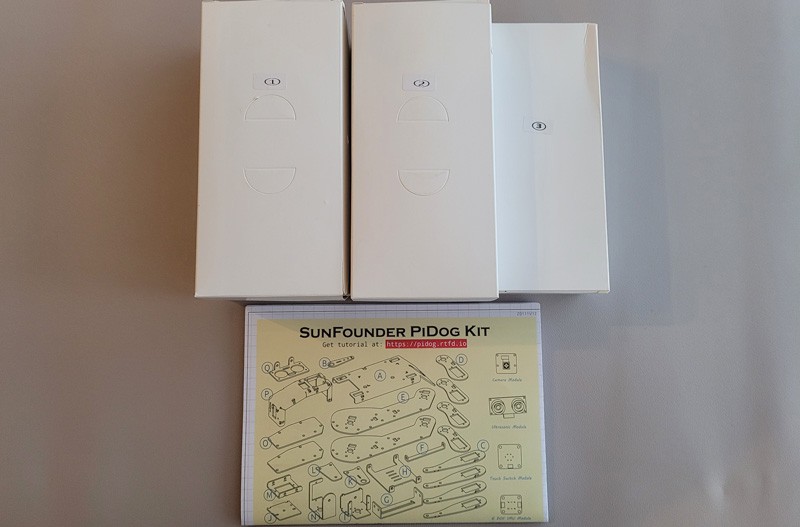
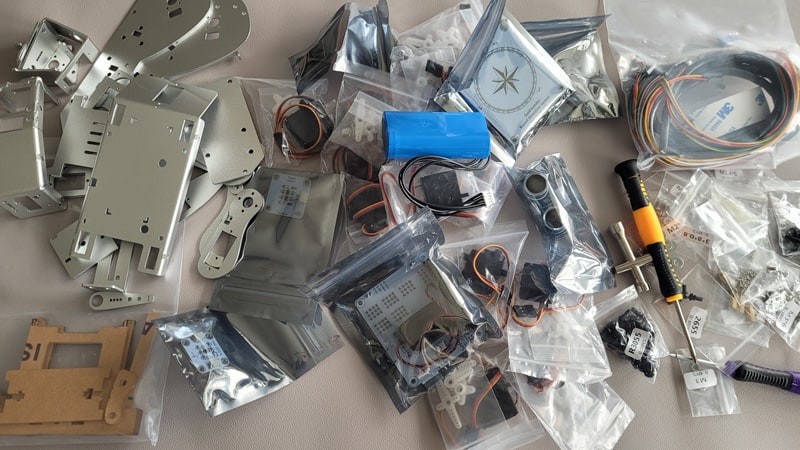
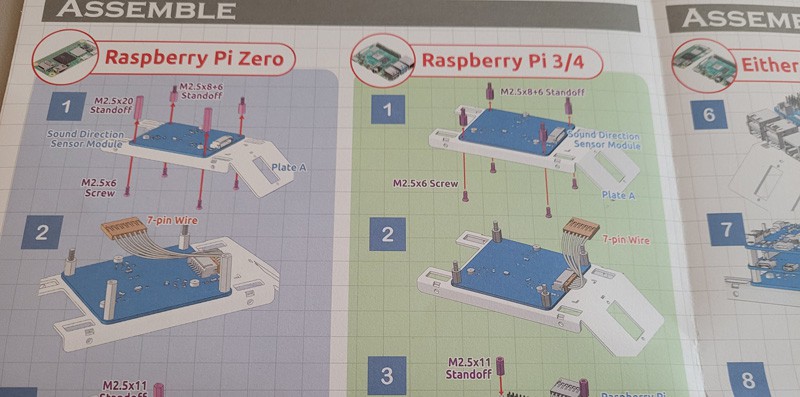
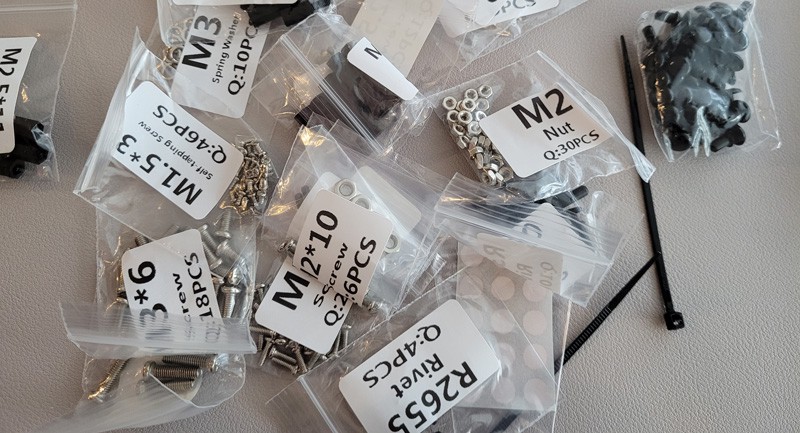
SunFounder always does a great job of labelling all the pieces, with tiny bags for each different piece, and includes a manual, printed in color, where each step is clearly explained.
If you are lost in all these new words and abbreviations, request my free Raspberry Pi glossary here (PDF format)!
Download now
That doesn’t mean it’s a quick and easy task at all (expect to spend a few hours assembling the whole thing, even if you have some experience), but at least it’s doable by anyone (if I did it, you can too, I’m clearly not the best at this kind of task).
I used a Raspberry Pi 3B+ for this project, and overall the process of putting everything together was pretty smooth. I tested a beta version of this product a year ago and this wasn’t the case, but they’ve improved a lot since then and everything went fine this time.
The more servos, wires and elements you connect to the main board, the messier it gets, but don’t worry, if you carefully follow the steps in the manual, you’ll eventually get there.
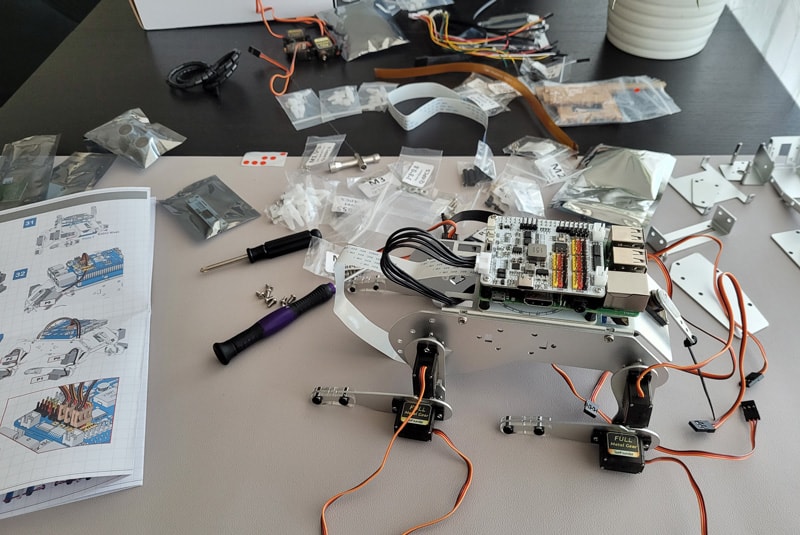
I think it took me about 4 hours to complete the assembly, but as I said, I’m not the fastest at this kind of thing. I also took notes and pictures along the way, so it can probably be done faster than that.

Join Our Community!
Connect, learn, and grow with other Raspberry Pi enthusiasts. Support RaspberryTips and enjoy an ad-free reading experience. Get exclusive monthly video tutorials and many other benefits.
Learn moreUnlike the PiCar-X I tested previously on this site, I didn’t have any major assembly problems. The different parts fit together pretty well, all screws are accessible, and I didn’t have any major doubts about what I was doing.
I must also mention that SunFounder has online documentation where you can find up-to-date information, including videos of the assembly. Here is the link, it might be really useful if you get stuck.
It's a free PDF guide containing every Raspberry Pi Linux command you should know!
Download now
First steps with your new Dog robot

SunFounder PiDog
Robot Dog Kit for Raspberry Pi
Calibration
During assembly, you’ll be invited to install the operating system on the Raspberry Pi and grab the project code from SunFounder. At the time of my testing, Bookworm was not yet supported, so you will need to use the legacy version of Raspberry Pi OS.
The code from SunFounder is used in two instances. It’s first used during the assembly to initialize the servos before screwing them together. It’s also used near the end to calibrate the PiDog robot to make sure it’s assembled properly and stable before trying to make it move.
Just follow the instructions to make sure it’s done correctly. It’s not complicated, just a bit of a hassle to plug in, power up, and run the script every time you assemble a new leg. But it will prevent any problems later, so it’s worth doing seriously.
Completing the assembly
All you have to do after that it’s to build the robot dog’s body following the instructions.
If you are lost in all these new words and abbreviations, request my free Raspberry Pi glossary here (PDF format)!
Download now
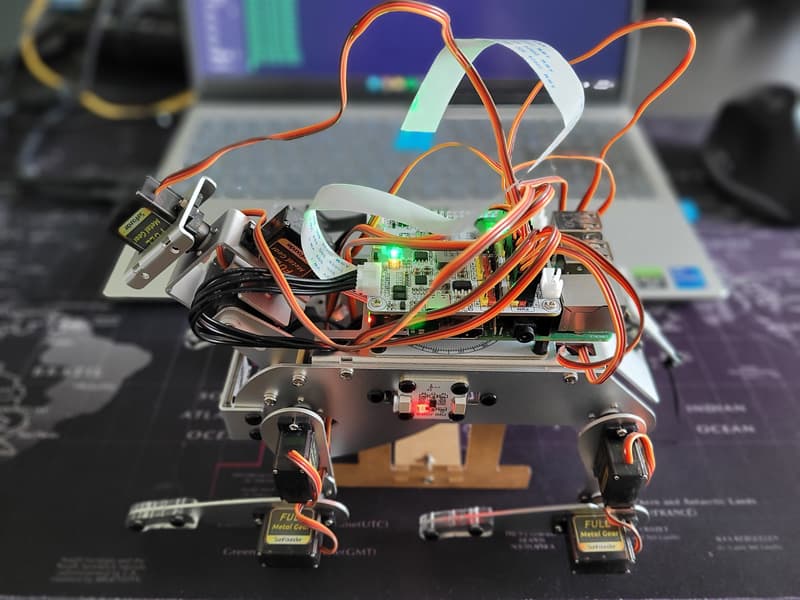
I’m always a little stressed at this stage. I feel like there should be more testing during assembly, and less uncertainty (what if the camera or battery is not connected properly? Do I start over?). But that’s just me, I guess.
Anyway, in this case, everything worked as expected, and I’m now ready to try to control the whole thing.
Feature Demonstration
The project code downloaded from SunFounder that we used for calibration, also contains examples, particularly a demonstration file. It’s recommended to start with this one, so you can quickly check if everything appears to be okay with your new dog.
When you run the script, you get a functions list, looking like this:
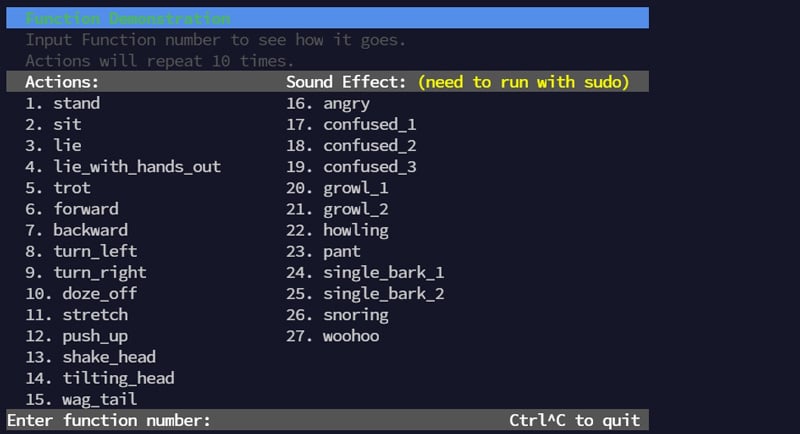
You can try simple actions and sound effects by typing the appropriate number. No need to type a line of code, but you can quickly see if the sensors are working and if the robot stays balanced while moving.
Then you’ll find other scripts in the same folder with more advanced functionality. In the video below, you can see some of these examples in action.
Control the PiDog with Python
The PiDog robot can be controlled with Python, using the PiDog class available in the project code we downloaded earlier.

While there is not a full reference documentation that explains all the functions and arguments in detail, there are enough examples in the project code and online documentation to understand the main functions and write your own scripts (coding documentation here).
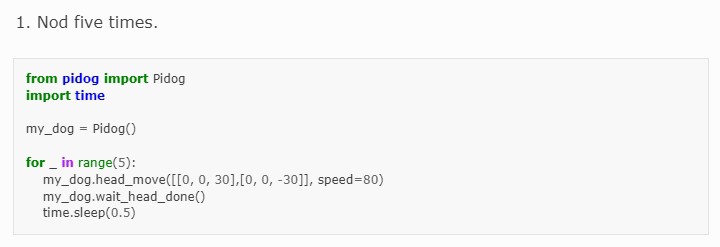
It may take some time to understand the possibilities and get it to do what you want, but that’s part of the fun, right?
Remote control with the smartphone app
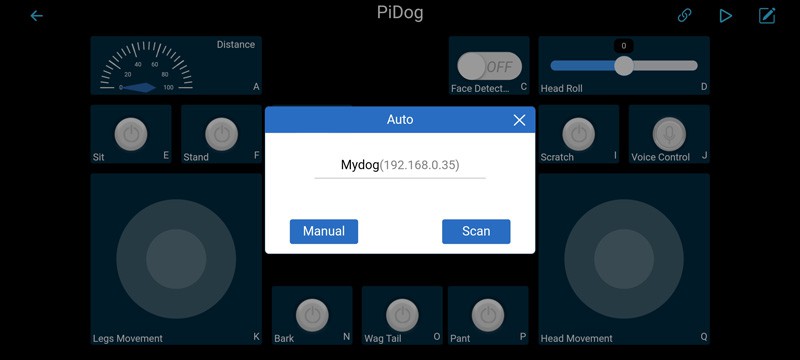
If you’re not ready to write your own code to control the robot with Python, or you’re buying this kit as a gift for a child, the PiDog robot kit comes with a smartphone app (available for Android and iOS) to control the robot.
Both the smartphone and the robot must be connected to the same Wi-Fi network. The app will scan the network and automatically connect to the robot (if it has the service installed). You can then see the camera, move the PiDog and perform other actions directly from your phone.
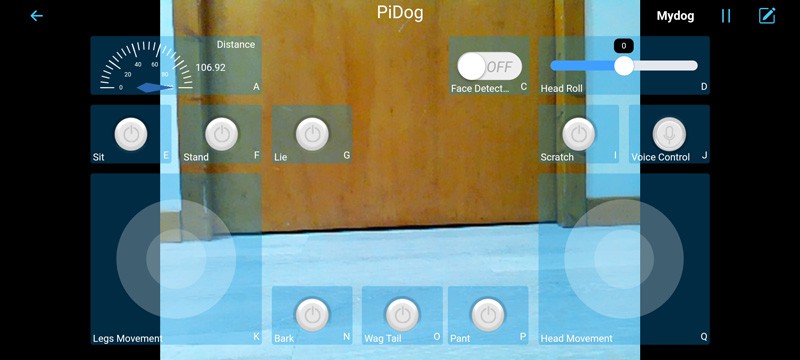
You don’t have access to the same actions as with Python in the default controller layout, but I think you can personalize it a bit, I’m not sure how much (didn’t spend that much time in the app).
Anyway, I used it several times to demonstrate the robot kit to kids and family members who asked what the PiDog could do, and it was a success every time :-).
SunFounder PiDog
Robot Dog Kit for Raspberry Pi
It's a free PDF guide containing every Raspberry Pi Linux command you should know!
Download now
Reminder: Remember that all the members of my community get access to this website without ads, exclusive courses and much more. You can become part of this community for as little as $5 per month & get all the benefits immediately.
SunFounder PiDog review: is it for you?
In summary, the PiDog robot kit from SunFounder is a great product if you already have experience with this type of project. With all the sensors, a clear assembly process and huge potential for fun, I highly recommend it.
I especially like the good quality of the components (metal instead of plastic), the good balance of the whole thing (unlike the Freenove equivalent that fell every few steps), and the clear instructions for the assembly, installation, and coding parts. Solid stuff.
Interested? Order your kit now directly from the SunFounder website or via Amazon.
Because it’s a high-end product, that takes time to assemble and needs some Python skills to really enjoy, I wouldn’t necessarily recommend it for a first kit or a young kid. For beginners, the PiCar-X from the same manufacturer (tested here) is probably a better choice, with an easier assembly and the option to use visual code to control it (EzBlock).
You can also check out my list of the best robot kits for Raspberry Pi, with some alternatives depending on your situation.
Whenever you’re ready, here are other ways I can help you:
The RaspberryTips Community: If you want to hang out with me and other Raspberry Pi fans, you can join the community. I share exclusive tutorials and behind-the-scenes content there. Premium members can also visit the website without ads.
Master your Raspberry Pi in 30 days: If you are looking for the best tips to become an expert on Raspberry Pi, this book is for you. Learn useful Linux skills and practice multiple projects with step-by-step guides.
The Raspberry Pi Bootcamp: Understand everything about the Raspberry Pi, stop searching for help all the time, and finally enjoy completing your projects.
Master Python on Raspberry Pi: Create, understand, and improve any Python script for your Raspberry Pi. Learn the essentials step-by-step without losing time understanding useless concepts.
You can also find all my recommendations for tools and hardware on this page.