How To Connect and Code a Motion Sensor with Raspberry Pi
Ever wondered how some rooms only light up when someone enters the room? The answer is motion sensors. But what’s more unclear is how you would connect a motion sensor to a Raspberry Pi. Let’s see how it works.
A motion sensor can be connected to the Raspberry Pi by using only 3 wires: power pins (+ and -) and signal. The GPIO Zero class, preinstalled on Raspberry Pi OS, can then be used in Python to detect movements in the room.
Continue reading as I explain to you how simple it is to connect a motion sensor to a Raspberry Pi. Having a motion sensor is only the first step in making your Raspberry Pi even smarter. You can check some of our articles where we even connect a camera to the Raspberry Pi.
By the way, if you get overwhelmed as soon as Python is required for a project, I recommend checking out my e-book “Master Python on Raspberry Pi“. It will guide you step-by-step to learn the essential concepts (and only the essential concepts) required to achieve any project in the future. Raspberry Pi without Python is like a car without an engine, you miss all the fun parts. Get 10% off by downloading it today!
Prerequisites
Hardware Prerequisites
- PIR motion sensor: The main sensor we need for this tutorial. PIR stands for “Passive Infrared”. This sensor can detect movement by sensing warm bodies in its view.
You can get a cheap PIR Motion Sensor on Amazon. - Any Raspberry Pi model: You can use any Raspberry Pi model for this. All Raspberry Pi models come with the GPIO pins we need. If you use a Zero, just make sure the male pin headers are soldered on, as we will need them to connect wires to it.
- Breadboard & jumper wires: You’ll also need to have a breadboard and a couple of jumper wires, so we can connect everything together.
Another option is to grab a kit like this one from SunFounder that has everything in it (sensors, wires, breadboard, etc.). This is the one I often use. If you want to use GPIO more often with your Pi, it’s perfect. It comes with many tutorials explaining how to use all the accessories included (Python, C, Java or Scratch).
Software Prerequisites
- Raspberry Pi OS: Any Raspberry Pi OS (formerly Raspbian) is okay for this example. For now, we will only need Raspberry Pi OS, as the packages we need to interact with the GPIO are already preinstalled. You can view my article to guide you in installing the Raspberry Pi OS.
- Python: The programming language we will use is Python. If you use Raspberry Pi OS, everything is installed, so nothing special to do at this point.
How to connect a motion sensor to the Raspberry Pi
Motion Sensor
A PIR Motion Sensor uses the change in heat signatures to sense if a “warm-body” passed by.
It does this by emitting 2 signals that cancel each other out when sensed by the PIR Sensor, but as a “warm-body” passes by it changes this value, thus resulting in a detected “warm-body”.
Using the example I mentioned at the start of this article: when someone enters a room with a motion sensor in it, the sensor picks up the change of heat signature as you (a “warm-body”), enter the room, sending a signal that a motion was detected.
If like me, you always mix the languages syntax, download my cheat sheet for Python here!
Download now
Wiring
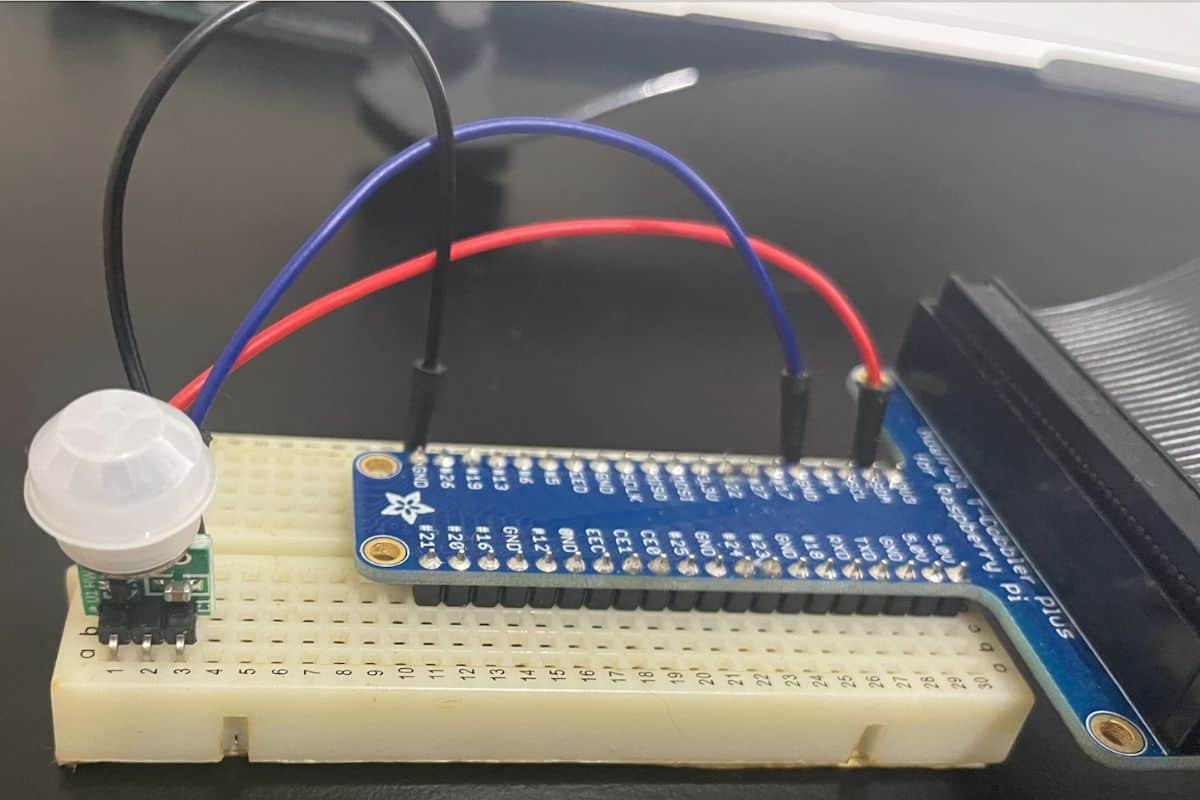
As you may have guessed, with only three pins we can already connect this sensor to the Raspberry Pi. Two pins are used to power the sensor, and one pin is used to get output from the sensor.
- Power Pins (+ and -): These pins are used to provide power to the sensor.
- S(Signal Output): This pin outputs a 3.3v signal or HIGH if motion is detected.
It is important to know what type of signal is emitted to determine which GPIO pin should be used to connect the Output of the sensor. Also, knowing the power requirements of the sensor is important, so we know which voltage we can connect it with 3v3 or 5v.
For this guide, we will be using pin 4. There isn’t a specific reason for choosing it as we can use any GPIO pin available.

Join Our Community!
Connect, learn, and grow with other Raspberry Pi enthusiasts. Support RaspberryTips and enjoy an ad-free reading experience. Get exclusive monthly video tutorials and many other benefits.
Learn moreIf it’s your first project with GPIO pins and Python, you should probably read this tutorial first, which will explain the basic wiring in much more detail.
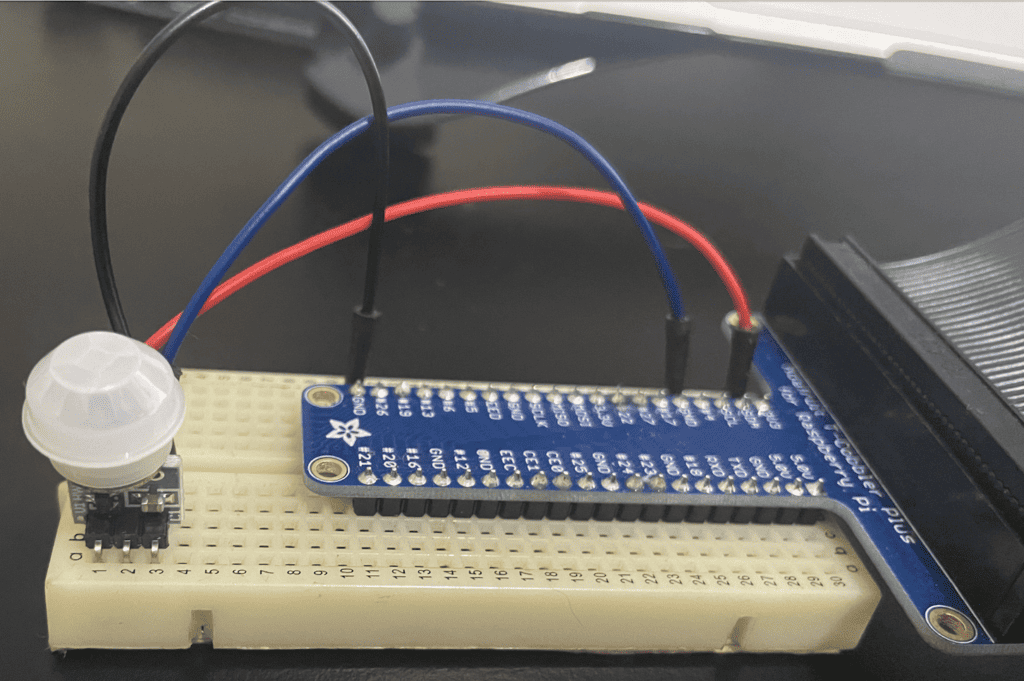
Note: You’ll notice I’m using this blue PCB. This is actually called a T-Cobbler, typically used if the Raspberry Pi case you are using gives you less room to access the GPIO Pins. This T-Cobbler gives you the ability to extend the GPIO from the case and use it externally. You can purchase this here.
How to use the motion sensor with the Raspberry Pi
Before proceeding to the next step, make sure you have the latest Python version installed. Now that we have the motion sensor connected, we can proceed with testing the sensor with Python.
A first simple script
The code below will test our motion sensor by printing “You moved” when you are detected.
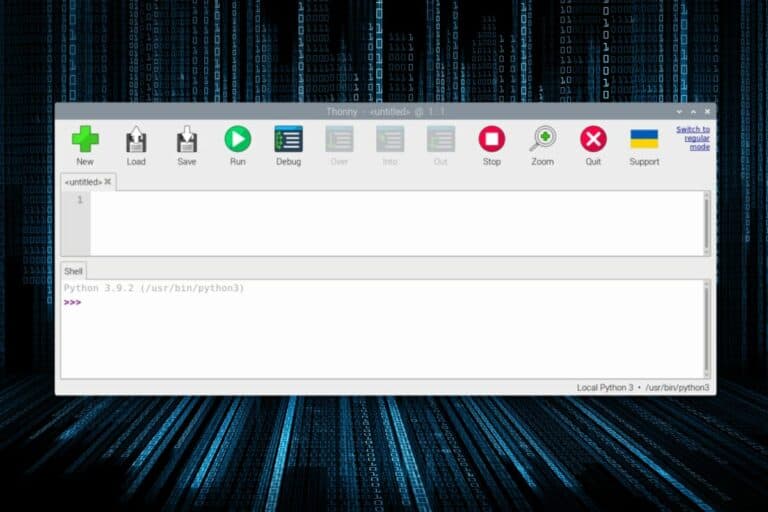
Use Thonny for this when copying/pasting the code to your Raspberry Pi:
from gpiozero import MotionSensor

pir = MotionSensor(4)

while True:
	pir.wait_for_motion()
	print("You moved")
	pir.wait_for_no_motion()
Once you’ve pasted, save and try running the script from Thonny. If you’re using a different editor, you can run the script by using this command on the terminal:python yourscript.py
A quick rundown of the script:
If like me, you always mix the languages syntax, download my cheat sheet for Python here!
Download now
- Import the required libraries.
We only need the class MotionSensor from the gpiozero package for this one. - Initialize the MotionSensor class by setting the pin where the motion sensor was connected to. For example, we used GPIO#4.
You can check the GPIO pinout here if you used another pin. - Create an infinite loop to loop through the code continuously.
- Let the PIR wait to detect a motion. If detected, it will proceed to the next line of code.
- Print “You Moved” to the output or console.
- Wait for the PIR to detect no motion, before going back to the start of the loop.
This is the basic sketch that we can use to test the motion sensor, but there are other settings that we can set so we can use based on our needs.
Additional parameters
When initializing the MotionSensor class, we have a number of parameters we can use for this instance. Here is the syntax:gpiozero.MotionSensor(pin, *, queue_len=1, sample_rate=10, threshold=0.5, partial=False, pin_factory=None).
You can check the full documentation here. Basically, the most important parameter is the pin (int or str) because this tells the class which pin is the motion sensor connected to. All the other parameters aren’t required to be declared, as it already contains default values it will use.
These are also two main functions that we can use from the MotionSensor class, for example:
wait_for_motion(timeout=None)
This will wait until motion is detected or if the timeout is reached.wait_for_no_motion(timeout=None)That does the opposite: wait until no motion is detected or if the timeout is reached.
Adding an LED
Now that we understand the MotionSensor class, let’s try a simple code where instead of printing out to the console we would TURN ON an LED when motion is detected and TURN OFF when there is motion, simulating a motion-activated room.
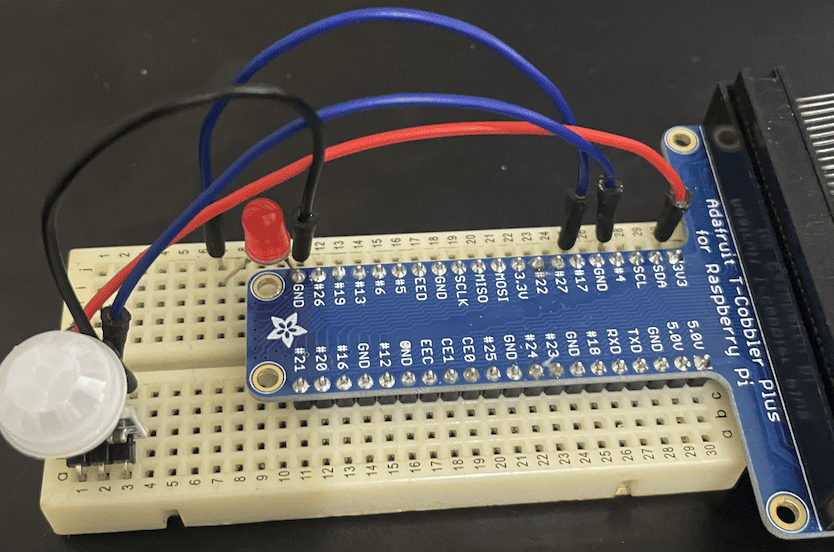
from gpiozero import MotionSensor, LED
pir = MotionSensor(4)
led = LED(17)

while True:
	pir.wait_for_motion(timeout = 5)
	if pir.value:
		led.on()
	else:
		led.off()
The code structure from the first sketch I posted is still the same. Now let me discuss the changes I made.
pir.wait_for_motion(timeout = 5)
You’ll notice I used the timeout parameter for this function, this is to ensure that it doesn’t get locked up waiting for a motion to be detected where you can do other things before coming back to this.
if pir.value:
		led.on()
	else:
		led.off()
Now since I added a timeout parameter, once it timed out it would then proceed, also the same even if motion is detected but the difference is, if motion is detected it would set the value parameter to 1 indicating the motion is detected and 0 if it timed out.
Before proceeding, we had to check whether motion was detected by checking pir.value. If we do read a value of 1 in pir.value, we then TURN ON the LED and TURN OFF if otherwise.
It's a free PDF guide containing every Raspberry Pi Linux command you should know!
Download now
Conclusion
Now that you know how easy it is to connect a motion sensor to the Raspberry Pi, the possible projects that you can do are now even wider. Adding a motion sensor to the Raspberry Pi can make it more “Smart” by being able to sense its surroundings, using this concept you can connect with different output components to make a “smart” system.
Check out my master list of suggestions for projects you can do with the Raspberry Pi, and check where you can integrate a motion sensor to add more value to the project.
It's a free PDF guide containing every Raspberry Pi Linux command you should know!
Download now
Want to chat with other Raspberry Pi enthusiasts? Join the community, share your current projects and ask for help directly in the forums.
Related questions
What if it can’t detect my motion?
When you run the script, and it stays blank, the main reason would be that it’s not receiving any signal from the motion sensor. This can have two reasons:
- Pins are connected incorrectly. If you have a different type of PIR Motion sensor, chances are, it might have a different pin configuration where the + and – pins are interchanged. It is important to verify the correct pin configuration to avoid breaking the motion sensor.
- Faulty PIR Motion Sensor. It might be that the PIR Motion sensor is broken, which can be caused by a number of things (most of the time related to the previous reason).
For these types of components, once you connect the power supply in reverse, they are usually broken for good. So watch out for the pin configuration
I have a different looking PIR Motion sensor, am I still able to use it?
Yes, but there are things you need to watch out for. There are many versions of the PIR Motion sensors available, some are compact like the one I suggested, while some are larger and have the ability to adjust certain configurations on the board itself like this one.
Now there are 2 things you need to look into before purchasing a PIR Motion Sensor:
- Power Requirements: You’ll have to check if it can be powered between 3v3 and 5 volts because these are the only voltages that the Raspberry Pi can provide. Anything above or below that range would require you to purchase additional components.
- Output Signal: Since we received an output signal from the sensor to the Raspberry Pi.
Keep in mind that the Pi is only capable of reading 3v3 volts, anything above this can damage it.
If I have a configurable PIR Motion Sensor, how can I configure it?
There are 3 settings that you can change on this type of PIR Motion Sensor:
- Delay: This is used to determine how long the output signal stays ON before turning OFF after detecting a signal. This is useful if you need to make sure the Raspberry Pi picks up this signal, if it’s too fast it might miss the signal, thus not being able to properly detect motion.
- Sensitivity: This is used to determine how far you want to detect motion from the sensor. If it’s set to max, then it can detect up to 20 feet (6 meters), if it’s set to low then it can detect around 10 feet (3 meters).
- Retrigger Jumper: This setting is used depending on which pin is connected to it. If connected to H, it will stay ON as long as motion is detected. If it’s connected to L, it will occasionally turn ON and OFF. Usually, we would like to set this to H or the normal position as this is how we expect the sensor to behave.
Whenever you’re ready, here are other ways I can help you:
The RaspberryTips Community: If you want to hang out with me and other Raspberry Pi fans, you can join the community. I share exclusive tutorials and behind-the-scenes content there. Premium members can also visit the website without ads.
Master your Raspberry Pi in 30 days: If you are looking for the best tips to become an expert on Raspberry Pi, this book is for you. Learn useful Linux skills and practice multiple projects with step-by-step guides.
The Raspberry Pi Bootcamp: Understand everything about the Raspberry Pi, stop searching for help all the time, and finally enjoy completing your projects.
Master Python on Raspberry Pi: Create, understand, and improve any Python script for your Raspberry Pi. Learn the essentials step-by-step without losing time understanding useless concepts.
You can also find all my recommendations for tools and hardware on this page.