

Install Raspberry Pi OS Bookworm on Raspberry Pi (Illustrated guide)
Raspberry Pi OS is the official operating system for a Raspberry Pi. Most kits include it by default, but when you need to reinstall it, you might be lost. In this article, I will show you how to easily install Raspberry Pi OS. To give you an overview of this tutorial, here are the required steps to install Raspberry Pi OS:
If you need help getting started on Raspberry Pi, I have an entire course to guide you through your first steps. I’ll help you use the perfect hardware, plug everything in and install your first system. You’ll also do your first projects with me, just to make sure you are ready for the next level. Get all the information on this page if you are interested.
Raspberry Pi OS introduction
If you are new to Raspberry Pi, I’ll start with a brief introduction to Raspberry Pi OS.
Presentation
Raspberry Pi OS is a Linux distribution based on Debian.
It’s the official distribution for Raspberry Pi.
Formerly named “Raspbian”, it was renamed “Raspberry Pi OS” in 2020.
Raspberry Pi OS follows the names of the Debian versions, so the latest version available is Raspberry Pi OS Bookworm (Debian 12). Raspberry Pi OS is optimized for Raspberry Pi and you can use this distribution for most projects.
I wrote an entire article about Raspberry Pi OS on this website, so you may need to read it first, to make sure you understand what we are doing in this tutorial.
Versions
Raspberry Pi OS is offered in three “versions”:
- Full: Raspberry Pi OS with desktop and recommended software.
- Desktop: Raspberry Pi OS with desktop.
- Lite: Minimal image for Raspberry Pi OS (no interface, command line only).
As its name suggests, the first two offer a desktop environment, while the third comes without (but it will still be possible to add it later).
If you are new to Linux, I recommend starting with the desktop or full version, so that you can familiarize yourself with the commands.
Throughout this article, I will explain how to install these two versions of Raspberry Pi OS.
The installation of the Full or Desktop version is the same process, I will call it “Desktop” only, but it’s for both. Whatever your choice, you will know how to do all the steps described.
Prerequisites to Install Raspberry Pi OS
To follow this article, you will need:
- An Internet connection.
- A computer to download and flash Raspberry Pi OS.
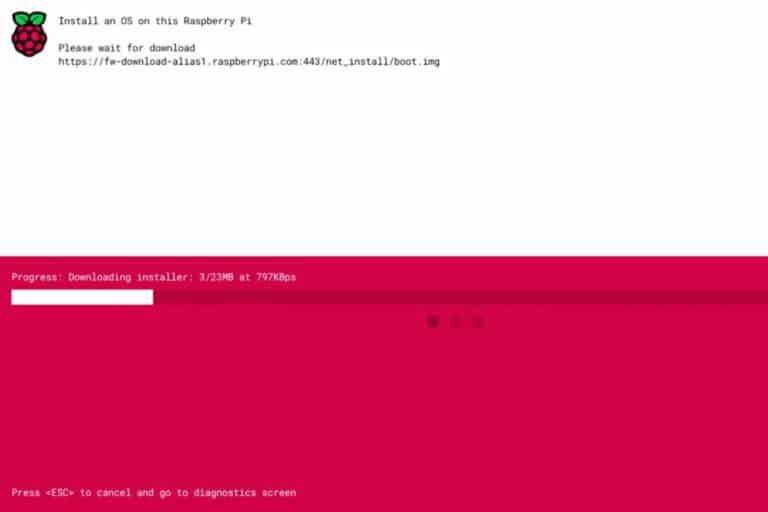
An alternative is to use the network boot feature. You can click on the link to get more details, but I’ll assume you use a computer in the following sections. - An SD card reader (USB or built-in computer).
If you don’t have one on your computer, you can get a USB adapter like this one on Amazon. - A minimum 8 GB SD card.
The best is this one, you can find a benchmark I did with the most popular SD cards here.
It’s also possible to use a USB drive (like a SSD for better performances), it’s the same procedure. - A micro-SD / SD adapter (often included with the SD card).
- A complete Raspberry Pi setup, with screen and keyboard, to install it in the best possible conditions.
I’m using a Bluetooth keyboard all the time, and I’m loving it (check it on Amazon).
Update: If you don’t have a computer except the Raspberry Pi, you can now use the new network boot feature to install your system. Check the link for more details about this.
Download Raspberry Pi OS
There are two main ways to install Raspberry Pi OS on your SD card:
- Use Raspberry Pi Imager: The tool created by the manufacturer, that will do everything for you.
- Use Balena Etcher: You’ll need to download the system image first, and flash it with Etcher.
Both techniques work well, but if you are reading this, you might be a beginner in this field, so I recommend going on with the first option. You’ll find many articles on this website where I explain how to do this with Etcher, but for now, let’s use Imager.
Download Raspberry Pi Imager
Raspberry Pi Imager is available on the official website. They are pushing this solution, so it’ll be easy to find.
Here is the direct link.
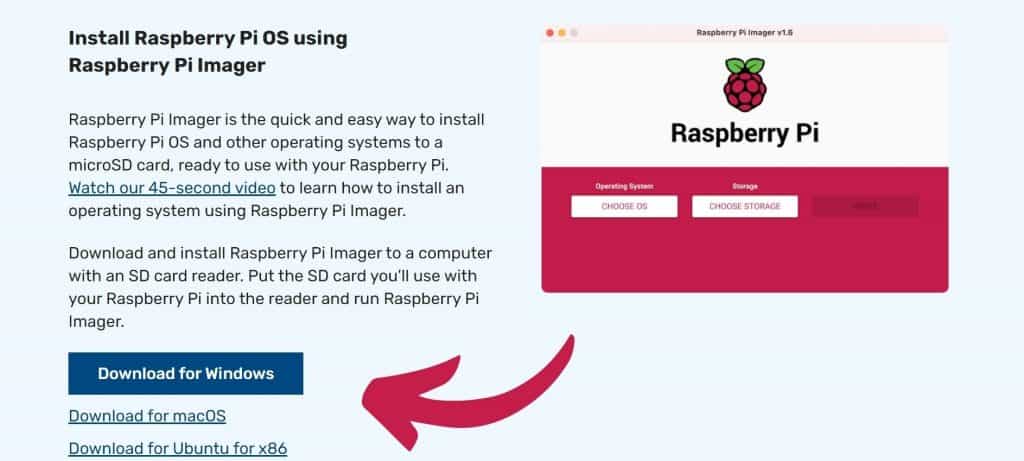
Install Raspberry Pi Imager on your Computer
Once downloaded on your computer, install it like any other application.
For Windows users, double-click on the downloaded file and follow the instructions to install it. Keep the default values if you have a choice.
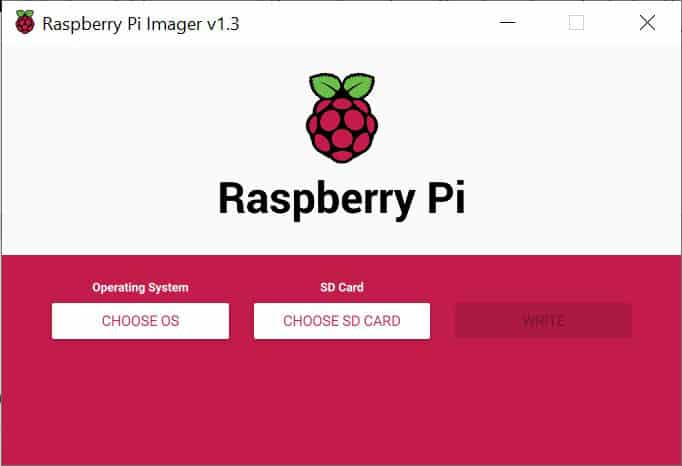
The tool will then be available in the main menu (or in your applications for other operating systems). Start it and you’ll be ready to move to the next step.
Flash Raspberry Pi OS on your SD card
Raspberry Pi Imager has an interface that is pretty easy to use. There are three main steps:
If you are lost in all these new words and abbreviations, request my free Raspberry Pi glossary here (PDF format)!
Download now
- Choose the operating system you want to install.
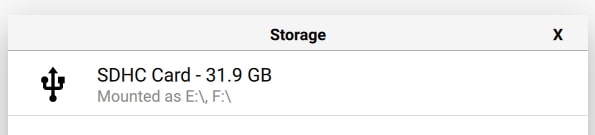
- Choose the SD card or USB device to use.
- Start the writing process.
Follow these three steps to create your SD card:
- Click on “Choose OS” and choose the version you want to install on your Raspberry Pi.
The first option is the Desktop version, and you’ll find the alternatives by clicking on the second element in the list: Raspberry Pi (other).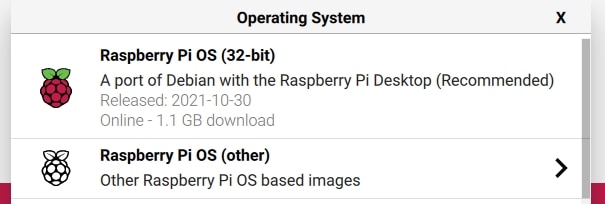
If you are lost will all the possibilities, you should probably read my guide about this here: Raspberry Pi OS Versions: All Your Questions Answered. - Once done, you can choose the SD card (in general, you’ll have only one choice).
- Click on Write to start the installation:
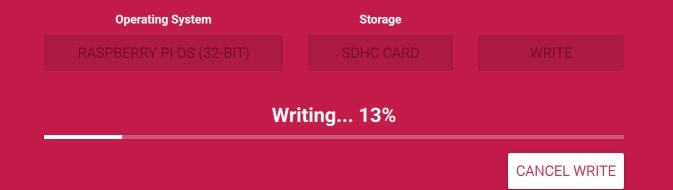
After a few minutes, your SD card will be ready.
If your operating system opens empty drives or format questions, you must ignore everything.
Imager will do everything. You have nothing else to do.
After the writing process, you can see on the picture, there will be a verifying process to ensure your SD card is not corrupted and that everything will work correctly.
Note: The first time (or if an update is available), Raspberry Pi Imager will download the latest image in the background, that’s why it might be slow depending on your Internet connection. But if you flash another SD card with the same OS, the image will be cached, and it won’t download it again.
First boot on Raspberry Pi OS
Insert the SD card
Get your SD card and insert it into your Raspberry Pi.
Then start the Raspberry Pi, with a screen and a keyboard plugged.
Your device may reboot a few times, don’t panic, this is normal.
Initial configuration
Whether you use a desktop environment or not, the first boot will give you a similar experience, offering you to create the first user, and change the initial configuration.
Desktop version
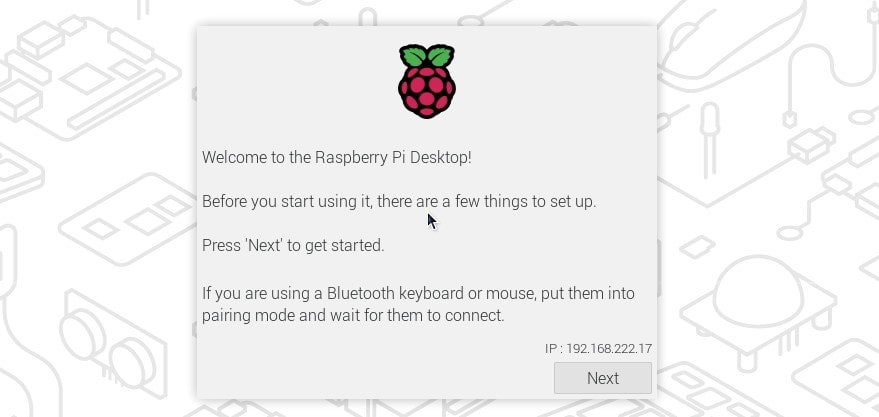
When you start on the desktop version for the first time, you’ll get a welcome wizard, guiding you with a few configuration steps:
- This welcome wizard looks like that, click “Next” to start the configuration:
- The first step is to configure your country, language and time zone:

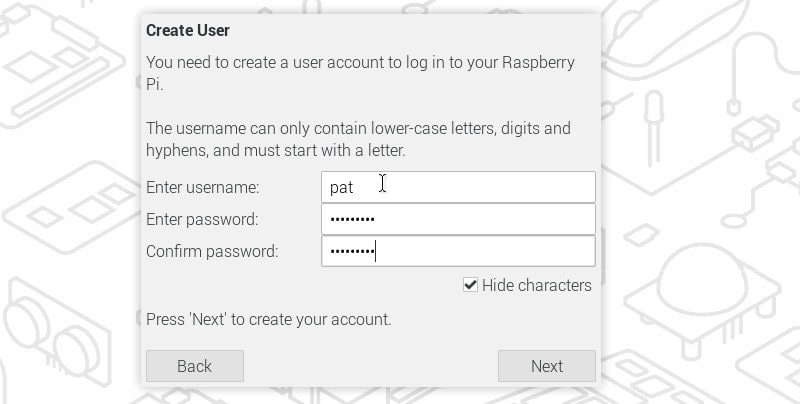
Make sure to pick the right keyboard configuration, as you’ll need it in the following step. - You can then create the first user, by deciding the username and password:
- If needed, you can then select a wireless network:
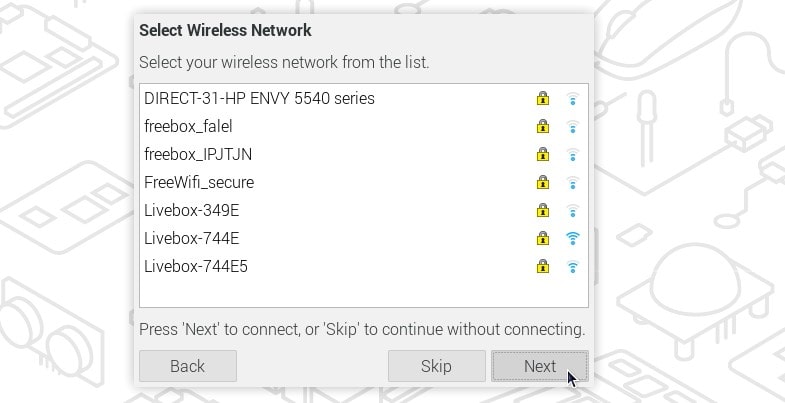
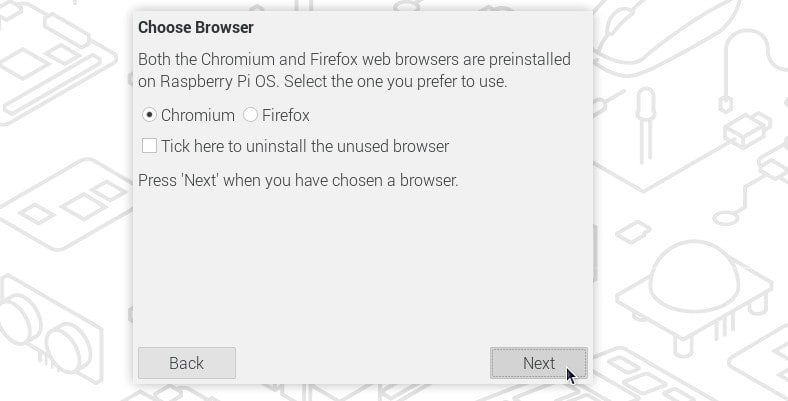
I’m using an Ethernet cable in this case, so I’m skipping it. It’s generally not a good idea to keep both connected. - You can then decide between Chromium and Firefox for your default browser (this can be changed at anytime after that, and you can always install other browsers on your Pi if needed).
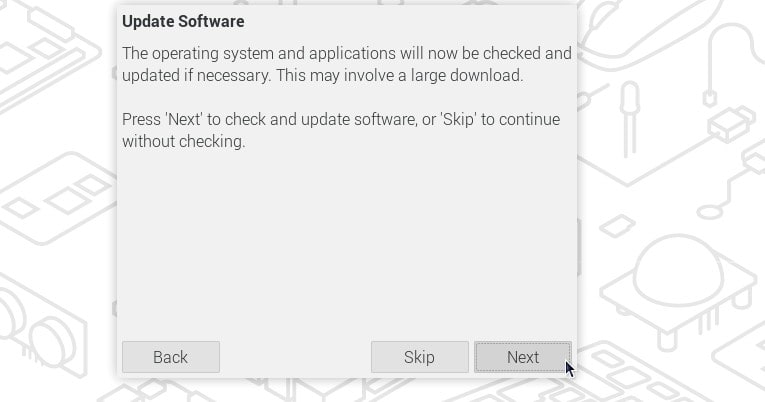
- Finally, it’s recommended to do the system updates if your network is set up:
- Once the updates completed, you can click on “Restart” to get access to your new system:
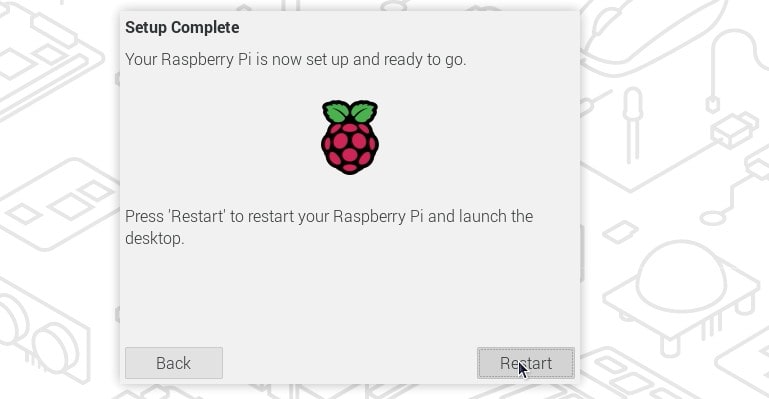
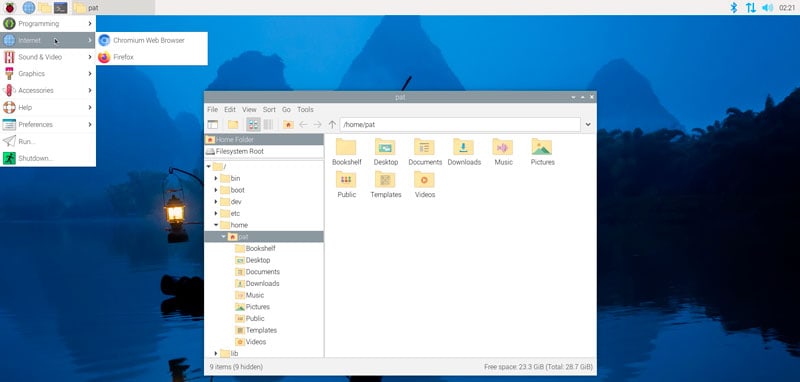
A session should open automatically with your main user account, and you’ll get access to the full interface:

Join Our Community!
Connect, learn, and grow with other Raspberry Pi enthusiasts. Support RaspberryTips and enjoy an ad-free reading experience. Get exclusive monthly video tutorials and many other benefits.
Learn moreLite version
If you are installing a Lite version of Raspberry Pi, there are fewer steps in the welcome wizard, with a more basic interface:
- The first step is to confirm your keyboard layout.
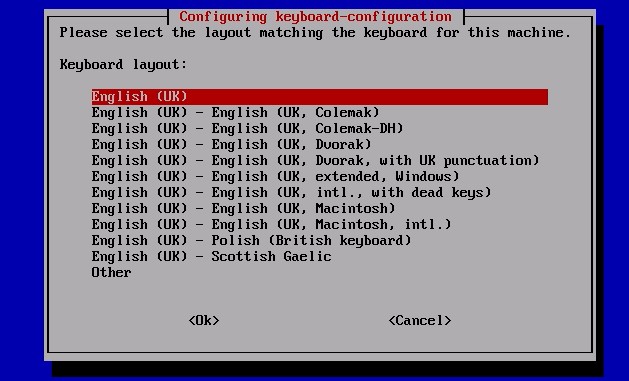
Make sure to pick the right one, as you’ll create your user and password next. - Once done, enter the new username and password.
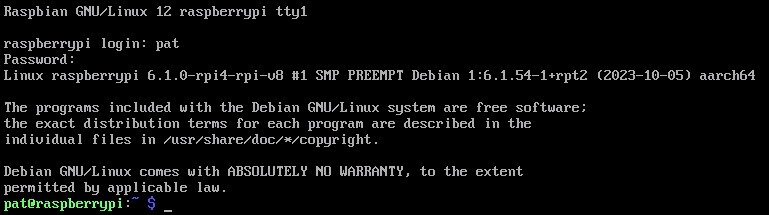
- The wizard will then close, and jump to a normal Linux prompt, where you can open a session with the user and password you just created:
Everything else can be configured with the Raspberry Pi configuration (raspi-config) once you’re logged in, so the wizard won’t help you with the updates or wireless configuration, for example.
I explain this in the next section.
Raspberry Pi OS configuration
Keyboard layout
The first thing you need to do is to choose the right layout for your keyboard (if not already set).
Desktop version
Generally, if you used the Welcome Wizard, your keyboard must already be configured appropriately.
However, if you need to change it. You can do it in:
- Main menu > Preferences.
- Open “Raspberry Pi Configuration“.
- Localisation tab.
- Set Keyboard…
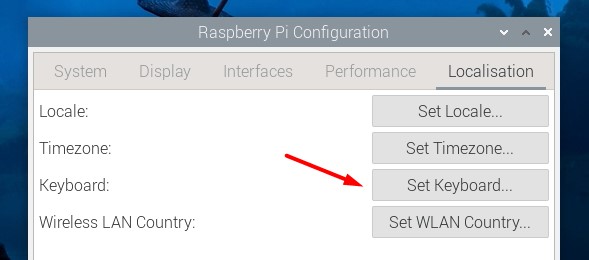
Change the values to fit the hardware you’re currently using.
The change should apply immediately, restart your apps if needed.
Lite version
On the lite version, use the raspi-config tool to configure everything.
Start the raspi-config tool with:sudo raspi-config
- Go to Localisation Options:
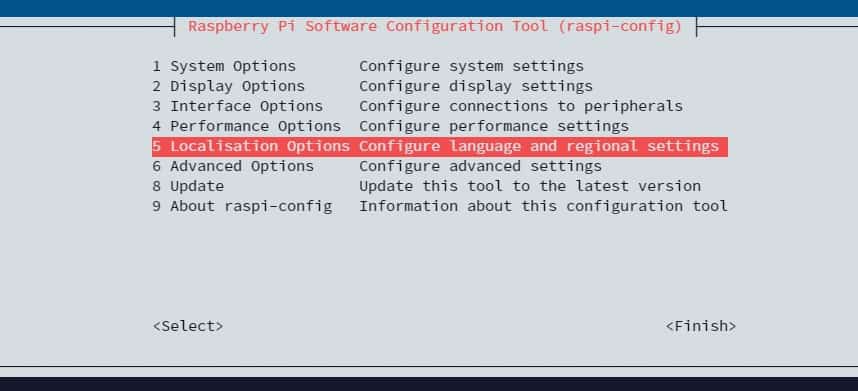
- Then Keyboard.
- Select the model of your keyboard (leave default if not found).
- Then select the layout of your keyboard (or other to have the choice of other countries, and then the specific layout of your country).
After that, you will have other options for special keys (alt gr, compose key, etc…).
It’s not the most important because with Raspberry Pi OS Lite you will use SSH most of the time (from another computer well configured).
You can keep default values if you are not sure.
After saving your changes, verify that your keyboard is typing what you want and continue.
Raspi-config is a great tool you can use from your Raspberry Pi directly, but also when connected by SSH. It allows you to configure many system options with a simple interface.
Are you a bit lost in the Linux command line? Check this article first for the most important commands to remember and a free downloadable cheat sheet so you can have the commands at your fingertips.
Network configuration
If you can connect your Raspberry Pi to a network cable with DHCP, the setting will be instantaneous, and you have nothing else to do.
In other cases, here’s how to deal with the network configuration.
Connect to a Wi-Fi network
Desktop
If you use a desktop version, you probably already configured it during the first boot, but you can always do it now or switch to another network.
To do this, click on the network icon in the top-right corner.
A list of available networks will show up:
If you are lost in all these new words and abbreviations, request my free Raspberry Pi glossary here (PDF format)!
Download now
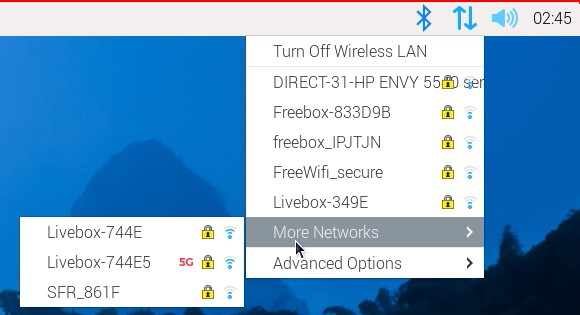
You just need to click on one to set the Wi-Fi password and get connected to it (I have no idea why my router is hidden in “More Networks”, but anyway).
Note: If you didn’t follow the welcome wizard, you may be asked your Wi-Fi country before seeing the list of networks. Just pick your current country and it should be fine.
Lite
To enable the Wi-Fi on the Lite version, you should first set your Wi-Fi country.
For this, use the raspi-config tool:sudo raspi-config
- Go to Localisation Options > WLAN Country.
- Select your Country in the list.
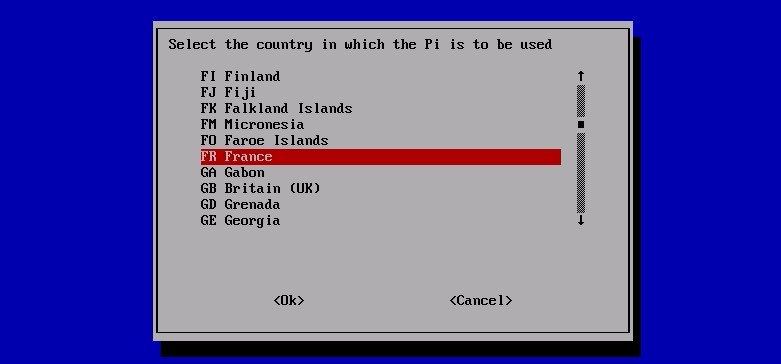
- Exit.
Once you set the country, you can start raspi-config again to set up your Wi-Fi connection:
- Go to System Options.
- Choose Wireless LAN.
- Enter your network SSID (its name).
There is no list, so make sure to type the exact name. - Enter your passphrase (password).
- Finish.
Set a static IP address
In most cases, your network router will assign an IP address to the Raspberry Pi automatically, but this IP address might change regularly (at each reboot, on when other devices are connected).
To make sure your Raspberry Pi is always reachable at the same IP address, it’s possible to set a static one. I explain how to do this in this article: 3 Easy Ways To Set A Static IP Address On Raspberry Pi.
While it’s not mandatory, it’s often convenient to do so (feel free to keep this link handy, and get back to it once the rest of your configuration is done).
Enable SSH
SSH is a protocol that will allow you to connect to your Raspberry Pi from another computer to be able to launch commands and scripts.
Desktop version
To start the SSH server, follow these steps:
- Open the Main menu.
- Start Preferences > Raspberry Pi Configuration.
- In the Interface tab, enable SSH.
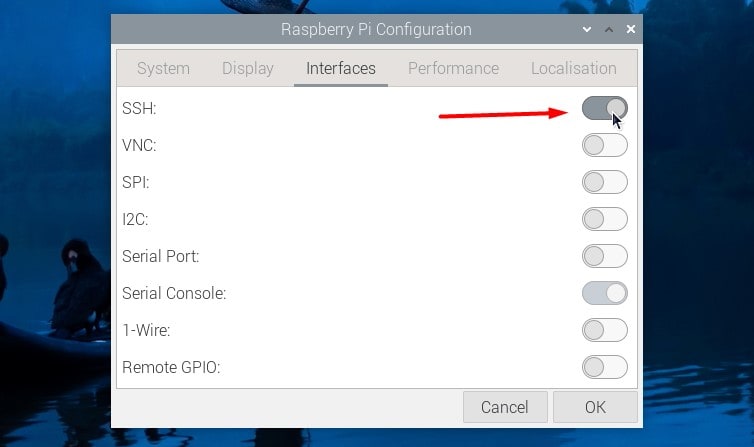
On the Desktop version, SSH server will auto-start at each boot until you disable it in this window.
Lite version
Start once
On the lite version, you can start the SSH server with this command:sudo service ssh start
Auto-start
Connection
Once the SSH server is enabled, you can connect from any computer on the local network.
You can even open a port in your firewall/box to access it from the Internet.
If you don’t know how to use SSH, you will find the information in the first paragraph of this article.
Install new packages
The base of your Raspberry Pi OS system is now in place.
You must then install all the software you need.
The most basic software is available in Raspberry Pi OS repositories, let’s see how to do it in both environments.
Desktop version
With the Desktop version, a graphical tool allows you to manage packages:
- Open the main menu.
- Go to Preferences.
- Click on Add / Remove Software.
A window opens:
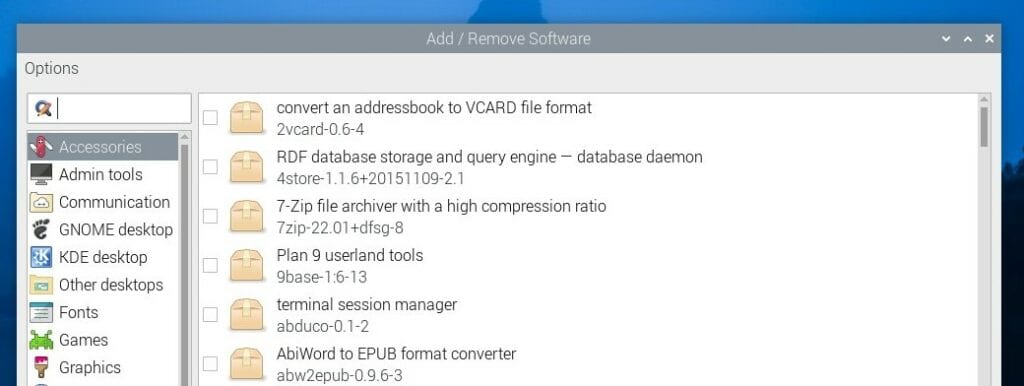
This tool allows you to view all packages available for Raspberry Pi OS, sorted by category.
A search engine is also available.
To install a new package, simply check the corresponding box.
Then confirm by clicking OK on the bottom right.
When a package is selected, a short description appears in the bottom frame.
To remove a package, uncheck the box corresponding to the package you want to uninstall.
Don’t know what to install? Here are my favorites applications for Raspberry Pi OS.
Lite version
In the Lite version, there is no interface, so you will have to learn some commands.
The apt commands allow you to manage package installation.
Start by updating the packages list:sudo apt update
If a password is asked, type your main user password.
Find the exact name of a package:apt search [TEXT]
Here is an example: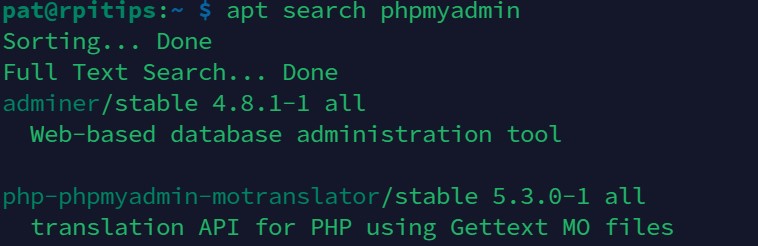
There are many optional parameters you can use, for example -n will search only in package names (so no adminer in the results):apt search -n phpmyadmin
Install a package:
Once you get the exact name for the package you want to install, use apt to install it:sudo apt install [PACKAGE-NAME]
Here is an example:
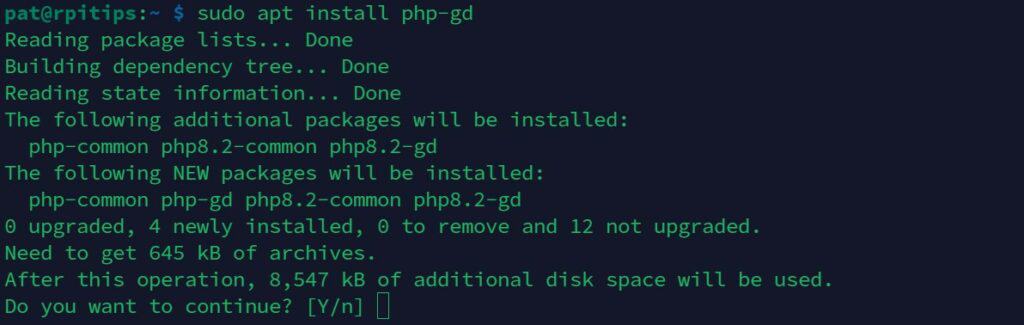
Hit enter to install the package and its dependencies.
Delete a package:
If you want to uninstall a package, use this command:sudo apt remove [PACKAGE-NAME]
Here is an example:

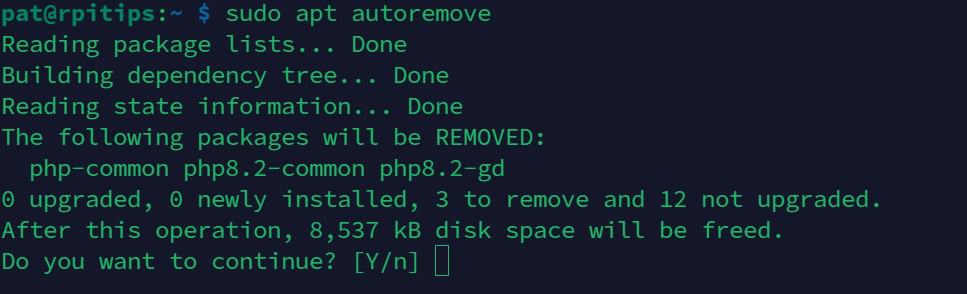
As you can see, apt will remove the package you ask for, but not its dependencies.
If you want to remove them, you have to use this command:sudo apt autoremove
Video
If you want to see a summary of all the first steps to install Raspberry Pi OS (Raspbian) on your Raspberry Pi, you can watch this video:
And you can subscribe here to receive the new videos about Raspberry Pi:
It's a free PDF guide containing every Raspberry Pi Linux command you should know!
Download now
Related posts
Before finishing this article, here are some articles that may interest you.
These are pretty simple things to set up, and that you may need after installation is complete:
- Find the current IP of your Raspberry Pi
- Change desktop appearance
- SSH tutorial for Raspberry Pi
- Remote desktop on Raspberry Pi
It's a free PDF guide containing every Raspberry Pi Linux command you should know!
Download now
Reminder: Remember that all the members of my community get access to this website without ads, exclusive courses and much more. You can become part of this community for as little as $5 per month & get all the benefits immediately.
Conclusion
You now know how to install or reinstall Raspberry Pi OS on a Raspberry Pi, and the first things to do once the installation is complete.
Raspberry Pi OS is the basis of most projects, now you have to choose one project and set it up 🙂
Whenever you’re ready, here are other ways I can help you:
The RaspberryTips Community: If you want to hang out with me and other Raspberry Pi fans, you can join the community. I share exclusive tutorials and behind-the-scenes content there. Premium members can also visit the website without ads.
Master your Raspberry Pi in 30 days: If you are looking for the best tips to become an expert on Raspberry Pi, this book is for you. Learn useful Linux skills and practice multiple projects with step-by-step guides.
The Raspberry Pi Bootcamp: Understand everything about the Raspberry Pi, stop searching for help all the time, and finally enjoy completing your projects.
Master Python on Raspberry Pi: Create, understand, and improve any Python script for your Raspberry Pi. Learn the essentials step-by-step without losing time understanding useless concepts.
You can also find all my recommendations for tools and hardware on this page.

I’ve already downloaded Raspbian Buster with desktop, the image with desktop based on, Debian Buster Version: July 2019, Release date: 2019-07-10, Kernel version: 4.19, and Size: 1149 MB.
Is there an update of your tutorial for the Debian Buster Version, or are there no issues at all?
Hi Ludi,
Yes I need to update the screenshots for buster
But the installation process is the same
Let me know if you have any issue or difference with this guide during the installation
Hi RaspberryTips,
thanks for the reply. At the moment, I’m working through your tutorial, and stated that after downloading the desktop version of Buster, I verified th .zip file with HashMyFiles on Windows, and with sha256sum on Linux:
root@hircum:~/Downloads# sha256sum 2019-06-20-raspbian-buster.zip
49a6b840ec2cb3e220f9a02bbceed91d21d20a7eeaac32f103923fdbdc9490a9 2019-06-20-raspbian-buster.zip
49a6b840ec2cb3e220f9a02bbceed91d21d20a7eeaac32f103923fdbdc9490a9 SHA-256: Website
Then, I did not had to unzip the .zip this file using Etcher! Am I wrong? But the SD Card started normally …
Regards, Ludi
Yes, Etcher is able to flash image in a zip format
I do not get Etcher running on Debian Buster – it simply does not do anything.
Unpacked the appimage, made it startable, nothing 🙁
Hello,
Post updated for Raspbian Buster today
Mostly screenshots updates and small edits, but the procedure stay the same as ever 🙂
Haven’t acquired my pi 4 as yet but in the meantime thought I would download Buster and view it on my desktop pc. Followed instructions and flashed the full desktop version onto a 8GB flash drive. The flash drive does not boot up. Why?
Hi,
It’s not possible to use Buster on your computer, Raspbian is for Raspberry Pi only, Debian is for computers but it’s not the same thing
I’m not even sure if it’s possible to boot a computer from a SD card
Ok, so the good answer if you want to try Buster is to use it inside a virtual machine
I have a guide about that, you can find it here: https://raspberrytips.com/run-raspberry-in-virtual-machine/
It’s for Stretch, but the idea for Buster should be the same
Patrick
Hello,
I just got a Pi4 and I’m just navigating around through the get started walk through. If i go to the recommended software tab i get an error message.
Error updating package data – E Repository ‘http://raspian.raspberrypi.org/raspbian buster InRelease’ changed its ‘Suite’ value frome ‘testing’ to ‘stable’
There’s an ok button that just closes the whole recommended software tab. Any idea what I can do to view/load recommended software or get this tab to work with no error?
All information what I found, says that root has no password, but is this changed in buster because I can not log in to root ?
Hi Pauli
Like on many other distributions, you can’t connect on Raspbian directly with root
You have to log in with “pi” and use sudo to run commands as administrator
If you really need to use the root user, your can create a password for it with “sudo passwd”
I wrote a comment about a kernel panic a while back – problem resolved (or rather, unresolved but I know what’s probably going on): “Only the Pi 3A+, 3B+ … can boot from an SD card larger than 256 GB” (Source is the Raspbian installation guide). I presume this is the issue…
Hello, I have raspberry pi 3+ ad I want to run Raspbian Buster on my waveshare 7 inch touch display. Must I make some changes on config. txt?
hello, are you aware that all your links to the official site are 404 not found? or has someone hacked my OS again?
Oh my god, they don’t redirect older links to the new software page >_< Thanks man, I will update all my tutorials very soon 🙂
You should also add instructions covering imager as that’s now the preferred method of installing os’s now.
Yes probably, not the one I prefer but if it helps some of you, why not 🙂