
How To Install Eclipse On Raspberry Pi (Updated for 2024)
If you are a developer and used to Eclipse on your computer, you might prefer to play with your Raspberry Pi using the same interface. Eclipse wouldn’t necessarily be my first choice for coding on Raspberry Pi, due to the hardware limitation and cumbersome interface, but it works fine on the recent models, and as a developer myself, I understand that using an editor you’re used to can potentially save a lot of time. In this tutorial, I’ll show you how to easily install Eclipse on Raspberry Pi OS.
The popular Eclipse IDE can be installed on Raspberry Pi but requires a 64-bits operating system. A package is then available for this architecture on the official website and can be downloaded and installed manually.
Don’t worry, in this article, I’ll explain how to do this step-by-step. You are at the best place to learn how to install it on your Raspberry Pi, just keep reading to follow my lead.
If you’re looking to quickly progress on Raspberry Pi, you can check out my e-book here. It’s a 30-day challenge where you learn one new thing every day until you become a Raspberry Pi expert. The first third of the book teaches you the basics, but the following chapters include projects you can try on your own.
Prerequisite: Get a 64-bits Operating System
To get Eclipse working on a Raspberry Pi, you need to use a 64-bits operating system. It can be either Raspberry Pi OS 64-bits (still in beta), Ubuntu, or any other distribution.
Most tutorials about Eclipse on Raspberry Pi I have seen are obsolete because Eclipse is no longer available in the default repository of Raspberry Pi OS 32-bits, and only offers downloads for 64-bits operating systems.
If like me, you always mix the languages syntax, download my cheat sheet for Python here!
Download now
So, first, you need to make sure your system is a 64-bits version:
- Open a terminal.
- Type the command:
uname -a - You’ll get something like:
Linux raspberrypi 5.10.63-v7l+ #1459 SMP Wed Oct 6 16:41:57 BST 2021 armv7l GNU/Linux
In this example, it’s “armv7”, so it’s 32-bits, which is not compatible with Eclipse.
On a 64-bits operating system, you’ll get something like:Linux raspberrypi 5.10.63-v8+ #1459 SMP PREEMPT Wed Oct 6 16:42:49 BST 2021 aarch64 GNU/Linuxaarch64 is what we are looking for. If you see it on your system, you are ready to go.
So, first, if you are not on a 64-bits operating system, you need to start from scratch on Raspberry Pi OS 64 bits, Ubuntu, or any other alternative that offers a 64-bits version. I have an article here about Raspberry Pi OS 64 bits, that will explain everything you need to know.

Join Our Community!
Connect, learn, and grow with other Raspberry Pi enthusiasts. Support RaspberryTips and enjoy an ad-free reading experience. Get exclusive monthly video tutorials and many other benefits.
Learn moreOnce done, make sure your system packages are up-to-date, by using the commands:sudo apt update
sudo apt upgrade
Are you a bit lost in the Linux command line? Check this article first for the most important commands to remember and a free downloadable cheat sheet so you can have the commands at your fingertips.
It's a free PDF guide containing every Raspberry Pi Linux command you should know!
Download now
Eclipse Installation on Raspberry Pi
Here are the required steps to get Eclipse running on a Raspberry Pi:
- Download the corresponding package from the official website.
- Extract the files from the downloaded archive.
- Run the “eclipse” application for the first time.
- Create a shortcut in the main menu.
I’ll now explain each step in detail.
If like me, you always mix the languages syntax, download my cheat sheet for Python here!
Download now
Download the Eclipse package
Here is the procedure to download the correct Eclipse version for your Raspberry Pi:
- Go to the Eclipse downloads page.
By default, it will give you a download link for the x86_64 architecture, which doesn’t work on Raspberry Pi. - So first, you need to click on “Download packages” to view the other options.
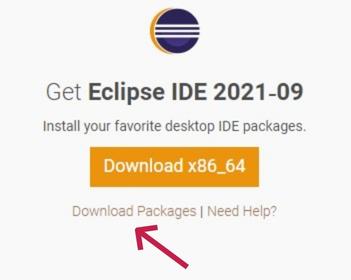
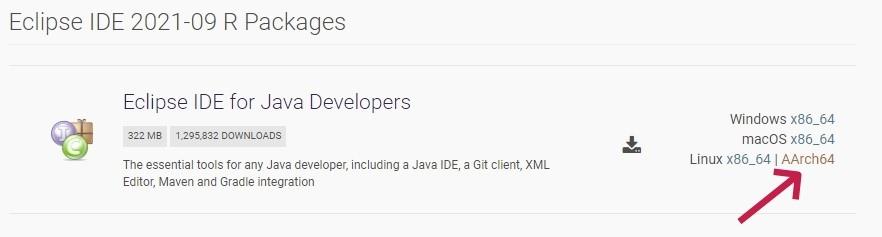
- Then, you can either download the “Eclipse Installer”, which will let you choose which Eclipse version to install, or directly download the version you want by scrolling a bit.
I chose this option, to show you the process, I’ll install “Eclipse IDE for Java Developers”, but it’s the same thing for any package. - Either way, click on the “AArch64” link to get the correct download for your Raspberry Pi system:
- Finally, you’ll have a download button to get the file.
If you are doing this directly on your Raspberry Pi, you can click on it.
If you are on your computer, it’s a bit tricky. There is a “Direct link to file” link in the right menu: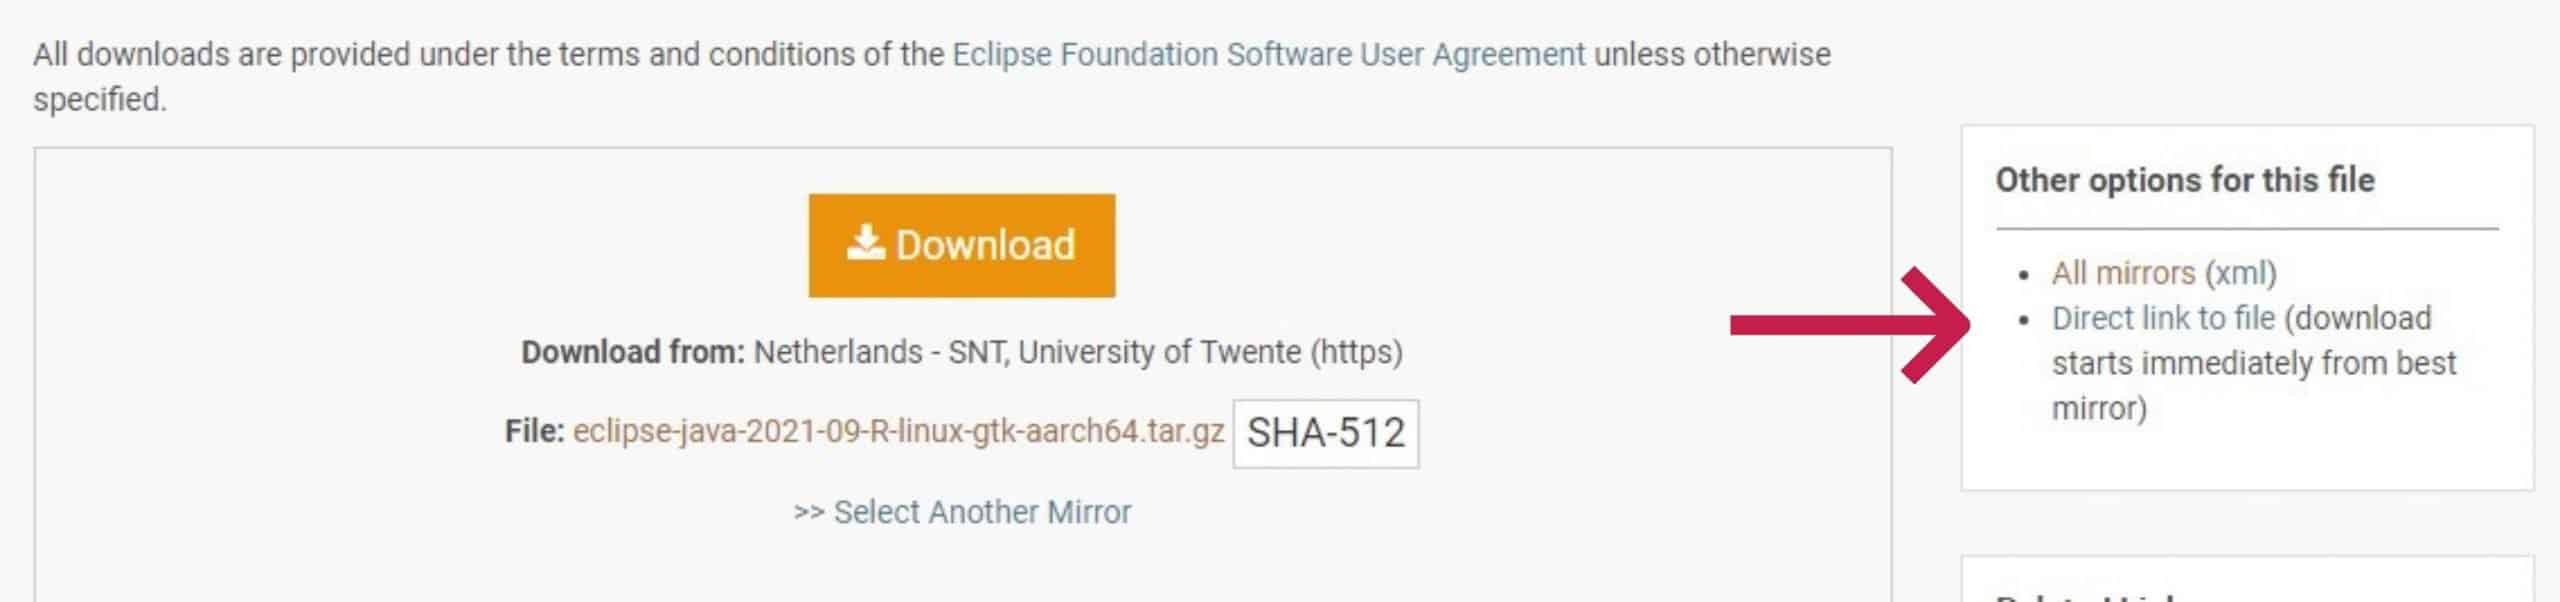
But it’s not really a direct link. To get the direct link, start the download on your computer, and then copy the direct link while the download is in progress.
Then you can use wget via SSH or in a terminal to get the file on your Raspberrry Pi, something like:wget https://ftp.snt.utwente.nl/pub/software/eclipse/technology/epp/downloads/release/2021-09/R/eclipse-java-2021-09-R-linux-gtk-aarch64.tar.gz
Don’t use this command directly, the mirror and file version will change all the time, so pick the correct link on their website first.
Once the download is complete, you can move to the next step.
Extract the Eclipse files
Downloading the Eclipse package on the official website will give you an archive, a .tar.gz file. You now need to extract the files before starting the installation:
- In your file explorer, go to the Downloads folder (or the folder where you downloaded the file).
- Find the Eclipse file (probably something like “eclipse-java-VERSION.tar.gz”.
- Do a right-click on it and choose “Extract files here”.
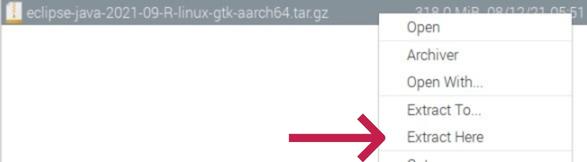
A few seconds later, a new folder named “eclipse” will appear, and you are ready to start the application.
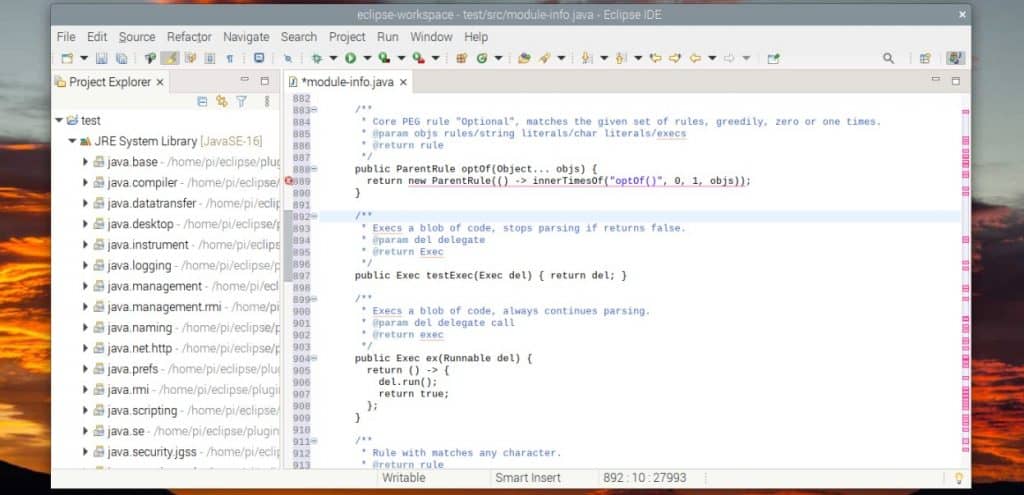
Run Eclipse for the first time
- Go into the new “eclipse” folder where you extracted the files.
- Find the “eclipse” application and double-click on it.
- In the popup windows that show up, click on “Execute”
- The Eclipse IDE Launcher will start, and ask you for the workspace folder. You can keep the default value for now.
Click Launch once ready. - You should now get access to the application that you are used to.
Create a shortcut for Eclipse in the main menu
As we are starting the application directly from the extracted files, the application is not really “installed” on your system, and so there is no shortcut in the main menu. You can easily add it yourself by following these few steps:
- Open the main menu, and go to Preferences > Main Menu Editor.
- Click on “Programming” in the left menu.
- Then click on “New Item”
- Enter the shortcut name (probably just “Eclipse”).
- Click on browse to select the file location (for me it’s just /home/pi/eclipse/eclipse).
- Click on the image and select “icon.xpm” in the same folder.
- You should get something like:
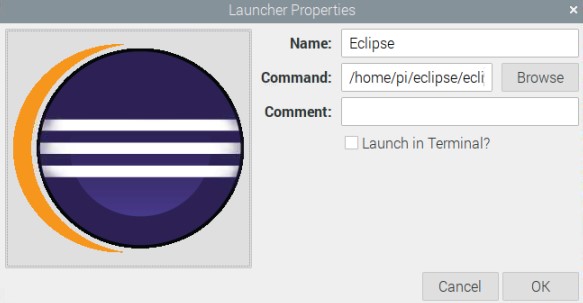
- Click on “OK” twice to close everything.
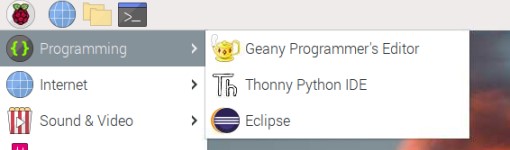
Eclipse is now available in the main menu, in the “Programming” category.
It's a free PDF guide containing every Raspberry Pi Linux command you should know!
Download now
If you are looking for exclusive tutorials, I post a new course each month, available for premium members only. Join the community to get access to all of them right now!
Alternatives to Eclipse on Raspberry Pi
Eclipse is a heavy solution, that is not always the best fit for the Raspberry Pi limitations. Many other code editors are available on Raspberry Pi, and most of them don’t require a 64-bits operating system. For example, you can use Visual Studio Code, PyCharm, or Geany.
I have a complete article where I compare all the options available, explaining the advantages and disadvantages of each solution and how to install them on your Raspberry Pi. You can find the article here: The 7 Best Text Editors for Programming on Raspberry Pi.
You’ll also find links to specific tutorials to get more tips for some of them, like Geany, which I’ve used for years at my job, Visual Studio, or PyCharm, which might be the best alternative to Eclipse, even if it’s not really a light application either.
I also made a video if you prefer, you can watch it directly here:
Whenever you’re ready, here are other ways I can help you:
The RaspberryTips Community: If you want to hang out with me and other Raspberry Pi fans, you can join the community. I share exclusive tutorials and behind-the-scenes content there. Premium members can also visit the website without ads.
Master your Raspberry Pi in 30 days: If you are looking for the best tips to become an expert on Raspberry Pi, this book is for you. Learn useful Linux skills and practice multiple projects with step-by-step guides.
The Raspberry Pi Bootcamp: Understand everything about the Raspberry Pi, stop searching for help all the time, and finally enjoy completing your projects.
Master Python on Raspberry Pi: Create, understand, and improve any Python script for your Raspberry Pi. Learn the essentials step-by-step without losing time understanding useless concepts.
You can also find all my recommendations for tools and hardware on this page.

Great content! Keep up the good work!