GPi Case 2W Intro & Review – Is it Really Worth it?
There are many Raspberry Pi cases available for retro-gaming that look like the NES or the Saturn, for example. But this one is probably the most interesting to me. It’s a clone of the Nintendo Game Boy, with a Raspberry Pi Zero inside.
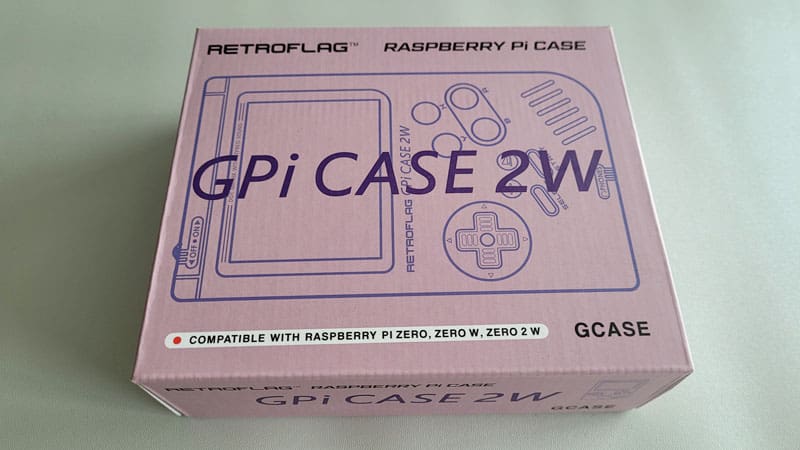
The GPi Case 2W is very similar to the original Game Boy but comes with a rechargeable battery, a 3″ IPS color screen and several other improvements. A Raspberry Pi Zero is mounted in the cartridge slot, making it way more powerful than the original console.
I’ve had the chance to play with it for a few weeks, so I will introduce this product to you, and share my honest review about it in this article. By the end of this article, you’ll know if it’s a good fit for you (or not).
If you’re looking to quickly progress on Raspberry Pi, you can check out my e-book here. It’s a 30-day challenge where you learn one new thing every day until you become a Raspberry Pi expert. The first third of the book teaches you the basics, but the following chapters include projects you can try on your own.
GPi Case 2W Introduction
Idea
The goal of this product is pretty simple: to give you the same feeling as when you played on the original Game Boy years ago, but add enough new technologies in it to still make it enjoyable today.

The overall look is very similar, but you can already see some major changes in this picture:
- It has a modern color screen, nothing to compare with the old green-looking screen of the original device.
- There are four buttons (A, B, X, Y) instead of two on the original Game Boy.
- You can also see 2 additional buttons at the bottom of this picture, added by RetroFlag (a star and a flag).
Specifications
Here are the full specifications of this GPi Case 2W model:
| Screen | 3.0″ IPS |
| Resolution | 640 x 480 |
| Compatibility | Raspberry Pi Zero, Zero W and Zero 2W |
| Buttons | Turbo (star), Home (flag). Right and Left shoulder buttons on the back. X and Y. Volume (right), brightness (left). On/Off (top). Safe shutdown on/off (under the cartridge). |
| Ports | DC power input (top-right). 3.5mm audio hack (bottom). USB port for firmware upgrade (inside, with battery). |
| Battery | 2800mAh Li-on |
| Power cord | USB to DC 2.5 x 0.7 mm (1 meter) |
The important changes versus the first version of this case (GPi Case) is the addition of the Turbo and Home buttons, an improvement of the screen size and resolution, as well as the use of a rechargeable battery (2800mAh) instead of standard AA batteries.
Pricing
The official price of this new model is around $80. You can check the current price here on Amazon.
Get a list of my 24 favorites games (with links) to play on Retropie, Recalbox or Lakka
Download now
It includes the case, the screen and the battery, but you’ll add to order the Raspberry Pi and the SD card separately. I’m doing this review with my Raspberry Pi Zero 2W and my favorite SanDisk SD card.
While a Raspberry Pi Zero 2W is still hard to find in stock (reasons and tips here), you can use any Raspberry Pi Zero model with it (except that it shouldn’t have headers soldered on it).
Warning: Different versions are available, with similar prices, so make sure to pick the right one. The GPi Case 2 is for the Raspberry Pi compute module (CM4), while the GPi case is for the old model with AA batteries.
It's a free PDF guide containing every Raspberry Pi Linux command you should know!
Download now
GPi Case 2W Review
Enough theory, let’s see what it looks like in real life, and how to assemble and install it, before testing a few games.

Join Our Community!
Connect, learn, and grow with other Raspberry Pi enthusiasts. Support RaspberryTips and enjoy an ad-free reading experience. Get exclusive monthly video tutorials and many other benefits.
Learn moreUnboxing
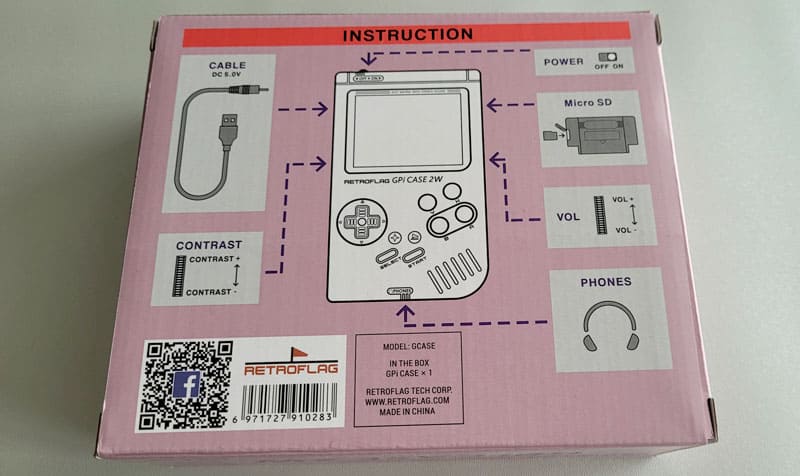
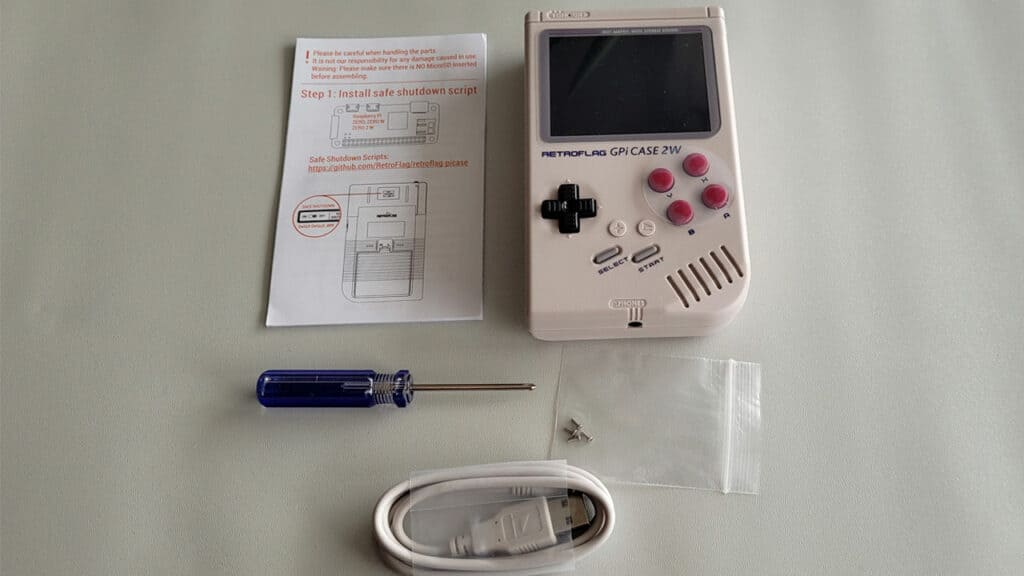
The GPi case 2W comes with:
- The Game Boy case with the battery and screen already mounted.
- A user guide with the assembly and installation instructions.
- The USB cable to charge the battery.
- A screwdriver and 4 screws to fix the Raspberry Pi Zero in the cartridge.
Assembly
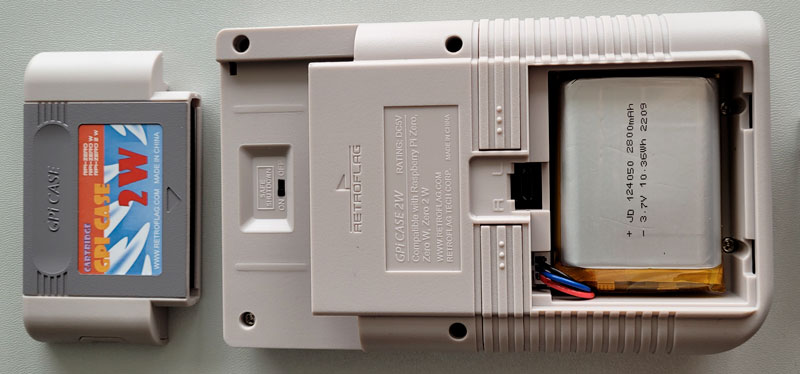
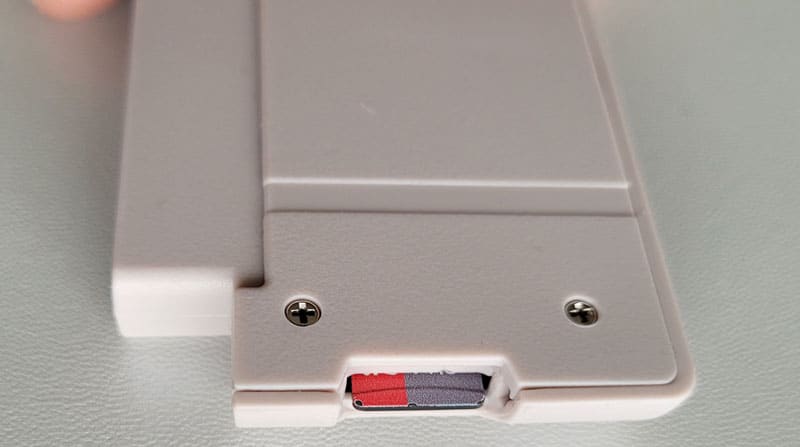
The only thing you need to do from there is to remove the “fake” cartridge from the back slot and open it to put the Raspberry Pi inside.
In this picture, you can also see the safe shutdown switch, the L and R shoulder buttons and the battery. We don’t see it well in this photo, but the USB port is between the battery and the R / L letters.
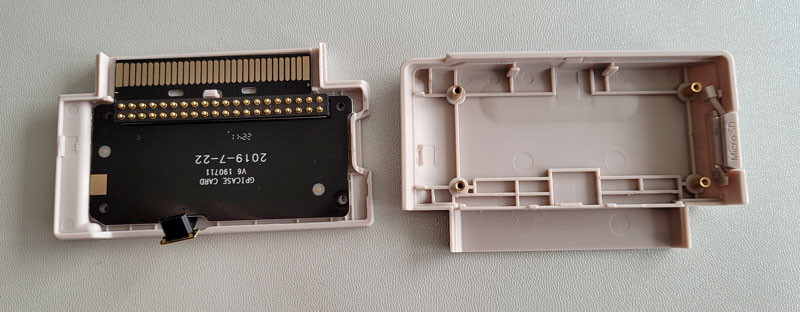
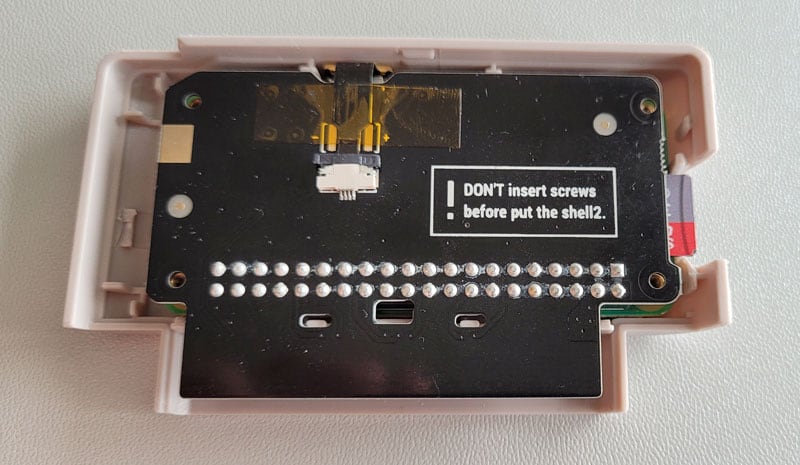
From there, you can open the cartridge to discover the space for the Raspberry Pi Zero. You’ll see the GPi case card already inside it. It was a bit hard to open, but don’t worry, it looks solid enough.
On the card, there is a tiny micro-USB cable to plug into the Raspberry Pi Zero like this:
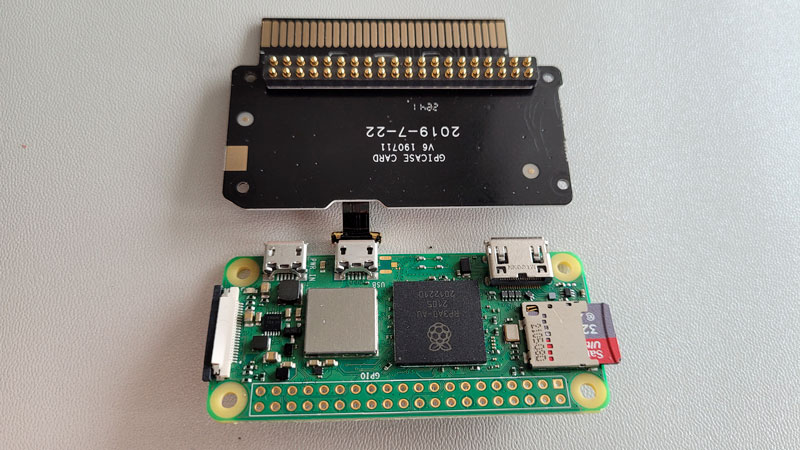
You’ll then gather the card and the Pi, plug in the GPIO pins gently and then put everything back inside the cartridge:
The last step is to put back the lid and use the 4 screws to fix everything properly. It requires a bit of care, but it’s not complicated, so you should be able to complete the assembly without any problem.
Installation
Once the assembly is completed, you need to install your favorite retro-gaming operating system on an SD card, and insert the SD card into the cartridge slot:
Get a list of my 24 favorites games (with links) to play on Retropie, Recalbox or Lakka
Download now
As it’s not a traditional setup, instructions are available on the RetroFlag website (this GitHub project in fact) to fix the display and enable the safe shutdown switch.
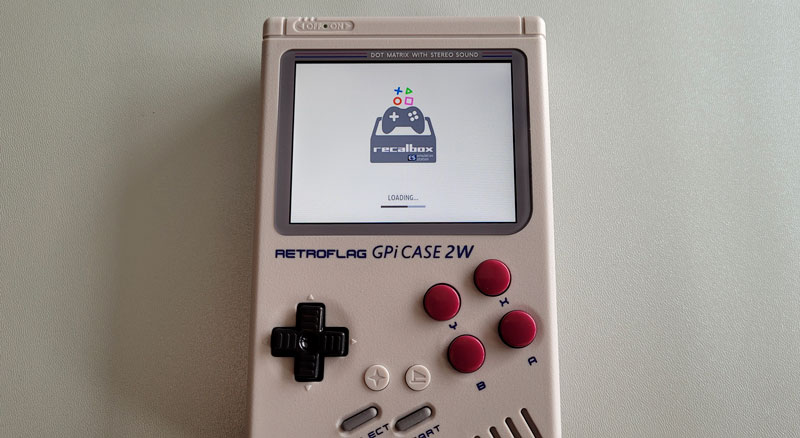
But after testing several distributions, my recommendation would be to go with Recalbox. If you install the latest version available on a Raspberry Pi Zero 2W, it will work directly. Supporting all the additional features, and with the controller already configured.
With Retropie, you need to install a patch on the SD card, or you’ll get nothing on the screen, the safe shutdown won’t work, and you’ll have to configure all buttons on the first boot. Retropie is also less convenient for many things (try to configure Wi-Fi without a keyboard), and most configuration menus won’t work well without a keyboard.
On Recalbox, I used the WPS option to connect to my Wi-Fi. I could then access the shared folder to upload new ROMs on it, and was ready to play only a few minutes later.
Recalbox also comes with dozens of games already installed, which is great to accelerate my testing process.
Note: The patch available on GitHub for Recalbox allows you to fix this kind of display problem on the first boot: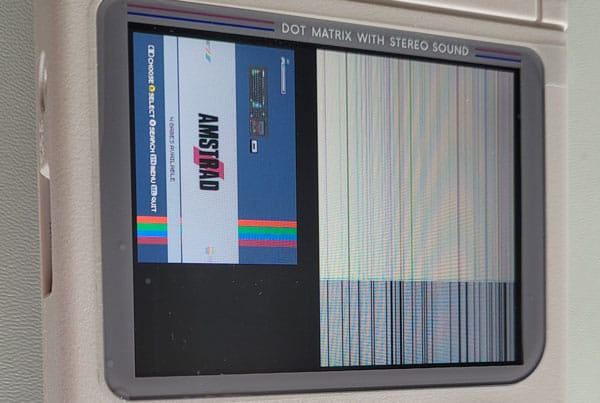
But if you use the latest Recalbox version (the one for the GPi Case 2W), it should work directly (no need to patch anything).
I experienced this problem with Recalbox 8 and a Pi Zero W, it worked directly with Pi Zero 2W and Recalbox 9.
It's a free PDF guide containing every Raspberry Pi Linux command you should know!
Download now
If you are looking for exclusive tutorials, I post a new course each month, available for premium members only. Join the community to get access to all of them right now!
GPi Case 2W Usage
Comfort & limitations
I was amazed at the quality and comfort of this product. I guess it’s half thanks to Retroflag’s design and half thanks to Recalbox for making things simple. But my first impressions are really excellent.
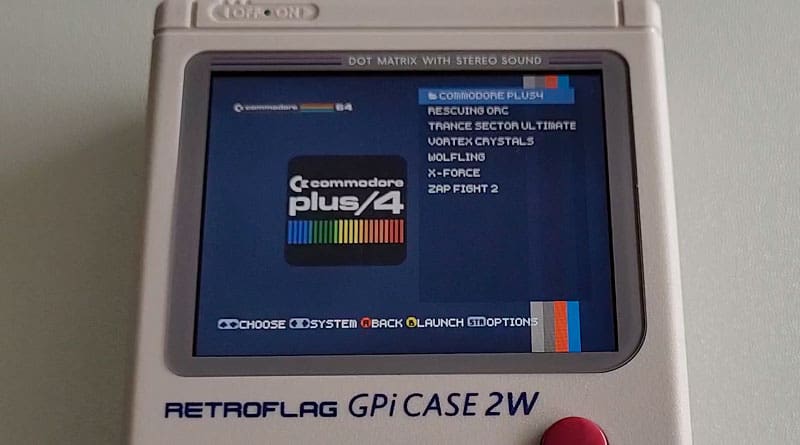
The Recalbox interface fits well on the screen, it’s easy to navigate in the interface with the case buttons, and you can quickly find and start any game.
It was fun to play old Game Boy and Game Boy Color games with a better screen and faster loading times.
The main limitations I encountered are more related to the Raspberry Pi than the GPi case itself. I first tried with a Raspberry Pi Zero W, but almost everything was very slow. It was way better with the Zero 2W.
If you stick to the older consoles (or handhelds), it should be fine. For example, I tried a few N64 games, but some of them were very slow. Once again, it’s not the fault of Retroflag or Recalbox, just the Pi limitations.
Anyway, the lack of buttons will also limit your choice of games. The addition of the shoulder buttons on the back is a good thing, but recent consoles require more buttons (dual sticks for PlayStation and N64, for example).
Get your Retroflag GPi case 2W on Amazon
Battery
The replacement of the 3xAA battery with a rechargeable Li-ion battery is an excellent thing. Its capacity is 2800mAh, which should be enough to play for at least 5 to 10 hours (depending on the game you play, the use of sound or not, and the Raspberry Pi model).
You can easily recharge it with the included USB cable. The red LED near the on/off switch turns on during the charge and turns off once the battery is charged. The only thing missing is a way to see the remaining battery life.
Final thoughts
Overall, the GPi case 2W is an excellent product. A nice improvement in comparison with the previous model, and available at a decent price.
It was fun for me to play old games with a similar experience to 25 years ago. I also had my nephew and my niece test it, and they had a great time. So I think it’s timeless and everyone can still have fun with this product.
If you like playing retro games and want a way to play them while travelling or watching TV, it’s definitely worth a try, you won’t be disappointed. There is no official shop on their website, you can simply get your GPi Case 2W from Amazon, or any other Raspberry Pi reseller.
I’m pretty sure it could also be a great gift, either for kids or guys like me who played with the original one back in the day.
Whenever you’re ready, here are other ways I can help you:
The RaspberryTips Community: If you want to hang out with me and other Raspberry Pi fans, you can join the community. I share exclusive tutorials and behind-the-scenes content there. Premium members can also visit the website without ads.
Master your Raspberry Pi in 30 days: If you are looking for the best tips to become an expert on Raspberry Pi, this book is for you. Learn useful Linux skills and practice multiple projects with step-by-step guides.
The Raspberry Pi Bootcamp: Understand everything about the Raspberry Pi, stop searching for help all the time, and finally enjoy completing your projects.
Master Python on Raspberry Pi: Create, understand, and improve any Python script for your Raspberry Pi. Learn the essentials step-by-step without losing time understanding useless concepts.
You can also find all my recommendations for tools and hardware on this page.