
RetroPie: A Step-By-Step Beginner Guide (with pictures)
Today, I’ll show you how to get started with RetroPie on Raspberry Pi. RetroPie is promoted as a free and easy retro gaming console. However, it’s not very easy for a beginner to get started with the console on Raspberry Pi and/or Linux. If you are a beginner that is interested in learning, this article is for you.
It can be difficult to know exactly where to begin when it comes to RetroPie. This article will tell you exactly what you need to know in order to get started with the retro gaming console. You will learn what RetroPie is, how to find the required hardware to play games on Raspberry Pi and how to install RetroPie, download new games and optimize your setup.
Even though I recommend reading all of this if you are a beginner, you can use the table of contents below to go directly to the sections that you’re interested in.
If you are looking for the fastest way to get Retropie with games on your Raspberry Pi, you can check this SD card loaded with Retropie and over 100k games. It’s available on Amazon, and really cheap for the time it would take to build that kind of library.
If you’re looking to quickly progress on Raspberry Pi, you can check out my e-book here. It’s a 30-day challenge where you learn one new thing every day until you become a Raspberry Pi expert. The first third of the book teaches you the basics, but the following chapters include projects you can try on your own.
RetroPie introduction
The RetroPie project
The main goal of the RetroPie project was to bring retro gaming abilities to the Raspberry Pi.
Building RetroPie included work on two dimensions: software and hardware.
On the software side, the project was divided into four parts:
- Operating system: made the choice to use Raspbian at the end.
- Emulators: had to bring all emulators of our favorite consoles inside.
- Setup script: wanted the installation to be easy, and the setup script should do everything possible.
- Front-end: needed a cool graphical interface to use Retropie as a classic game station.
But it was not enough. The hardware part was also important work. They wanted to add the ability to transform the Raspberry Pi into an arcade box. They created a GPIO adapter to plug the joystick and button into the Raspberry Pi.
RetroPie today
Today the RetroPie project has a dedicated website available here. They keep updated pre-made images for the Raspberry Pi. But it’s also possible to install RetroPie on other operating systems (over Raspbian or in Ubuntu/Debian systems).
The last image includes most emulators, just about everything you can dream of:
- Nintendo: NES, SNES, GameCube, GameBoy, N64, etc.
- PlayStation: PS1, PS2, PSP, etc.
- Other consoles: NEO GEO, Dreamcast, Saturn, etc.
- Old computers: Atari, Commodore, etc.
- And a lot of other emulators!
Retro Gaming vocabulary
Just before getting started, let’s ensure that you understand two words I’ll use a lot in the following paragraphs.
What is an emulator?
An emulator is software that allows you to run games from another computer on your current computer.
For example, an N64 emulator in Retropie allows you to run N64 games on a Raspberry Pi.
What is a ROM?
A ROM stands for Read-Only Memory. In gaming, this is an image from the original game. For example, on N64, you played a game like GoldenEye by inserting the cartridge into the console.
On Raspberry Pi, you can’t use this cartridge. You need to have a file with the cartridge content.
What is a BIOS?
A BIOS is the only software part you have on a computer before installing an operating system.
On a PC, you may use it to set options like Boot devices order, date/time, or hardware preferences.
On a game station, it tells how the computer should work, so the emulator may need it for launching games.
Hardware prerequisites
To make the most of your new retro-gaming console, you’ll need hardware improvements.
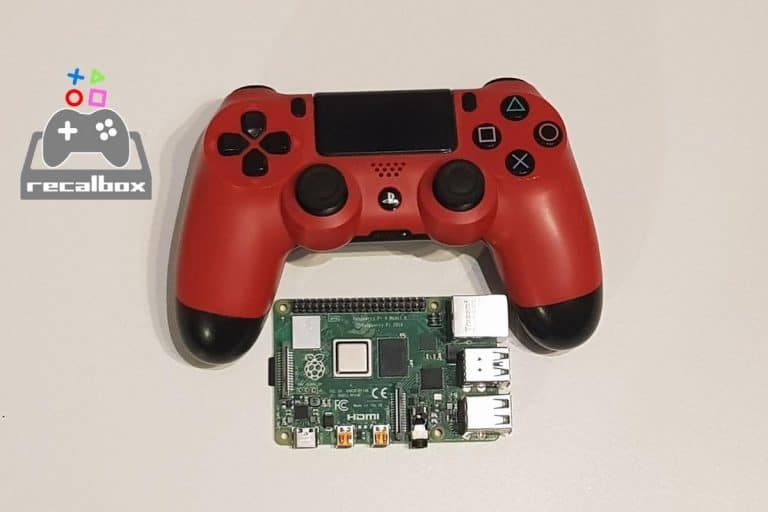
Raspberry Pi
Yes, you already know you need a Raspberry Pi to install RetroPie. But I want to be sure you have the Raspberry Pi 3B + or more. On other models, games can be slow as the hardware is not powerful enough to run all games.
You can try with another one for a test, but in the longer term you should buy a Raspberry Pi 4 (check the best kit in my resources page).
SD Card
Even if any SD card could do the job, I recommend starting directly on a fast and large SD card.
Get a list of my 24 favorites games (with links) to play on Retropie, Recalbox or Lakka
Download now
Fast because as you’ll see, the Raspberry Pi is a cheap console, but not the fastest for this kind of thing.
A fast SD card ensures that this part does not slow your games down. I have tested all the most popular SD cards here, please read this article before making your choice.
And a large one to store all the games you want. Yes, you can start on a small one, and change later, but you’ll have to reinstall everything, back up your saved games, etc.
So first thing, find a fast and large SD card to start. The best idea for Retropie beginners is to look for a preloaded SD card with Retropie and thousands of games already installed. My favorite is this one on Amazon, it’s the best price/quality and quantity ratio and it works on any Raspberry Pi (even Pi 4).
You’ll save a lot of time by not having to download and install each game one by one. If you prefer starting with an empty one, check my recommended product page for the best you can buy at the moment.
Raspberry Pi case
The second point is the Raspberry Pi case or at least the cooling. Gaming on Raspberry Pi, mainly with recent games, can increase your hardware temperature. And it’s not good for the Raspberry Pi life span.
So ensure you have a well-ventilated case, heat sinks and maybe a fan. I wrote a post about how to install heat sinks if you need more information.
Passive cooling might be an option for casual players. I also have in-depth reviews of my Flirc case and Argon Neo case that you can check.
And for the case or fan, you can find original cases with a good cooling system (this one is perfect for retro gamers 🙂 ).
You’ll get the classic look, even for your case. Don’t forget to add the options you need for a complete kit (fan, heat sinks, power supply or SD card).

Join Our Community!
Connect, learn, and grow with other Raspberry Pi enthusiasts. Support RaspberryTips and enjoy an ad-free reading experience. Get exclusive monthly video tutorials and many other benefits.
Learn moreGame controllers
And finally, what is a good retro gaming console without retro controllers?
Even if you could play with your keyboard, it’s not the same, the time machine requires the use of an old-fashioned controller.
My favorite, for now, is this one on Amazon, but you can find other alternatives on my resources pages. Playing games like the ones from N64 with a basic controller is not possible, you need at least two sticks to control it. That’s why I prefer this controller, or at least an N64 controller clone.
Also, if you are using a Bluetooth controller, you can read this tutorial on how to set it up with RetroPie.
How to install Retropie
At this point, you know what RetroPie is, the common vocabulary and you have all the needed hardware to play in good condition.
Let’s move to the installation process.
Option 1: Use Raspberry Pi Imager
Retropie is now available in Raspberry Pi Imager, so if you have it on your computer, it’s probably the easiest way to get started:
- Open Raspberry Pi Imager.
You can download it here if needed. And I have a full tutorial about it on this website if you never used it before. - Click on “Choose OS”.
- Go into the “Emulation and games OS” submenu.
- Choose Retropie.
- Then select which version you want to install (depending on your Raspberry Pi model):
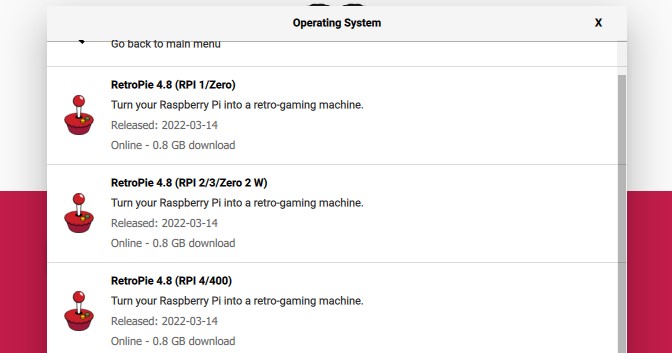
Once done, you can select your storage (SD card for example) and click “Write” to start the installation.
Option 2: Manual download and installation
If you prefer the old way of installing Retropie (manual download + Etcher), you can follow these steps.
Download Retropie
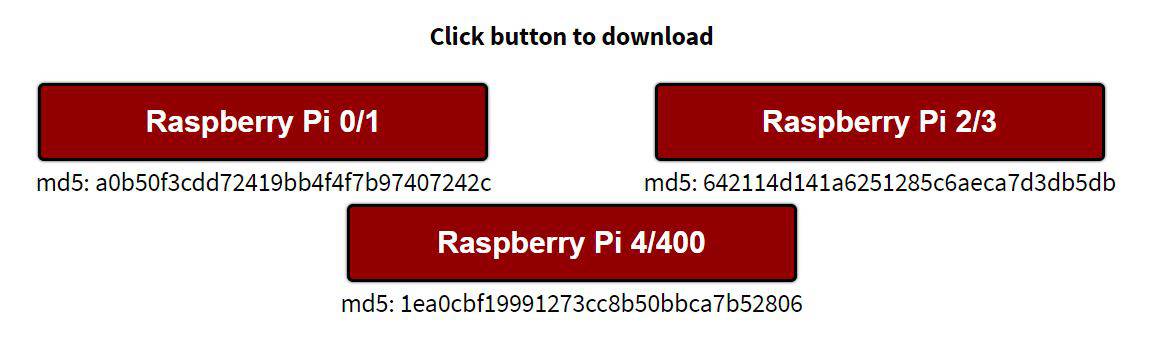
The first thing to do is to download the RetroPie image from the official website: here. There are two versions, so take the one corresponding to your Raspberry Pi model.
I don’t recommend downloading images from other websites. Even if you can find images with a lot of games or add-ons inside, don’t trust them. You can’t guess if they are safe or not.
If you prefer, you can also start on an existing system, and install Retropie on top of it. Check my tutorial on how to install Retropie on Ubuntu as a reference.
Flash your SD card
Once you finish downloading the image, follow this procedure to create the SD card:
- Insert the SD card into your computer.
If you don’t have an SD card slot on your computer, you can use a cheap adapter to plug it into a USB port (check the price on Amazon). - Download and install Etcher if needed (it’s a free tool to flash SD cards).
- Start Etcher:
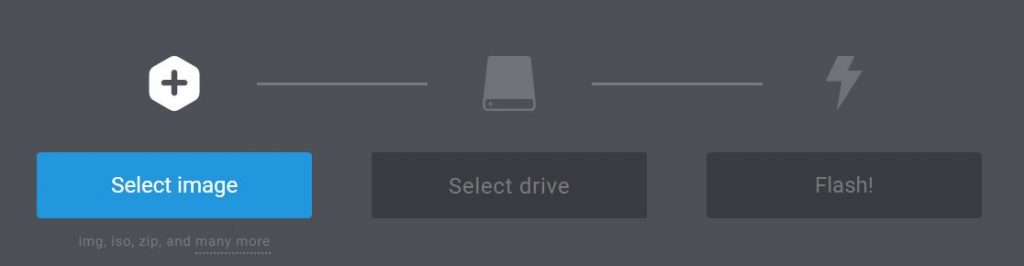
- On the left choose the image file.
- In the middle select your SD card.
- Then click “Flash!” to start the SD card creation.
- After a few minutes, your SD card is ready.
First boot with Retropie
Insert the SD card and start the Raspberry Pi. There is almost nothing to do other than wait for the boot sequence to finish.
The only thing you need to do is to configure the first controller:

- When RetroPie asks you to plug your controller, do it.
- Press one key for a few seconds until RetroPie detects it.
- Then follow the wizard to configure all the controller keys.
- If you have a basic controller, without all keys, press one key for a few seconds until the wizard moves to the next one.
- When you configure all keys, press “OK” and the main menu appears.
You can now use the main menu to follow the basic configuration procedure in the next paragraph.
Basic configuration
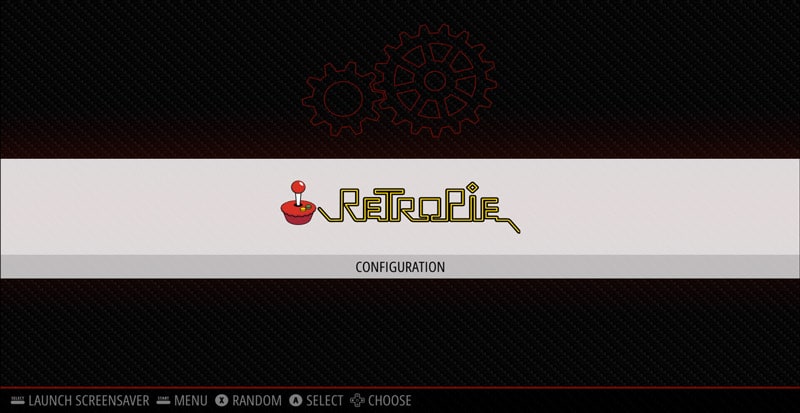
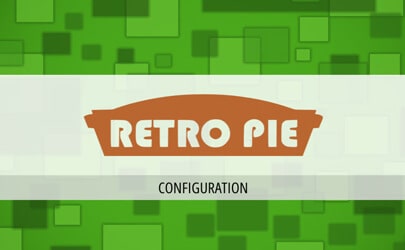
In the main menu, select “Configuration” and enter (press A).
You should now get a full configuration menu like this:
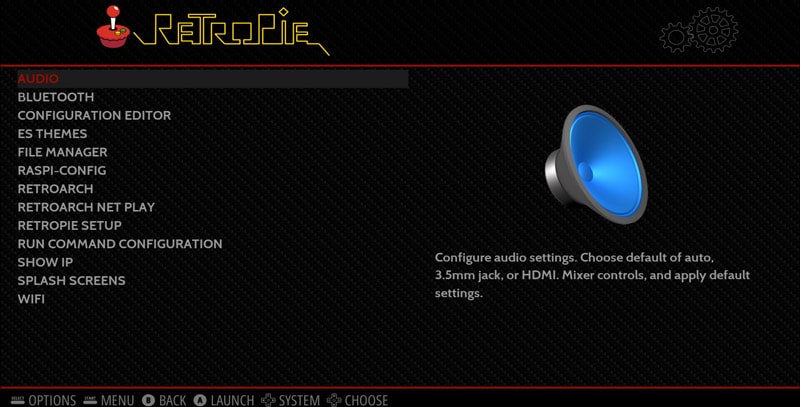
I’ll give you all the things to configure in this menu before going further. Obviously, you can browse all the submenu to set everything as you want, but I give you only the important things to configure.
Audio
This menu is only to set the audio output for Retropie. Set the default sound output as you want.
Get a list of my 24 favorites games (with links) to play on Retropie, Recalbox or Lakka
Download now
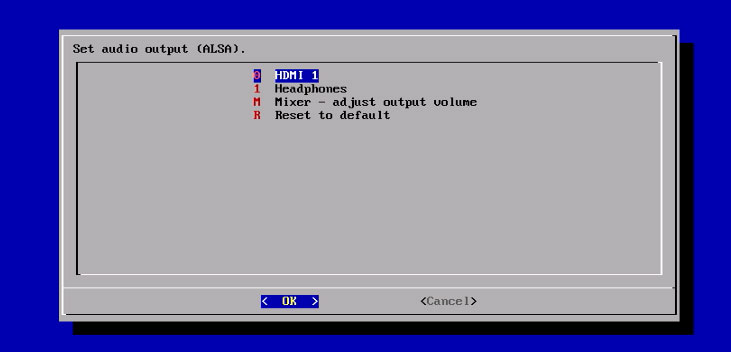
On a TV, HDMI should be fine.
On a basic computer screen, you may select jack 3.5 and plug speakers or headphones.
Raspi-config
If you’re used to Raspbian, this is the same menu.
Note: On my installation, I needed to switch back to the keyboard to use this menu. I’m not able to make a selection with my game controller.
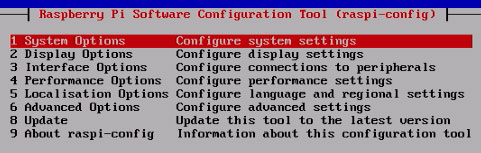
Set what you need in this menu:
- Localisation options:
- If needed, start there to configure the locale, time zone and keyboard layout.
- System options:
- Especially useful to configure a Wi-Fi connection.
- Update:
- Then select this one to update the system to the latest version.
RetroPie setup
This menu will help you manage RetroPie components.
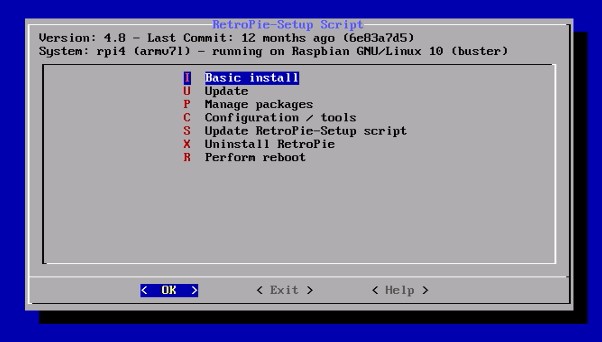
Try at least to update the system:
- Choose “Update” in the first menu.
- Answer “Yes” to all the following questions.
- This will update everything on your system (Retropie packages, but also the underlying system). Then choose “Perform Reboot” to apply all changes.
Then come back to the same menu after the reboot, as I recommend installing Retropie Manager directly. Retropie Manager is a web interface to upload new games to your retro-gaming console.
It’s not mandatory, but it’s the easiest solution in my opinion (more on this later).
- Install Retropie manager:
- In the Retropie Setup menu, select “Manage Packages”.
- Then “Manage experimental packages”.
- Find “Retropie Manager” (near the bottom of the list) and install it from the source.
- Start Retropie manager:
- When you get back to the Retropie Manager submenu after the installation, choose “Configuration / options”.
- Then select “Enable RetroPie-Manager on boot” and “Start Retropie-Manager now”.
Once done, you can press “Esc” several times to get back to the Retropie main interface. I’ll explain later how to use Retropie Manager.
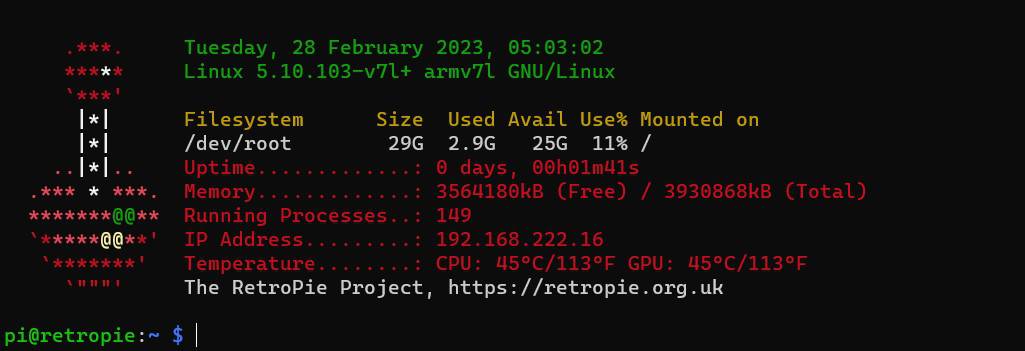
Show your IP
You must know your Raspberry Pi IP address later in this guide. So enter this menu and note your current IP address.
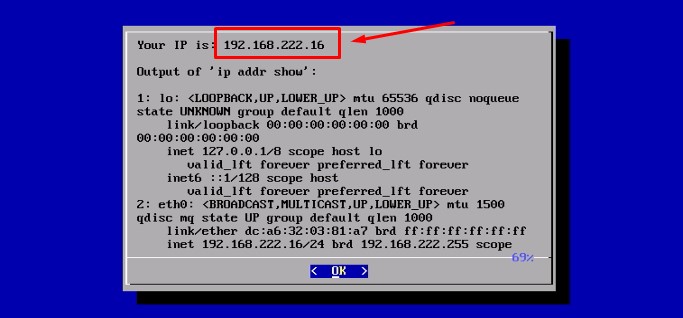
You can also use traditional techniques to find your Raspberry Pi on the network, as explained in this article.
Get new games
Download games
I already wrote an article about downloading ROMs for Retropie. So if you need help with this, I recommend you read this post and come back after.
Short answer:
You can download ROMs from websites like MAMEDev or ROM Hustler.
But I think that the best idea to save time is to look for a preloaded SD card with Retropie and thousands of games already installed. My favorite is this one on Amazon, as it’s the best price/quality and quantity ratio and it works on any Raspberry Pi.
You’ll save a lot of time by not having to download and install each game one by one. If you have a Raspberry Pi 4, you can try this one.
Install games
Once you have downloaded one game on your computer, you need to send it to RetroPie.
RetroPie Manager
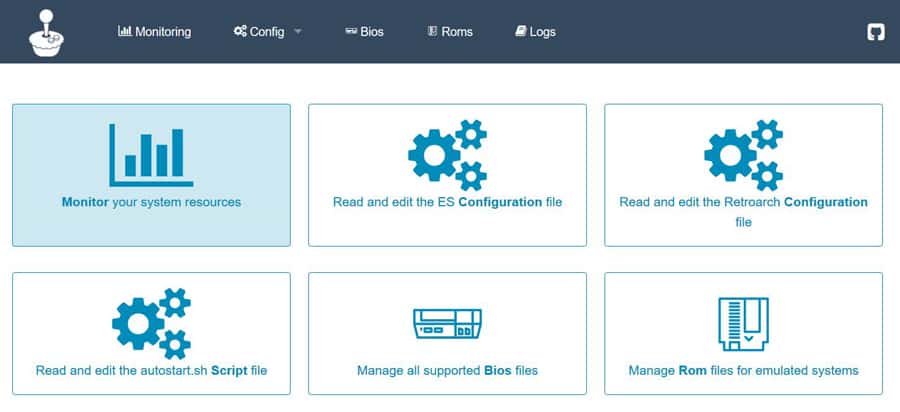
RetroPie Manager is a web interface to manage your RetroPie system. You can access it with your web browser at http://<RASPBERRYIP>:8000.
If you didn’t note your IP address, you can find it under the “Show your IP” menu in the RetroPie configuration screen.
In this interface, you can find a lot of information about your system. The monitoring screen will show you the current status of the Raspberry Pi (memory, file system and CPU). But our goal is to upload a new game on the RetroPie console.
Interesting, isn’t it? If you want to discover other tips about Retropie to improve your experience, you can check this article where I introduce 13 tips that will impress your friends.
Installing a new game
- Prepare the game files:
- Most of the time, you download a compressed file.
- You need to extract it to another folder with your favorite software (for example WinRAR or 7zip on Windows).
- Upload the files:
- Click on “Roms” on the top menu.
- Select the system corresponding to the game.
- Drag and drop the extracted files into the intended frame:
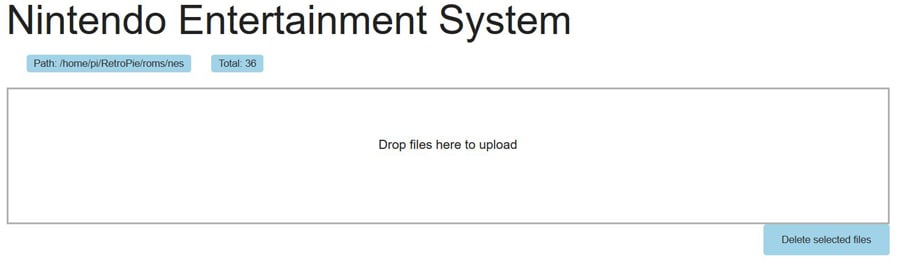
- Wait a few seconds, games are now visible in the list below.
If you want to use other options, you can check this tutorial where I go in more depth about this.
Playing your new game
Now it’s time to play!
- You may need to reload the main menu for the new games to appear:
- Press Start on your controller.
- Then select “Quit” in the pop-up menu.
- And finally, choose “Restart Emulstation”, and confirm “Yes”.
- Now your main menu should have changed.
The new game system should appear in the list.
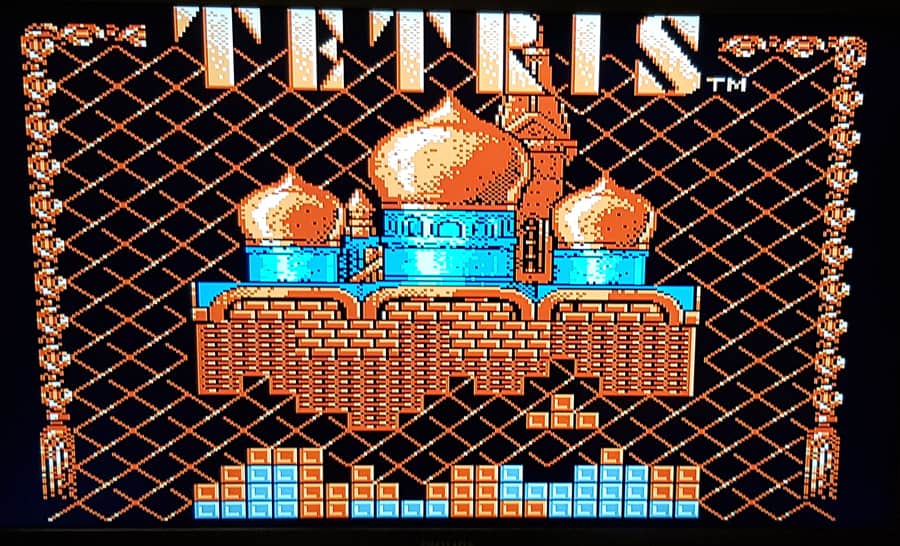
- Select the game system you want to play (in my case Nintendo).
- Then choose the ROM to start (you may have multiple versions in the ROM archive, find the one you prefer).
- And then it’s done, you can play your favorite game.
Just repeat the steps from this section for each game you want to play.
Retropie FAQ
The first game played on Retropie is a good start, but you’ll soon have other questions
I’ll try to answer them in this section
How to exit the game in Retropie?
Once in the game, you have to go to the main menu to exit and come back to RetroPie. For this, you need to use the hot key from your controller.
If you don’t have configured it, it must be Select+Start at the same time.
How to change the controller configuration in Retropie?
You may have been fast on the first boot and want to change something.
Press “Start” in the main menu, then select “Configure Input”. It will ask you again to define all the keys.
Same thing if you want to add another controller. Go to this menu and hold a button on the new controller.
How to use a Bluetooth controller with Retropie?
It’s possible to use a Bluetooth controller on RetroPie (like the 8bitdo SNES controller). It’s my favorite controller because you have the classic SNES look, with all the modern improvements (dual stick, Bluetooth, etc.) and it works not only on Raspberry Pi but also on any computer or smartphone.
First, you need to set up your Retropie with a wired controller (use your keyboard if you have only a Bluetooth controller).
Then go to the configuration menu and choose Bluetooth > Register and Connect to Bluetooth Device.
Finally, select your device in the list and follow the previous instruction to configure keys.
As said previously, you can read the step-by-step guide in this article, where I show you how to configure a PS4 controller on Retropie.
How to remove games from Retropie?
If you uploaded too many games or if you are missing space on your SD card, you can remove games from Retropie Manager.
Get back to the web interface (http://IP:8000), go to Roms and choose the game system. Find games you want to delete in the list above, check them, and click on “Delete selected files”.
Another option is to follow the same steps to install new games, but in reverse. So, for example, you can go to the shared folder (\\IP\roms) and remove all files you no longer need.
How to save progress in a game?
Some games create a save automatically at some point, or when you use Select+Start to leave. If not, you can try to use Select+R1 to save and Select+L1 to load the saved game.
What’s the default Retropie login and password?
If asked, the default login and password are the same as on old Raspbian installations:
Login: pi
Password: raspberry
How to fix Emulation Station not starting automatically on boot? (auto login)
For me, after a few updates and reboots, the Retropie menu wasn’t launching automatically. I had to log in with the keyboard and then the menu came up.
To fix this, go into the configuration menu > RetroPie Setup > Configuration/Tools.
Then select “autostart” and “Start Emulation Station at boot”.
Next time you’ll get the menu directly on boot.
How to use another theme?
You can install and apply other themes for the Retropie Menu.
Go to Retropie configuration > ES Themes.
In the list select one line starting with “Install …”
Once installed, press Start in the main menu and choose “UI Settings”.
Then go to “Theme Set” and select the one you just installed.
Exit and enjoy the new menu theme.
You can see a preview for all themes here.
Or even better, check my selection of the best themes for Retropie in this article.
Videos
I also have a YouTube channel there, with a bunch of videos about RetroPie. Here is the one corresponding to this article:
But you can also watch the other ones that might be interesting for you:
- Should you really use Retropie?
- How to download and install new games
- Install Retropie on Raspberry Pi OS
It's a free PDF guide containing every Raspberry Pi Linux command you should know!
Download now
My Recommendations for Retro Gaming
- Retropie SD card: Save time and play directly to any game you want with this giant SD card preloaded with over 100k games.
- Raspberry Pi 4: Retropie is now available for Raspberry Pi 4, and it’s excellent. Why would you stay on a slower device?
- 8bitdo controller: This is currently the best controller for retro gaming on Raspberry Pi. All the latest technologies in a retro design.
- Retropie Arcade Game Machine: If you are a serious gamer, you should take a look at this to build your own arcade console. Your friends will love this.
It's a free PDF guide containing every Raspberry Pi Linux command you should know!
Download now
If you are looking for exclusive tutorials, I post a new course each month, available for premium members only. Join the community to get access to all of them right now!
Conclusion
I hope this post helps you to make a good start with Retropie and answers most of your questions.
Feel free to leave a comment in the community if you need help on other things, or if you want to give everyone some other tips to enjoy RetroPie.
Whenever you’re ready, here are other ways I can help you:
The RaspberryTips Community: If you want to hang out with me and other Raspberry Pi fans, you can join the community. I share exclusive tutorials and behind-the-scenes content there. Premium members can also visit the website without ads.
Master your Raspberry Pi in 30 days: If you are looking for the best tips to become an expert on Raspberry Pi, this book is for you. Learn useful Linux skills and practice multiple projects with step-by-step guides.
The Raspberry Pi Bootcamp: Understand everything about the Raspberry Pi, stop searching for help all the time, and finally enjoy completing your projects.
Master Python on Raspberry Pi: Create, understand, and improve any Python script for your Raspberry Pi. Learn the essentials step-by-step without losing time understanding useless concepts.
You can also find all my recommendations for tools and hardware on this page.

Just a little correction, the text says:
You can access it with your web browser at http://:8080
But it’s actually the 8000 port.
Thanks for this guide. 🙂
I’m new to this. Working on my first retropie. I have followed every step and am unable to find my raspberry pie to install games. I tried both the 8080 port? And 8000 port? But nothing shows up in browser. Any help is greatly appreciated! Thanks in advance
Hi Tim,
Did you install and start the manager?
Half the games will not run because the start button and keyboard keys wont start the games or the controller doesn’t work for like pacman.
Not sure to understand your issue, you can configure the keys for each game if needed
Hi Patrick,
My SD card is not big enough to store all of the ROMS on. Do you know how I can change the storage location for them so that I can use an external drive to store them all on?