How To Install UniFi Controller on Ubuntu
Ubiquiti has great products, especially when you need to set up Wi-Fi access points for 10+ users in companies, hotels, or public places. Another good thing is that you don’t need a hardware controller, any computer can host the software. But it doesn’t mean it’s straightforward, that’s why I’m writing this tutorial for you.
There is a repository available that can be added to your Ubuntu computer to install UniFi with the package manager. There are, however, many requirements that need manual installation before using APT.
I’ve used Ubiquiti products for about 10 years, with controllers running on Ubuntu (and even one on a Raspberry Pi), so let me share with you the procedure to get it working on your end.
Prerequisites
A few prerequisites are required before starting the UniFi controller installation in itself, let’s list them quickly before moving forward.
UniFi access point
The goal of the UniFi controller is to connect and configure your Wi-Fi access points, so you need at least one to achieve the full setup. You can get them from official resellers, or directly online, on Amazon for example.
You can still follow this tutorial if you haven’t received them yet, you’ll just need to wait until you get them to configure your wireless networks, but the server can be installed anyway.
Ubuntu installed
The UniFi controller can be installed on any Ubuntu version. I’m testing this for you on Ubuntu Server 23.04 and it was fine, you don’t need a GUI. An LTS version is recommended for server installation.
You can follow one of my tutorials if you need help installing Ubuntu Server. Make sure to use a strong username and password.
Download your exclusive free PDF containing the most useful Linux commands to elevate your skills!
Download now
Network connection
The Ubuntu server needs to be connected to your network and also to the Internet (at least during the installation process). Using an RJ45 cable is recommended to get a more stable connection, which is mandatory as all the Wi-Fi traffic will go through this server.
System updates & required packages
Once the Ubuntu server is installed and connected to the Internet, don’t forget to download and apply the latest system updates. You can do this with:sudo apt update
sudo apt upgrade
A few packages are also required for the installation:sudo apt install ca-certificates apt-transport-https
If you’re new to the Linux command line, this article will give you the most important Linux commands to know, plus a free downloadable cheat sheet to keep handy.

Join Our Community!
Connect, learn, and grow with other Raspberry Pi enthusiasts. Support RaspberryTips and enjoy an ad-free reading experience. Get exclusive monthly video tutorials and many other benefits.
Learn moreMongoDB installation
While testing this tutorial with the latest versions of Ubuntu and a UniFi controller, I discovered that the installation was not as easy as in the past. I don’t exactly know what has changed and when, but a few additional steps are now required because of the database system used by UniFi.
UniFi uses MongoDB, a database manager, to store all the data for the application. On some distributions (like Ubuntu 23.04), MongoDB is not available in the default repositories, so you need to install it manually.
And here is the tricky part: at the time of writing, MongoDB Server is now at version 6 but UniFi doesn’t want anything more recent than 4.0. None of the MongoDB repositories still include this version for Ubuntu (or they are not listed on their website at least).
So, the only workaround I have found is to download the Debian package for MongoDB 3.6 and install it manually before starting the UniFi installation. I hope you don’t need Mongo for anything else on the same computer.
Here are the steps to install the MongoDB server as I did:
- LibSSL1.1 is required but is no longer available in the Ubuntu default repositories.
You can download it manually, like this:wget http://archive.ubuntu.com/ubuntu/pool/main/o/openssl/libssl1.1_1.1.1f-1ubuntu2_amd64.deb
sudo dpkg -i wget http://archive.ubuntu.com/ubuntu/pool/main/o/openssl/libssl1.1_1.1.1f-1ubuntu2_amd64.deb
If you don’t do this first, you’ll get an error during the MongoDB installation:
“mongodb-org-server depends on libssl1.1 (>= 1.1.0); however:
Package libssl1.1:amd64 is not installed.“ - Then, download the package for MongoDB Server 3.6:
wget https://repo.mongodb.org/apt/ubuntu/dists/bionic/mongodb-org/3.6/multiverse/binary-amd64/mongodb-org-server_3.6.23_amd64.deb - And install it with dpkg:
sudo dpkg -i mongodb-org-server_3.6.23_amd64.deb
That was the hardest part to figure out as it’s not explained in most tutorials, including the official documentation. But once done, you should be ready for the UniFi installation.
Download your exclusive free PDF containing the most useful Linux commands to elevate your skills!
Download now
UniFi Controller Installation
Now that the system is ready, we can move on with the UniFi controller installation. Here are the main steps:
- Add the UniFi repository to the Ubuntu package manager.
- Add the GPG key and sync the repository.
- Install the UniFi package from this new repository.
Add the UniFi repository
Ubiquiti has a repository available for APT, compatible with all Debian and Ubuntu versions.
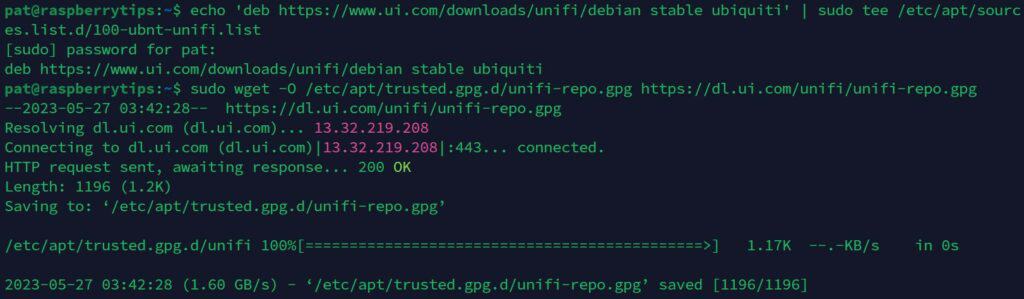
It can be added to your system with one command line:echo 'deb https://www.ui.com/downloads/unifi/debian stable ubiquiti' | sudo tee /etc/apt/sources.list.d/100-ubnt-unifi.list
It will create a new configuration file, under the APT sources.list.d folder, with the link to the Ubiquiti repository.
Add the GPG key
As when adding any new repository, we need to add the GPG key from Unifi to the system, to set it as a trusted source.
Same thing, you can do it with only one command line:sudo wget -O /etc/apt/trusted.gpg.d/unifi-repo.gpg https://dl.ui.com/unifi/unifi-repo.gpg
Sync the new repository
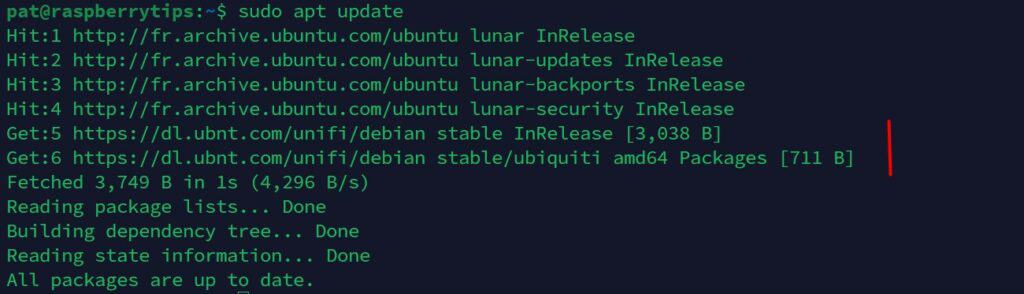
Once done, the last step before the installation is to use “apt update” to sync the list of packages available in this new repository:sudo apt update
Install UniFi
That’s it, we’re ready to install the UniFi controller, as for any package with APT:sudo apt install unifi
All the other requirements will be added automatically if you don’t already have them on your system (Java Runtime, for example).
Download your exclusive free PDF containing the most useful Linux commands to elevate your skills!
Download now
Getting started with UniFi Controller
The hard part is now done. The web interface should be accessible, and you can simply follow the steps to complete the initial configuration.
The interface URL is either:
- HTTP: http://IP_ADDRESS:8080
- HTTPS: https://IP_ADDRESS:8443
You’ll get a warning in your browser until you install a suitable certificate.
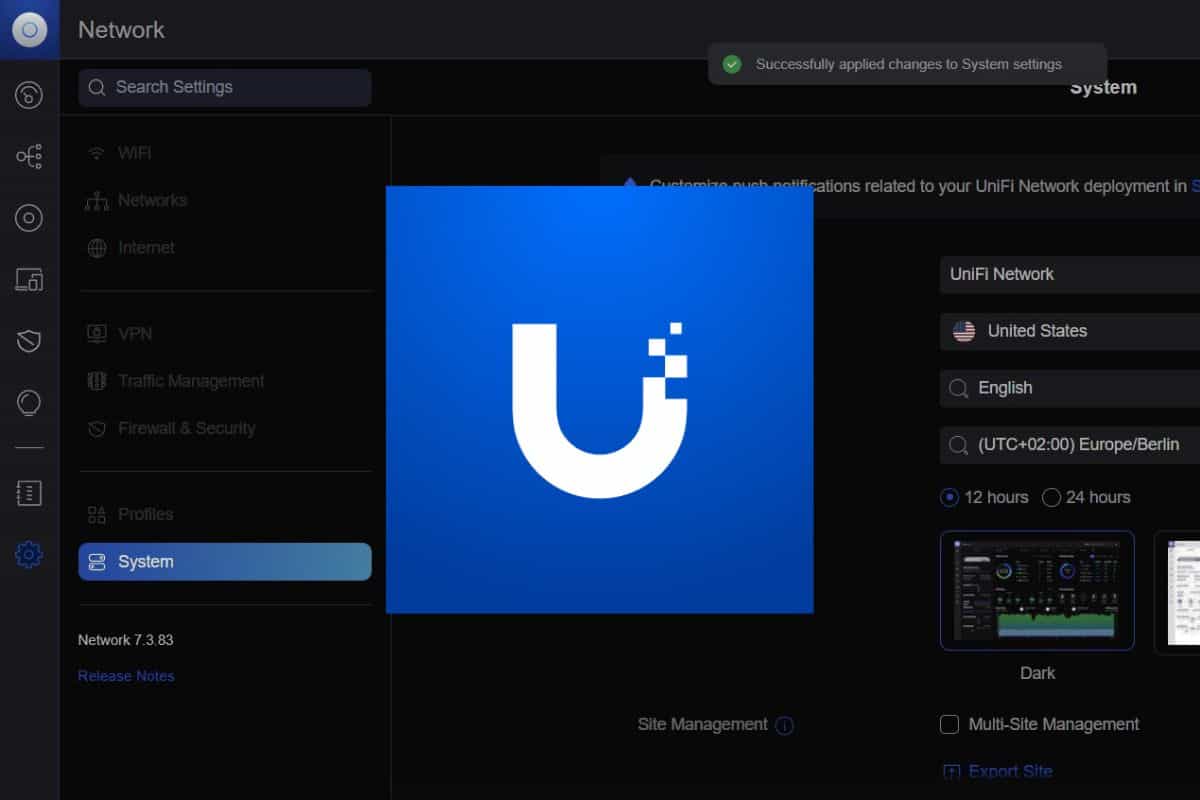
In both cases, you’ll get access to a welcome wizard for the initial configuration:
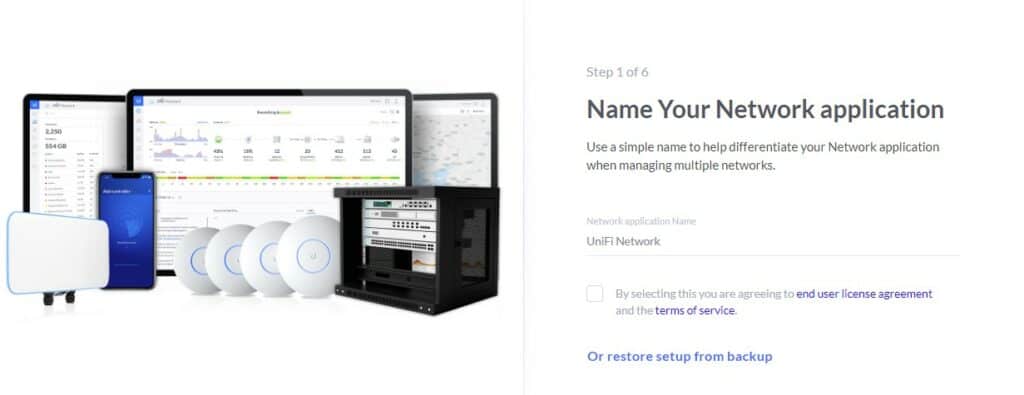
They will try to get you to use their “cloud user account”. If you don’t want to create an account with them, you need to switch to “Advanced Setup” during the second step, and disable the two options (remote access and login with Ubiquiti account). Once done, you can create a local administrator account.
You can then add your devices and configure your Wi-Fi network as you want.
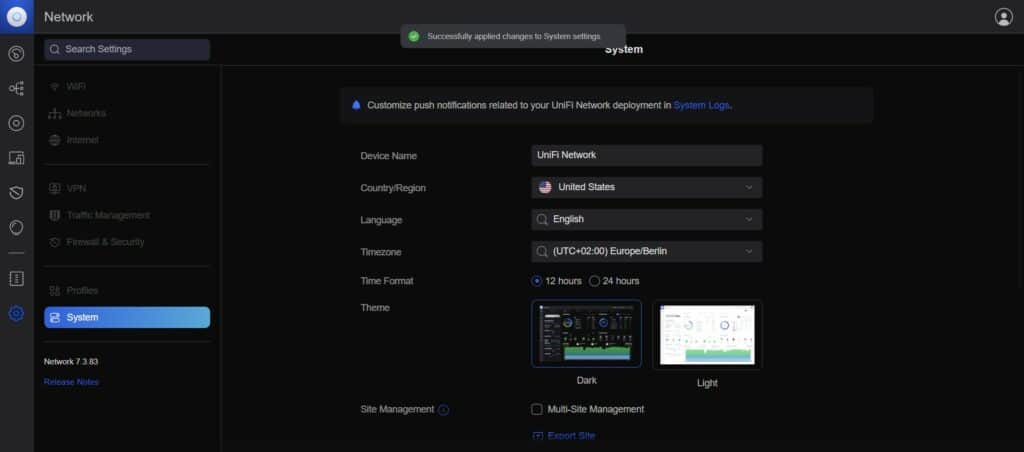
Once the initial configuration is completed, you’ll get access to the full interface, where you can see your devices, add new ones, and manage your Wi-Fi networks and clients.
At this stage, I recommend switching to the official documentation to add and configure all your devices (here is the link). They don’t necessarily have an up-to-date tutorial for all Linux distributions, but the interface usage is pretty well documented once installed.
And if you’re looking for more tutorials about Ubuntu Server, I have a lot available on this website. Here are some that might interest you:
- Ubuntu Server: How To Enable The Root User (Login & SSH)
- How To Change DNS Settings On Ubuntu Servers (Commands)
- 5 Most Effective Ways to Free Disk Space on Ubuntu Server
Download your exclusive free PDF containing the most useful Linux commands to elevate your skills!
Download now
Want to chat with other Raspberry Pi enthusiasts? Join the community, share your current projects and ask for help directly in the forums.
Additional Resources
Overwhelmed with Linux commands?
My e-book, “Master Linux Commands”, is your essential guide to mastering the terminal. Get practical tips, real-world examples, and a bonus cheat sheet to keep by your side.
Grab your copy now.
VIP Community
If you just want to hang out with me and other Linux fans, you can also join the community. I share exclusive tutorials and behind-the-scenes content there. Premium members can also visit the website without ads.
More details here.
Need help building something with Python?
Python is a great language to get started with programming on any Linux computer.
Learn the essentials, step-by-step, without losing time understanding useless concepts.
Get the e-book now.