Install Tor Browser on Raspberry Pi: A Step-by-Step Guide
When you worry about privacy and anonymity online, using Tor Browser is the first step that you can take. It’s easy to get it installed on Raspberry Pi, so you can feel safer on this device too. Your Internet traffic will be encrypted and go through random relays around the world, making it harder to track your online activities. Here is how to get started with Tor Browser.
The easiest way to install Tor Browser on Raspberry Pi is to get it installed via Pi-Apps. It’s a free tool that helps install applications that are not available in the default repository.
In this tutorial, I will explain in detail what you need to get started, how to install the Tor Browser, and how to configure it to make sure it’s working as expected.
If you’re looking to quickly progress on Raspberry Pi, you can check out my e-book here. It’s a 30-day challenge where you learn one new thing every day until you become a Raspberry Pi expert. The first third of the book teaches you the basics, but the following chapters include projects you can try on your own.
Prerequisites to use Tor Browser on Raspberry Pi
Hardware requirements
There are no specific hardware requirements to follow this tutorial, I would just recommend a decent configuration that’s enough for comfortable desktop usage, but nothing extra. For example:
- A Raspberry Pi 4 or 400: It’s your best option currently for desktop usage, so it’s a great fit to try Tor Browser on Raspberry Pi. I put links to Amazon if you don’t have one available for this project.
- A fast SD card or USB stick: When using a desktop environment, performance is not only affected by the Raspberry Pi model but also by the storage speed. I linked to my favorite options, and you can check my benchmark of the fastest SD cards here if needed.
- A good network connection: As we’ll see in the tutorial, using Tor Browser instead of a standard browser will slow down your browsing speed quite a bit, so try to set up the system on a fast network connection: Ethernet if possible, a fast Internet connection if available.
Apart from that, try to get a keyboard, mouse, and monitor for the installation. You can find what I’m using listed below, but it doesn’t matter that much.
Software prerequisites
In terms of software, here’s what you need:
- Raspberry Pi OS: I’ve tested the installation on it, so if you use the same, you have the guarantee it will work. I guess it should work the same way on Ubuntu, but I can’t say if it will work on other distributions (especially if not Debian-based).
You can check my Raspberry Pi OS installation guide here if you want to start from scratch. - SSH: I recommend using SSH if possible, so you can copy/paste the next command.
Check my SSH guide here if needed. It’s not mandatory, I just find it easier to follow online tutorials from my laptop instead of doing everything on the Pi. - Pi-Apps: Pi-Apps is the installer we’ll use to get Tor Browser installed in one click on your system. You can get it by copying/pasting this command line:
wget -qO- https://raw.githubusercontent.com/Botspot/pi-apps/master/install | bashThis script will install the prerequisites, download and install Pi-Apps and add shortcuts to use it later.
If you need more guidance, I have a dedicated video lesson in the community (join here if you’re not yet a member).
For your information, I did the tests for this article with this configuration:
It's a free PDF guide containing every Raspberry Pi Linux command you should know!
Download now
- Raspberry Pi 4 (4 GB).
- Raspberry Pi OS with Desktop (Bullseye, 64-bit) installed on this USB drive.
- My usual monitor and my favorite Raspberry Pi keyboard (links to my reviews if you need one).
Aside from that, nothing more is required. Once you have these requirements, you can follow the next section to install it on your Raspberry Pi.
Are you a bit lost in the Linux command line? Check this article first for the most important commands to remember and a free downloadable cheat sheet so you can have the commands at your fingertips.
It's a free PDF guide containing every Raspberry Pi Linux command you should know!
Download now
How to install Tor Browser on Raspberry Pi
Pi-Apps can be used to install Tor Browser on Raspberry Pi without using a single command line. That’s the fastest and easiest way to get it installed.
Here are the steps if you have never used Pi-Apps before:

Join Our Community!
Connect, learn, and grow with other Raspberry Pi enthusiasts. Support RaspberryTips and enjoy an ad-free reading experience. Get exclusive monthly video tutorials and many other benefits.
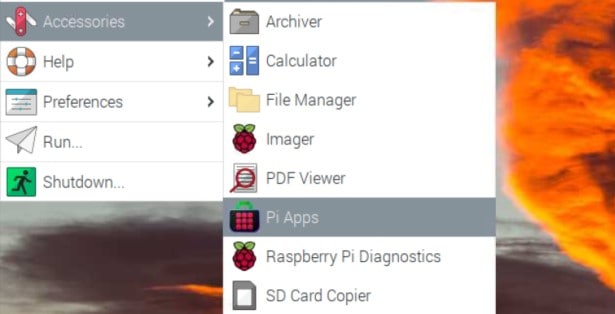
Learn more- Double-click on the Pi-Apps shortcut on your desktop, or find it in the main menu (it’s under “Accessories”):
- Then, go to “Internet” > “Browsers” in the apps list.
- Find “Tor” and click on it:
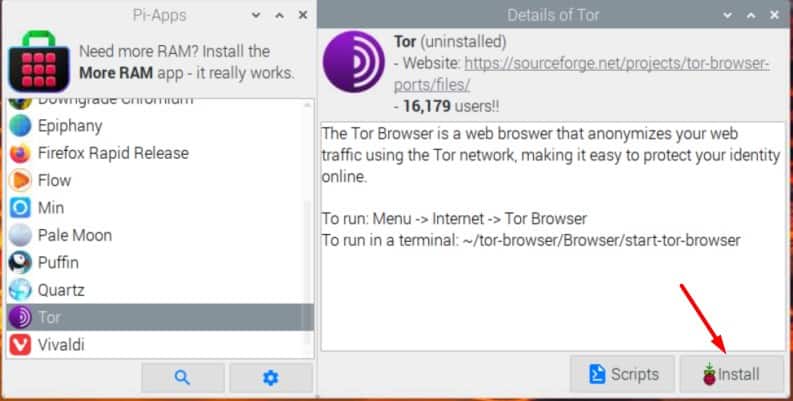
- Click on the “Install” button, and wait for the installation.
Everything is done automatically, you just need to be a bit patient while Pi-Apps run the commands in the background.
That’s it!
Maybe a bit more than one click, but nothing complicated anyway.
Let’s see how to use it now.
It's a free PDF guide containing every Raspberry Pi Linux command you should know!
Download now
Want to chat with other Raspberry Pi enthusiasts? Join the community, share your current projects and ask for help directly in the forums.
Getting started with Tor Browser on Raspberry Pi
Using Tor Browser is not that different from using a traditional web browser. There are just a few things to check on the first run to make sure the Tor network is enabled in the browser configuration.
First start
Once installed, you can start Tor Browser from the main menu, a shortcut has been added under “Internet”.
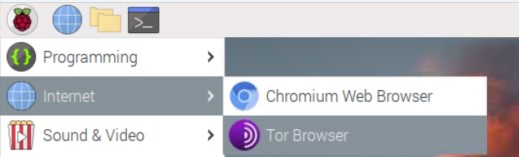
The default Internet icon in the top bar is not updated, which is probably a good thing. But it’s possible to add it there if you need to (I explain how to in my Brave installation guide, check it if you need some guidance).
Anyway, on the first start, Tor Browser will ask if you want to connect to the Tor network and if it should be done automatically or not. I suggest checking the “Always connect automatically” box, and then click on “Connect”.
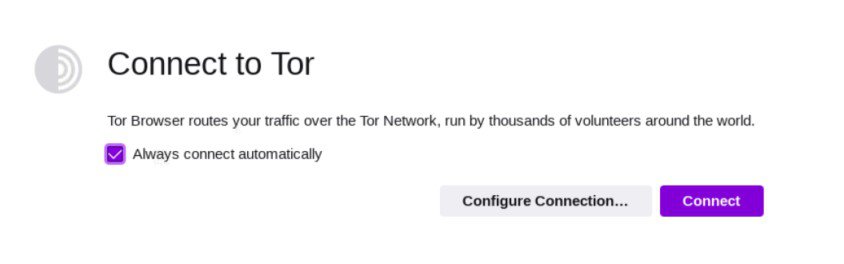
There is no point in using Tor Browser if you don’t browse the web via the Tor network, so we might as well enable it all the time. Once done, you get access to the default page, with DuckDuckGo as the search engine.
It's a free PDF guide containing every Raspberry Pi Linux command you should know!
Download now
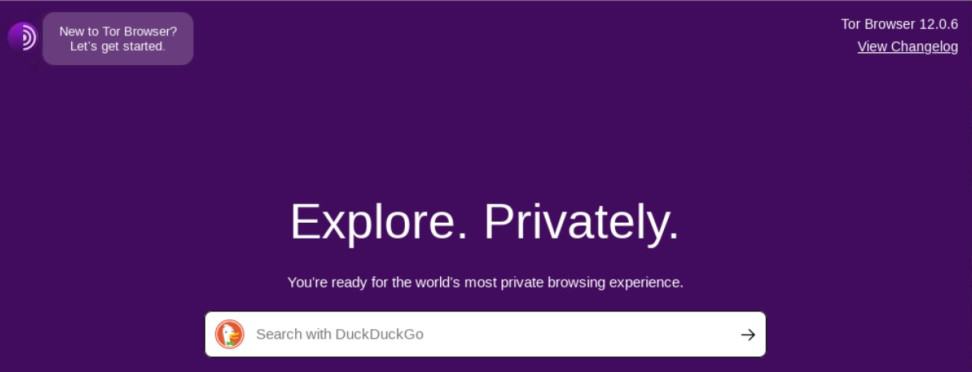
If you don’t know, DuckDuckGo is an alternative to the Google search engine that focuses on user privacy. It’s a good fit when you use Tor Browser (I guess if you don’t want to give your data to the Google browser, you don’t want to use their search engine either).
Testing Tor connectivity
One last step, before using Tor Browser like any web browser, is to check that you’re properly connected to the Internet via the Tor network.
You can use the official Tor network tool for this, here’s the link:
http://check.torproject.org/
If you followed this tutorial carefully, you should get a green message, looking like this:

If you get a red message saying that you’re not using Tor, you probably missed the previous step, or are not using Tor Browser.
By the way, the IP address mentioned on this page shouldn’t be your real public IP address, it’s one of the Tor network nodes (the last one you go through I guess).
If I use an IP tester tool to get details about the IP address associated with my connection, it gives me another one, and locates me in the US (where I’m not):
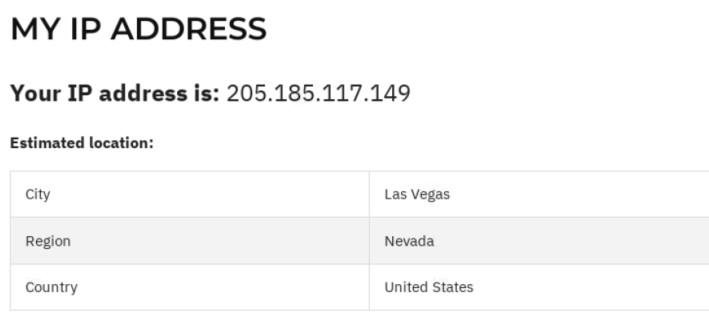
That’s the goal of using Tor Browser instead of the other options. Our connection goes through the Tor network, our public IP is hidden, and the traffic encrypted, which should keep your data and Internet history safe.
Other options and settings
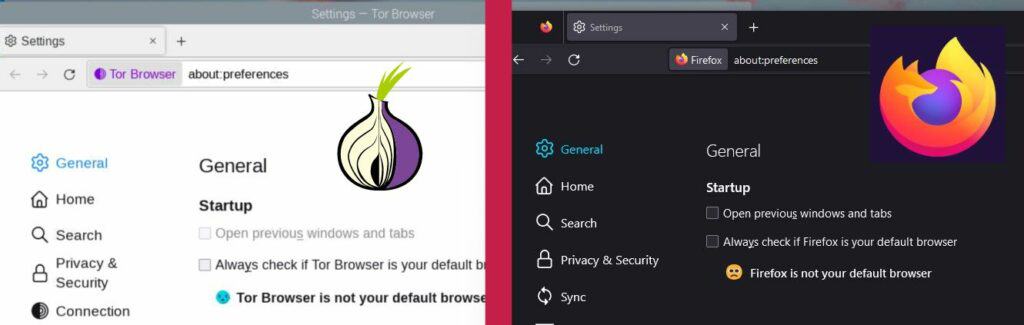
Except for the specific connection method used by Tor Browser, the browser usage in itself is very much like Firefox. This is not a surprise because Tor Browser is based on Firefox.
You can see the Tor Browser settings (on the left) compared to the Firefox settings (on the right), it’s basically the same:
Feel free to browse the options available, change your default browser, search engine or language there if you want.
The only new thing in the browser settings is the “Connection” page, which you may need to check if you get issues by using Tor in your country, location, or network. In most cases, you don’t have to change anything there.
Final thoughts
Using Tor Browser is great to keep your privacy online, but remember that using Tor Browser will slow down your Internet connection.
I got a speed test of around 75 MB/s with Chromium, but only 15 MB/s via Tor. It’s fine if you have a decent connection, but can be very slow if your base speed is already not that good.
Except for that, using Tor Browser is not that different from using Firefox. I got slightly worse results with Speedometer (a browser benchmark tool I used in this comparison of the top browsers for the Raspberry Pi), but it’s not that bad.
Here are the exact values I got:
| Test done | Chromium | Tor Browser |
|---|---|---|
| Speed test (Download, Mbps) | 73.88 | 15.96 |
| Speed test (Upload, Mbps) | 48.03 | 13.80 |
| Speedometer (Runs/minute) | 18.1 | 11.9 |
And if you like projects related to security, you might be interested in these topics:
- 17 Security Tips To Protect Your Raspberry Pi Like A Pro
- OpenWrt on Raspberry Pi: Use your Pi as a router (Tutorial)
- Install Bitwarden on Raspberry Pi: The ultimate guide
- Brave on Your Pi: A Quick Guide to Install the Brave Browser
Whenever you’re ready, here are other ways I can help you:
The RaspberryTips Community: If you want to hang out with me and other Raspberry Pi fans, you can join the community. I share exclusive tutorials and behind-the-scenes content there. Premium members can also visit the website without ads.
Master your Raspberry Pi in 30 days: If you are looking for the best tips to become an expert on Raspberry Pi, this book is for you. Learn useful Linux skills and practice multiple projects with step-by-step guides.
The Raspberry Pi Bootcamp: Understand everything about the Raspberry Pi, stop searching for help all the time, and finally enjoy completing your projects.
Master Python on Raspberry Pi: Create, understand, and improve any Python script for your Raspberry Pi. Learn the essentials step-by-step without losing time understanding useless concepts.
You can also find all my recommendations for tools and hardware on this page.