How To Read A Raspberry Pi SD Card On Windows (Free option)
When you plug a Raspberry Pi SD into Windows, it will only show one partition (the /boot partition), but your files aren’t on it. Natively, Windows can’t read Linux partitions in the file explorer. It’s a different format, and Microsoft didn’t bother to include tools to read this. In this article, I’ll show you how to fix this.
On Windows, an application like “Linux Reader” is required to read partitions formatted on Linux systems. After installing the software, all partitions are accessible from this tool, even “rootfs” from the Raspberry Pi SD card.
There are probably alternative solutions, but most of them are paid, so I’ll show you what I have set up to access my files for free on Windows. Let’s start with a bit of theory, and I’ll then give you the step-by-step process.
If you’re looking to quickly progress on Raspberry Pi, you can check out my e-book here. It’s a 30-day challenge where you learn one new thing every day until you become a Raspberry Pi expert. The first third of the book teaches you the basics, but the following chapters include projects you can try on your own.
How do I connect my Raspberry Pi SD card to my computer?
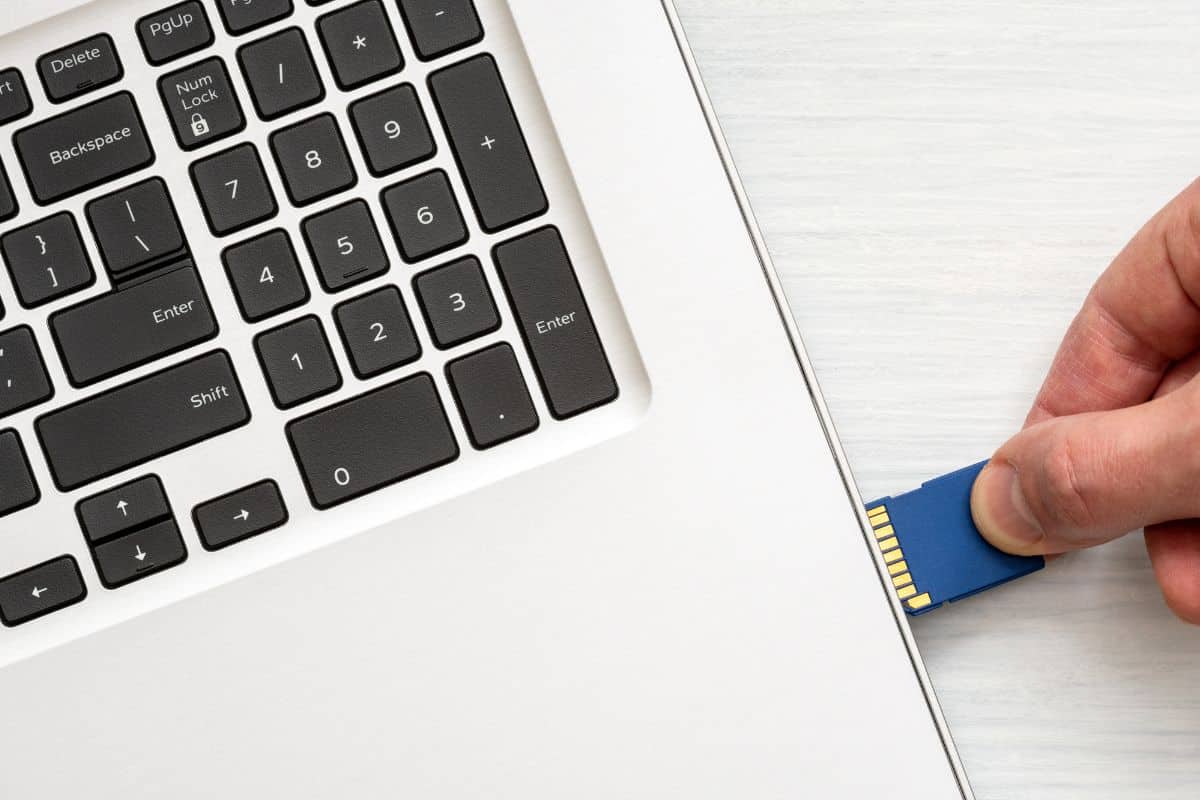
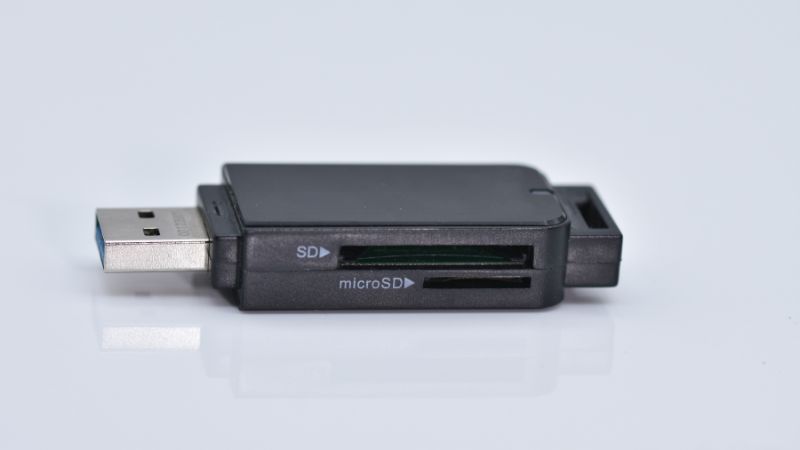
You can connect your Raspberry Pi SD card to your computer, by inserting it into the SD card reader slot if one is available. An SD/micro SD adapter is generally required. You can also use a USB/SD card reader if your computer doesn’t have an SD card slot.
It's a free PDF guide containing every Raspberry Pi Linux command you should know!
Download now

Once the SD card is inserted, Windows will generally detect the SD card, and ask you to format it. Windows will quickly check any external device you plug in, and if it isn’t in a supported format, it will run a scan or format it.
You don’t have to do that. If you just want to install a new operating system on your Raspberry Pi, you can use Raspberry Pi Imager (I have a full guide about this here), or keep reading to learn how to read the files on it.

Join Our Community!
Connect, learn, and grow with other Raspberry Pi enthusiasts. Support RaspberryTips and enjoy an ad-free reading experience. Get exclusive monthly video tutorials and many other benefits.
Learn moreIt's a free PDF guide containing every Raspberry Pi Linux command you should know!
Download now
Can you read a Raspberry Pi SD card on Windows?
Windows supports NTFS, FAT, FAT32 and exFAT file system partitions by default. The Raspberry Pi uses another format: extFS, which is not supported. So, it’s not possible to read a Raspberry Pi SD card on Windows without a third-party application.
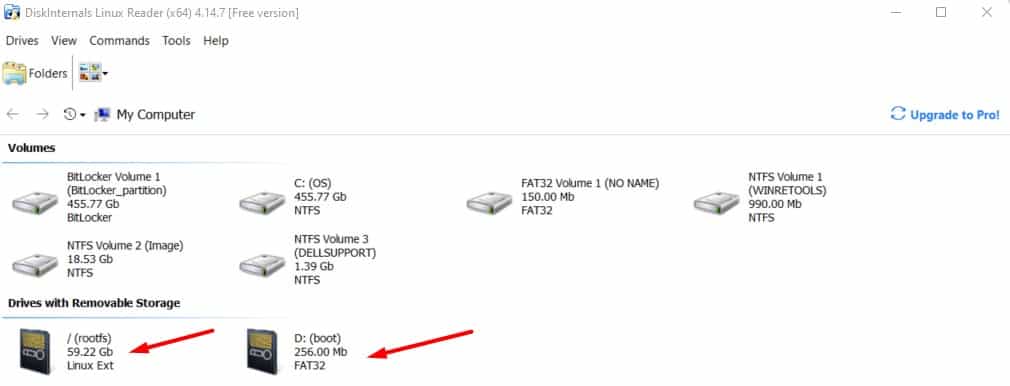
If you open the disk manager on Windows with your micro-SD card plugged in, you’ll see something like this:
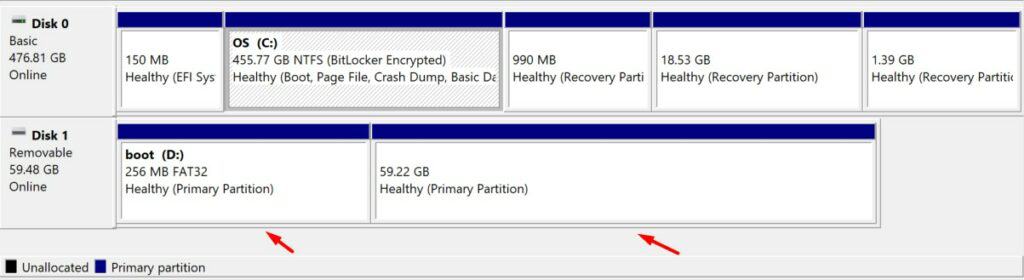
The first line is my hard drive with Windows installed on it. The second line is my Raspberry Pi SD card. Windows sees two partitions:
- The first one, named “boot” is in FAT32 and so Windows can read it. It’ll be mounted automatically when you plug in the SD card. You can see the files on it (and can put some too, like for a headless setup explained here). But it’s a tiny partition, so you can’t really use it to store your personal files.
- The second partition takes most of the SD card. It’s the main partition on the Raspberry Pi subfolders of a typical Linux file system (/home, /var, etc.).
But as already mentioned, Windows can’t read the content, so you won’t see it in your file explorer.
Now, that I’ve explained the issue and the concepts behind it, let’s learn how to access the files on the partition.
It's a free PDF guide containing every Raspberry Pi Linux command you should know!
Download now
It's a free PDF guide containing every Raspberry Pi Linux command you should know!
Download now
Want to chat with other Raspberry Pi enthusiasts? Join the community, share your current projects and ask for help directly in the forums.
Access Raspberry Pi OS files with Windows
A free tool, named “Linux Reader” can be installed on Windows to get access to all Linux partitions (for example, Ext2/3/4, UFS, HFS and ReiserFS systems are supported).
I recently forgot to copy screenshots from my Raspberry Pi to my computer before shutting everything down and disconnecting it. So, I tried to find a solution to get the files on my laptop.
I used this method and it worked, but it doesn’t mean it’s the “best” solution. It is, however, free and easy.
Install Linux Reader
- Open this page on the DiskInternals website.
- Click on “Get it free” to download the application.
- Click on the downloaded file to install.
I came across many other apps, but most of them required a commercial license. As my goal was to avoid having to re-plug everything and read the files, I didn’t want to pay for it.
If you are looking for something more regular, and maybe if you need to write on the SD card, a paid version makes sense. It’s up to you.
Access your Raspberry Pi files from Windows
Here is how to access the files from your Raspberry Pi SD card with Linux Reader:
- Open the application from the main menu.
- The main screen looks like this:
- You can see all your partitions, including the two partitions from the SD card.
The one that interests us is the “rootfs” partition.
Right-click on it, and select “Open partition”. - You’ll get access to all the folders on the root partition, something like:
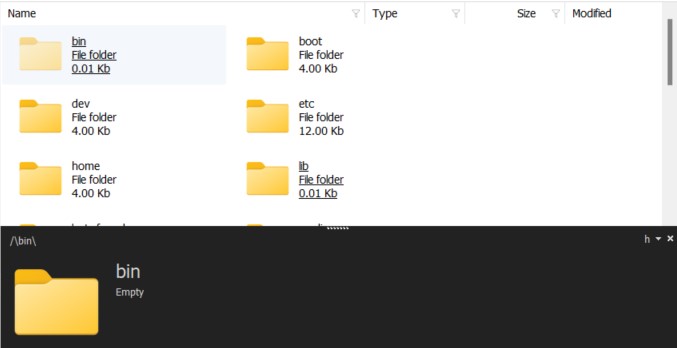
These are the same folders you can see under “/” on the Raspberry Pi.
Just use this explorer to find the files you are looking for (probably under “/home/<username>”). - Once you have located the file you want to read on Windows, right-click it, and click “Save”:

With some files, the tool will even give you a preview (like for this PDF):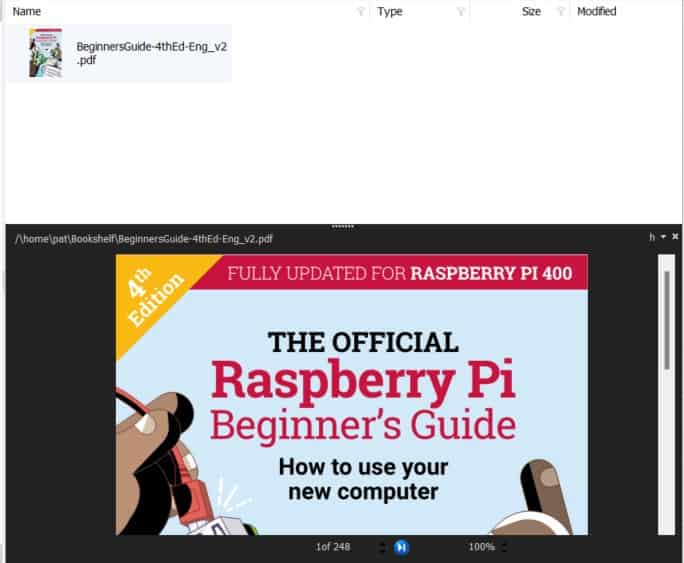
When you click on “Save”, a new wizard guiding you to save the corresponding files on your computer appears.
- You first need to choose what you want to do with the files:

- Then, give all the options to complete the task.
For example, if you keep “Save files”, you can choose the destination directory: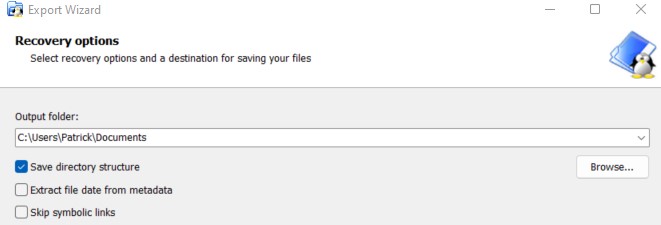
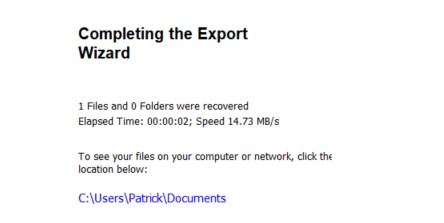
- Follow the next steps until the files are copied to your main drive:
That’s what I did for my screenshots and also camera test pictures, and it worked very well, so I wanted to share this tip with you. I hope it helps.
I understand that if you want something more powerful, like editing files on the SD card directly or mounting the partition, this won’t be enough. But in this case, you can always get the paid version that includes these features.
I guess you can do this with Linux on your computer or another Raspberry Pi, or even with a virtual machine, but it was too complicated in my case, I just wanted a quick way to get my files :-).
Whenever you’re ready, here are other ways I can help you:
The RaspberryTips Community: If you want to hang out with me and other Raspberry Pi fans, you can join the community. I share exclusive tutorials and behind-the-scenes content there. Premium members can also visit the website without ads.
Master your Raspberry Pi in 30 days: If you are looking for the best tips to become an expert on Raspberry Pi, this book is for you. Learn useful Linux skills and practice multiple projects with step-by-step guides.
The Raspberry Pi Bootcamp: Understand everything about the Raspberry Pi, stop searching for help all the time, and finally enjoy completing your projects.
Master Python on Raspberry Pi: Create, understand, and improve any Python script for your Raspberry Pi. Learn the essentials step-by-step without losing time understanding useless concepts.
You can also find all my recommendations for tools and hardware on this page.