
Install Anthias by Screenly on Raspberry Pi (Digital signage)
More and more stores are putting screens in their windows to attract new customers. This was a big challenge a few years ago, and the only options available were expensive digital signage solutions. In this tutorial, I’ll show you how to do this easily for free with just a Raspberry Pi.
Anthias is a free and open-source digital signage software built by Screenly. It can be installed on a Raspberry Pi, by either using a custom image or downloading the software on Raspberry Pi OS.
The goal of this tutorial is to explain what Anthias and Screenly are, and to show you how to install it on your device. I’ll also show you the first steps to configure it the way you like.
If you’re looking to quickly progress on Raspberry Pi, you can check out my e-book here. It’s a 30-day challenge where you learn one new thing every day until you become a Raspberry Pi expert. The first third of the book teaches you the basics, but the following chapters include projects you can try on your own.
Introducing Screenly and Anthias
Let’s start with a short introduction on Screenly.
The company: Screenly Inc
Even though we’re mainly looking at the open source solution today, Screenly is a company. They started their activities in 2011, a few months before the official release of the Raspberry Pi. At first, the main goal was to build a cost-killing solution for the digital signage market.
They started building the open-source solution (probably to test and improve it quickly), and they quickly saw a need in the market for a cloud solution at a low cost. So they expanded their offerings to include hosting and support plans.

Today, Screenly allows thousands of stores to use digital signage at low cost. If you are interested in this integrated solution, you can check the pricing on their website.
The software: Screenly
The software part is really easy to use and understand. It gives you an intuitive solution to manage your monitor(s):
- Everything is managed via your web browser.
- You can upload “assets”, meaning images, videos or websites you want to display on screens.
- Then you select a screen (I mean, a physical monitor registered in the interface).
- For each screen, you can schedule what to display, when and the frequency of changes (optional if you rotate between multiple assets).
Think of a photo frame you manage from a web browser, digital menus in restaurants, demo videos in game stores, etc.
Anthias: the one-source solution
Screenly is a paid solution designed for businesses that can manage everything in the cloud. It’s perfect for a retail chain with dozens of stores, but not necessarily perfect for you to try out on your Raspberry Pi for personal use.
It's a free PDF guide containing every Raspberry Pi Linux command you should know!
Download now
Hopefully, there is a solution: Anthias. It’s the open-source version of Screenly, available for free, forever, even if you are a company.
The main difference with the paid app is that in the open-source version, you don’t have the deployment and management tools for all your screens, you have to manage them one by one.
Also, the monitoring solution is not directly available in the free version, you have to build it yourself if needed.
So the free option is a good way to try it out, or for small structures (at home it’s more than enough). But for larger companies with many stores, Screenly is definitely worth it. Your IT and marketing teams will save a lot of time on installation, management and support.
How to Install Anthias on Raspberry Pi
From now on, I’ll only talk about Anthias (the free version), and show you how to install it on your Raspberry Pi.
There are currently two ways to install Anthias on a Raspberry Pi:

Join Our Community!
Connect, learn, and grow with other Raspberry Pi enthusiasts. Support RaspberryTips and enjoy an ad-free reading experience. Get exclusive monthly video tutorials and many other benefits.
Learn more- The easiest solution is to use Raspberry Pi Imager, as Anthias is now referenced in the OS list.
- Another option is to install Raspberry Pi OS Lite on your Raspberry Pi, and then install Anthias on top of it. It gives you more control if you plan to use it for other projects and servers.
Prerequisites
At the time of my last update, Anthias was only working on Raspberry Pi OS “Bullseye”. The latest version (“Bookworm”) is not supported, which means the Raspberry Pi 5 can’t be used for this project.
I’ll let you check their GitHub to see if they now support it. Don’t start the installation before making sure your hardware and operating system are supported.
Option 1: Install Anthias with Raspberry Pi Imager
If your setup will be dedicated to Anthias, the easiest way to install the full system is to use a pre-built image for your Raspberry Pi:
- Open Raspberry Pi Imager.
If you don’t have it yet, check my complete guide about Imager here. - Choose your device.
Remember: the latest models are not necessarily supported right away. - Click on “Choose OS” and go to “Other specific purpose OS”.
You’ll find Anthias in this list: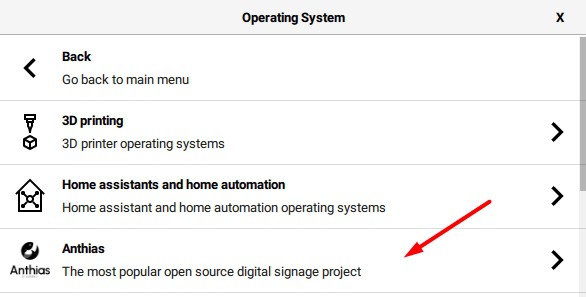
- After clicking on it, you’ll see different versions, one for each Raspberry Pi model supported:
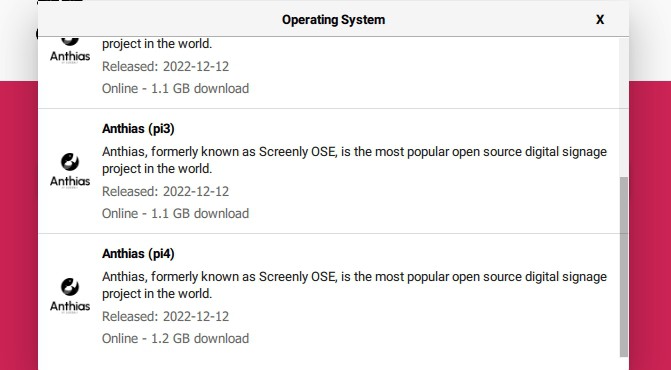
Pick the image corresponding to your device (yes, I know, at the time of writing this list wasn’t filtered properly according to the model you picked in the first step).
Then click on “Next” to start the image download and installation.
Once the SD card is ready, insert it into the Raspberry Pi and power it on.
If you’re plugged in with a network cable, there is nothing else to do. You’ll get directly the IP address to use on the screen.
If you only have access to Wi-Fi, a hotspot will be created so you can configure the Wi-Fi connection directly from their web interface. Follow the instructions to connect to it via your computer or smartphone, and give it the settings for your usual Wi-Fi network.
Once ready, you can skip the next section and go directly to “Getting Started with Anthias”.
Option 2: Install Anthias on Raspberry Pi OS Lite
If you prefer, it’s possible to start with Raspberry Pi OS Lite and install Anthias on top of it, as in most other applications.
Note that the latest version of Raspberry Pi OS Lite may not be supported. I’m testing this with Raspberry Pi Bullseye on a Raspberry Pi 4, which is the newer version currently supported.
Start by installing Raspberry Pi OS Lite as usual (check this tutorial if you need some guidance), using Raspberry Pi Imager for example. Make sure to do the system updates, and accessing the Pi via SSH is recommended (so you can follow the next steps from your computer).
It's a free PDF guide containing every Raspberry Pi Linux command you should know!
Download now
Once connected to a terminal (or SSH), use this command to install Anthias on Raspberry Pi OS Lite:bash <(curl -sL https://install-anthias.srly.io)
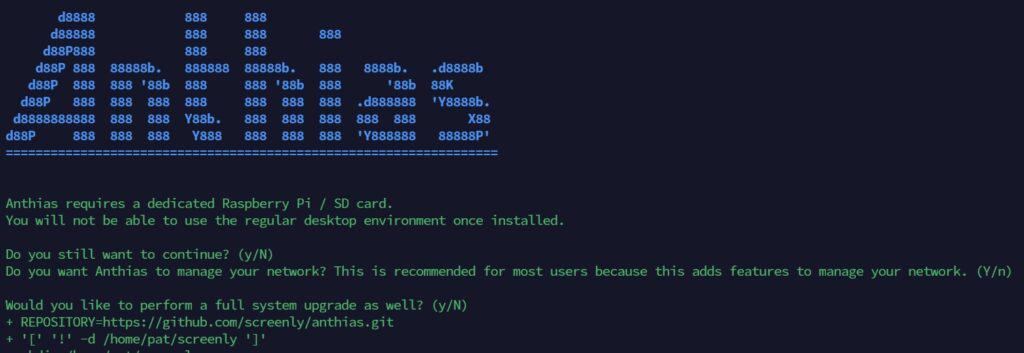
You’ll be asked and few questions, and then the installation process will start. You can let it run.
Installing everything may take a long time. In the documentation, they mention that it can take between 15 minutes and several hours depending on your hardware and Internet connection (it was more or less 15 minutes for me, on my Pi 4).
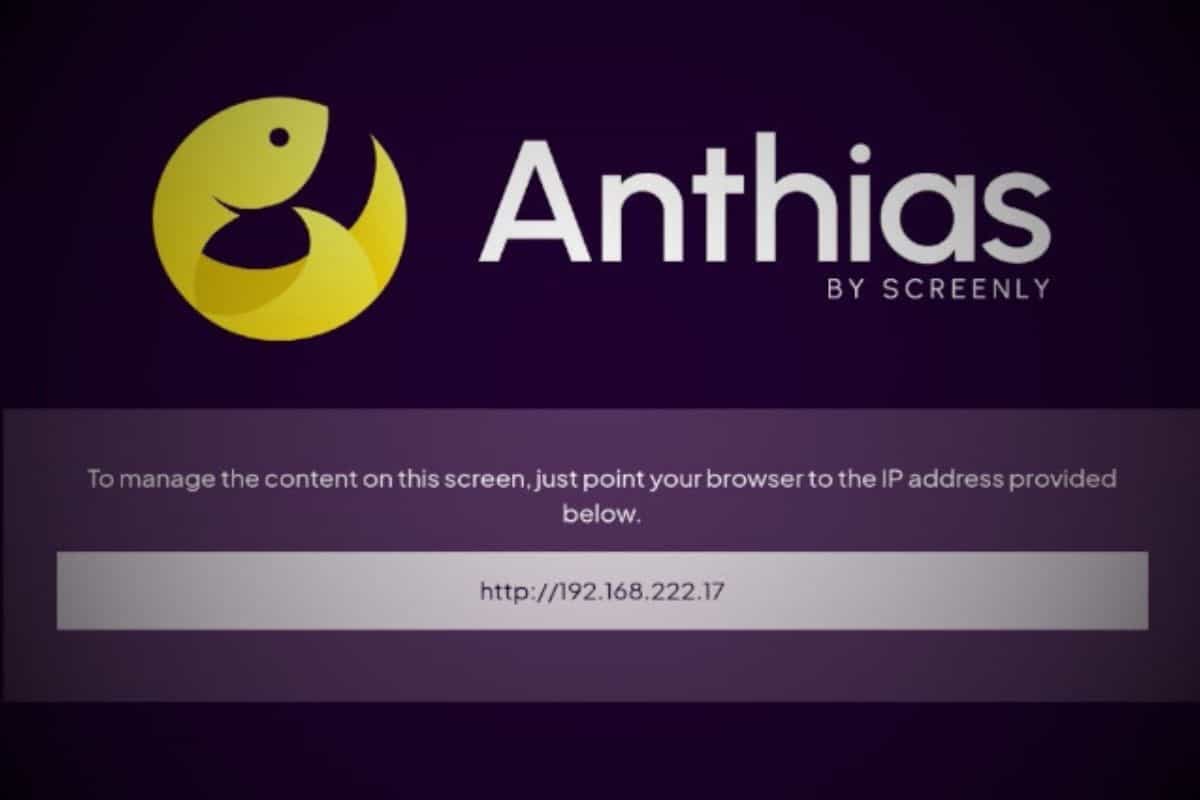
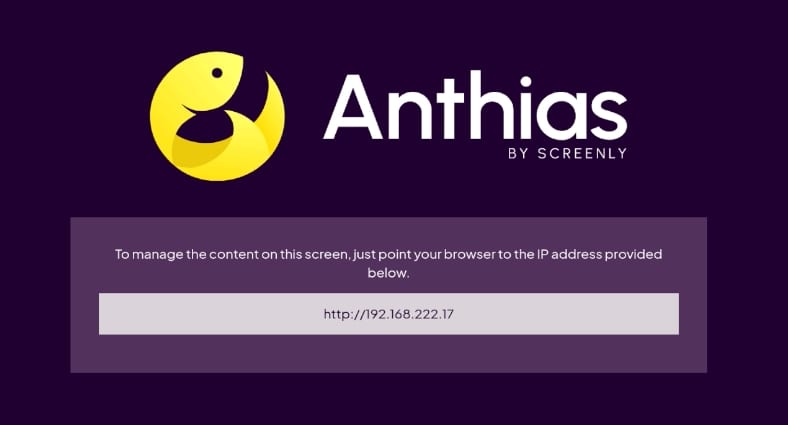
At the end of the installation, the wizard will ask you to do a reboot. Once done, you’ll get the same screen you did when installing Anthias from Raspberry Pi Imager, showing you the system IP address.
At this point, using Raspberry Pi OS Lite or the Anthias directly from Imager shouldn’t make any major difference.
Getting started with Anthias
In this part, I’ll show you how to configure the basic stuff on Anthias.
First access to the interface
If you noted the Raspberry Pi IP address after your installation, you can open that URL in your browser. If not, restart your Raspberry Pi to display it again, or use my post on how to find the Raspberry Pi IP Address.
We can then access the web interface directly:
- Open the web interface URL.
It’s something like http://A.B.C.D, in my case it’s http://192.168.222.17. - On your first connection, the web interface looks like this:
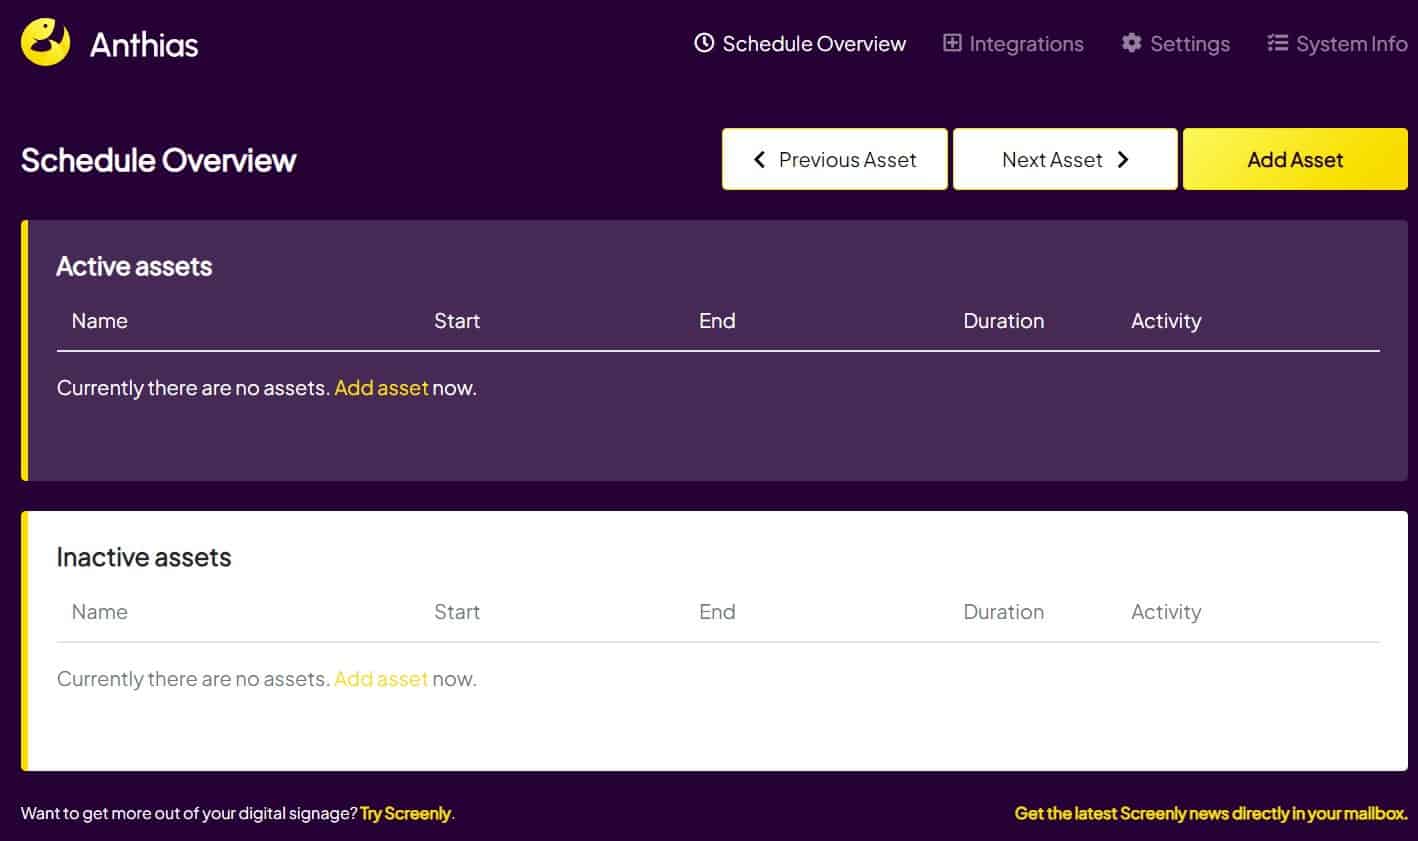
- The first part shows your active assets and the second part is for inactive assets. It’s empty by default, but we’ll add some in the next steps.
What Screenly calls an asset is something you’d want to display on the screen (any format).
We’ll get back to the interface utilization in the next section.
Assets management
Screenly allows you to display a lot of different formats on your digital signage screen:
- Images: it supports most popular image formats like JPG, PNG or GIF.
- Videos: You need to encode videos with H264 MPEG4, but I think it supports any quality (1080p for sure) and size.
- Video feeds: Screenly also supports camera feeds (for surveillance or illustration screens).
- URL: And this is the magic about Screenly, you can display any website URL, so it’s unlimited.
So you have a bunch of possibilities for your screen. The common usage will be to use an image or a URL to display your prices or sales, but you can be more creative and think of other usages.
Let’s try it now by uploading a new asset to your system:
- Click on “Add Asset” in the top-right corner.
- A pop-up form shows up, where you can either use a URL or upload a file directly.
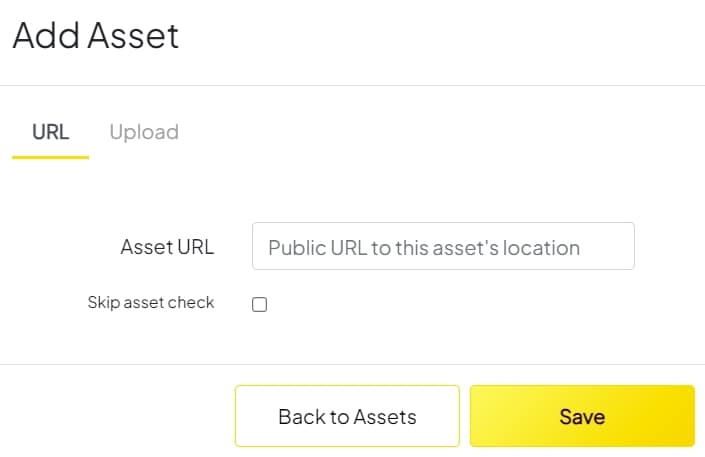
- For example, let’s click on “Upload” and select an image on your computer.
Once done, click on “Back to Assets” and you’ll see your files in the “Inactive Assets” section. Now it’s time to configure the planning for this asset (when to display it).
Planning
When you upload a new asset, for example, the image goes into the Inactive Assets section with default values:

- Click on the Edit button (middle button).
- You’ll get a screen with all configuration options:
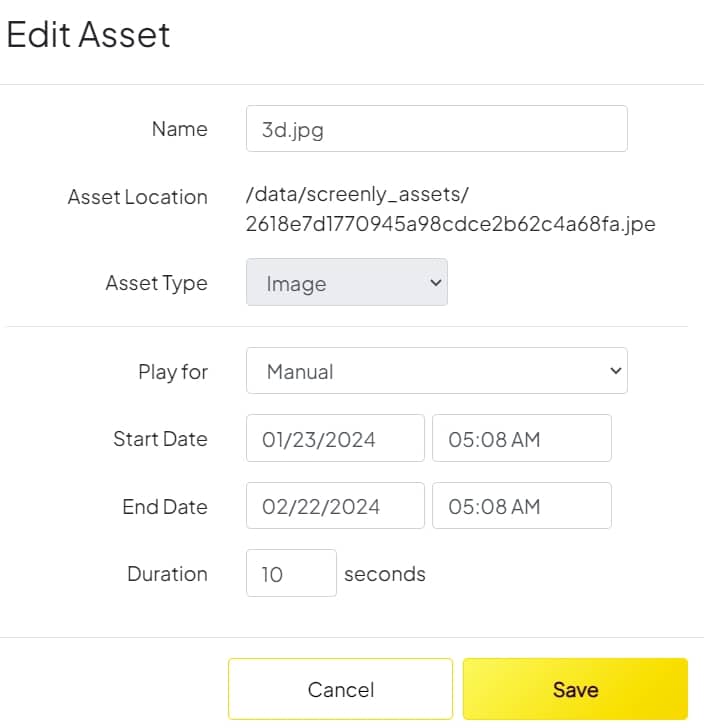
- Asset name.
- Location on the storage drive.
- Type.
- Schedule duration in days/weeks/month or by entering a start and end date if you prefer (the default is one month).
- Then you have the duration on screen.
It means how often the system will switch between your assets. If you have only one, you can put a very high number in this box, so it won’t use resources for no reason.
- Fill all of this and click on Save.
- Now your asset is ready, you can click turn the “Activity” switch on to enable it.
The corresponding line will move to the “Active assets” section, and Anthias will include it in the next rotation.
Rotations
If you have several active assets, Anthias will rotate between all assets automatically.
It’s perfect to show images of your current products or to use it as a photo frame for home usage.
If you want to display only one thing on your screen, remove the other assets
Other options
If you explore a bit the Anthias interface menu, you’ll find the “Settings” in the top menu. There isn’t much to configure there, but you might find some useful options, like enabling a basic authentication to protect access to the interface.
System info may help to keep an eye on resource usage (disk space especially).
Usage ideas
On the Screenly website, you’ll find a list of ideas you can implement with their software.
But to sum up, everything is possible.
Here are a few creative examples you can try:
- Dashboard in your open space, with sales or best customer agents.
- Screen with current weather and occupancy status for beaches near the hotel (with live cameras).
- Current drink costs in a bar with moving prices (depending on the day, the hour or how many sales you already made).
- Display your daily or weekly Google Calendar on a wall at home (you can even switch between both every 30 seconds).
I hope you’ll find the perfect idea for your business. Please share it in the community with a picture, it’ll inspire other people!
It's a free PDF guide containing every Raspberry Pi Linux command you should know!
Download now
Video
I created a video a while ago on my YouTube channel, where you can see Screenly in action. It was with the previous version (Screenly OSE), but you’ll get a better idea of everything I just explained.
It's a free PDF guide containing every Raspberry Pi Linux command you should know!
Download now
Want to chat with other Raspberry Pi enthusiasts? Join the community, share your current projects and ask for help directly in the forums.
Conclusion
That’s it, you already know everything needed to use Screenly on a Raspberry Pi.
There are a few more options in the settings if you want to check, but it’s very intuitive (user authentication, audio, Wi-Fi settings and backup).
I recently tested and posted a review of the RasPad 3, which might be a good fit to use with Screenly / Anthias if you don’t need a huge screen. You can display your backend information, calendar or promotions on this nice 10″ screen.
Whenever you’re ready, here are other ways I can help you:
The RaspberryTips Community: If you want to hang out with me and other Raspberry Pi fans, you can join the community. I share exclusive tutorials and behind-the-scenes content there. Premium members can also visit the website without ads.
Master your Raspberry Pi in 30 days: If you are looking for the best tips to become an expert on Raspberry Pi, this book is for you. Learn useful Linux skills and practice multiple projects with step-by-step guides.
The Raspberry Pi Bootcamp: Understand everything about the Raspberry Pi, stop searching for help all the time, and finally enjoy completing your projects.
Master Python on Raspberry Pi: Create, understand, and improve any Python script for your Raspberry Pi. Learn the essentials step-by-step without losing time understanding useless concepts.
You can also find all my recommendations for tools and hardware on this page.

it is possible to allow usage of RDP on the Raspberry Pi with Screenly?
Hello Lea,
I don’t think so
As there isn’t any desktop environment, it may not be possible
But why do you need this? SSH + web interface are not enough?
Let us know if you find a solution
Device does not boot after imaging the SD card using etcher.
Was able to download and install a different OS and boot, so I know the SD card and device pi are working.