How To Safely Upgrade your Raspberry Pi Firmware (and when)
The Raspberry Pi team regularly releases firmware updates. These updates include the latest features, security upgrades, and other improvements. In this guide, I will show you how to update your Raspberry Pi firmware to the latest version.
The Raspberry Pi firmware is usually updated automatically by running the packages update (with APT), but it’s also possible to use ‘rpi-update’ to manually upgrade or downgrade to a specific version.
In this tutorial, I will discuss both methods of updating the Raspberry Pi Firmware. I will also provide a step-by-step guide of each technique, along with screenshots. This tutorial will also cover various tools that can be useful in managing the firmware.
If you’re looking to quickly progress on Raspberry Pi, you can check out my e-book here. It’s a 30-day challenge where you learn one new thing every day until you become a Raspberry Pi expert. The first third of the book teaches you the basics, but the following chapters include projects you can try on your own.
Introducing the Raspberry Pi firmware
Before running any command, I just want to make sure you understand what the firmware really is, why and when you may need to do these updates, and other important considerations.
Difference between firmware and operating system
To keep your computer running smoothly, two programs work together:
- The operating system: displays apps and programs. It gives you an interface to interact with the machine.
- The firmware: defines how the operating system interacts with different hardware.
It’s basically the bridge between the hardware and higher-level software like the operating system (OS).
The firmware defines how hardware elements work and communicate with each other. This makes it possible for devices like the Raspberry Pi to function correctly.
Regular firmware updates fix existing problems. They also make your computer perform better and add new features.
The Raspberry Pi firmware
The Raspberry Pi firmware is composed of the following components:
- Bootloader: The bootloader is the first program that initializes the Raspberry Pi. The bootloader’s primary task is to find and execute the kernel. Some versions of Raspberry Pi have the bootloader stored on EEPROM. In other versions, the bootloader is stored on the SD card.
- Kernel: The kernel manages hardware resources for the operating system. The Raspberry Pi kernel is optimized for the Raspberry Pi hardware.
- GPU/ VideoCore Firmware: VideoCore Firmware enables the GPU to load and run ARM-specific code for the CPU.
- Other Files: The firmware also includes additional files, like the device tree overlay. These files handle system configuration during the boot process.
Why are firmware updates important?
Here are a few benefits of updating the Raspberry Pi firmware:
It's a free PDF guide containing every Raspberry Pi Linux command you should know!
Download now
- Security Fixes: Firmware updates often patch security holes. They keep your Raspberry Pi secure.
- Bug Fixes: Updates fix bugs or issues in old firmware. This improves stability and performance.
- Compatibility: New firmware updates can ensure smooth operation with the latest devices.
- Feature Enhancements: Firmware updates can add new features to the Raspberry Pi and improve its functionality.
- Optimization: Updates may include optimizations that improve overall system performance and efficiency.
- Hardware Support: Firmware updates may add support for new hardware. They may also fix problems with existing hardware.
In short, updating the firmware keeps your Raspberry Pi reliable. It also keeps it secure and supports the latest software and hardware.
Important considerations before any update
Before updating your firmware, here are a few things you should consider:
- Do you need to update?: Most of the time, you do not need to update manually. Routine system updates automatically update your firmware to the latest stable release.
- Backup: Before you update the firmware, back up any critical data or settings on your Raspberry Pi. Firmware updates are generally safe. However, there’s always a slight risk of something going wrong.
- Check Release Notes: Check the Release Notes. They explain the changes in the new firmware.
How to check your current kernel and bootloader version
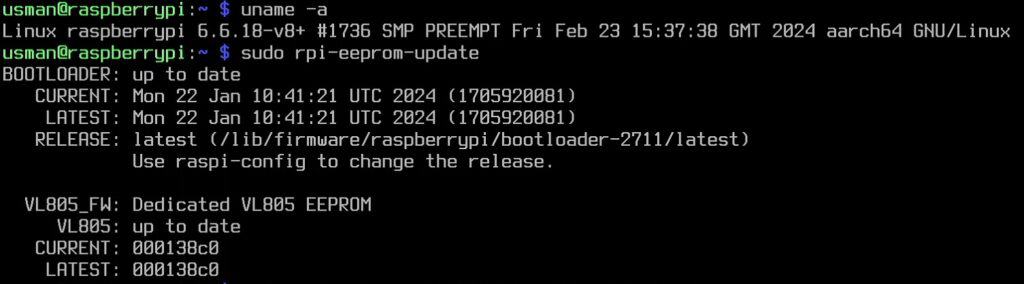
To check your kernel version, open a terminal on your Raspberry Pi and enter the following command:uname -a
For example, in my case, we can see the kernel version is 6.1.0-rpi7-rpi-v8:

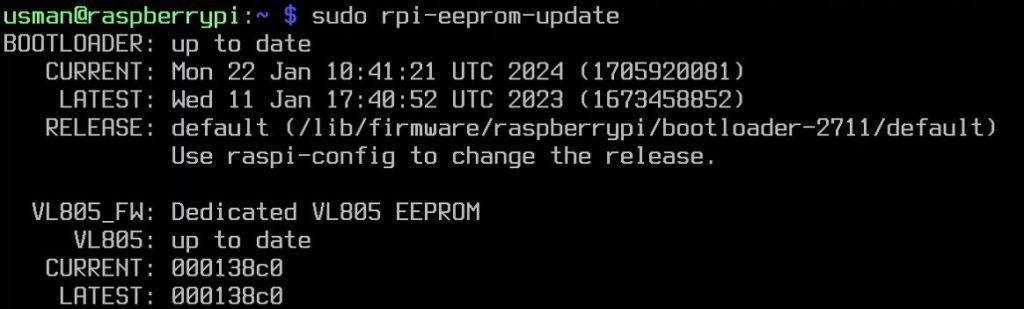
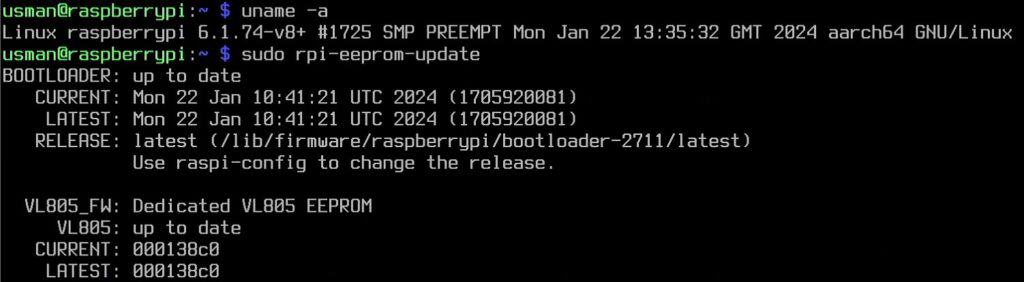
If you have a Raspberry Pi 4, 400, or 5, you can check your bootloader version with the following command:sudo rpi-eeprom-update

Join Our Community!
Connect, learn, and grow with other Raspberry Pi enthusiasts. Support RaspberryTips and enjoy an ad-free reading experience. Get exclusive monthly video tutorials and many other benefits.
Learn moreIn addition to showing the current version of your bootloader, it will also show you the latest one available and indicate if you are up-to-date. For example, in my case, it showed me that my bootloader version is up-to-date.
Caution: Before proceeding, ensure you have backed up your system and have a stable power supply and network connected to your Raspberry Pi.
Are you a bit lost in the Linux command line? Check this article first for the most important commands to remember and a free downloadable cheat sheet so you can have the commands at your fingertips.
It's a free PDF guide containing every Raspberry Pi Linux command you should know!
Download now
How to update the Raspberry Pi firmware
As mentioned in the introduction, there are two ways to update the Raspberry Pi firmware: automatically (via APT) or manually (via “rpi-update”). Let’s see how to do both.
Automatic method: via APT
The conventional/ automatic method for updating Raspberry Pi firmware is to use APT (Advance Packaging Tool).
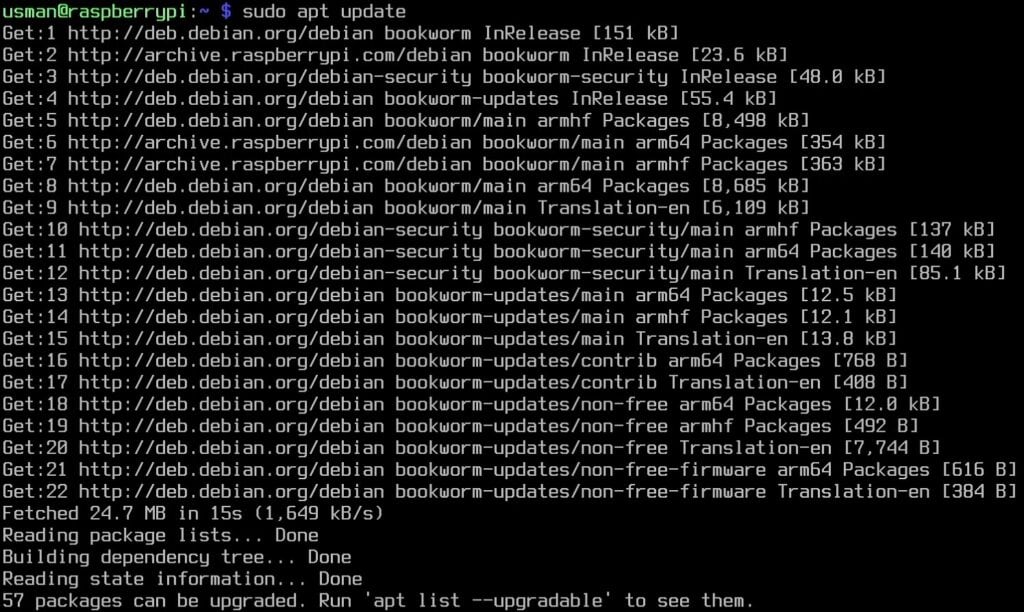
Open a terminal on your Raspberry Pi and update your package list by entering the following command:sudo apt update
Wait for it to update your package list. See the screenshot below:
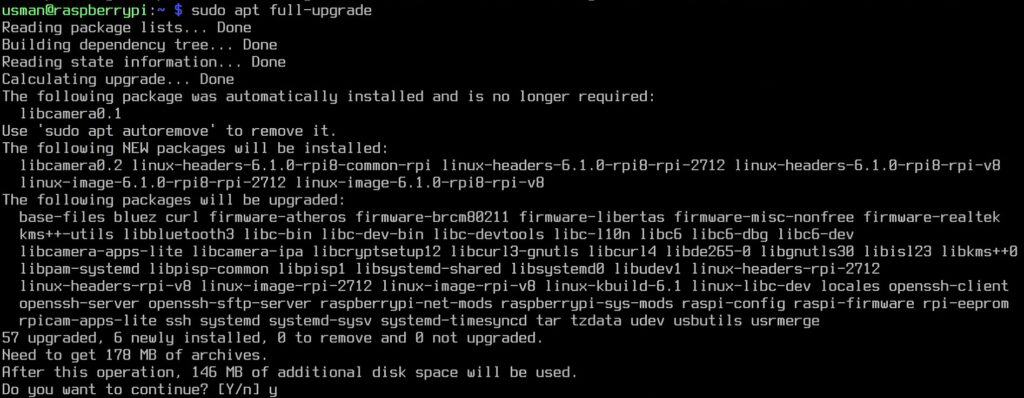
Once your package list is updated successfully, run the following command in the terminal to upgrade all your installed packages to their latest versions:sudo apt full-upgrade
It may take some time, depending on your network speed and the number of packages that you have installed.
It's a free PDF guide containing every Raspberry Pi Linux command you should know!
Download now
Now reboot your Raspberry Pi and check that the kernel has been updated using:uname -a

This set of commands will update all your packages. Run these commands often to update your system with all the security packages. You will also update your firmware to the latest stable version by running these two commands.
For an average user, this should be enough, and there is usually no need to update the firmware manually.
Manual method: Using RPI-UPDATE
Update to the latest version available
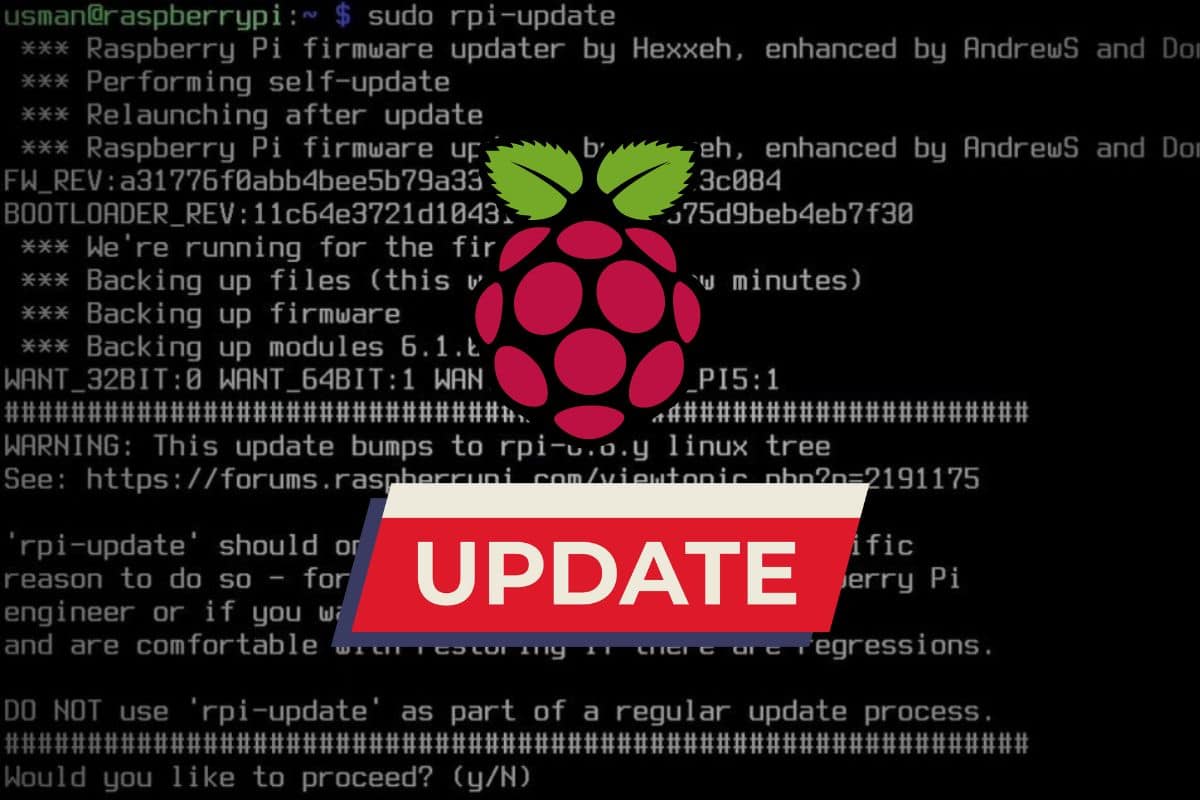
If, for some reason, you need to update the firmware of your Raspberry Pi to the latest pre-release version, you can use the rpi-update command.
To run the script, open a terminal on your Raspberry Pi and enter the following command:sudo rpi-update
Running this command will download the latest pre-release version of the Linux kernel, matching modules, device tree files, and the VideoCore firmware (GPU firmware) and install these files in the relevant locations on your SD Card.

Once completed, reboot your Raspberry Pi and check your updated kernel and bootloader version using uname-a and rpi-eeprom-update commands.
Updating to a Specific Firmware Version
If instead of updating to the latest pre-release version of Linux Kernel, you wish to update to a specific version, use the following command syntax:sudo rpi-update <HASH_CODE>
The requisite <HASH_CODE> can be found on the GitHub project. Search for the kernel version to which you wish to update/downgrade:
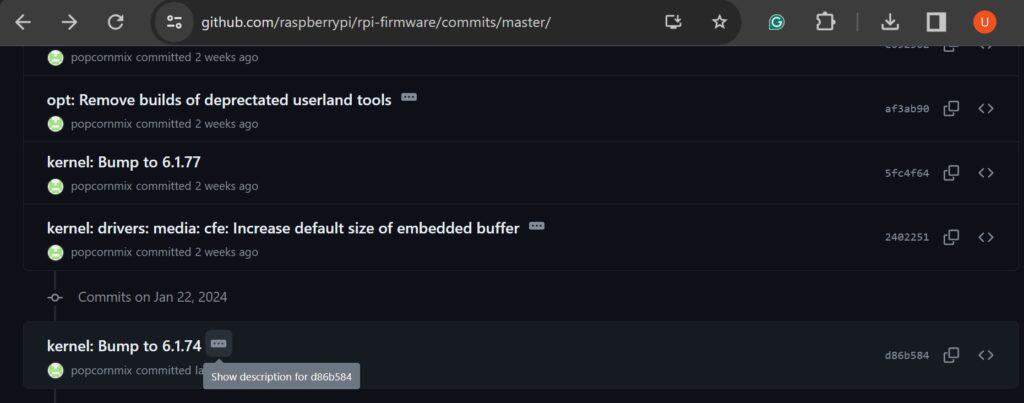
Click on the commit corresponding to the required kernel version and open its webpage. The required hash code can be found from the address bar, as shown in the following screenshot:

For example, to update to kernel version 6.1.74, you must run the following command:sudo rpi-update d86b5843d68b9972a5430a6d3da1b271cfc83521
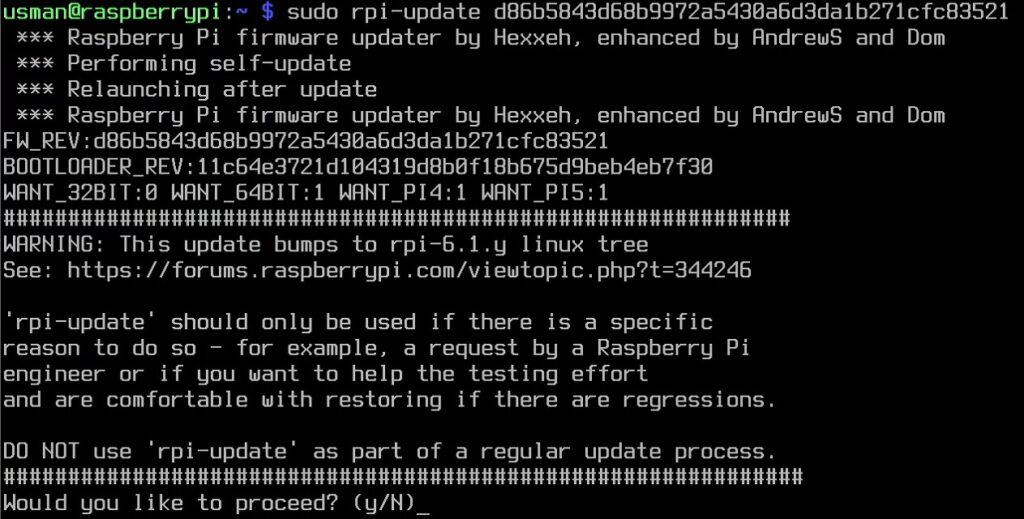
Once completed, reboot your Raspberry Pi.
You can then verify the current kernel version using:uname -a
Which should give you the exact version you decided to install:
It's a free PDF guide containing every Raspberry Pi Linux command you should know!
Download now
Want to chat with other Raspberry Pi enthusiasts? Join the community, share your current projects and ask for help directly in the forums.
Related questions
How to revert a firmware update?
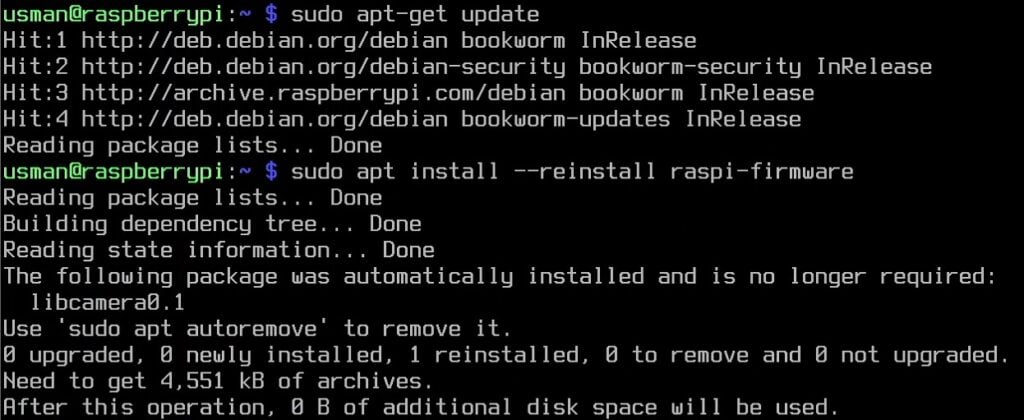
If, after a manual update using rpi-update, things are not working as you intended but your Raspberry Pi is still bootable, you can return to the latest stable release of the Raspberry Pi kernel via the following commands:sudo apt-get update
sudo apt install --reinstall raspi-firmware
What if my Raspberry Pi is no longer booting after a firmware upgrade?
If, after an update, your Raspberry Pi is bricked/stuck at the rainbow screen of death, the easiest way to recover your Raspberry Pi is to flash your card with the backup you made before updating.
Another option is to update the bootloader manually using Raspberry Pi Imager (see next question).
How to update the Raspberry Pi bootloader only?
Usually, when you update your firmware using apt or rpi-update script, the bootloader is also automatically updated.
However, if you wish to update the bootloader only, you can use one of the following methods:
With Raspberry Pi Imager
You can update your Raspberry Pi bootloader using a spare SD card.
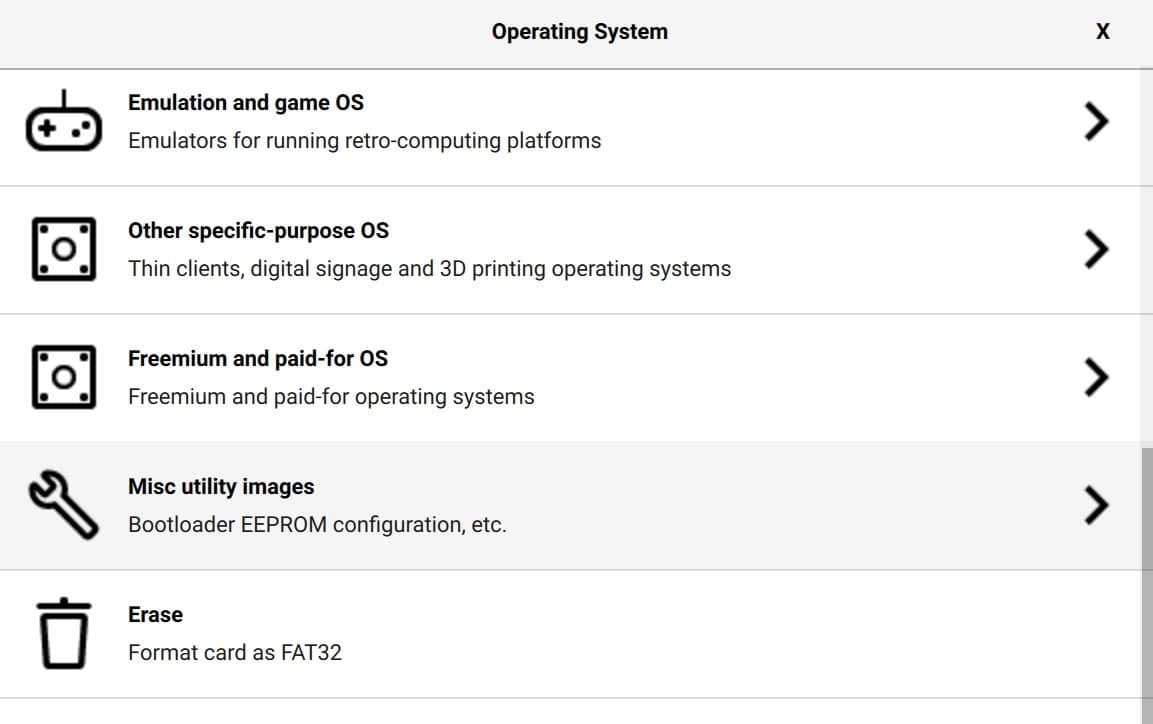
- Insert your spare SD Card into a computer and run the Raspberry Pi Imager.
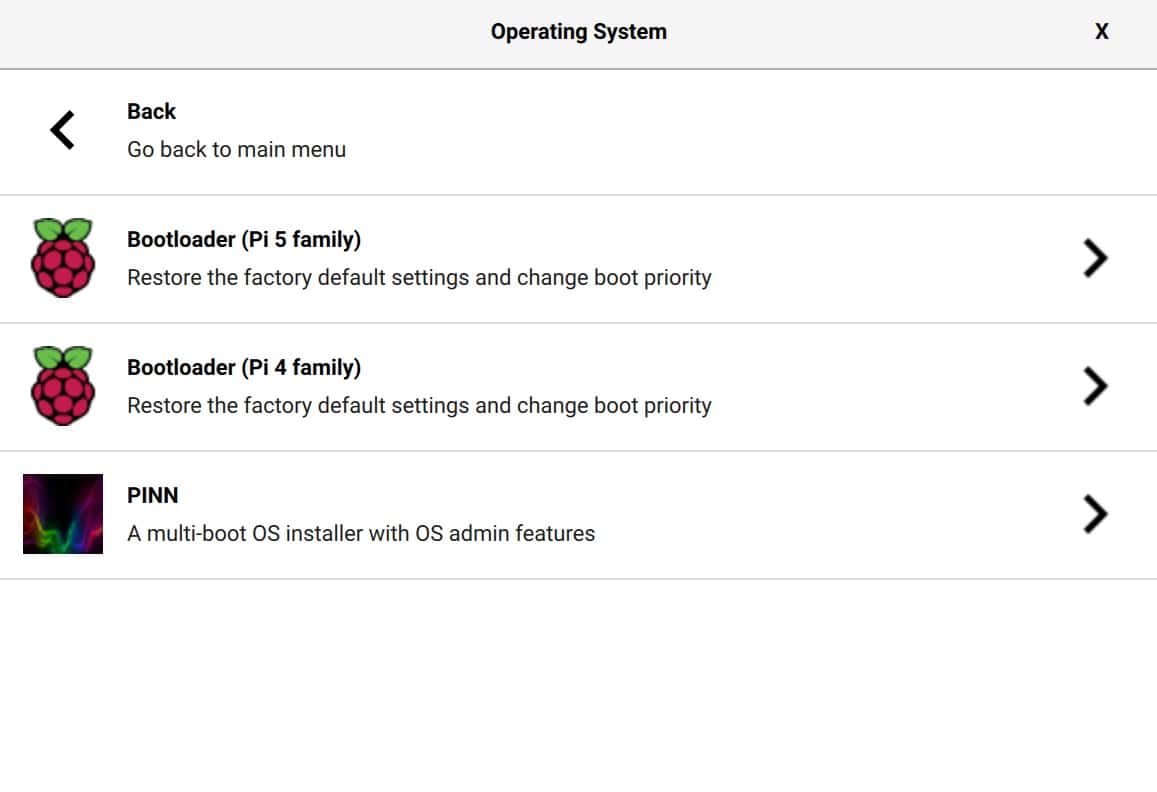
- Click on Choose OS and find the Misc utility images option:
- Select the board you are working with:
- Select the SD Card Boot option (or any other based on your setup):
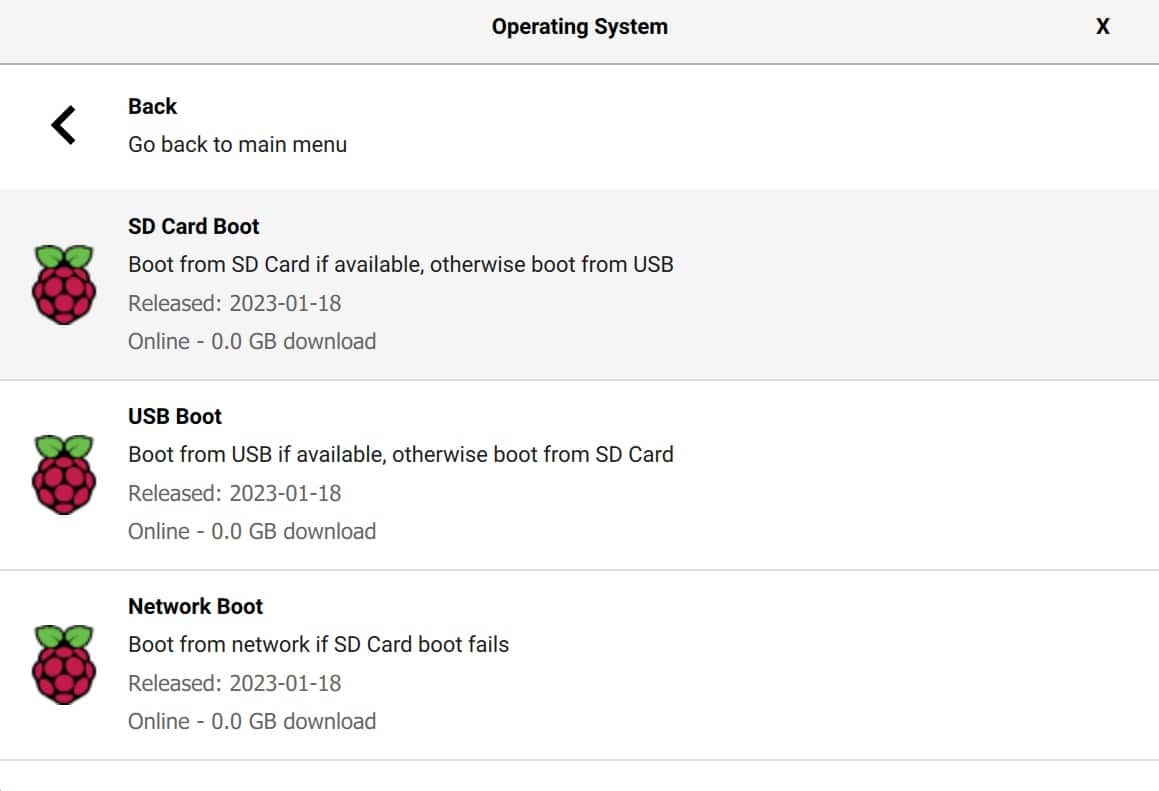
- Select the SD Card and then Write.
Boot the Raspberry Pi with the SD Card and wait at least 10 seconds.
You have successfully updated the Bootloader when the green LED blinks with a steady pattern, and the HDMI display shows a green screen. You can now power off the Raspberry Pi and remove the SD Card.
Using raspi-config
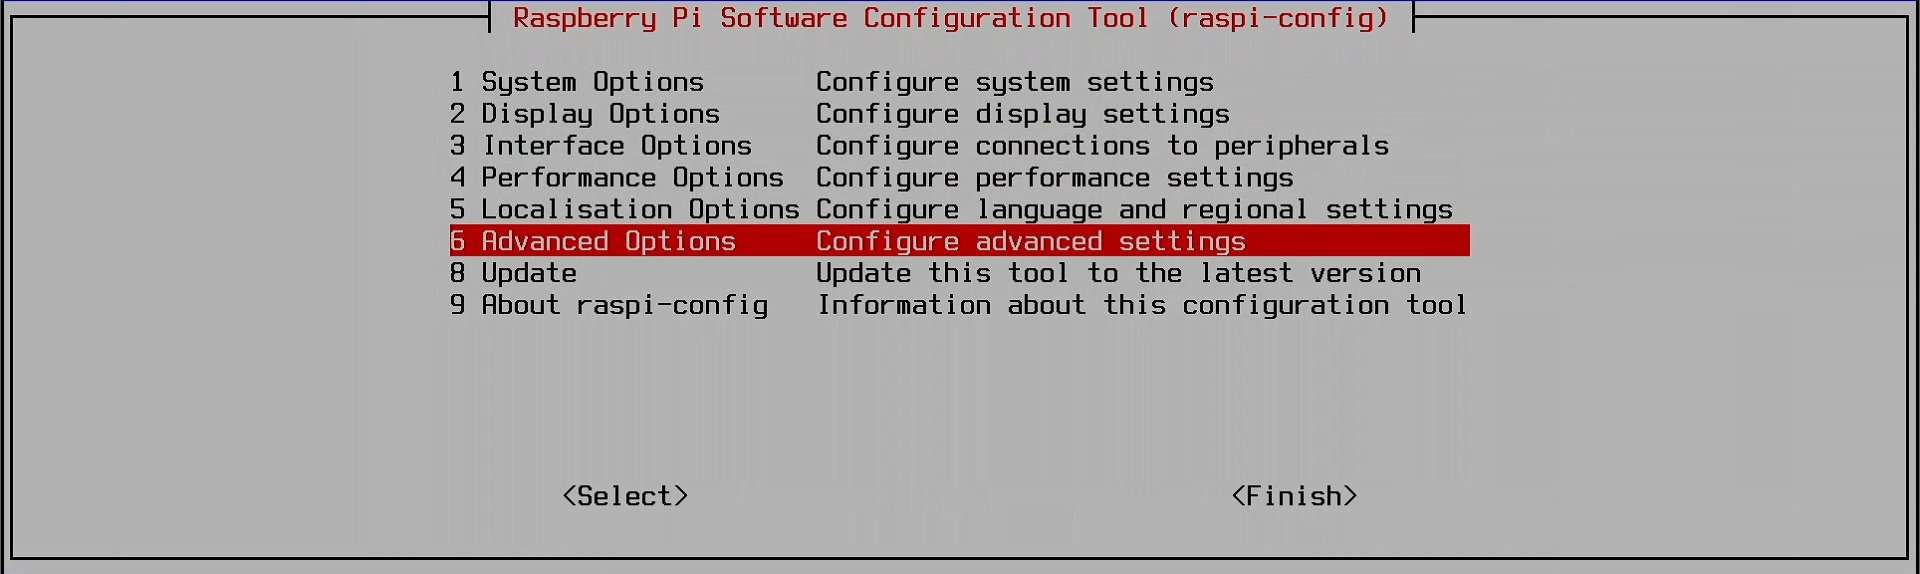
If your Raspberry Pi is bootable, you can use raspi-config to update your bootloader:sudo raspi-config
- Select Advanced Options.
- Select Bootloader Version.
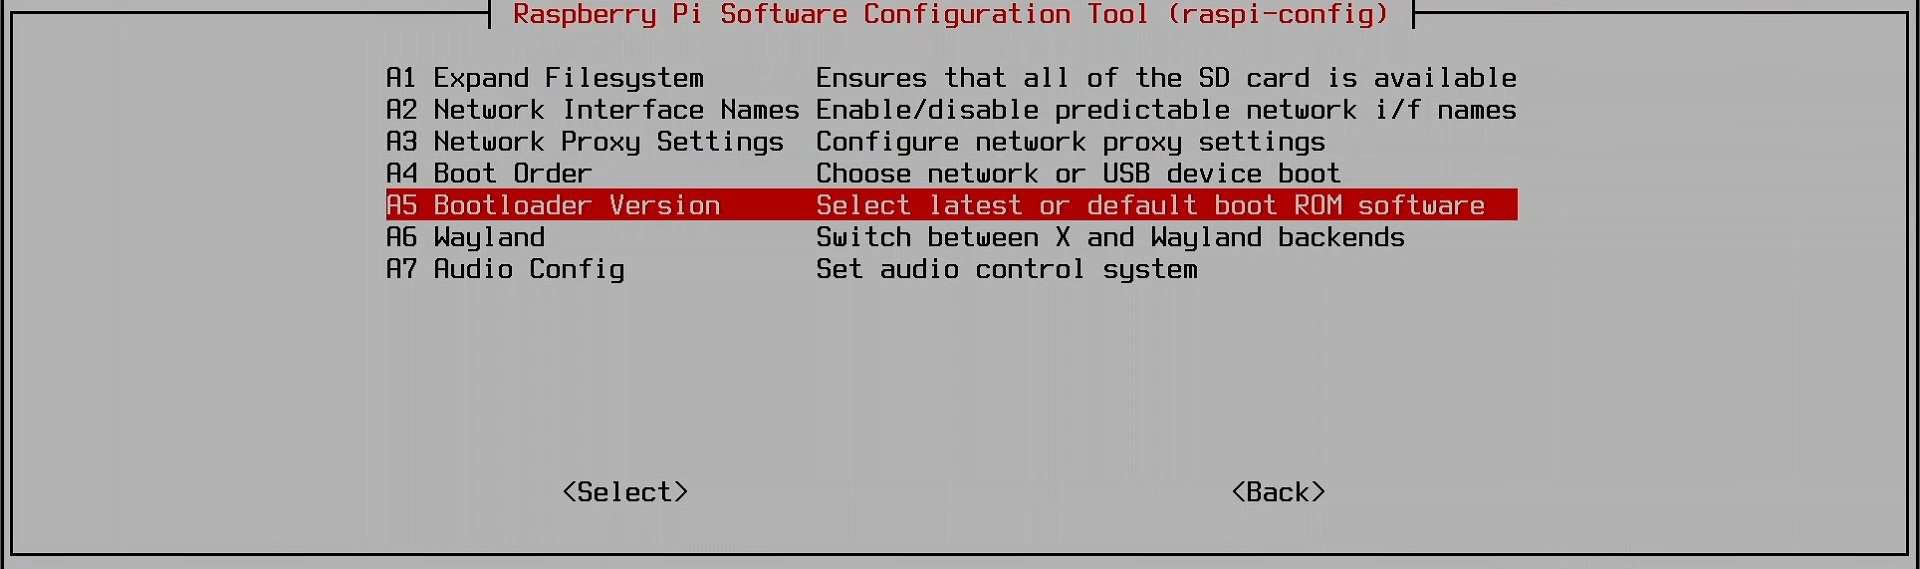
- Select Default for factory default settings and Latest for the latest stable bootloader version.
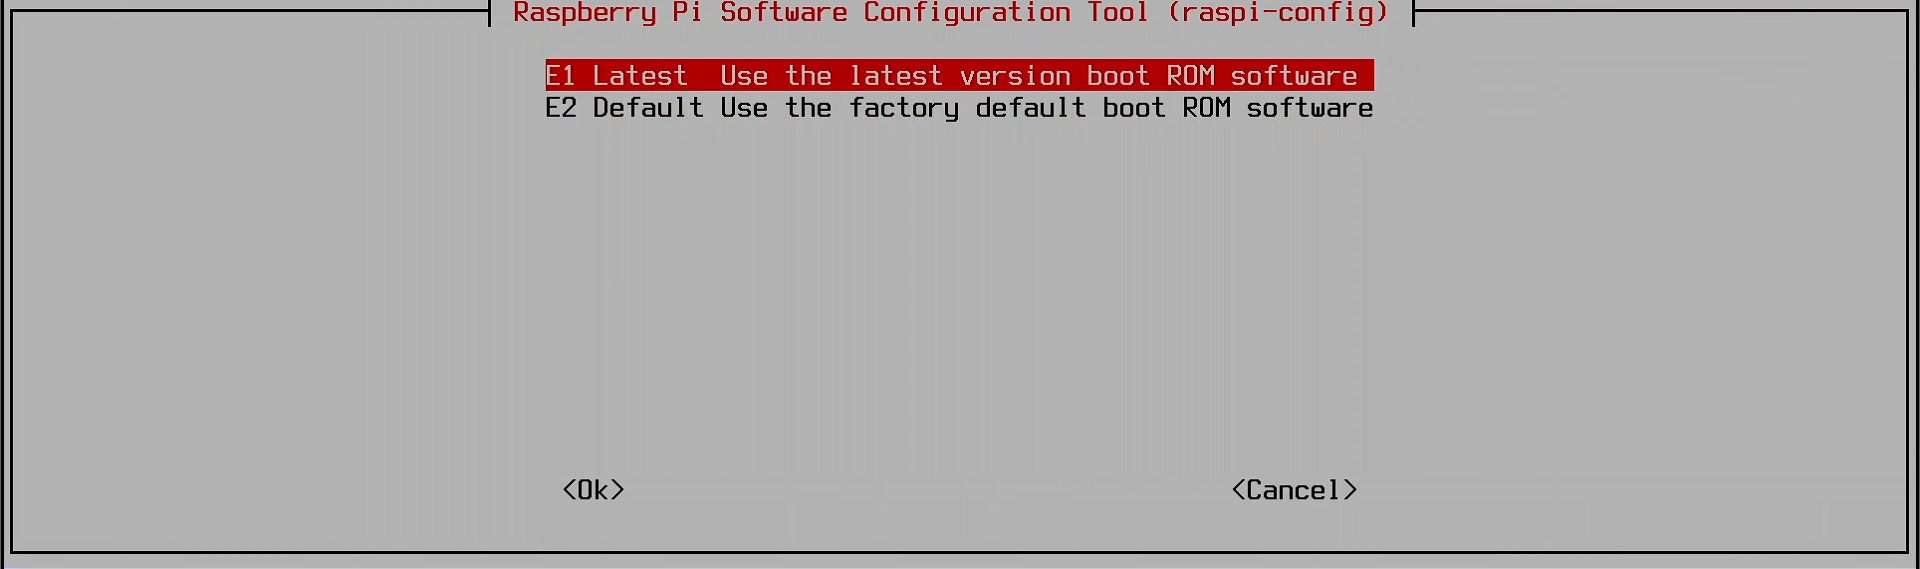
- Reboot your Raspberry Pi.
Whenever you’re ready, here are other ways I can help you:
The RaspberryTips Community: If you want to hang out with me and other Raspberry Pi fans, you can join the community. I share exclusive tutorials and behind-the-scenes content there. Premium members can also visit the website without ads.
Master your Raspberry Pi in 30 days: If you are looking for the best tips to become an expert on Raspberry Pi, this book is for you. Learn useful Linux skills and practice multiple projects with step-by-step guides.
The Raspberry Pi Bootcamp: Understand everything about the Raspberry Pi, stop searching for help all the time, and finally enjoy completing your projects.
Master Python on Raspberry Pi: Create, understand, and improve any Python script for your Raspberry Pi. Learn the essentials step-by-step without losing time understanding useless concepts.
You can also find all my recommendations for tools and hardware on this page.