BerryBoot on Raspberry Pi: Your step-by-step guide
Picture this: your Raspberry Pi needs an application incompatible with its current Operating System, that is already running other programs. Reflashing a new OS would erase old files. What’s the solution? It’s BerryBoot, a bundled OS installer and boot manager that enables you to run multiple operating systems on your Raspberry Pi.
BerryBoot can be installed onto an SD card through a ZIP file downloaded from the official page. It can then be configured for multi-boot by installing 2 different operating systems from its interface.
Let us first look at the hardware and software prerequisites for this tutorial (don’t worry, there are very few requirements!), and then I’ll guide you through the exact steps for the initial installation and multi-boot configuration.
If you’re looking to quickly progress on Raspberry Pi, you can check out my e-book here. It’s a 30-day challenge where you learn one new thing every day until you become a Raspberry Pi expert. The first third of the book teaches you the basics, but the following chapters include projects you can try on your own.
Hardware and Software Prerequisites
There aren’t many hardware or software prerequisites for this tutorial. In terms of hardware, the prerequisites are as follows:
- Raspberry Pi: I would recommend getting a Raspberry Pi with at least 1 GB RAM for this installation.
- SD Card: This is the primary storage device we will be using for this installation. We will install everything onto this, so use one with at least 16 GB of storage space (Note that you will have to erase this card).
- USB Storage Device (Optional): A part of the tutorial covers how to install an image from a USB stick. It is optional, but I would recommend going through this as it is a powerful feature that BerryBoot offers.
There are no previous software requirements. We will install everything as we go through the tutorial. Apart from this, a working laptop or PC with an active Internet connection is required (to install all the required software).
This is all! We will walk through and install all required software during the tutorial itself.
BerryBoot Installation
Here are the steps to install BerryBoot on a Raspberry Pi:
- Download the latest version of BerryBoot from Sourceforge.
- Format your SD card and copy the BerryBoot files onto it.
- Insert the SD card into the Raspberry Pi and follow the instructions.
Let’s see how to do each step in detail.
Download BerryBoot
To install BerryBoot on the Raspberry Pi, we will first download the latest available version from this website.
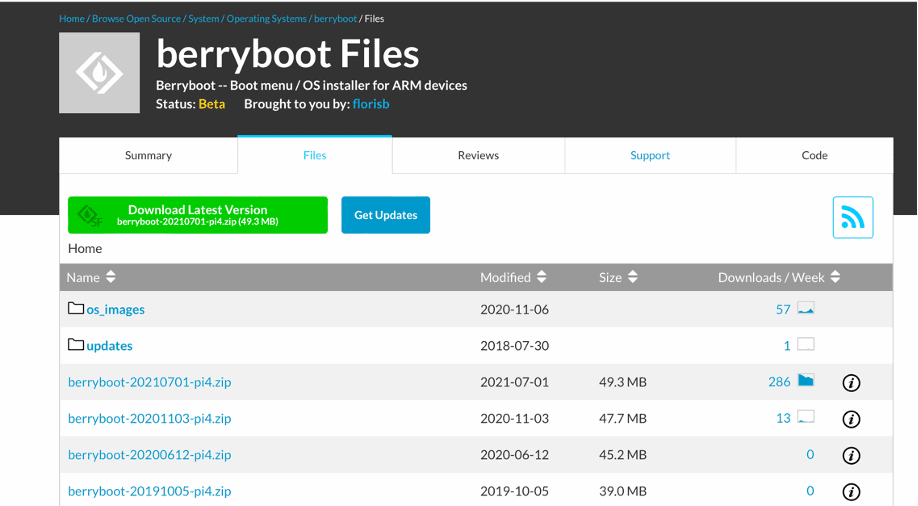
The “Download Latest Version” button on the webpage automatically downloads the most recently uploaded version of BerryBoot.
Copy BerryBoot to your SD card
Note that the downloaded file will be a zip file and not an image file. Files will be copied manually to the SD card and we won’t install it on the Raspberry Pi the way we normally would.
The only task is to format the SD card and copy-paste all the files from the unzipped folder for BerryBoot onto it. Here is how to do this easily:
It's a free PDF guide containing every Raspberry Pi Linux command you should know!
Download now
- Insert your SD card into your computer.
- Start Raspberry Pi Imager.
- In “Choose OS”, find the “Erase SD card” feature and click on it:

- Then select your SD card and click “Next” to start the process.
Confirm with “Yes” to start formatting the SD card.
It should just take a few seconds.
Once done, you can extract the ZIP file content from BerryBoot to the SD card, by using your file explorer.
First boot with BerryBoot
Insert the SD card into your Raspberry Pi, plug in your monitor and keyboard, and you can then power it on to follow the next steps.
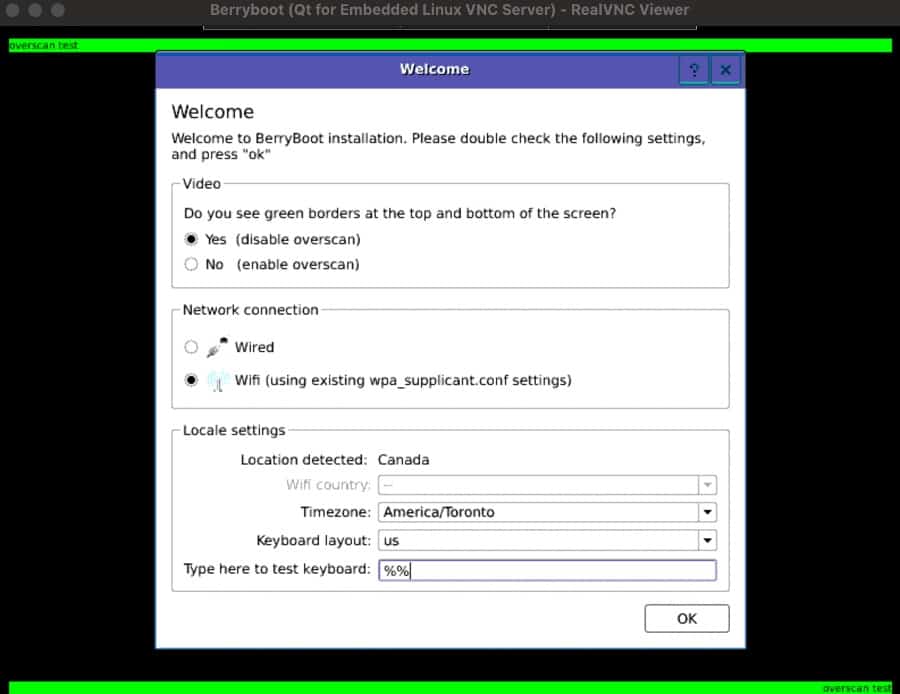
On the first boot, you should get a welcome wizard looking like this:
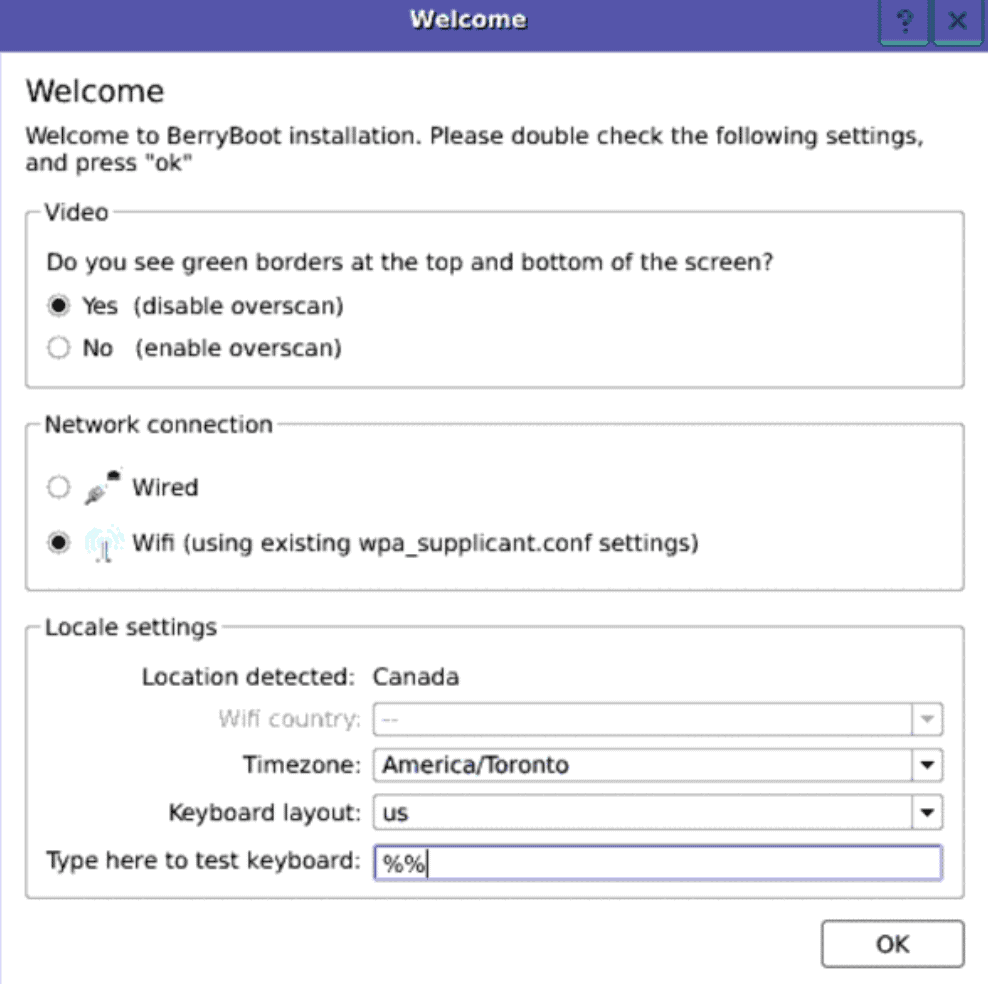
Simply fill the form with your settings, and click on “OK” once you’re done.
That is all for the installation. In the next section, we will configure BerryBoot and install 2 different operating systems on our SD card, one through the list of available images on the BerryBoot UI and the other custom operating system through an external USB stick.
Note: If you don’t have a monitor, check the related questions at the end of this article to see how to configure VNC for the first boot.

Join Our Community!
Connect, learn, and grow with other Raspberry Pi enthusiasts. Support RaspberryTips and enjoy an ad-free reading experience. Get exclusive monthly video tutorials and many other benefits.
Learn moreBerryBoot Initial Configuration
The first step in the configuration is to select the storage device on which you would like to install and run your operating systems.
The big advantage of BerryBoot is that you can even select an external SSD drive connected to the Pi and configure it as a boot drive with minimal configuration (it is as easy as selecting the drive from the menu!).
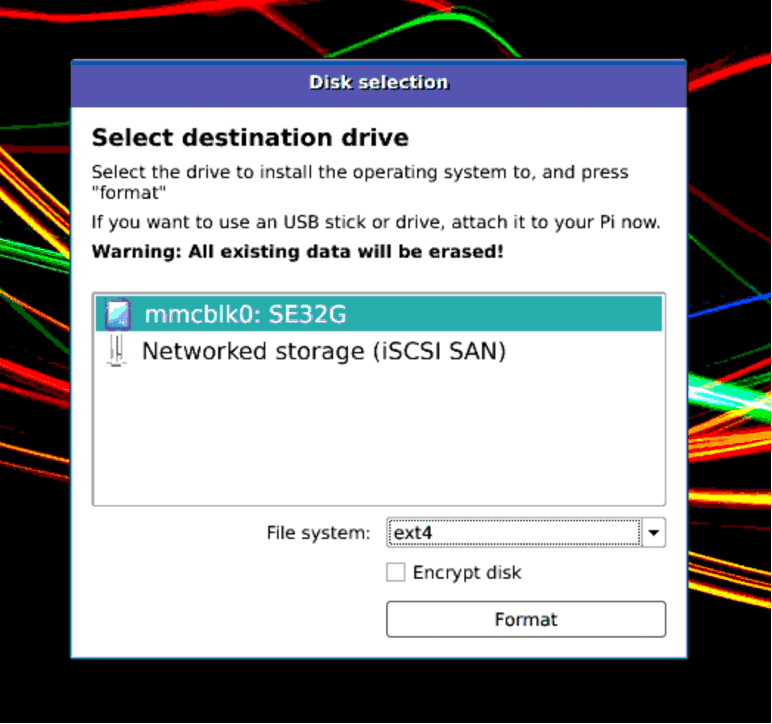
For this tutorial, we will select our SD card as the destination drive. Select the File system as ext4, and press Format. It will take a minute or so to complete.
Once it is done, you will see the Add OS window on the screen.
Installing new systems with BerryBoot
Now that the initial configuration is done, we can finally start to install new operating systems on the Raspberry Pi. You have two options there:
- Installing systems available in the BerryBoot UI.
- Downloading images from other sources, put them on an external storage and install them from there.
Let’s see how to do this.
Installing an OS from BerryBoot UI
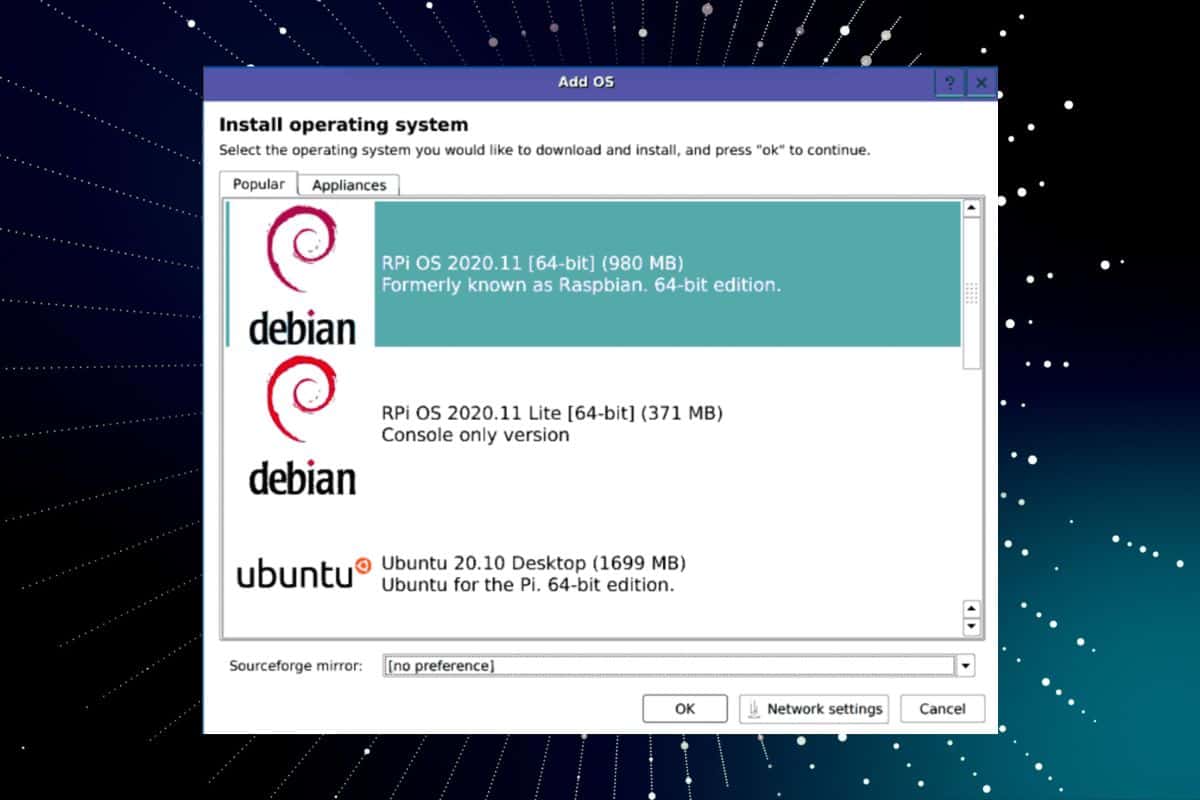
The first option is to use the one available directly via the “Add OS” window on your screen.
For this tutorial, we will select the Rpi OS 2020.11 [64-bit] (note that it is not the latest version of Raspberry Pi OS available, but it will do for demonstration purposes).
Select the OS by clicking on it:

Press the OK button and it should start downloading it.
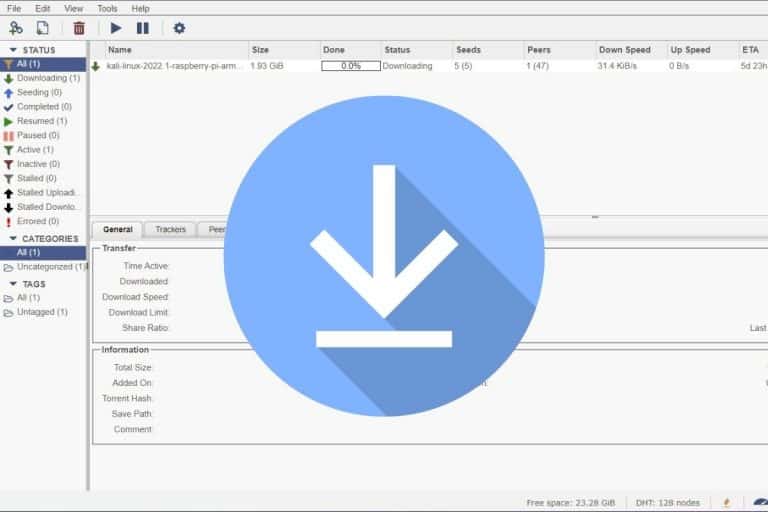
This will take some time to complete as BerryBoot will first download the OS image and then install it.

Once done, you can reboot the Raspberry Pi, and it should boot automatically on the new operating system.
It's a free PDF guide containing every Raspberry Pi Linux command you should know!
Download now
Installing an OS from an external storage device
The list of available systems in the “Add OS” menu is not necessarily exhaustive and doesn’t include the latest versions for each system. That’s why using external sources can be an interesting solution.
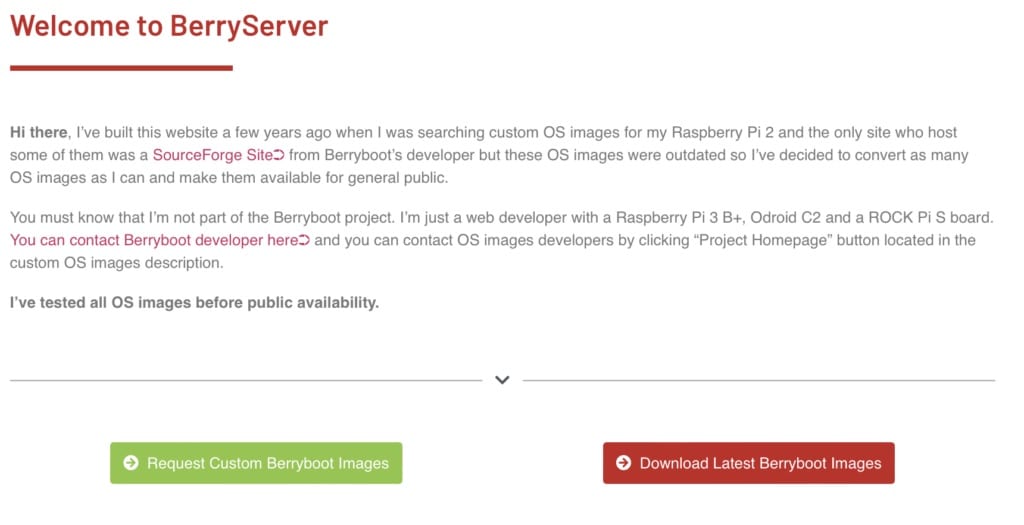
We can install images from external storage. Here is a website with a repository of custom images for BerryBoot. You can download one and install the image of your choice from there.
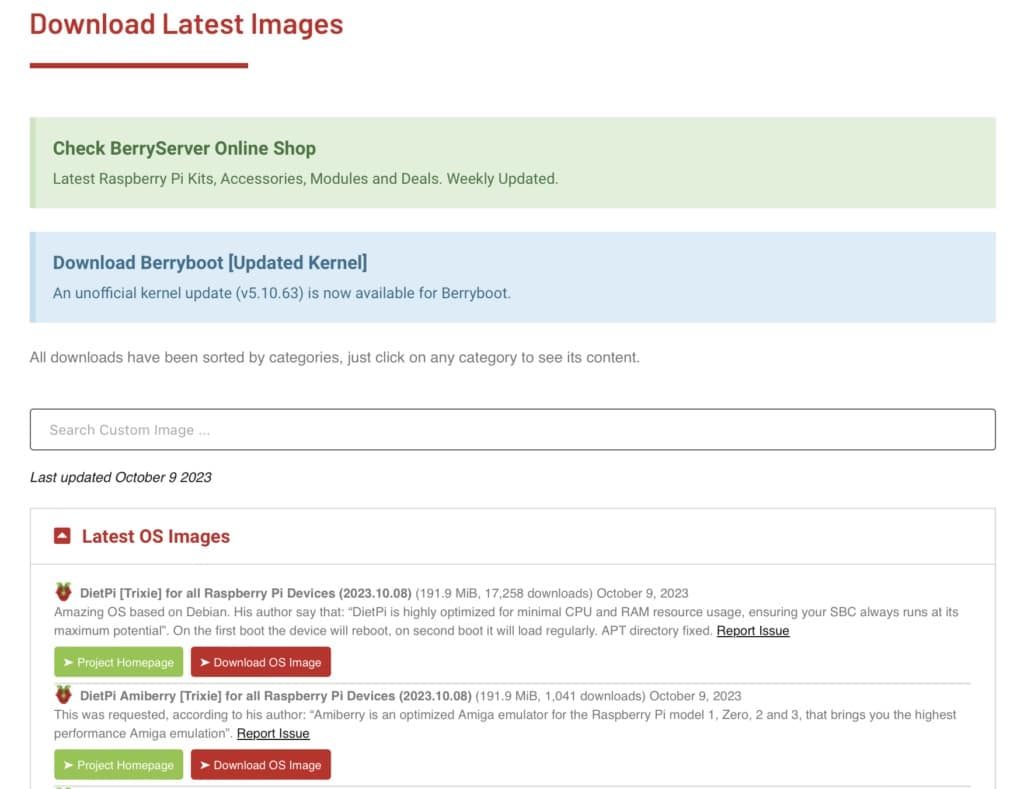
Once you have downloaded the image, all you need to do is add this image only a USB stick or any other external storage of your choice. (I am doing it for Ubuntu).

Next, insert the USB stick into your Pi and then open the BerryBoot UI.
Here are the steps to install the system from your external storage:
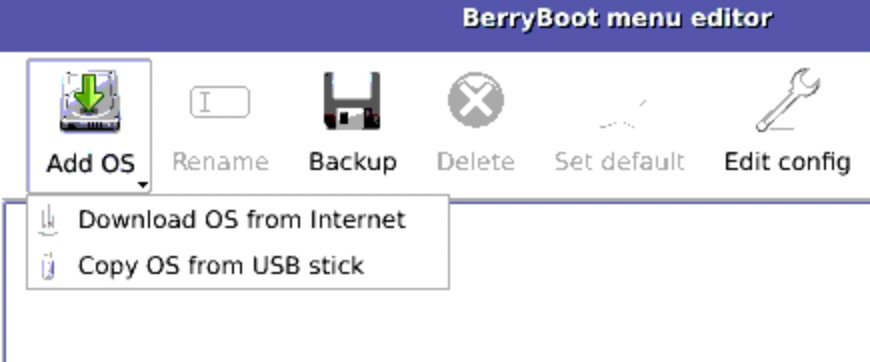
- From the BerryBoot menu editor, long press the left mouse click to open a menu that has the option to Copy OS from a USB stick.
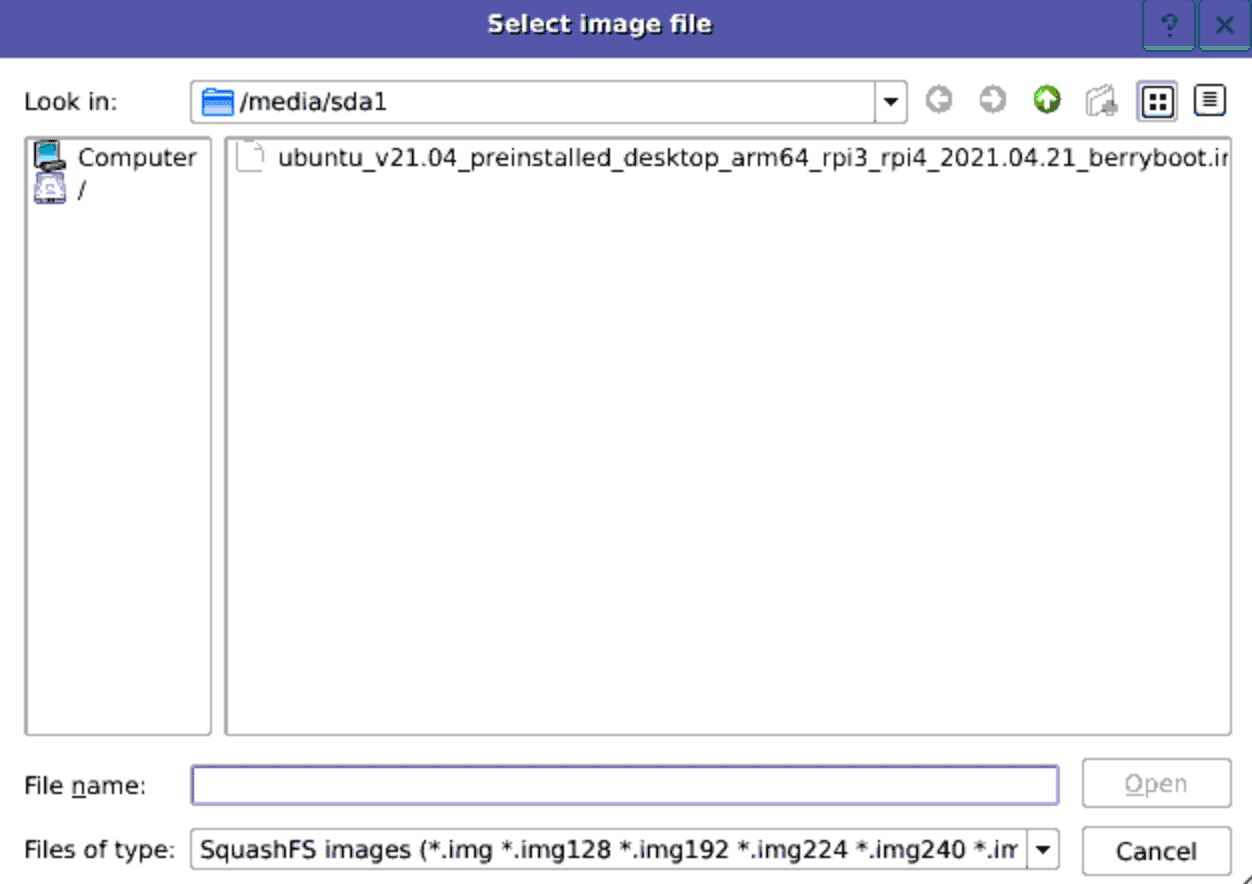
- Pressing that option opens a Select image file window with the USB device directory.
- Select the image file and press open. This will start and complete the installation process.
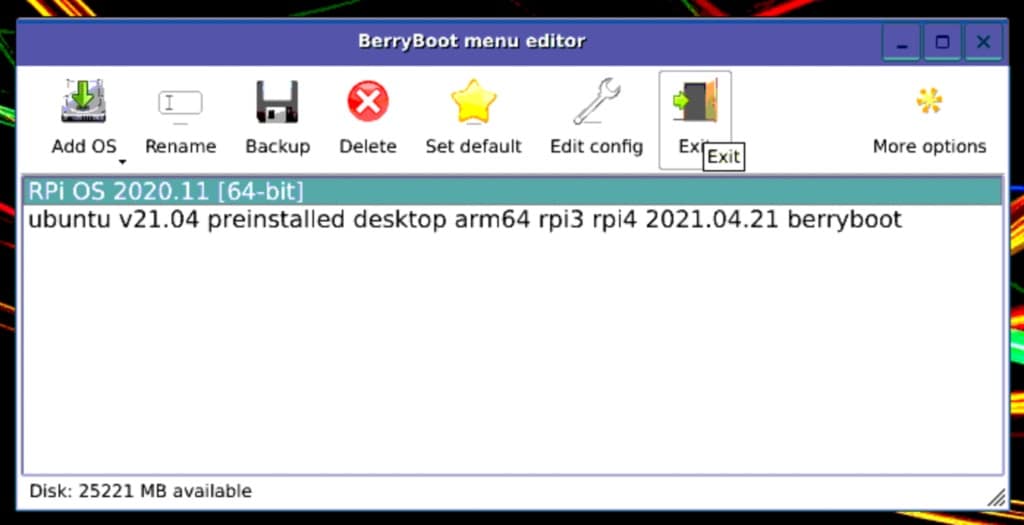
- Once the installation is complete, you should see the OS listed in the menu editor window.
How to use dual boot with BerryBoot
One of the main goals of using BerryBoot is to have multiple systems installed on the same Raspberry Pi, that you can run alternatively, one at a time.
Installing multiple systems
To install a second operating system with BerryBoot, just follow the same steps as previously. You can either pick one from the BerryBoot UI list or download another image.
Follow the same steps, and install as many systems as you need.
Using multi boot
Once the Raspberry Pi is set up to run multiple operating systems, we can boot into any of these easily and work on both simultaneously without any issues.
To boot into an OS, just restart the Pi through the BerryBoot UI by pressing the Exit button:
Once the system restarts, you should see the BerryBoot menu window:
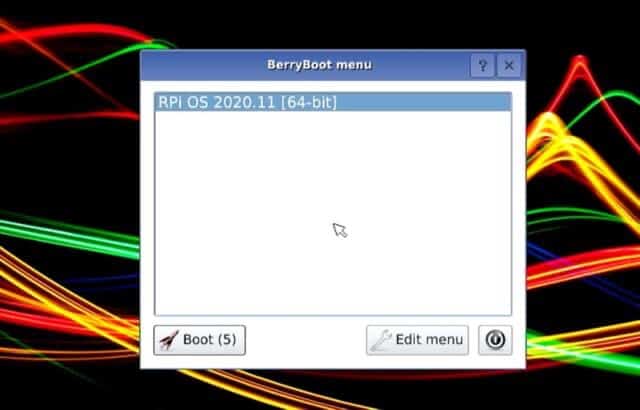
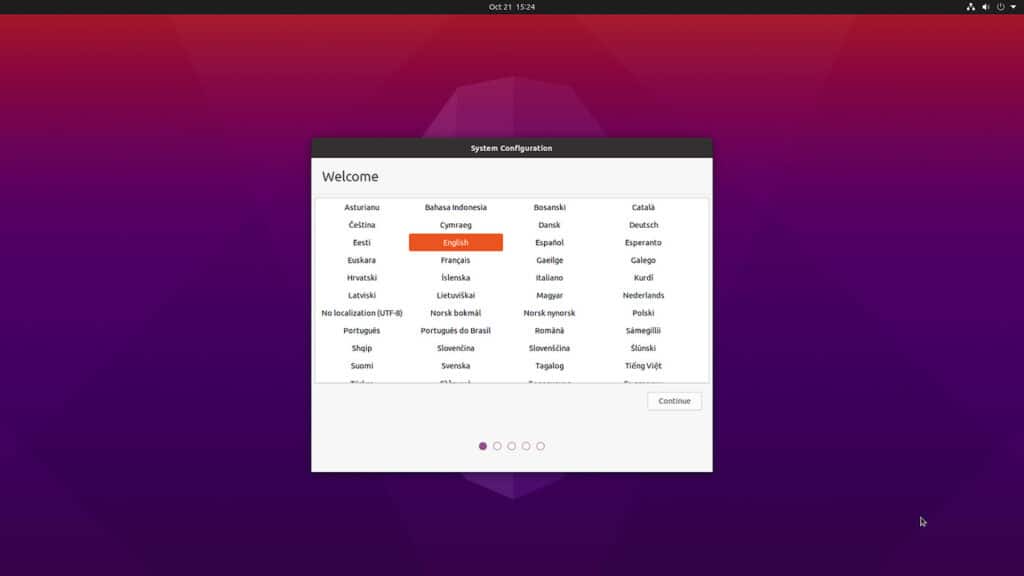
Just select the OS you want to boot into and press the Boot button. This will start the selected Operating system on your Pi. For instance, I booted into Ubuntu for this tutorial.
That is all for this section and this tutorial. The above tutorial demonstrates just how powerful is BerryBoot. In the next section, we will cover some popular questions I came across when it comes to BerryBoot.
It's a free PDF guide containing every Raspberry Pi Linux command you should know!
Download now
Related Questions
What if I want a system that is not available on BerryServer?
Although there are a lot of OS options on the BerryBoot community website, there may be a case when the OS image you want is not available on the website.
You can’t use the open-source image directly with BerryBoot. It uses a compressed image format, which is a bit complex to achieve personally. This means there are not really other sources for those kinds of images.
The community website has an option to take in requests for adding popular OS images like Bookworm (the latest version of Raspberry Pi OS) through the Request Custom Berryboot Images button.
All you have to do is fill out a simple Google form and if there are enough requests, the developers maintaining the website will add that image.
How to enable headless access with BerryBoot?
Some additional configurations are required to use headless access when using BerryBoot.
We need to modify a file cmdline.txt (commands written in this file run on the first boot) and add a new file wpa_supplicant.conf which will provide the required Wi-Fi credentials to the Pi to connect to the network.
Follow this article given on the official BerryBoot website to get instructions on how to modify these files. Just one change: instead of the big vncinstall command shown on the website, just add “vncinstall” in the cmdline.txt file and save it.
That is all that is required for the headless setup. You will now be able to connect to your Raspberry Pi through VNC and access the BerryBoot user interface.
All you need to do is plug the SD card into the Pi, figure out the Raspberry Pi’s IP address to VNC into it, and access the user interface.
However, be aware that enabling the VNC option will disable BerryBoot UI access through HDMI output and you can only use this to install the operating systems.
The installed OS will not have SSH and VNC setup so you will need a monitor for the initial setup.
Note that if you are using a monitor setup, you will have to configure a Network connection if you would like to install operating systems over the internet. If you have added the wpa_supplicant.conf file, this is not required.
How to choose the default OS to boot into?
BerryBoot allows you to select which should be the default operating system to boot into through its configuration menu. It’s as easy as toggling an option.
Once you set it up, BerryBoot will always boot into this system unless another system is selected from the BerryBoot menu window.
It's a free PDF guide containing every Raspberry Pi Linux command you should know!
Download now
Reminder: Remember that all the members of my community get access to this website without ads, exclusive courses and much more. You can become part of this community for as little as $5 per month & get all the benefits immediately.
Conclusion
That’s it for this article. You now know how to install and run multiple operating systems on your Raspberry Pi using BerryBoot. This article gives an overview of the capabilities of BerryBoot and highlights its key features. There are 2 primary advantages of using it over its alternatives:
- You can install and boot into different OS images from an external storage device like an SSD or USB stick.
- Thanks to the BerryServer website, all the latest images are available for BerryBoot.
On top of this, it offers numerous configuration options for different systems, which is also a big plus.
If you are interested in testing other distributions than Raspberry Pi OS, check this post about the best operating systems for your Raspberry Pi.
Whenever you’re ready, here are other ways I can help you:
The RaspberryTips Community: If you want to hang out with me and other Raspberry Pi fans, you can join the community. I share exclusive tutorials and behind-the-scenes content there. Premium members can also visit the website without ads.
Master your Raspberry Pi in 30 days: If you are looking for the best tips to become an expert on Raspberry Pi, this book is for you. Learn useful Linux skills and practice multiple projects with step-by-step guides.
The Raspberry Pi Bootcamp: Understand everything about the Raspberry Pi, stop searching for help all the time, and finally enjoy completing your projects.
Master Python on Raspberry Pi: Create, understand, and improve any Python script for your Raspberry Pi. Learn the essentials step-by-step without losing time understanding useless concepts.
You can also find all my recommendations for tools and hardware on this page.