
Set Up a LAMP Web Server On A Raspberry Pi In 2024
Setting up a web server can be useful for various projects. Unfortunately, it isn’t really straightforward, especially if you need PHP and a MySQL database. I’m also a web developer and have built many web projects, so I’m used to it. But I understand it may be overwhelming for some of you.
Let’s see how to set up a web server the right way.
Here are the required steps to set up a web server on a Raspberry Pi:
- Install Linux, Raspberry Pi OS is recommended.
- Install Apache, to answer HTTP requests.
- Install PHP, and configure Apache to allow dynamic content.
- Install MariaDB (MySQL), the most popular database server.
We’ll now learn how to complete each step in detail. I’ll also show you how to install and configure them to work together. And I’ll end this tutorial with some extra tips.
By the way, if you are really interested in improving your skills on Raspberry Pi, I highly recommend to check out my e-book here. It’s a 30-days challenge from beginner to master, with step-by-step tutorials and many projects to practice along the way.
Web Server Components: An Introduction
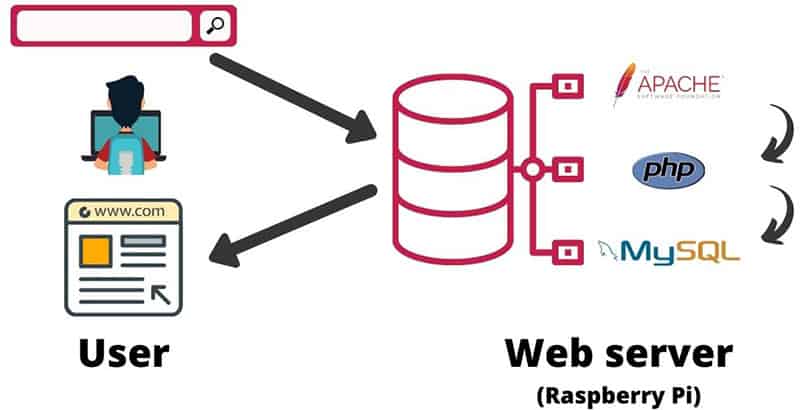
Before going deeper into the installation steps, I want to be sure that everyone understands what we are doing and how a web server works.
Note: If you want to see all these steps in action, I have a video lesson available for the community members. You can join here and watch it directly if you are interested (with 10+ other lessons for Raspberry Pi and many other benefits).
Apache
The main goal for the Apache service is to answer requests on HTTP and HTTPS ports of your Raspberry Pi.
HTTP and HTTPS are the main protocols on the Internet for web surfing.
It works because Apache is here to respond to your browser requests on ports 80 and 443.
When Apache receives a request on your Raspberry Pi IP address (ex: http://192.168.1.10), it has to display something, depending on your Apache configuration.
Typically, it’s an HTML page for your website or the app you’re using on the Raspberry Pi.
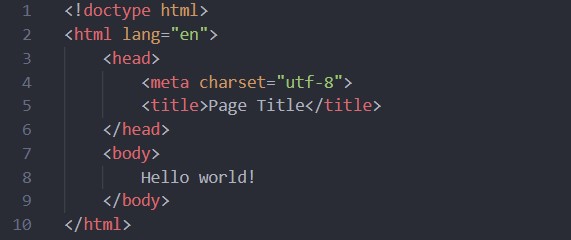
HTML is a language served by Apache and readable by your web browser to display web pages.
PHP
PHP is here to bring dynamic content to your web pages.
HTML is a static page language you can supercharge with PHP code to make your page look different depending on external conditions (visitor language, visitor history, time of the day, etc.).
Here’s what happens when a visitor sees your page:
It's a free PDF guide containing every Raspberry Pi Linux command you should know!
Download now
- PHP compiles the PHP code in your page (via an Apache module).
- PHP generates a specific HTML code.
- Apache always displays static HTML code, but this time PHP generates it before.
I’ll show you examples later in this post to better understand this part.

MySQL
MySQL is a database management system that allows you to host a database and store any data you need to keep on your site.
For example, on RaspberryTips, there is a database with all the posts, all the images links, all the comments, etc.
MySQL includes three parts:
- A server: to store data in files and answer requests.
- A client: to connect the server locally or remotely.
- A specific language (SQL): to grab the needed data precisely (from PHP for example).
PHP includes functions allowing you to do requests to the MySQL database, and display them on your website.
MySQL is my favorite database management system, but other options are available, as listed in this article: Which Database Is Best For Raspberry Pi? (My Top 5).

Join Our Community!
Connect, learn, and grow with other Raspberry Pi enthusiasts. Support RaspberryTips and enjoy an ad-free reading experience. Get exclusive monthly video tutorials and many other benefits.
Learn moreSet Up A Web Server On Raspberry Pi

At this point, you should understand what each component is (Apache, PHP and MySQL), and if you need them or not.
If you want to create a basic and static web server, then Apache will be enough.
Or if you want dynamic pages but you don’t need to save data on the server, Apache and PHP will be enough.
I’ll let you make your choice and skip the unnecessary parts in the following process.
Step 1: Install And Update Your Operating System
To get started, here are the required prerequisites:
- Install Raspberry Pi OS on your Raspberry Pi if not done already.
Click on the link to read my full tutorial about this if needed. Any version is fine. - Create the default user and connect your device to the Internet.
- Update your system to get the latest version of each package:
sudo apt update
sudo apt upgrade
Once done, you are ready to start with the installation of the first component of your web server: Apache.
Are you a bit lost in the Linux command line? Check this article first for the most important commands to remember and a free downloadable cheat sheet so you can have the commands at your fingertips.
Step 2: Install Apache
The next step is to install Apache on your Raspberry Pi.
To do this, we can use APT, with this command:sudo apt install apache2
Press “Y” to confirm the installation.
Once the installation completed, we’ll confirm that Apache is working:
- Find your Raspberry Pi IP address.
Click on the link if you don’t know how to do this. - Open your web browser and go to http://<RASPBERRY IP>.
For example, http://192.168.1.18. - Check that a page like this appears:
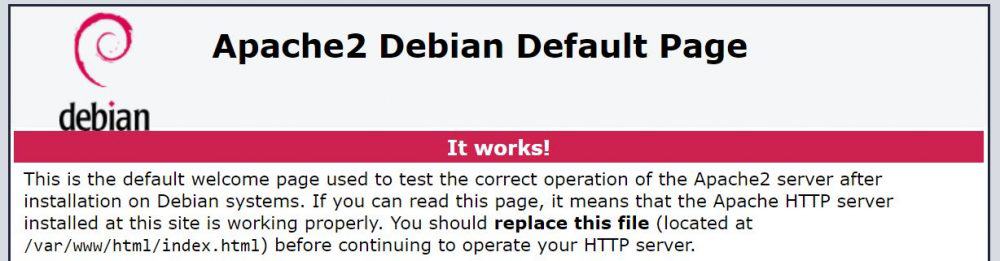
As you can see in this page content, web pages are located under /var/www/html on the Raspberry Pi.
You can edit index.html to change this page or add new pages in the same folder.
You need administrator privileges to do this, so make sure to use “sudo” as a prefix for all of your commands (more details here).
Another option is to remove this page and just upload the files you want to share in this folder.
For example, if you just need to share files on your network, remove the index.html and put your files directly in /var/www/html, Apache will automatically generate a web page with links to each one.
Step 3: Install PHP
The next step is to install PHP to add dynamic content capabilities to our web server.
It's a free PDF guide containing every Raspberry Pi Linux command you should know!
Download now
Installation
To install PHP, we need to add two packages:sudo apt install php libapache2-mod-php
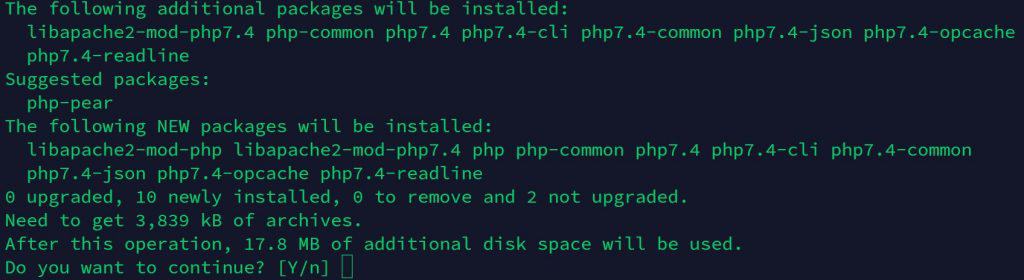
The first one adds the core packages for PHP and the possibility to run PHP scripts in a terminal.
The second one supercharges Apache with PHP capability, allowing us to put PHP code in our HTML pages.
First PHP page
Once PHP installed, we should check that everything is fine with our installation before going further.
Follow these steps to create a PHP file and test it in your browser:
- Go to the Apache web folder:
cd /var/www/html - Create a new PHP file:
sudo nano test.php - Copy this code into it:
<?php phpinfo(); ?>
This is a basic PHP function to display PHP configuration in the browser. - Save and Exit (CTRL+O, CTRL+X).
- Open this URL with your web browser: http://<RASPBERRY IP>/test.php.
- This should display something like this:

If you see this page, everything is OK, Apache and PHP servers are installed correctly, and you can use HTML and PHP code in your pages.
Move to the next section if you need to use MySQL too.
Step 4: Install MySQL
The last component is MySQL, and again we’ll install it with APT:sudo apt install mariadb-server php-mysql
The first package (mariadb-server) installs the main server for your MySQL databases.
The second package adds the possibility to use MySQL functions in your PHP code (like the link between Apache and PHP).
You need to restart Apache to add this functionality:sudo service apache2 restart
I have a complete tutorial about MariaDB only if you want to learn more about this. But I’ll give you the quick version here.
Create your first MySQL user
MySQL stores data. Authentication is required to be sure that only allowed people can access these data.
For a quick start, we’ll create a MySQL superuser to use in our PHP code later.
But you can create as many users as you want with different privileges:
- Log in to the MySQL console:
sudo mysql - Create your first database:
CREATE DATABASE test; - Create the first user:
CREATE USER 'webuser' IDENTIFIED BY 'password';
Try to use a strong password immediately, especially if you’ll forget to change it later. - Add all privileges to our test database to this user:
GRANT ALL PRIVILEGES ON test.* To 'webuser'@'localhost' IDENTIFIED BY 'password'; - Save the changes:
FLUSH PRIVILEGES; - Quit the MySQL console:
quit
Create a first table in the database
Now we have a test database and a test user. We’ll confirm that everything works fine by creating a first table in the database to use later in the PHP code.
If you’re new with these database words, imagine the database as an Excel spreadsheet and a table as a tab in this spreadsheet. We’ll store data in this table.
- Go back to the MySQL console, but with the “webuser” this time:
mysql -uwebuser -ppassword test - Create a basic table:
CREATE TABLE IF NOT EXISTS test ( line_id INT AUTO_INCREMENT, data VARCHAR(255) NOT NULL, PRIMARY KEY (line_id) );
Obviously, this is a basic useless table, if you want to use anything else you can.
Press ENTER after pasting the request. - Insert one line in this new table:
INSERT INTO test (data) VALUES ("This is a test string in my database");
We add a first line in your table, with the test sentence in the data field.
Yes, I’m very creative with this. - Exit:
quit
Now we’re ready to move to the PHP code.
We have all we need (database, table and user).
First PHP script to connect to MySQL
After all these preparation steps we can now check if PHP can speak with MySQL:
- Go to the Apache folder:
cd /var/www/html - Create a new PHP file:
sudo nano test-mysql.php - Paste these lines into it:
<?php
$link = mysqli_connect("127.0.0.1", "webuser", "password", "test");
if($link) {
    $query = mysqli_query($link, "SELECT * FROM test");
    while($array = mysqli_fetch_array($query)) {
       echo $array['data']."<br />";
} }
else {
    echo "MySQL error :".mysqli_error();
}
?>
You may need to edit the first line to fit your first user login and password.
I won’t do a PHP lesson here, but basically, this script tries to connect to your MySQL server and read the “test” table. If successful, it displays all the content of the “test” table in your web browser. - Save and Exit (CTRL+O, CTRL+W).
- Switch to your web browser and check the URL: http://<RASPBERRY IP>/test-mysql.php.
This should display the content of your database table.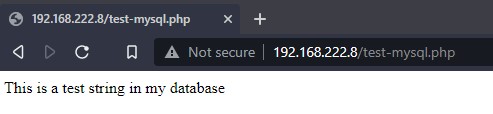
Here we are, you know how to install a basic web server and create a first page to connect to MySQL and display something from your database.
Feel free to adapt the database and the PHP code to fit your needs.
It's a free PDF guide containing every Raspberry Pi Linux command you should know!
Download now
Extra tips
I’ll give you two extra tips to improve your web server or to make it easier to manage.
PHPMyAdmin
Previously in this post, we made all the changes in the MySQL database manually, doing the SQL requests directly to create users, grant access or insert data.
But there is a popular tool to do this faster and intuitively: PHPMyAdmin.
It’s a free tool that provides a web interface to manage your MySQL server.
To install PHPMyAdmin, follow these steps:
- Install the package with apt:
sudo apt install phpmyadmin - During the installation process, select these options:
- Select Apache2 (press space and then enter).
- Configure the database for PHPMyAdmin with db-common: No
- After the installation, go to http://<RASPBERRY IP>/phpmyadmin.
- Log in with the user created previously.
- You’ll find your database in the left menu, with the table inside and the data on the right.
Something like this: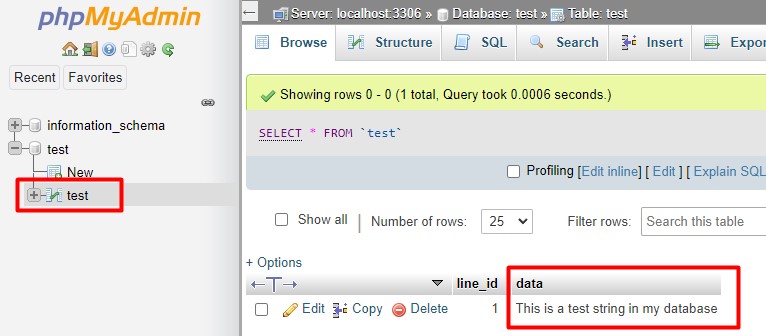
- You’ll also find an intuitive menu to do everything within your database.
Virtual Hosts
If you want to host several websites or apps in your Raspberry Pi, you have two choices:
- Use one folder for each app, like http://192.168.1.1/app1 and http://192.168.1.1/app2.
- Use virtual hosts to have an address like http://app1.domain.com and http://app2.domain.com.
For the first option, just create as many folders as you need in /var/www/html.
For the second one, you need to:
- Add subdomains in your DNS server or in your hosts file.
- Create virtual hosts in the Apache configuration, one for each subdomain.
You can make this configuration in the /etc/apache2/sites-enabled/ folder.
You’ll find all the help you need on this page for example.
It's a free PDF guide containing every Raspberry Pi Linux command you should know!
Download now
If you are looking for exclusive tutorials, I post a new course each month, available for premium members only. Join the community to get access to all of them right now!
Conclusion
I hope this article will help you to install a basic web server on your Raspberry Pi.
I think this is rather a beginner how-to guide, and I could write a lot more on this topic.
If you are interested, I’ll create other posts on Apache/PHP/MySQL to help you master these main services on Linux.
These other tutorials might be interesting to continue your project:
- How to Install and Use No-IP on Raspberry Pi? (Dynamic DNS)
- Install Webmin: Configure Your Raspberry Pi Without Commands
- 17 Security Tips To Protect Your Raspberry Pi Like A Pro
Also, if your website is kind of essential, like with real applications that need to be accessible at all time, and remote users, it’s probably a good idea to put something in place to monitor it. You can read my article on the topic here: The Definitive Guide To Monitor A Website On Raspberry Pi
Whenever you’re ready, here are other ways I can help you:
The RaspberryTips Community: If you want to hang out with me and other Raspberry Pi fans, you can join the community. I share exclusive tutorials and behind-the-scenes content there. Premium members can also visit the website without ads.
Master your Raspberry Pi in 30 days: If you are looking for the best tips to become an expert on Raspberry Pi, this book is for you. Learn useful Linux skills and practice multiple projects with step-by-step guides.
The Raspberry Pi Bootcamp: Understand everything about the Raspberry Pi, stop searching for help all the time, and finally enjoy completing your projects.
Master Python on Raspberry Pi: Create, understand, and improve any Python script for your Raspberry Pi. Learn the essentials step-by-step without losing time understanding useless concepts.
You can also find all my recommendations for tools and hardware on this page.


This post was clear and precise every steps of the way. I was able to set things up nicely on my pi and i am now working on putting together my site. Thank you, this was very helpful!
Hi,
Thanks for your support!
Dear:
When installing php-mysql this message appear: unable to locate php-mysql.
Do you know what can i do?
Thank you very much!
Hi Herman,
Seems to work on my side
Try to use “apt search php-mysql” to see if there is a small change in the package name
I know on Debian it’s php5-mysql or php7-mysql, but on Raspbian it seems to be simply php-mysql
Let me know
hey there . I have an important Question if you could give me an answer on how to execute it .
I am implementing a project based on Atrial Fibrillation using rasspi .
Our code in rasspi generates a excel(Csv) file when a user puts on a ppg (heart) sensor. Now the question remains that how could we upload the excel sheet on myphp admin . I just want that csv file to be uploaded to the database in the same way as it generates the file automatically .
Can you help me out please.
Hello,
Yes, you can import it
Create a table with the same columns
Then go to PHPMyAdmn, in the “Import” tab
You just need to have the same fields in your table and your Excel file
Maybe it’s easier if you save your Excel file in CSV before importing
Hello Patrick
I have been trying my hand at Linux for a few years now and am almost self taught. I still consider myself a beginner as there is so much to learn in the “Linux/RPi” world (and so little time!). I recently got myself a RPi4 after having decided finally to wane away from the ‘windows’ universe and have been using it more instead of the Win10 Laptop I have. While this article is a great guide for a web server for dynamic content, please correct me if I dare to say that the setup for static site would be different?? Is there a similar article you have done for setting up a web server for only static sites?? ( say if one uses static site generators like Zola or Hugo to generate webpages and publishes them on the internet using a web server setup on RPi). If yes please could you suggest the URL and if no then would you please consider writing an article on the same lines such as this. Take Care and Thank you.
Hi,
I don’t have much experience with static sites (for me, I would probably install Apache only and do it directly in HTML).
I think Nginx is also a good option for static sites. I never tried Zola and Hugo, so I can’t tell you.
It seems there is a snap available, maybe you can start there: https://snapcraft.io/install/zola/raspbian