Webmin + Ubuntu Server: The Ultimate Installation Guide
Even though I am well versed with Linux terminal commands, sometimes I want to manage my server graphically. It gives me an objective view of my file system, partitions, and overall system configuration more intuitively. Today, I will show you how to install Webmin – a web-based control panel for your Ubuntu server.
The easiest way to install Webmin on an Ubuntu server is to use the installation script provided on its official website. The script will automatically add the Webmin GPG key to the servers and download all the necessary metadata.
Webmin is a web-based system administration tool for Unix-like systems. In this guide, I’ll walk you through the step-by-step process of installing Webmin and how to use this great utility to monitor and manage your servers.
Webmin installation
At this point, I assume you already have the Ubuntu server installed and running. If not, please review my linked tutorial, which gives you a comprehensive guide on installing the Ubuntu server.
As stated in the introduction, the best way to install Webmin is to use the installation script, which does all the hard work for you. However, if you love doing everything manually, we will still look at the other option, where you must add the Webmin repository manually.
Tip: You will need to have access to your server to install Webmin. In my case, I am already connected to the server via SSH. Another option is to directly access your server’s terminal through a physical console or a virtual console provided by your hosting provider.
Option 1: Install Webmin using the Installation script
This is one of the simplest ways to install and get Webmin up and running on your Ubuntu server. We will use the automatic setup-repos.sh script to configure repositories.
Follow the steps below:
- Download the installation script. Execute the following command:
curl -o setup-repos.sh https://raw.githubusercontent.com/webmin/webmin/master/setup-repos.sh
It will download the installation script (setup-repos.sh) in your working directory. You can use the ls command to view the file.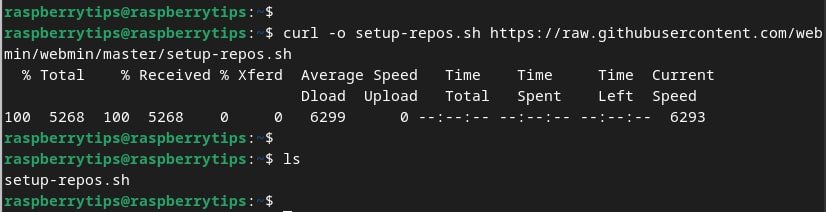
- Run the script. First, you need to make the script executable. Use the chmod command as shown below:
chmod +x setup-repos.shNext, run the script as the root user:sudo sh setup-repos.sh
You will see a single prompt, “Setup repository,” type “Y,” and hit ‘Enter” to continue. The script will download the Webmin key and add it to your server. Once done, it will continue to download Webmin metadata.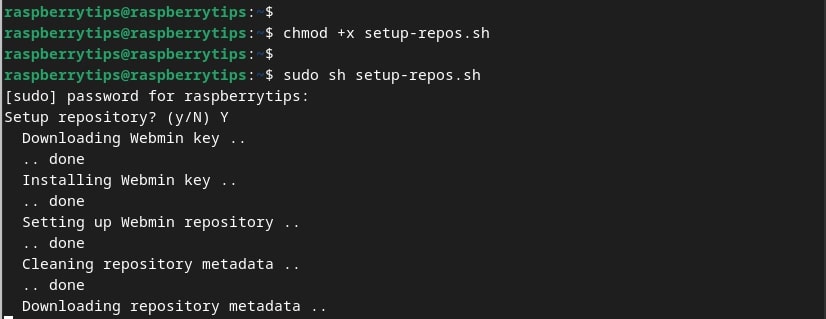
- Install Webmin. After successfully running the installation script, use the command below to install Webmin on your Ubuntu server:
sudo apt install webmin --install-recommends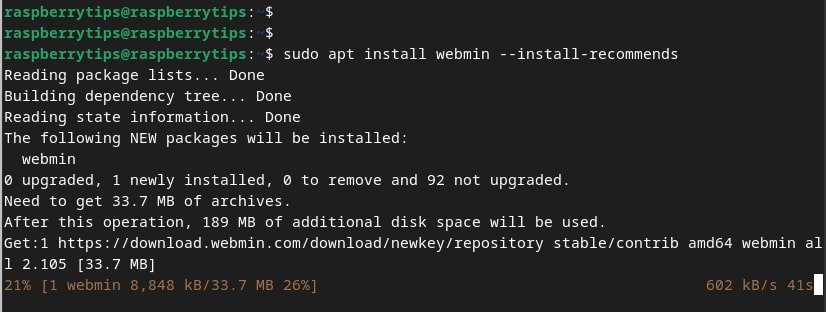
If you’re new to the Linux command line, this article will give you the most important Linux commands to know, plus a free downloadable cheat sheet to keep handy.
Download your exclusive free PDF containing the most useful Linux commands to elevate your skills!
Download now
Option 2: Install Webmin from the repository
Even though this method might seem complicated, I like it because I get to know what exactly I am adding to my system. Also, it is easier to manage Webmin updates since it involves adding the Webmin repository to the sources.list file.
Follow the steps below. You only need to copy and paste the commands as they are on your terminal.
- Open the etc/apt/sources.list file. Use the command below:
sudo nano /etc/apt/sources.list - Add the Webmin repository. Paste the line below at the end of the sources.list file:
deb https://download.webmin.com/download/repository sarge contrib
I know you are surprised that we are using Sarge. Yes, it’s a pretty old Debian release (released in 2005). However, the repository is updated regularly and is safe to use. Your sources.list should now include the line shown in the image below: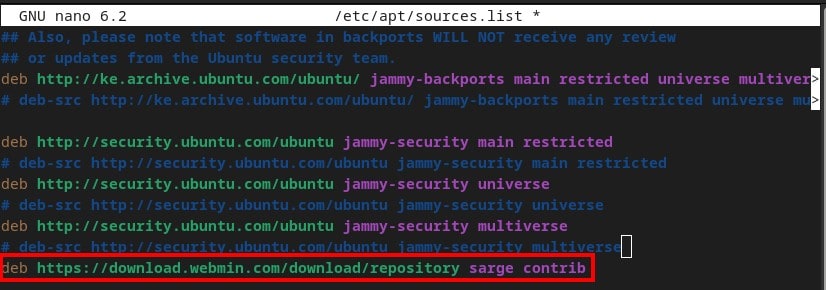
- Install Webmin GPG key. A GPG key (GNU Privacy Guard key) is a cryptographic key used for verifying the authenticity and integrity of software packages and repositories.
Execute the commands below:wget http://www.webmin.com/jcameron-key.asc
sudo apt-key add jcameron-key.asc
- Install Webmin. To finalize everything, use the commands below to install Webmin. Please don’t skip the “update” command:
sudo apt update
sudo apt install webmin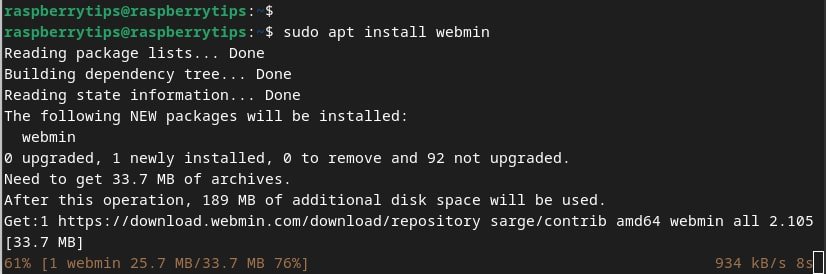
Download your exclusive free PDF containing the most useful Linux commands to elevate your skills!
Download now
Getting started with Webmin
Up to this point, I believe you have successfully installed Webmin. If you encountered any errors along the way or had an issue with running some of the commands, feel free to share your issue in the comments section or our community page.

Join Our Community!
Connect, learn, and grow with other Raspberry Pi enthusiasts. Support RaspberryTips and enjoy an ad-free reading experience. Get exclusive monthly video tutorials and many other benefits.
Learn moreLet’s dive in and see how to use Webmin.
First access
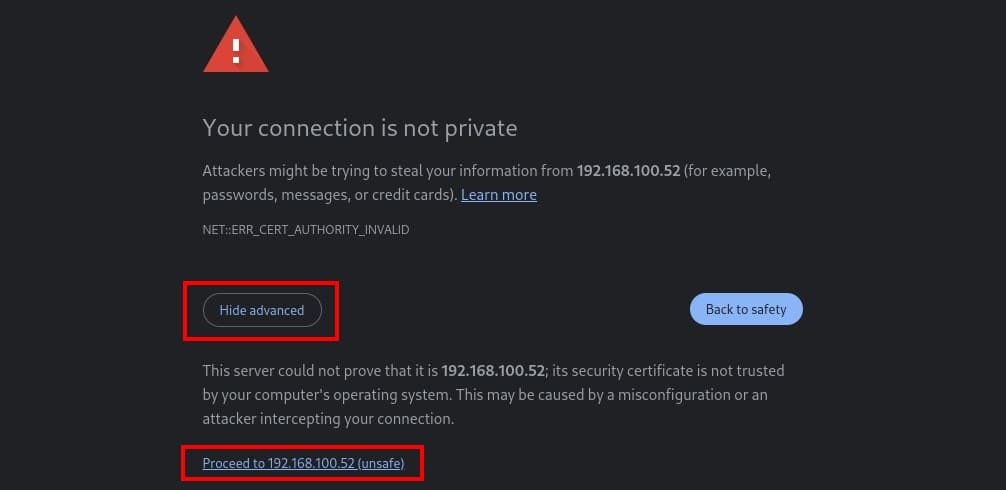
Webmin is a web-based application. You can access it on your browser using the URL:https://[server-ip]:10000For example, in my case, I access it using the URL:https://192.168.100.52:10000/
At first, you will get an SSL error because we have not yet configured any trusted SSL certificate to our Webmin. But that’s not a problem. Click the “Advanced” option and select “Proceed.”
You will be redirected to the Webmin login screen. Here, you will need to log in with your system credentials.

Interface overview
After logging in, you will see the Webmin dashboard, similar to the image below.
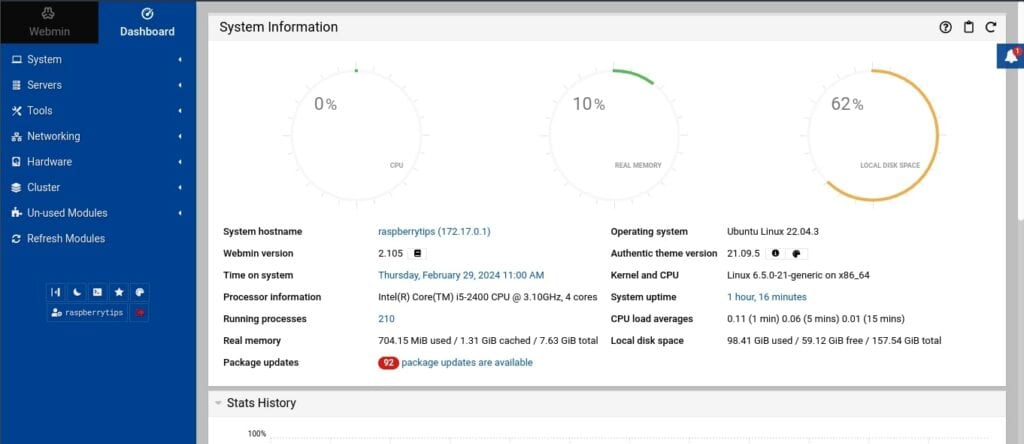
Let’s quickly overview this dashboard.
On the left, we have the main menu and sub-menus. Click on any menu item to view the submenus. For example, I have clicked the Hardware menu item in the image below. That enabled me to view the sub-menus under “Hardware,” such as “Partitions,” “Printer Administration,” and “System Time”.
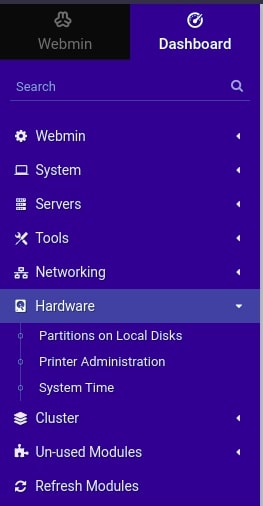
Under the Main menu, you will see a toolbar with several icons that serve different purposes. For example, enable a dark theme, terminal, an option to pin/unpin the main menu, etc.
Download your exclusive free PDF containing the most useful Linux commands to elevate your skills!
Download now

Examples
From the first glance at the Webmin dashboard, you will notice that there are so many tools that you can use. Let’s take a quick look at some of them.
Users and Group management
One prevalent task I work on, mainly as a system administrator, is managing users and groups.
Even though I can easily do that from the command line, it can be pretty hectic sometimes, scrolling through several lines of text on the terminal. Webmin offers an intuitive graphical utility that helps you manage all that.
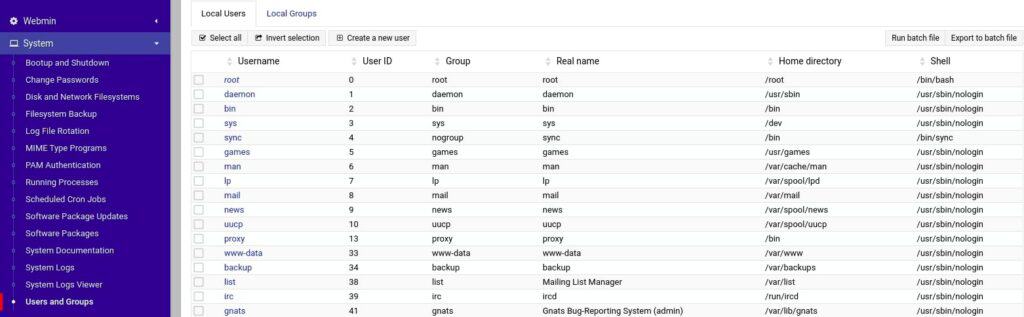
- Click the “System” menu item and select the “Users and Groups” sub-menu.
- You will see a list of all users on your server and other details like UserID, group, home directory, and shell.
- Click the “Create a new user” button at the top to add a new user.
- If you want to manage a specific user, click on their username.
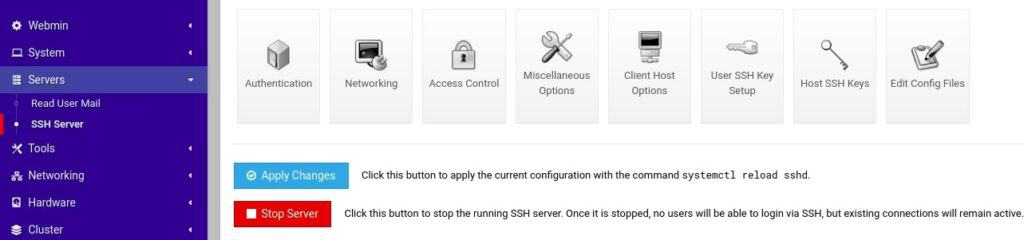
SSH server
Another essential utility you can use is the SSH server. This option enables you to manage your active SSH connection and also the ability to enable or disable the SSH service.
If you installed Webmin with the SSH service running, you can find the SSH server option in the “Servers” menu item. However, if the SSH service is not running or you don’t have OpenSSH installed on your server, you will find the SSH server option under the “Un-used Modules” in the main menu.
Accessing terminal
Another powerful utility you can utilize on Webmin is the web-based terminal emulator. It enables you to manage the server graphically and from the command line easily. As you know, some tasks are more manageable if carried out from the command line.
To launch the terminal, click the “third icon” on the toolbar under the main menu.

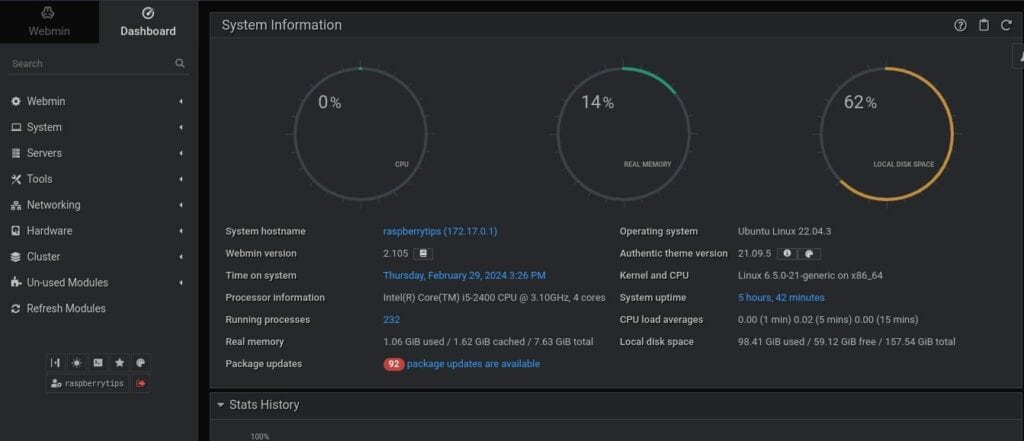
Dark theme
I am a big fan of dark themes. Be it on my desktop, code editor, terminal, or even my wallpapers, I always use a dark theme. If you’re like me, Webmin has got you covered. You can easily enable “dark them” by clicking the “moon” icon on the toolbar under the main menu.
It will give your Webmin a new look, as shown in the image below:
More tips for advanced use cases
Up to this point, you should have Webmin up and running and learnt how to navigate the dashboard. If you have loved the tool and plan on using it for long-term purposes, here are a few tips that may come in handy.
Adding a Valid Certificate with Let’s Encrypt
Webmin currently uses a self-signed certificate for HTTPS, which causes security issues with the browsers. That’s why you keep getting the “site not secure” error. Let’s switch it to a valid one from Let’s Encrypt.
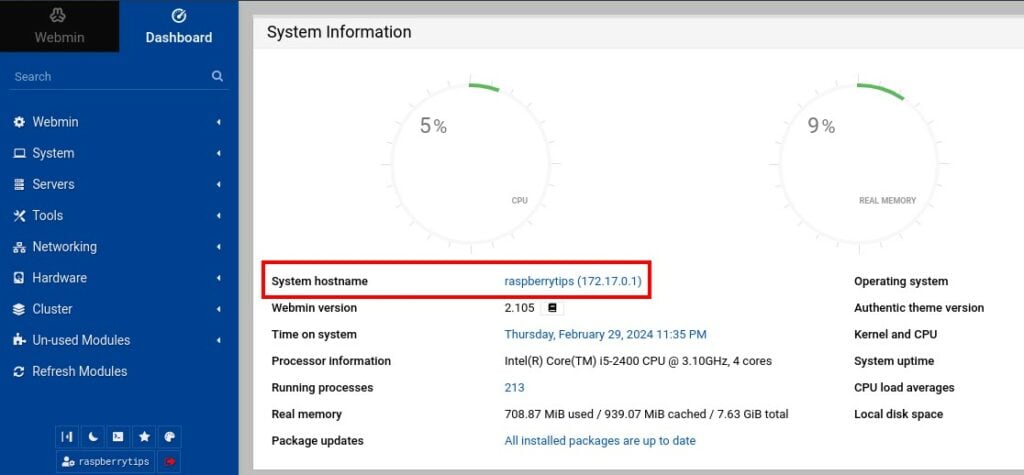
To start, set your server’s hostname by clicking on the System hostname field. You can find this field in the “System Information” screen, as shown below:
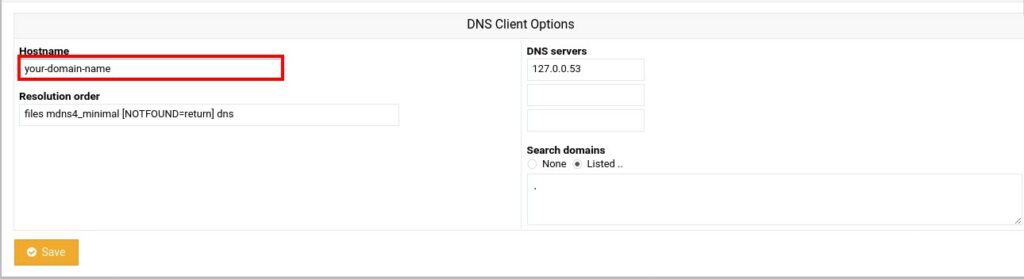
It will open the “Hostname and DNS client” page. Replace the current hostname with your Fully Qualified Domain Name (FDQN) in the hostname field. Once done, click the “Save” button at the bottom.
A Fully Qualified Domain Name (FDQN) is the complete address of a website or server on the internet. It includes specific details like the hostname, domain name, and top-level domain (like .com or .org).
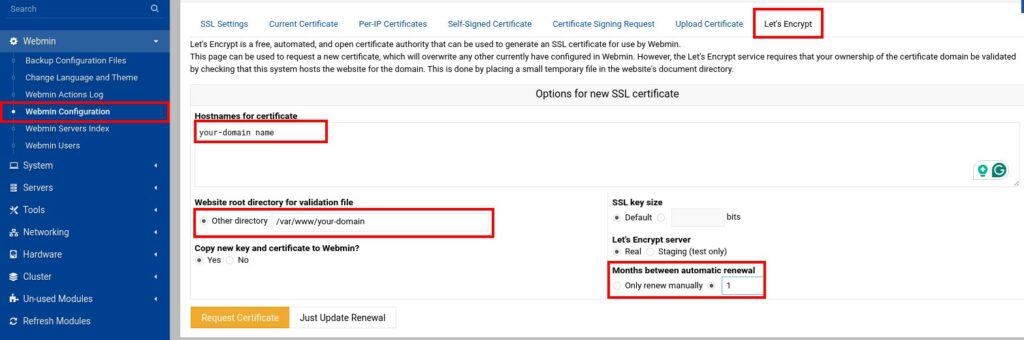
Next, head to “Webmin Configuration,” choose “SSL Encryption,” and click on “Let’s Encrypt”. Here, you’ll tell Webmin how to get and renew your certificate. Let’s Encrypt certificates last for 3 months, but you can set Webmin to renew it monthly.
Fill in your Fully-Qualified Domain Name for the certificate. For the validation file, choose your website’s document root (usually /var/www/your_domain). Set the renewal to automatic and hit “Request Certificate”.
Once confirmed, return to Webmin configuration, restart Webmin, and wait for about 30 seconds. Reload your browser and log in again, and you should see a valid certificate indication.
Going further
Webmin comes with comprehensive documentation, which is available on their official website. If you don’t know how to navigate your way through a particular module, don’t hesitate to go through the documentation, as everything is well laid out.
Download your exclusive free PDF containing the most useful Linux commands to elevate your skills!
Download now
Want to chat with other Raspberry Pi enthusiasts? Join the community, share your current projects and ask for help directly in the forums.
Additional Resources
Overwhelmed with Linux commands?
My e-book, “Master Linux Commands”, is your essential guide to mastering the terminal. Get practical tips, real-world examples, and a bonus cheat sheet to keep by your side.
Grab your copy now.
VIP Community
If you just want to hang out with me and other Linux fans, you can also join the community. I share exclusive tutorials and behind-the-scenes content there. Premium members can also visit the website without ads.
More details here.
Need help building something with Python?
Python is a great language to get started with programming on any Linux computer.
Learn the essentials, step-by-step, without losing time understanding useless concepts.
Get the e-book now.