Installing and Configuring Jellyfin on Ubuntu Server
If you want to configure your Ubuntu Server as a media server, Jellyfin is an ideal choice. It is an open-source media server that has been developed and is managed by community volunteers. Let’s discuss how you can install it.
Jellyfin can be installed by executing a single command, which runs a bash script to install and start the Jellyfin server. After that, the Jellyfin media server can be configured from the web interface.
This tutorial will discuss the installation process, setup instructions, and configuration tips for Jellyfin on the Ubuntu Server OS. Before starting with the tutorial, let’s learn more about Jellyfin and what’s required to install it on Ubuntu.
Jellyfin: Introduction and Prerequisites
What is Jellyfin?
Jellyfin is a powerful media server software that lets you set up your own streaming platform. You can watch all of your favorite shows and movies on different devices on your home network.
What sets Jellyfin apart is that there are no paid versions or subscription-based models, which makes it a great alternative to other options like Plex and Emby.
Let’s review the prerequisites required for this tutorial.
Download your exclusive free PDF containing the most useful Linux commands to elevate your skills!
Download now
Prerequisites for Running Jellyfin on Ubuntu
Jellyfin runs on most newer versions of the Ubuntu Server. I have personally tested it on Ubuntu Server’s latest version. Like always, I suggest you stick with the latest stable version of the operating system.
Here is a list of things you need to do before you can start this tutorial:

Join Our Community!
Connect, learn, and grow with other Raspberry Pi enthusiasts. Support RaspberryTips and enjoy an ad-free reading experience. Get exclusive monthly video tutorials and many other benefits.
Learn more- Ubuntu Server installed: You need a server running Ubuntu to follow this tutorial. Although the Jellyfin website does not provide a minimum required version, going with the latest version is always a safe bet.
- Enable SSH access: This is optional, but I generally find it easier to use SSH for installations like this. It allows you to do everything from your usual computer.
- Complete all system updates: Like any new installation, make sure your system is up-to-date before going any further:
sudo apt update && sudo apt upgrade
In short, your server should be running Ubuntu and should be up-to-date. You can get your system version with this command:lsb_release -a
So, now that we are clear about the requirements, let’s start with the tutorial.
If you’re new to the Linux command line, this article will give you the most important Linux commands to know, plus a free downloadable cheat sheet to keep handy.
Jellyfin Installation and Setup
Installing Jellyfin on Ubuntu
There’s one command to install Jellyfin on your Ubuntu Server system. Just follow the steps given below to complete this installation:
Step 1: Running the Jellyfin Installation Command
The official Jellyfin documentation states that they provide a bash script that handles the repo and Jellyfin installation automatically. So, let’s keep things simple and use this script!
Download your exclusive free PDF containing the most useful Linux commands to elevate your skills!
Download now
Here is a simple command to install this script on your system and execute it:curl https://repo.jellyfin.org/install-debuntu.sh | sudo bash
Executing this will prompt you to enter your password, so please do so.
Step 2: Confirming the System and Repository OS
Once you enter your password, the script will check your system’s OS version and prompt you to review and confirm the installation configs.
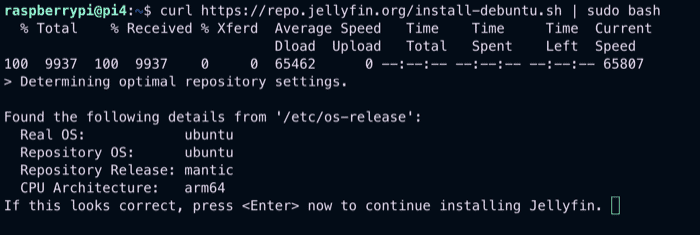
Everything looks as intended, so press Enter to continue the installation process.
Step 3: Completing the Installation Process
Now all you need to do is sit back and relax. The script will complete the entire installation process, which includes:
– Adding the external Jellyfin Repository.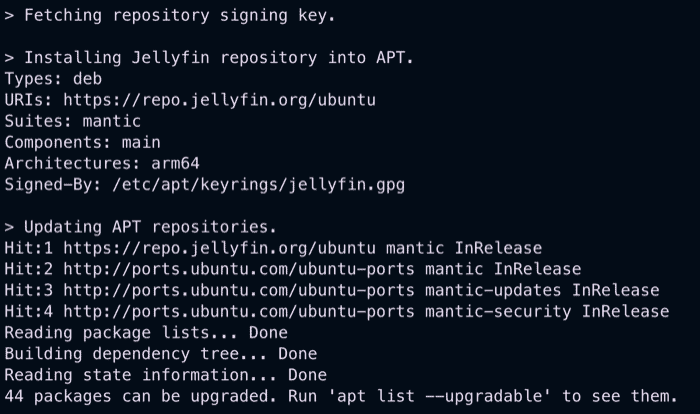
– Installing the Jellyfin package.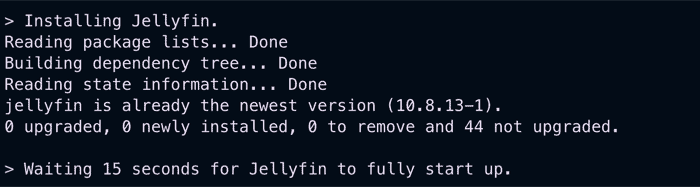
– Confirming the Jellyfin is running successfully on our system.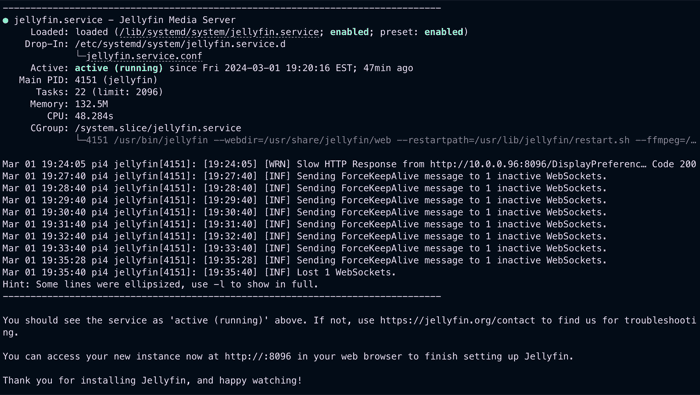
We have successfully installed and started Jellyfin on our Ubuntu Server system. Next, we will access the Jellyfin web interface to complete the initial setup.
Jellyfin Initial Configuration
To access the web interface, which is used to complete the initial setup, open the following URL in your browser:http://<Server's IP Address>:8096
Note that you will need to allow access for this port to either your system or globally if you are used to a cloud-hosted server with inbound traffic disabled.
Once the interface is open, follow these steps to complete the initial configuration:
- On the Jellyfin Welcome Page, you can press the Quick Start Guide button to get more information about the setup process.

- Now, we will go through the setup process together. Pressing the Next button will take you to the User Setup page. Here you will set up a new user profile, which fully controls the media server. It is equivalent to creating an admin user.
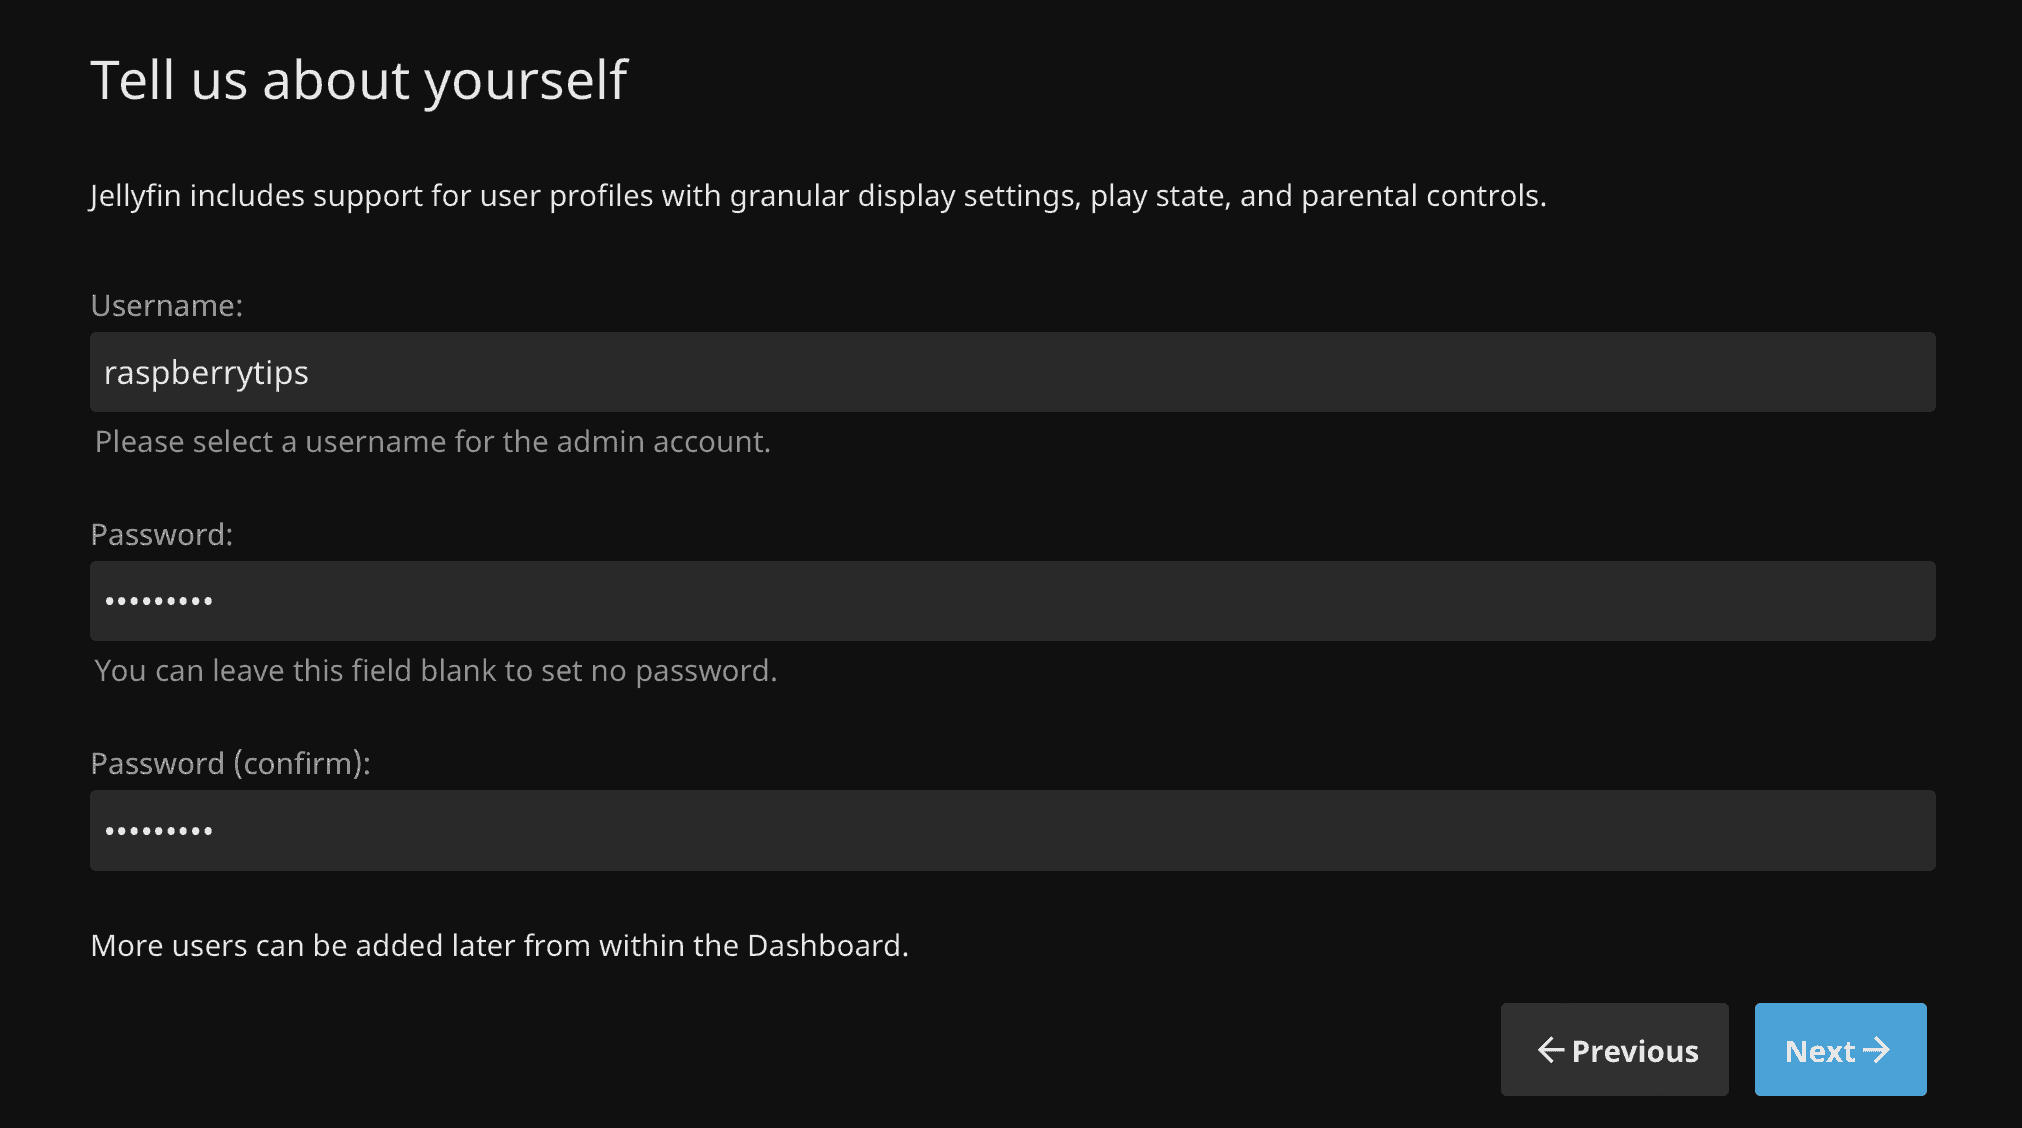
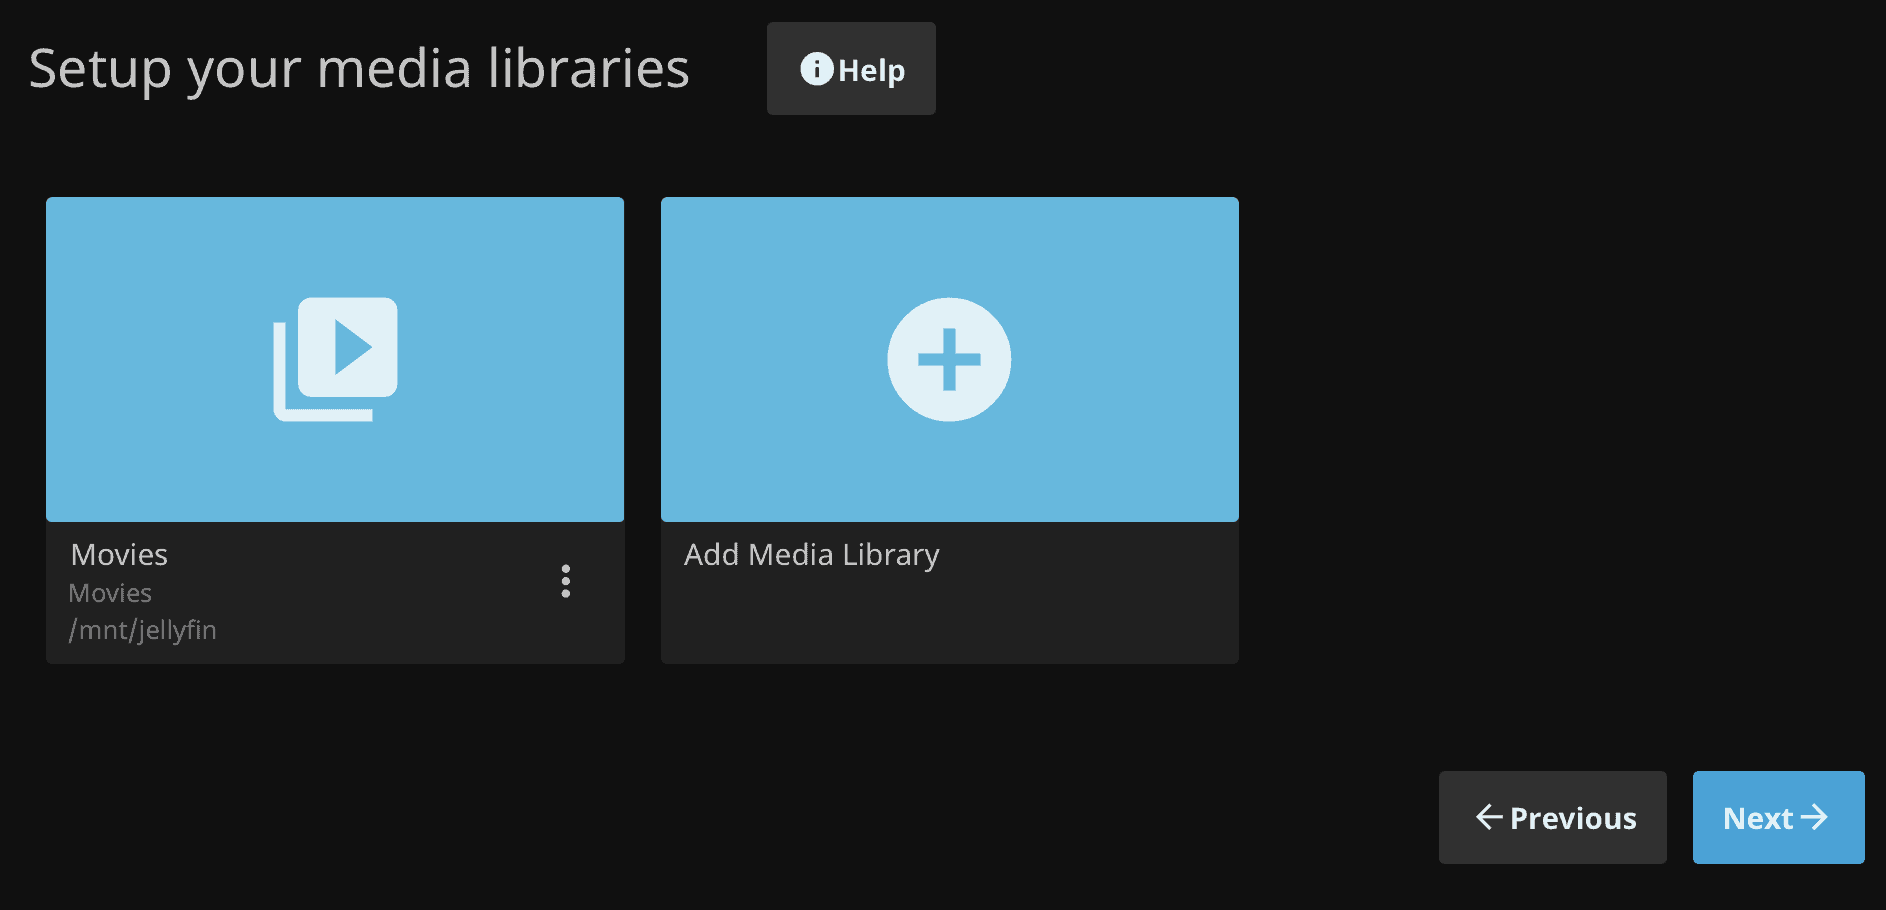
- I suggest setting up a basic password for added security. Once all required fields are filled, click Next. It will then prompt you to select a media library. This will be the primary directory where all your media will be stored.
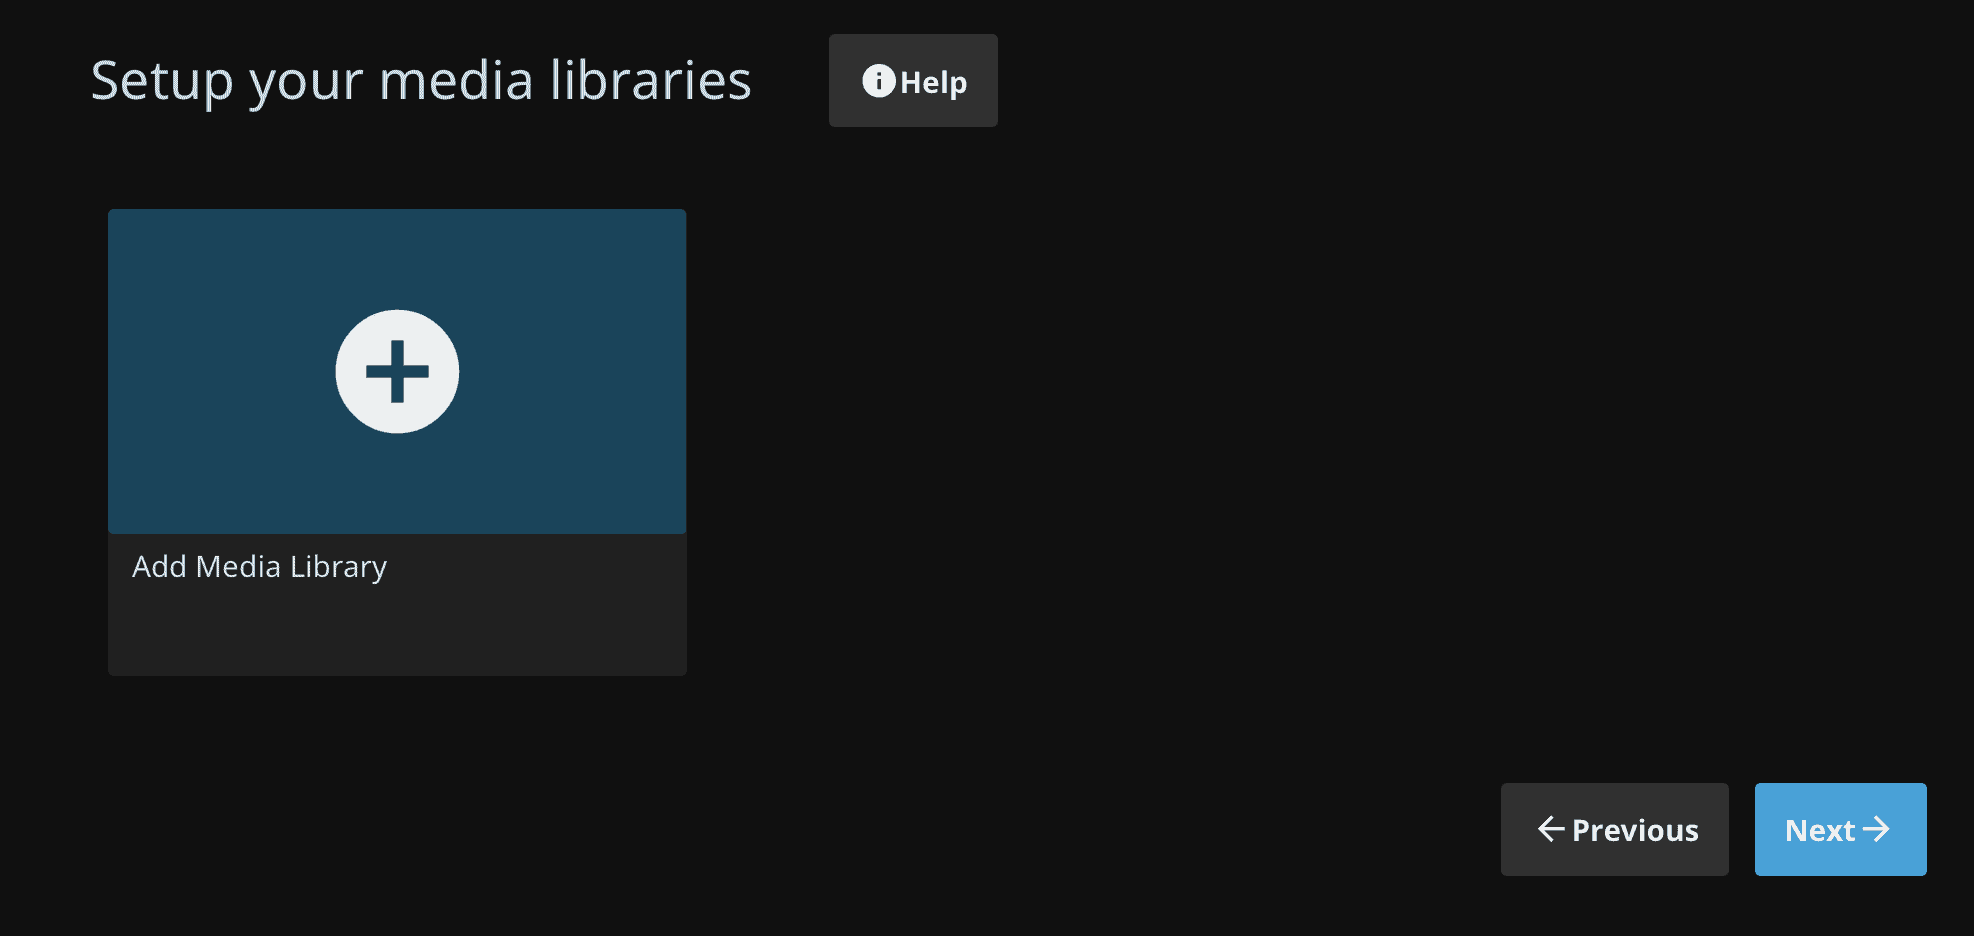
- You can add a location where you store all your movies or music. Press the Add Media Library button and select the desired Content type and Display name.

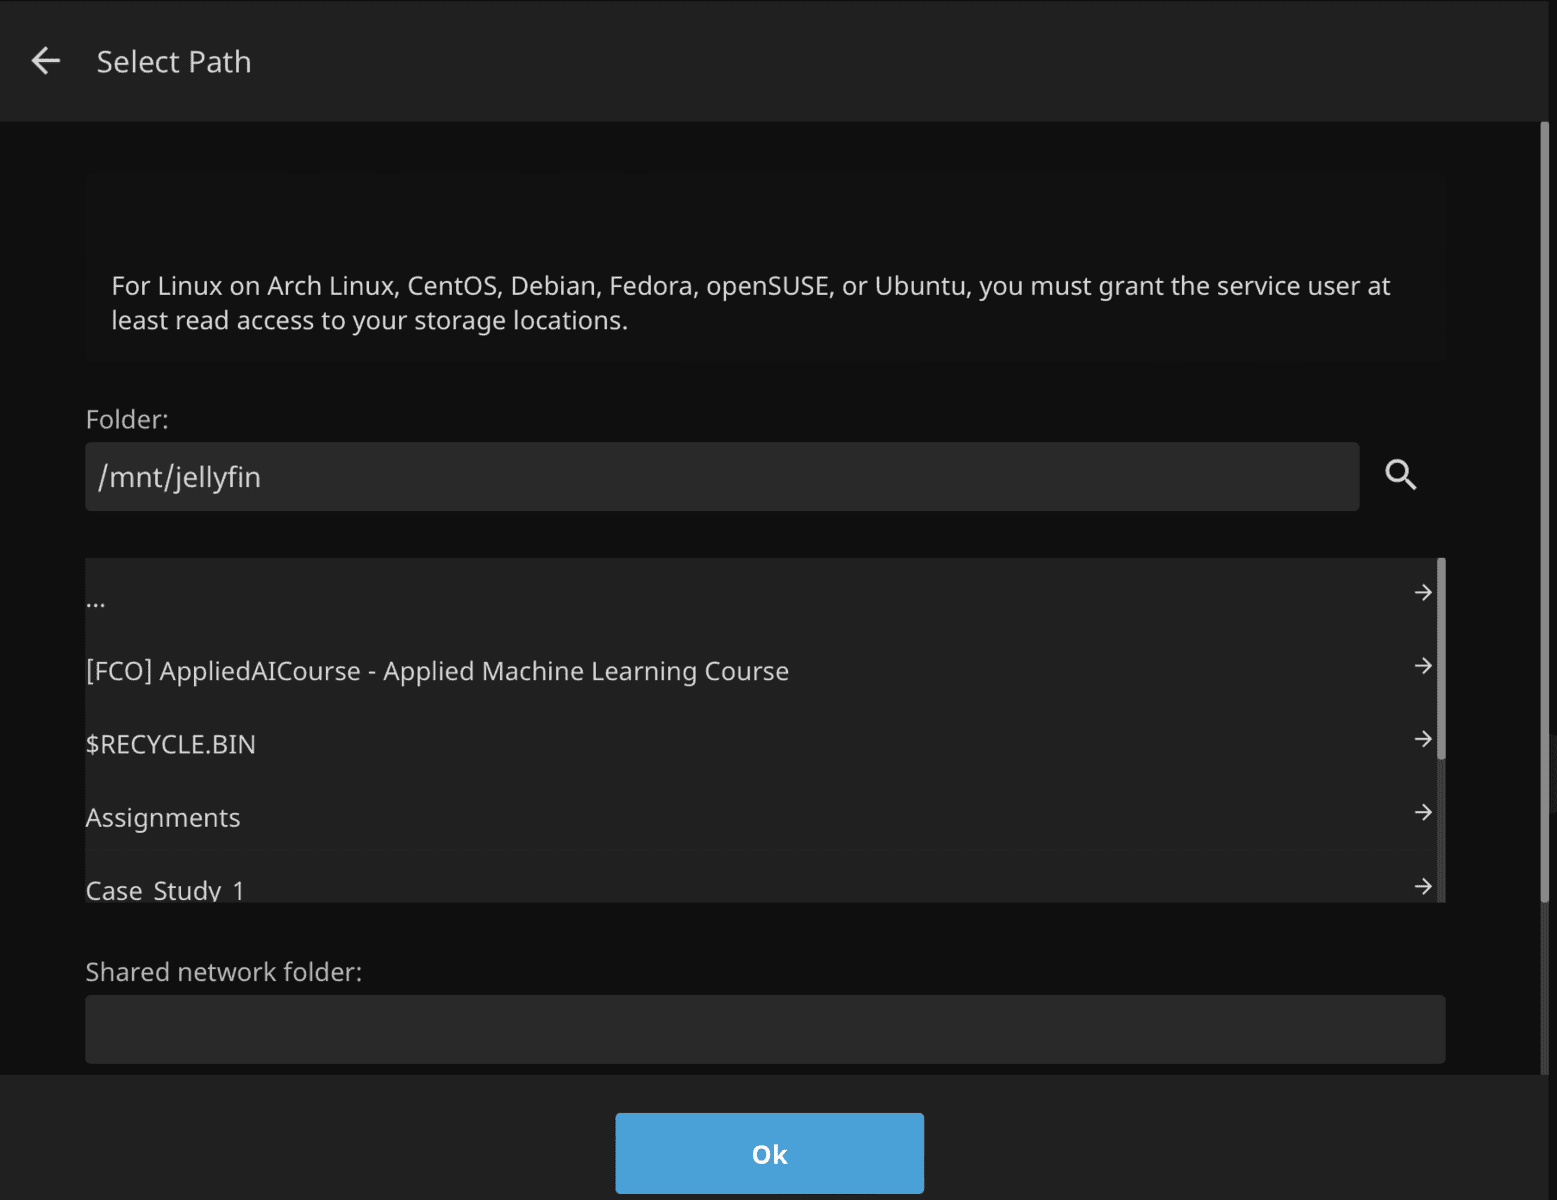
- Next, we will configure this library to point to our Jellyfin directory. For that, press the + button beside Folders, select the “/mnt/jellyfin” directory from the list of available directories and press OK.
- Keep the rest of the options for Add Media Library as default and press the OK button. Now, you should see your newly added Library in the libraries directory. Press the Next button to continue with the setup process.
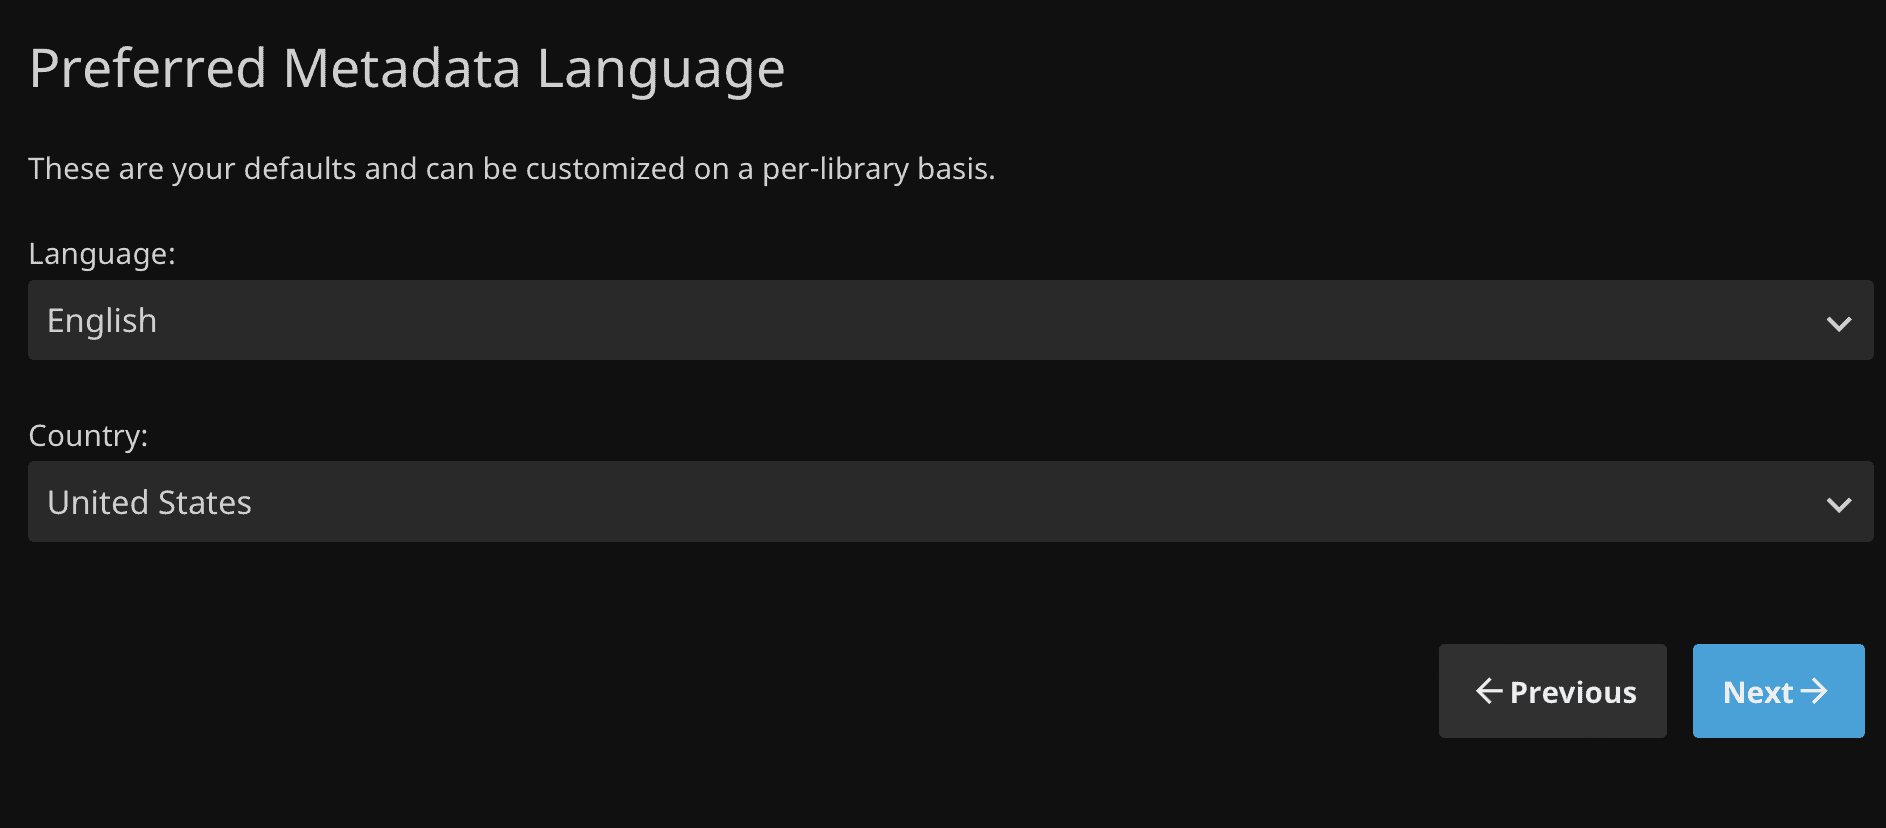
- Jellyfin maintains the metadata of all the media content in our local library from various online repositories, providing an enriched user experience. So, it asks us to set up the preferred language for displaying this metadata. Set it up and click Next.
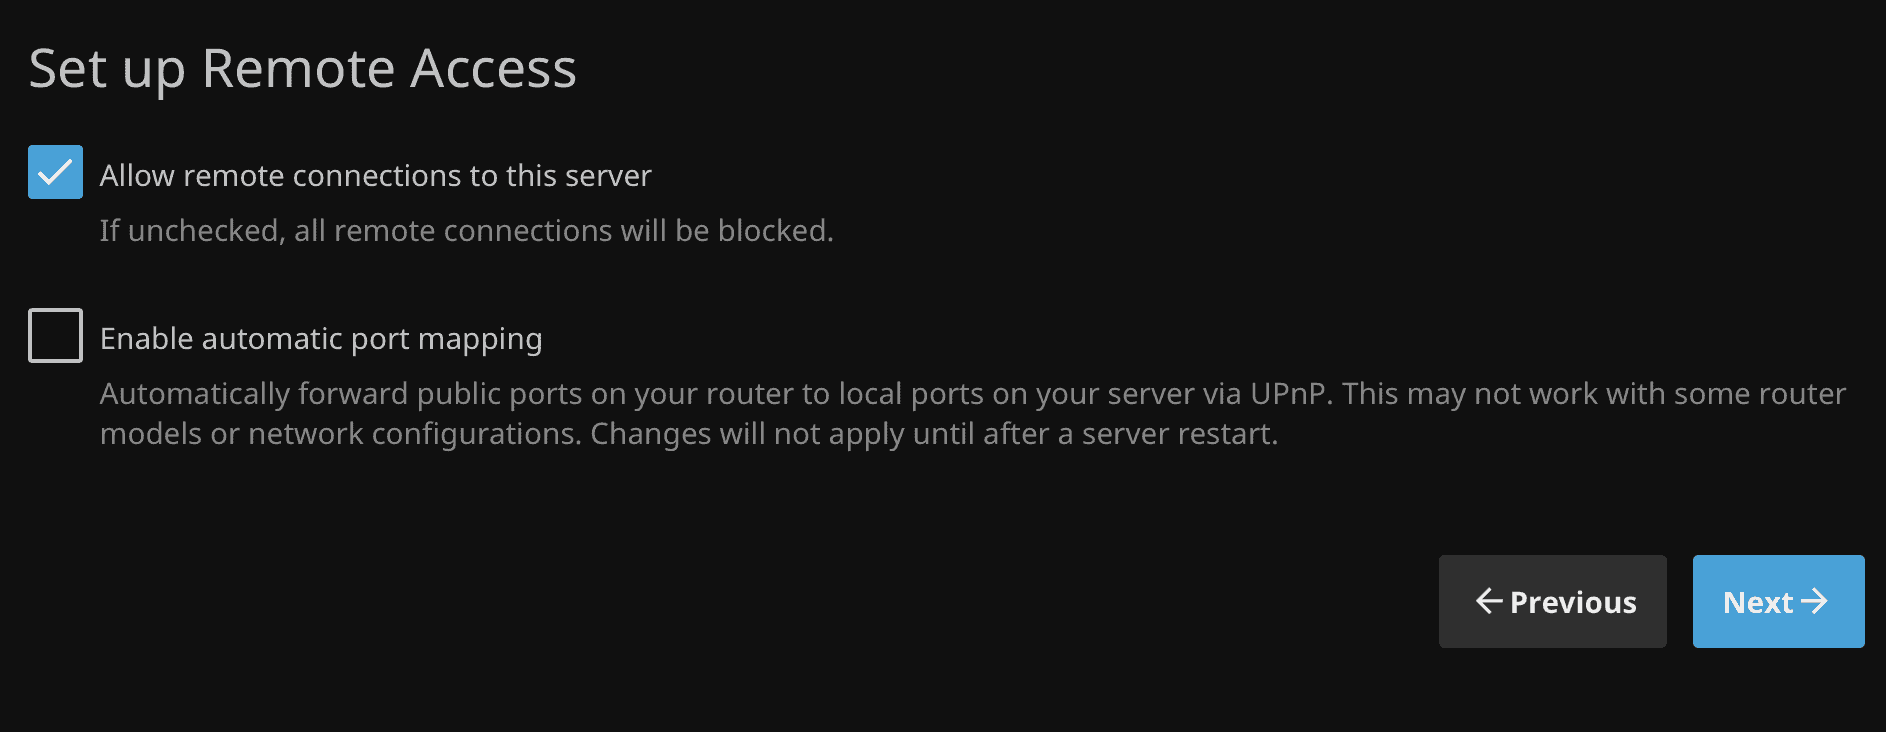
- Next, we will set up Remote Access (accessibility of the web interface from different devices on the same network). By default, remote connections are allowed (of course, as we are setting up Jellyfin remotely!). Keep the configurations as is and press Next.
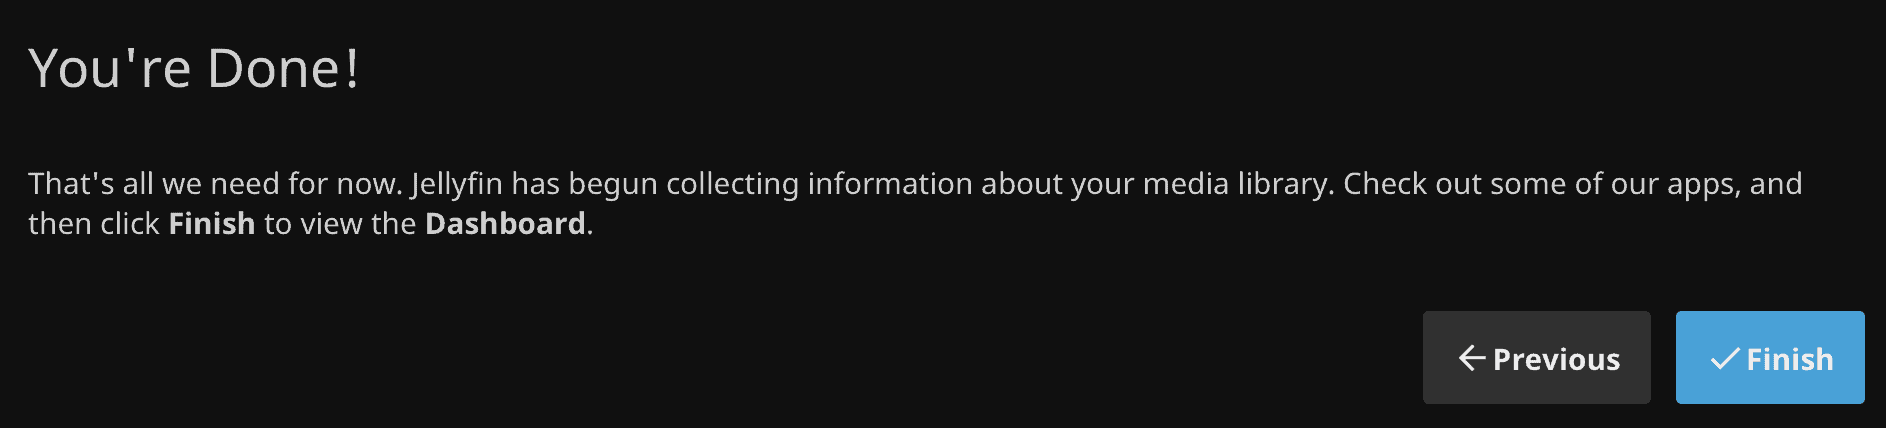
- This completes the initial setup! You are now ready to use Jellyfin to binge-watch your favorite media content.
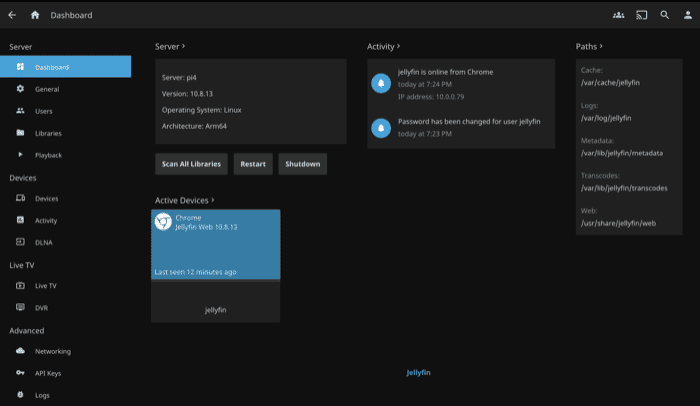
You should now be able to access the Jellyfin web interface through the same URL after signing in with the created user. 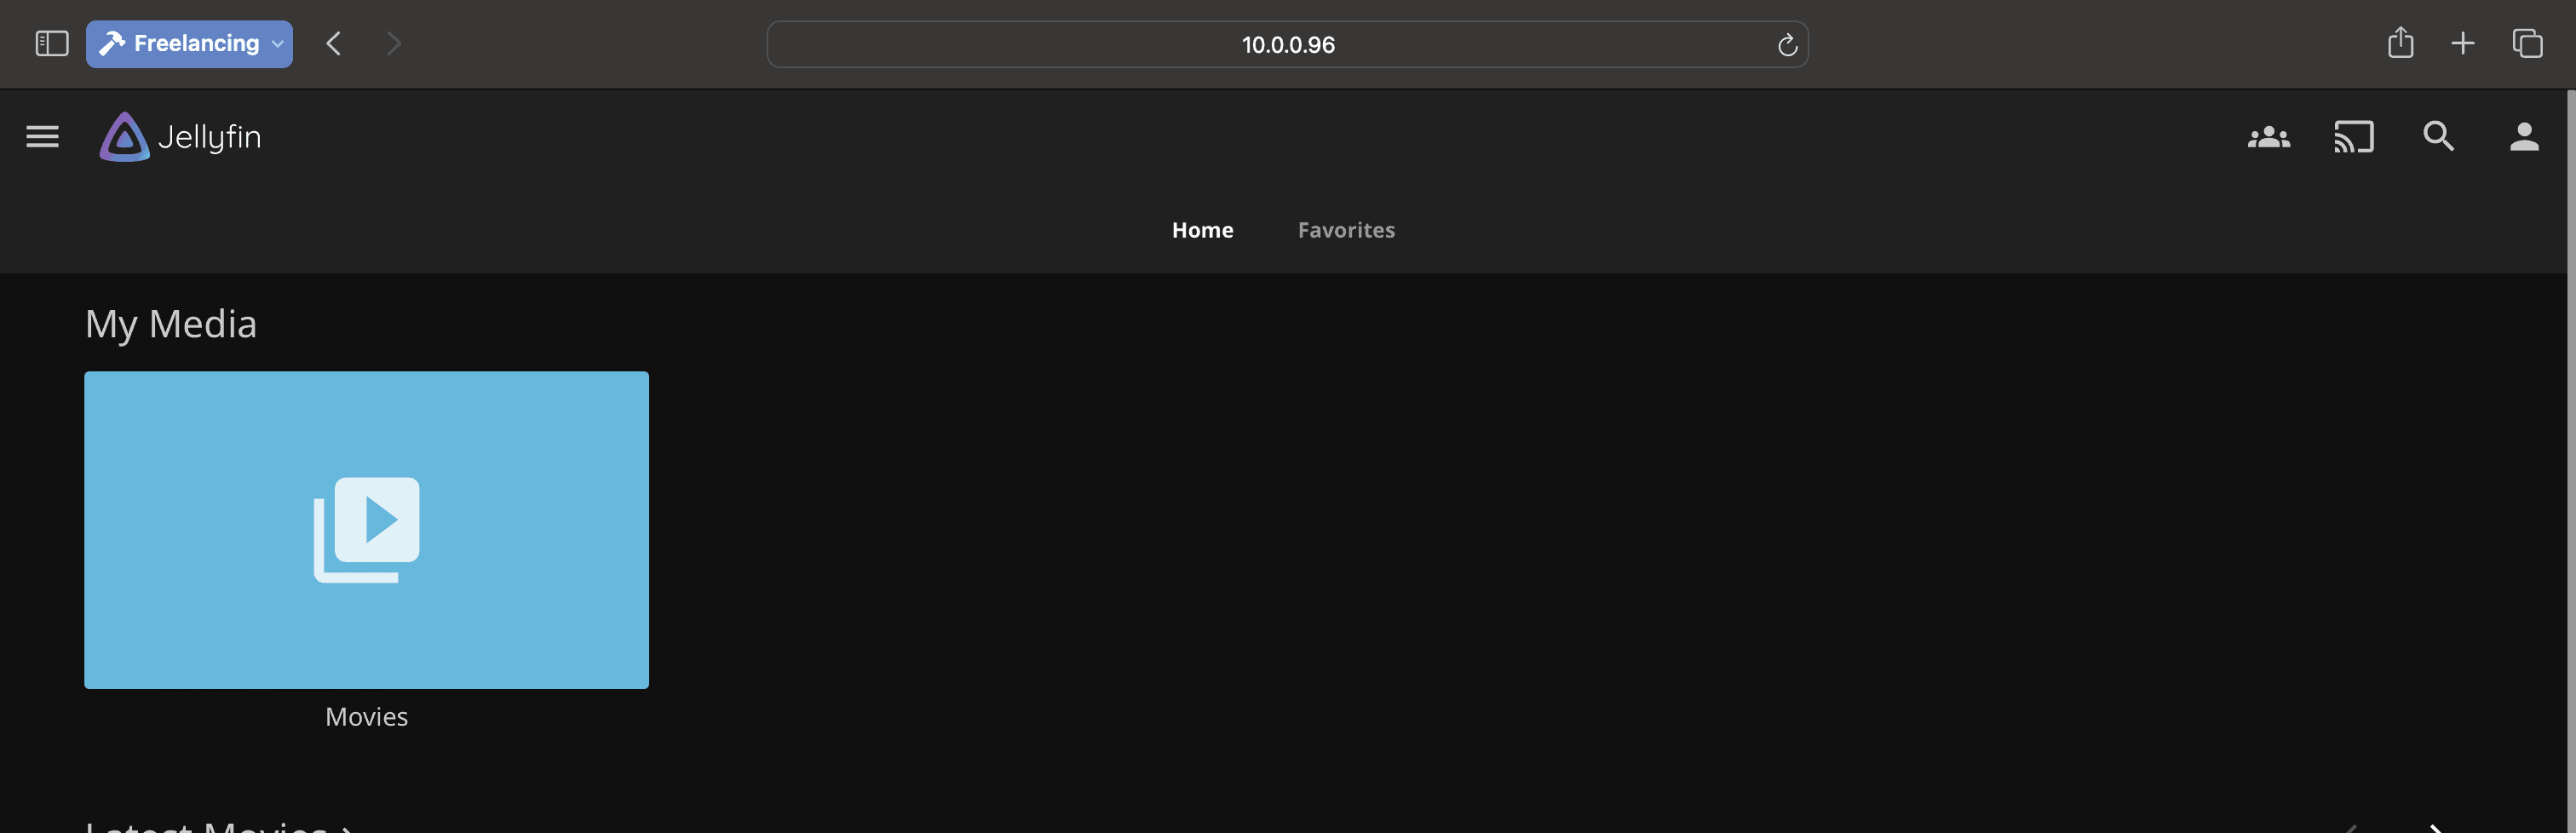
You have successfully installed Jellyfin on your Ubuntu-based system. This marks the end of this section. If you’re interested in other configuration options and common issues, refer to this article’s Advanced Configuration Options and Related Questions Section.
Download your exclusive free PDF containing the most useful Linux commands to elevate your skills!
Download now
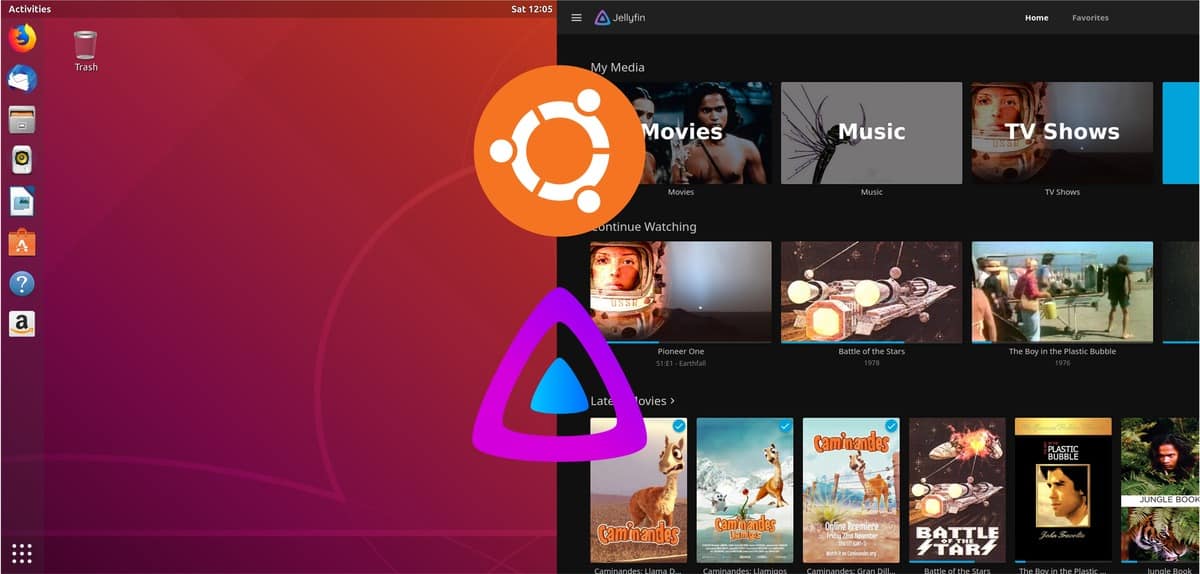
Conclusion
You now know how to install and configure Jellyfin on an Ubuntu-based system. This gives you access to a fully functional media server for your home. This is just the start. You can enable and configure various additional features on your server.
Apart from this, you can even explore and test other media servers like Plex and Emby. For instance, I suggest you look at this article: Installing & Configuring Plex on Ubuntu Server (Easy Guide).
You may also like:
- Master Linux Commands (eBook)
- The 5 fastest ways to find a file on Linux
- Snap vs APT: what’s the difference?
Download your exclusive free PDF containing the most useful Linux commands to elevate your skills!
Download now
If you are looking for exclusive tutorials, I post a new course each month, available for premium members only. Join the community to get access to all of them right now!
Additional Resources
Overwhelmed with Linux commands?
My e-book, “Master Linux Commands”, is your essential guide to mastering the terminal. Get practical tips, real-world examples, and a bonus cheat sheet to keep by your side.
Grab your copy now.
VIP Community
If you just want to hang out with me and other Linux fans, you can also join the community. I share exclusive tutorials and behind-the-scenes content there. Premium members can also visit the website without ads.
More details here.
Need help building something with Python?
Python is a great language to get started with programming on any Linux computer.
Learn the essentials, step-by-step, without losing time understanding useless concepts.
Get the e-book now.