Easy OctoPrint Setup on Raspberry Pi for 3D Printing
OctoPrint revolutionizes the 3D printing experience by eliminating the need for cumbersome file transfers using SD cards or USB connections. It is available for various platforms, and today we’ll install OctoPrint on a Raspberry Pi. Want to give it a try? Just follow this tutorial for the step-by-step instructions.
OctoPrint offers two installation methods. First, by installing the official OctoPi image configured to run OctoPrint out of the box, and second, by installing the OctoPrint snap package on an already installed Raspberry Pi OS.
Let’s get started and in a few minutes, you will have OctoPrint running on your Raspberry Pi, providing an easy way to manage your 3D printer.
If you’re looking to quickly progress on Raspberry Pi, you can check out my e-book here. It’s a 30-day challenge where you learn one new thing every day until you become a Raspberry Pi expert. The first third of the book teaches you the basics, but the following chapters include projects you can try on your own.
Prerequisites to run OctoPrint on Raspberry Pi
Here is what you will need to install OctoPrint on a Raspberry Pi.
- Raspberry Pi: Other than Raspberry Pi Zero and Zero W, which have shown severe performance issues with OctoPrint, you can run OctoPrint on any other Raspberry Pi model. However, I recommend a standard model like Raspberry Pi 3B+ or 4B, so you can plug in a webcam and record time-lapses without any lags.
- Storage: An 8GB SD card or USB drive will be enough to run OctoPrint unless you plan to queue many prints. I prefer more storage (16GB or 32GB) as I tend to make time lapses regularly. Here is my favorite SD card currently.
- Power adapter for the Pi: Most people overlook the power adapter option when carrying out projects. When dealing with 3D printing, you need to use the official Raspberry power supply as under-voltage might lead to performance issues.
- USB cable: This is the cable you will use to connect your Raspberry Pi to the 3D printer. You need to verify the type of connection port available on your 3D printer. It could be a USB Type-A, Type-B, Mini, or Micro. Remember, the Pi uses a USB type A.
It's a free PDF guide containing every Raspberry Pi Linux command you should know!
Download now
Install OctoPrint on the Raspberry Pi
As mentioned in the introduction, there are two ways that you can use to run OctoPrint on your Raspberry Pi.
- Use the OctoPi Image: OctoPi is a pre-configured operating system image based on the official Raspberry Pi OS, which includes OctoPrint. It is designed specifically for use with the Raspberry Pi, making it easier for users to set up OctoPrint on their 3D printers without needing extensive manual configuration.
- OctoPrint snap package: If you already have the official Raspberry Pi OS installed, you don’t have to remove it. Instead, you have an option to use the OctoPrint snap package.
Method 1: Install OctoPrint using the OctoPi Image
The OctoPi Image is equipped with all the necessary configurations, eliminating the need for users to manually set up OctoPrint on their Raspberry Pi. Some of the pre-configured settings include the web interface, which is a critical component for controlling and monitoring 3D printing tasks, and the webcam support.
Below is a step-by-step guide on how to install the OctoPi Image on the Raspberry Pi.
Get Raspberry Pi Imager
To get started, you need to flash the OctoPi Image onto the SD card you will use to boot your Raspberry Pi. There are various software options available for this task, but we highly recommend using the Raspberry Pi Imager utility.
You can learn more about this tool in this article and find instructions on how to install it on your system.
Flash the OctoPi Image
Next, you will need to download the OctoPi Image that you will use to flash the SD card. Here, you have two options.
It's a free PDF guide containing every Raspberry Pi Linux command you should know!
Download now
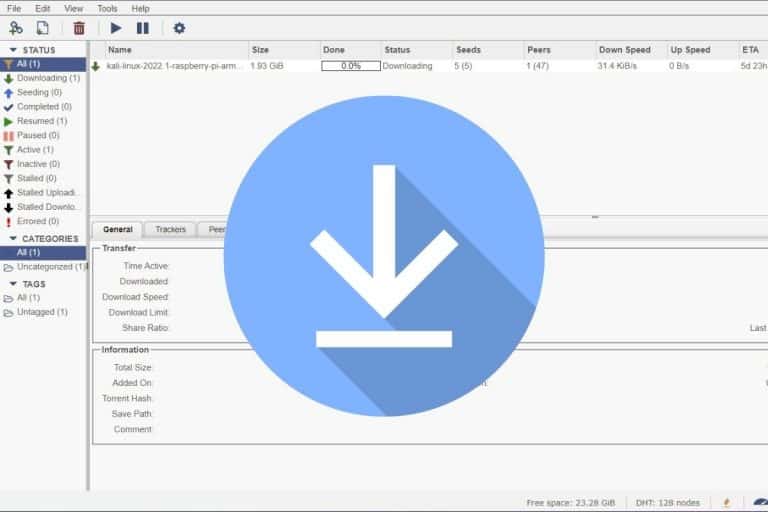
- You can download the OctoPi Image from their official website. It is approximately 1 GB in size. I highly recommend this method if you plan to store the image locally on your system, allowing you to use it whenever needed or if you encounter internet connection issues.
- Alternatively, you can download the OctoPi Image directly from Raspberry Pi Imager during the flashing process.
Now let’s look at the flashing process. It is pretty straightforward.
- Launch the Raspberry Pi Imager.
If you successfully installed the Raspberry Pi Imager tool, proceed to launch it from the applications menu on your PC. You should see a window similar to the image below with three huge buttons.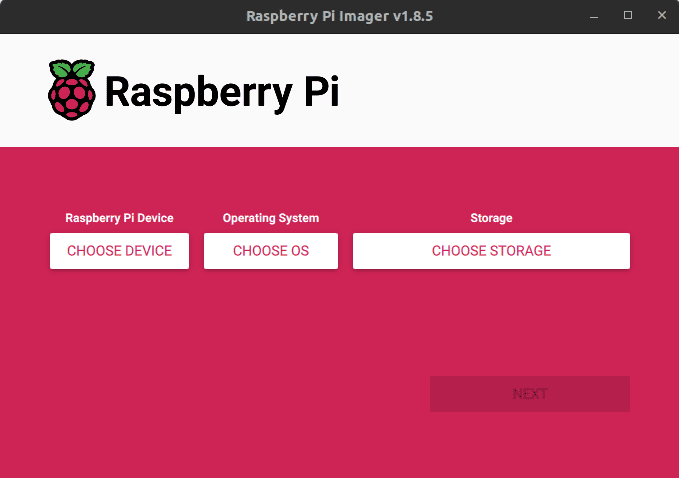
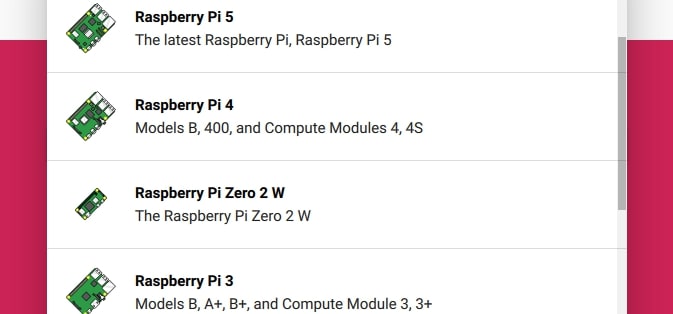
- Choose your Raspberry Pi model.
In the “CHOOSE DEVICE” option, select the Raspberry Pi model you are using for this project. In my case, I am using a Raspberry Pi 4B board.
- Select OS.
Next, select the Operating System you want to flash to the SD card. In this case the OctoPi Image.
If you downloaded OctoPi from their official website, click “CHOOSE OS” – scroll to the bottom and select “Use custom OS.” That will open the file manager on your system and you can select the OctoPi Image you downloaded.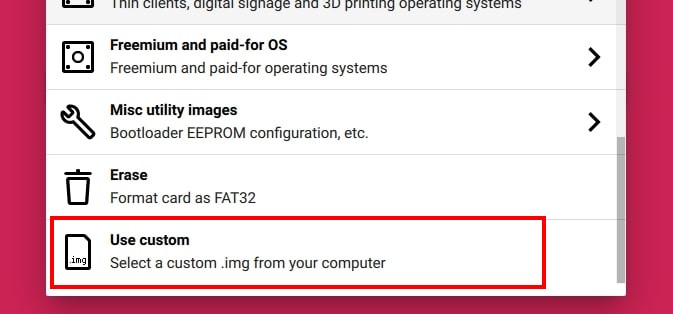
However, if you want to download OctoPi Image from the Raspberry Pi Imager, select “Other specific-purpose OS” -> “3D Printing” -> “OctoPi.”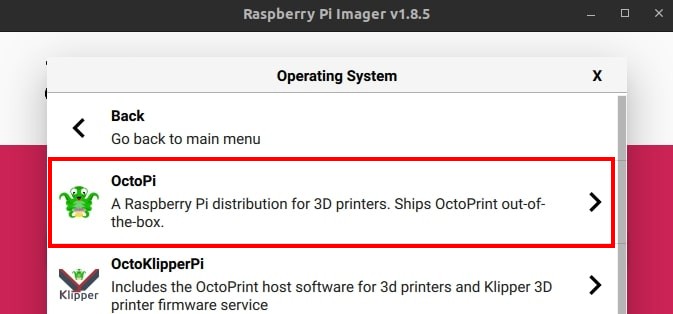
- Select storage.
Insert the SD card into your computer using an SD card adapter and click “CHOOSE STORAGE.” You will see a list of all connected storage devices. Select the target SD card. Please be very careful and select the right storage device as it will be wiped clean. - OS customisation.
Now unlike other flashing Software, the Raspberry Pi Imager enables you to perform some initial configuration to the OS such as configuring the wireless connection, enabling SSH, and setting the hostname.
You will see this option when you click “NEXT.” Select “Edit Settings.”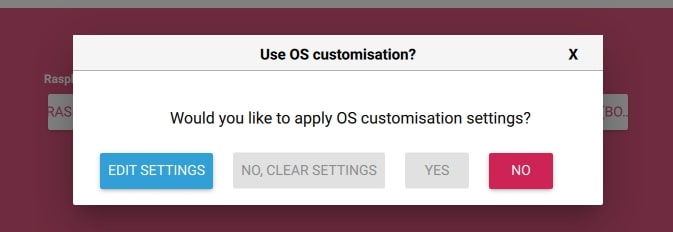
In the screen that appears, enter your network credentials (SSID and password), enable SSH and set the hostname that you can use to access the OS over SSH. Click “Save” when done.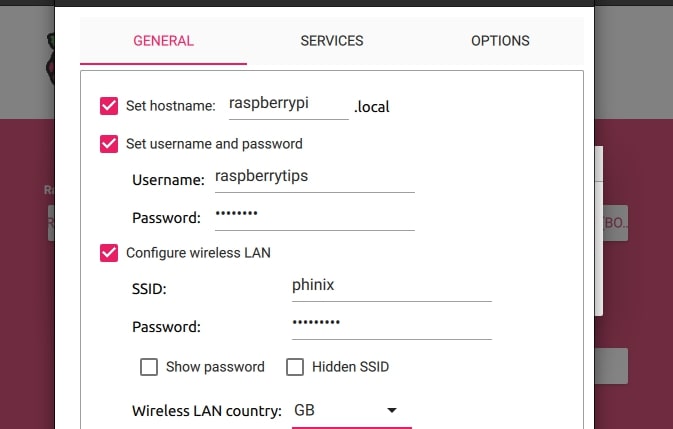
- Write OS.
After clicking “Save” you will see a prompt on whether you want to apply the OS customisation settings, click “Yes” to start writing the OS to the SD card.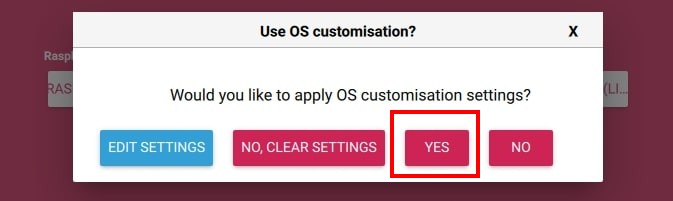
You will see a warning that all existing data on your SD card will be erased. Click “Yes” to start writing the OS to the SD card. This process might take several minutes and even more if you are downloading OctoPi using the Raspberry Pi Imager.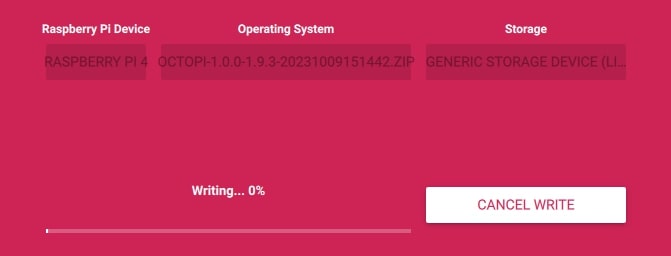
First start
You don’t need a display monitor for OctoPi as it doesn’t come with a graphical interface. All you get is a login Terminal prompt. OctoPi will automatically start a web server that you will use to access OctoPrint using another device on the same network.
After successfully flashing OctoPi into the SD card, eject your SD card from your PC and insert it into the Raspberry Pi.
If you are going the Ethernet route, connect your Raspberry Pi to the network with a network cable. Otherwise, it will automatically connect to the WiFi network with the information we provided during OS customisation.

Join Our Community!
Connect, learn, and grow with other Raspberry Pi enthusiasts. Support RaspberryTips and enjoy an ad-free reading experience. Get exclusive monthly video tutorials and many other benefits.
Learn moreFinally, with your 3D printer turned off, connect your Pi to the 3D printer with the right USB cable. Once done, turn on the 3D printer, connect the Pi to a power source and power it ON.
If you have connected the Raspberry Pi to a display monitor (optional), you will see lines running down your screen as the Raspberry Pi applies all the initial configurations we set during OS customisations. This process might take a while (around 3 minutes) and the Pi will reboot several times. Once done, you will see a login prompt.
It’s important to note that these configurations only take place the first time you boot a freshly installed OctoPi Image. Subsequent boots will be much faster.
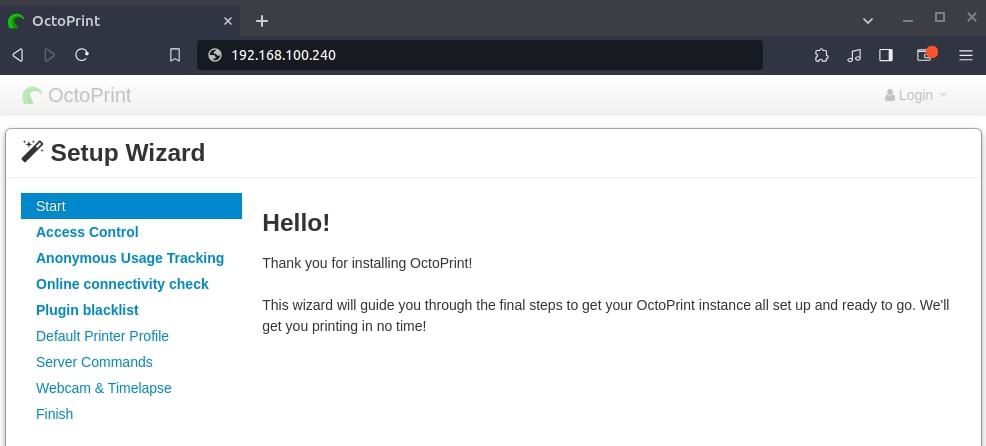
After a successful boot, launch a browser from any other device on the same network as the Raspberry Pi and use any of the URLs below to access the OctoPrint web interface.
- http://raspberrypi.local: Replace “raspberrypi” with the hostname you entered in the “OS customisations” window during the flashing process.
- http://[raspberry-ip]: For example, http://192.168.1.240.
Method 2: Install OctoPrint using the OctoPrint Snap package
I recommend this method if you already have the official Raspberry Pi OS installed on your system.
Snap is a distribution-independent package format that ships applications bundled together with all the dependencies required to run on different Linux distributions.
In my case, I am accessing the Raspberry Pi over SSH for this particular section. You can learn more about using SSH to remotely control your Raspberry Pi in this article.
Install Snap
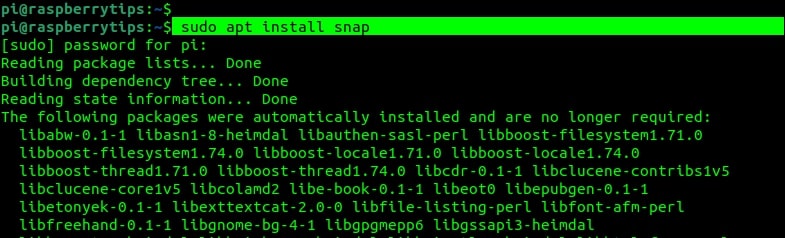
Snap doesn’t come pre-installed on Raspberry Pi OS. To get started, use the command below to install Snapd – a background service (daemon) used to manage Snap packages on Linux.
sudo apt update
sudo apt install snapd
It's a free PDF guide containing every Raspberry Pi Linux command you should know!
Download now
Are you a bit lost in the Linux command line? Check this article first for the most important commands to remember and a free downloadable cheat sheet so you can have the commands at your fingertips.
Install the OctoPrint snap package
After successfully installing Snapd, use the command below to install the OctoPrint Snap package.
sudo snap install octoprint-pfs --edge

After a successful installation, you can access the OctoPrint web interface on your browser using the URL below.
http://[raspberry-ip]:5000
e.g,
http://192.168.100.240:5000
It's a free PDF guide containing every Raspberry Pi Linux command you should know!
Download now
Reminder: Remember that all the members of my community get access to this website without ads, exclusive courses and much more. You can become part of this community for as little as $5 per month & get all the benefits immediately.
Getting started with OctoPrint on Raspberry Pi
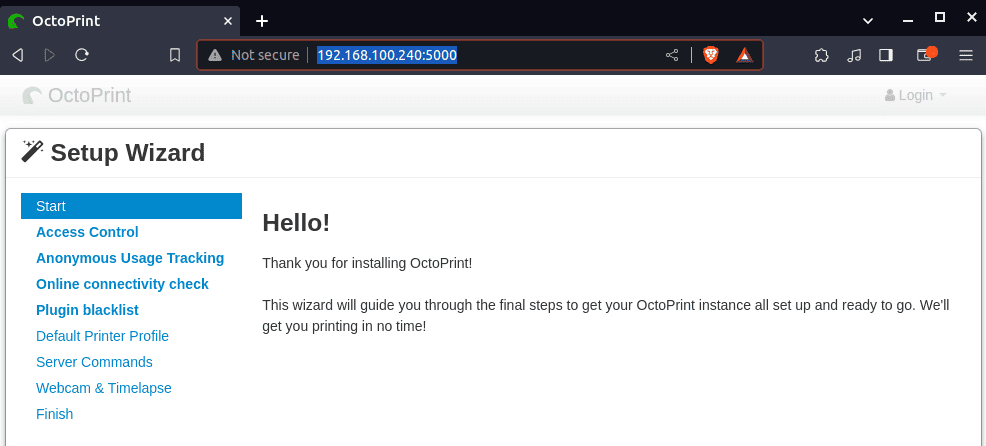
Up to this point, I believe you already have access to the OctoPrint web interface. Now let’s get started with the initial configuration.
Setup OctoPrint
The first screen is the “Welcome screen.” There isn’t much to do here. Just click “Next” to proceed.
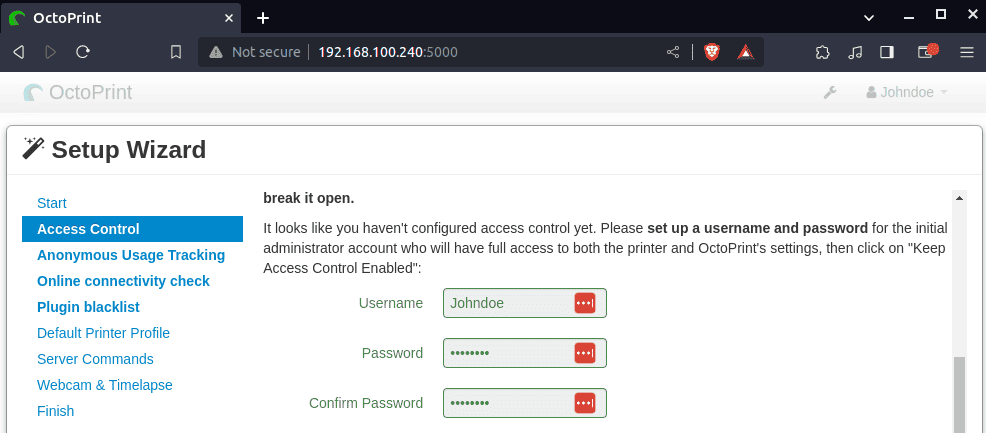
Access Control
The next screen is “Access Control.” Here, you will need to set the username and password of the user who will have full access to the OctoPrint and printer settings. Click “Next” when done.
Anonymous Usage Tracking
In this screen, you need to make a personal preference on whether you want OctoPrint to anonymously collect data on your end. This data is meant to identify problems with different OctoPrint releases and how to fix these issues and improve performance.
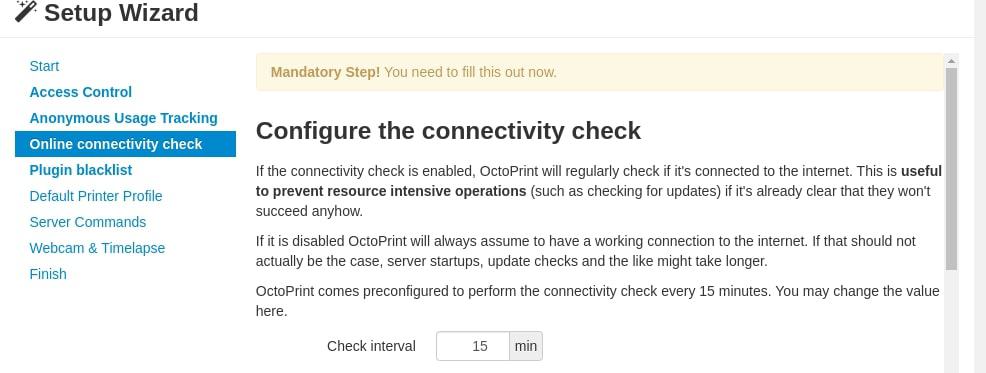
Online connectivity check
The next step in the process is configuring a connectivity check. When this is enabled, it tells OctoPrint to make sure it can reach the internet. The reason OctoPrint does this is so it can skip things like update checks if it knows it can’t get to the internet. That way, it doesn’t waste time or CPU cycles that could otherwise be dedicated to printing.
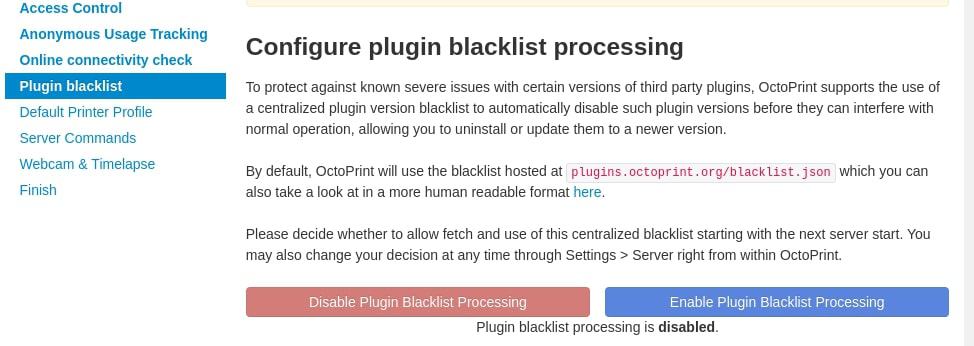
Plugin blacklist
In this step, you’ll be prompted to decide on the use of a centralized plugin version blacklist. OctoPrint offers protection against known severe issues with specific versions of third-party plugins by automatically disabling them.
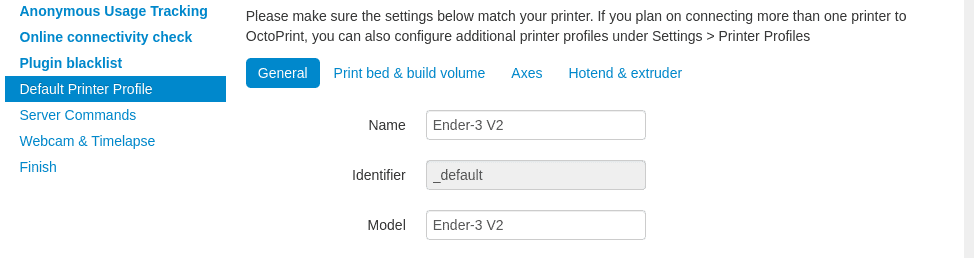
Set up your printer profile
This screen is where we tell OctoPrint about the printer it’s going to be controlling. In the General tab, enter the name of the printer and the model. For the name, you can decide to use any fancy name that you want to call your printer. In the other tabs, you can decide to leave the default values or change them to match your printer.
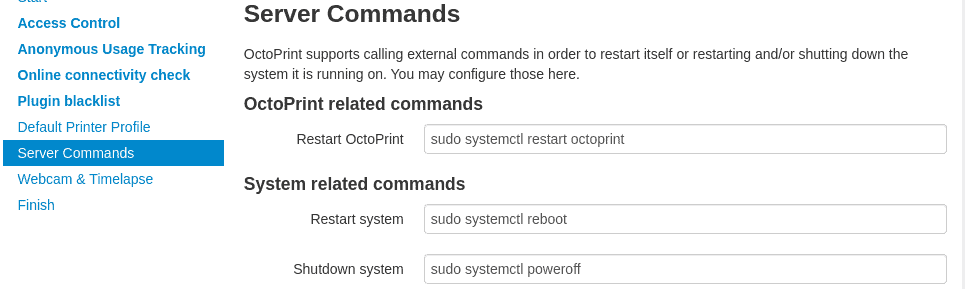
Server commands
In this screen, you can configure server commands that OctoPrint will support. These commands enable the ability to call external functions, allowing actions such as restarting OctoPrint itself or initiating system restarts or shutdowns.
- Restart OctoPrint:
sudo systemctl restart octoprint - Restart system:
sudo systemctl reboot - Shutdown system:
sudo systemctl poweroff
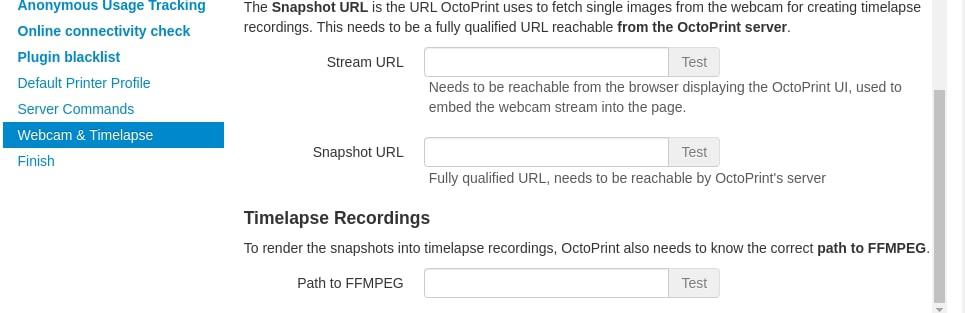
Webcam and timelapse recordings
In this section, you can configure your webcam settings and set up timelapse recordings. Just click “Next” if you don’t plan on using a webcam.
- Webcam: Configure the Stream URL, which is the URL OctoPrint uses to embed the webcam stream into the web interface. This URL should point to an MJPG stream and must be reachable from your browser.
- Timelapse Recordings: For creating timelapse recordings, OctoPrint requires the correct path to FFMPEG. Make sure to provide the accurate path to FFMPEG to enable the rendering of snapshots into timelapse recordings.
Using OctoPrint
When you are done setting up OctoPrint, you will see a window similar to the image below.
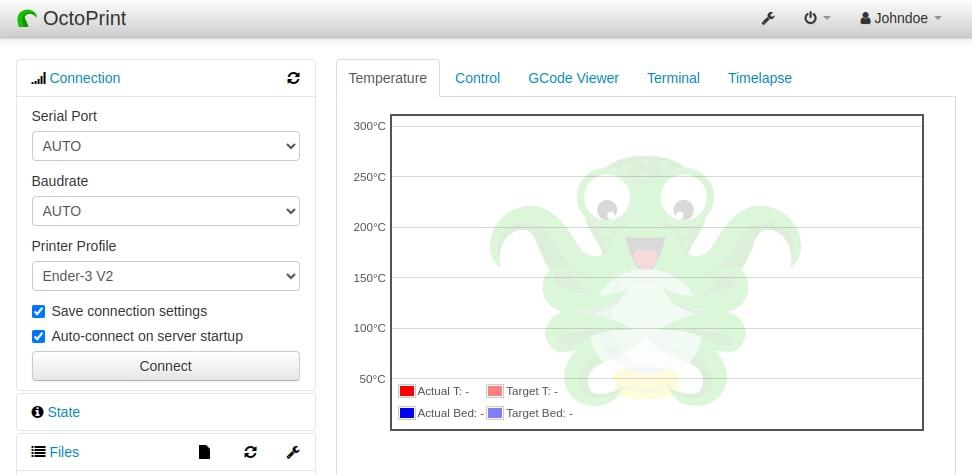
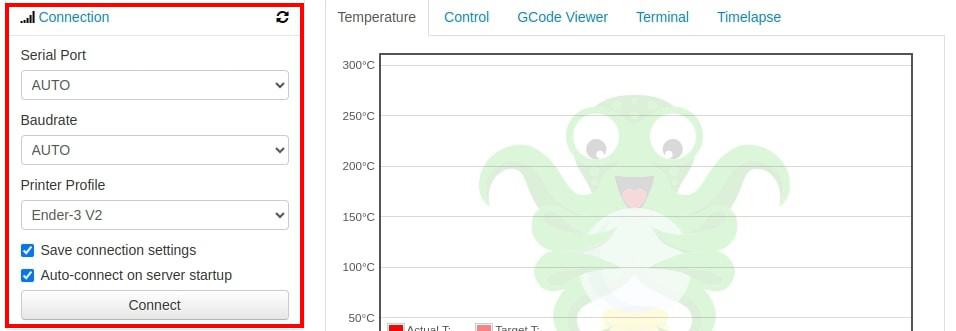
Connecting to the 3D printer
Since this is the first time we have started this instance of OctoPrint, we will need to tell it to connect to the printer. You can do this using the settings on the left-hand side of the screen.
Leave Serial Port and Baudrate set to AUTO. Next, tick the check box for “Save connection Settings” and “Auto-connect on server startup”. This will enable OctoPrint to automatically connect to the printer when it starts. Click “Connect” when done.
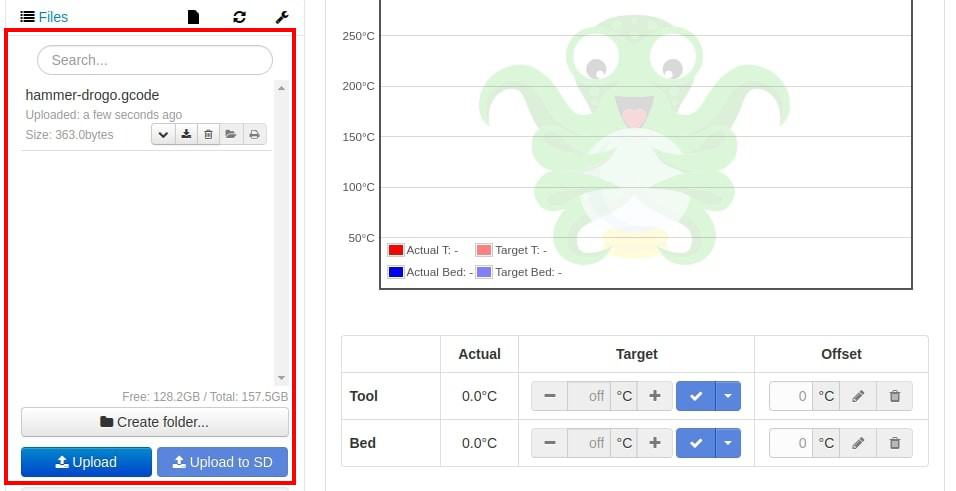
Uploading G-Code
You have multiple options for uploading your G-Code to OctoPrint. You can either utilize the ‘Upload’ option or simply drag and drop the file onto the left side panel under the files section for a convenient and efficient transfer.
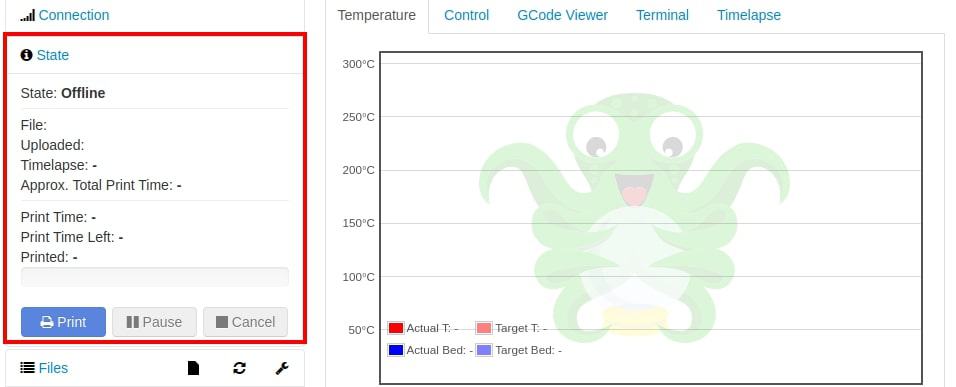
To initiate the printing process, expand the ‘State’ menu in the left tab and click on ‘Print’. It’s important to note that if your 3D printer is not detected or not properly configured with OctoPrint, the ‘Print’ button will be disabled.
Additionally, within the same menu, you’ll find other options that provide control over the printing process, such as ‘Pause’ and ‘Cancel’.
In my case, I have not connected my 3D printer. As a result, the printer state is currently marked as “offline.”
These are just a few of the features available on the OctoPrint window. Many more functionalities await your exploration. You can monitor the temperature of your 3D printer, set up a webcam for live streaming and time-lapse recording, and extend capabilities by installing various plugins.
By the way, if you’re into 3D printing projects, you might be interested in this article: How to Run Blender on Raspberry Pi: A Complete Tutorial.
Whenever you’re ready, here are other ways I can help you:
The RaspberryTips Community: If you want to hang out with me and other Raspberry Pi fans, you can join the community. I share exclusive tutorials and behind-the-scenes content there. Premium members can also visit the website without ads.
Master your Raspberry Pi in 30 days: If you are looking for the best tips to become an expert on Raspberry Pi, this book is for you. Learn useful Linux skills and practice multiple projects with step-by-step guides.
The Raspberry Pi Bootcamp: Understand everything about the Raspberry Pi, stop searching for help all the time, and finally enjoy completing your projects.
Master Python on Raspberry Pi: Create, understand, and improve any Python script for your Raspberry Pi. Learn the essentials step-by-step without losing time understanding useless concepts.
You can also find all my recommendations for tools and hardware on this page.