

Ultimate guide to NordVPN on Raspberry Pi (Kodi & Raspbian)
NordVPN is a VPN provider that allows you to protect your privacy, secure your connection and access any country-oriented content (like streaming services).
In this guide, I’ll show you how to install this software on your Raspberry Pi.
The easiest way to install NordVPN on Raspberry Pi OS is to download the Debian package on the official website. On Kodi, a VPN Manager app is available and can be configured with the NordVPN servers.
I’ll start by an introducing what a VPN is, NordVPN, and how to create an account on their website (mandatory to try it).
Then I’ll show you how to install NordVPN on Raspberry Pi OS Desktop, Lite or Kodi.
And finally, I will give you a list of useful commands for NordVPN.
Feel free to use the table of contents to go directly to the part of the article you are interested in.
NordVPN introduction
What is a VPN?
VPN stands for Virtual Private Network.
The goal is to link two remote networks to make them appear as only one.
I already wrote an article on how to install OpenVPN to create a VPN server.
Today, we’ll see another way. NordVPN will act as a client to connect to their servers.
As I told you in introduction, a VPN has 3 main benefits:
- Security: your data is fully encrypted in a secure tunnel between you and the provider.
- Privacy: it goes with security, but a VPN allows you to hide your Internet activity from snoops.
- Country: for some reason, you might want to show your connection as coming from another country. Many websites offer different content depending on the country you are in.
The main interest on Raspberry Pi is to use it to access streaming services (with Kodi for example). NordVPN works very well, for whatever reason you need to install it.
What is NordVPN?
So, NordVPN is a VPN provider.
It’s a company with VPN servers all over the world.
The company provides software to connect to these servers from your computer, smartphone or Raspberry Pi.
The company was created in 2012 and is now one of the biggest ones in this market.
They host over 5,000 servers in 60 countries.
The price isn’t expensive (about $3 a month) and the software works very well (on Raspberry Pi and other systems).

To be more exhaustive here, NordVPN offers a software for the following systems:
- Windows 7/8/10
- macOS
- Linux (DEB/RPM)
- Android and Android TV
- iOS
- Raspberry Pi and Synology NAS are mentioned on the download page.
- You can even install a browser extension on Chrome or Firefox, so it doesn’t change your network settings.
They also allow you to download an OpenVPN configuration if you need or prefer to use it instead.
Create a free account on NordVPN
Ok, it’s not “Free”, but they do offer a full refund for 30 days.
So, you can try it without a risk, and ask for a refund if you are not satisfied.
It's a free PDF guide containing every Raspberry Pi Linux command you should know!
Download now
Here is how to create your account:
- Go on the NordVPN website.
- Click on “Pricing” in the top menu.
The previous price table shows up. - Pick the plan you want.
Like many subscription services, the longer you stay, the less you will pay.
The 3-year plan is the best deal, but choose the one that fits your needs and click on “Get XX plan”. - Then you need to create your account.
Start by enter your email address: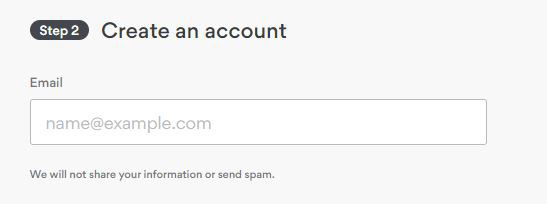
- And select your payment method.
Many options are available:
Once your payment is complete, you’ll receive an email to confirm your email address:
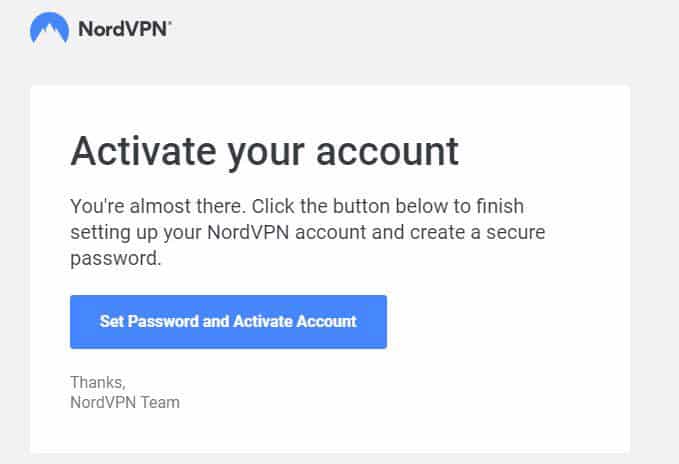
Click on the button and that’s it, your account is ready to use.
NordVPN installation on Windows
To make sure your account is working correctly, you can try the NordVPN software on Windows (or any other system).
- Log in on the website.
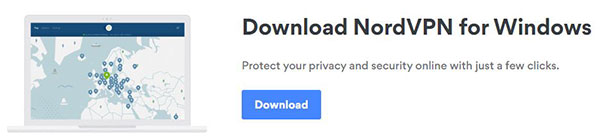
- Go to VPN Apps (top menu).
- Download the Windows app:
- Install it like any other application (double-click on it).
- You need to log in on startup.
And then the Windows app looks like this: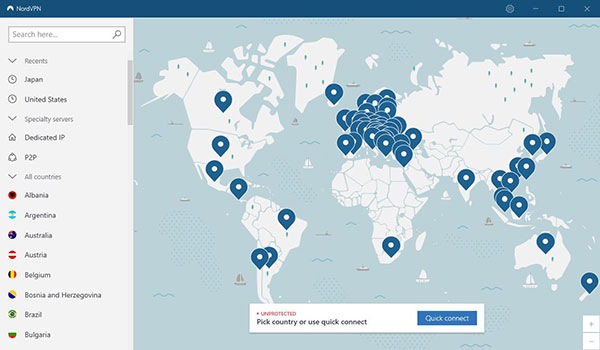
- Click on a country to connect to a server.
That’s it :).
If everything works well, you can move to the Raspberry Pi part.

Join Our Community!
Connect, learn, and grow with other Raspberry Pi enthusiasts. Support RaspberryTips and enjoy an ad-free reading experience. Get exclusive monthly video tutorials and many other benefits.
Learn moreNordVPN installation on Raspberry Pi OS
If you are on Raspberry Pi OS, you can install NordVPN as on any computer (the Raspberry Pi 4 can even replace your desktop PC).
This way you can use NordVPN for any reason, including Kodi (as Kodi is available on Raspberry Pi OS).
If you don’t have Raspberry Pi OS installed yet, you can start by reading the tutorial on how to install it here.
NordVPN on Raspberry Pi OS Desktop
Unfortunately, NordVPN doesn’t offer a Raspberry Pi OS Desktop app.
But you can install it with the graphical interface, so I’ll show you how to do this here.
Download the NordVPN package
The first step is to download the package available on the NordVPN official website.
- From your Raspberry Pi, open Chromium.
- Go to the NordVPN download page.
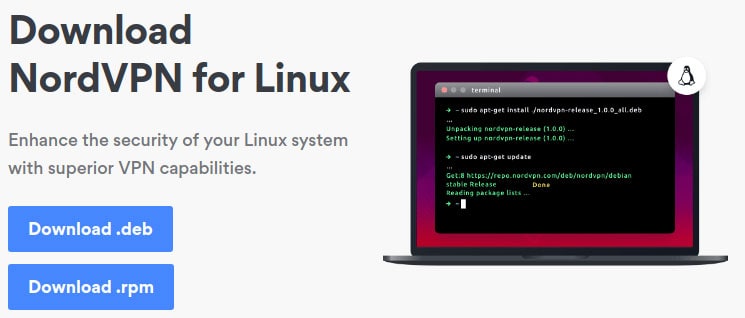
- Click on “Download .deb”.
- At the end of the download, Chromium will give you a warning (“This type of file can harm your computer. Do you want to keep it anyway?”).
Choose to keep it, there isn’t a risk. - Click on the downloaded file in Chromium to open it.
- A window shows up:
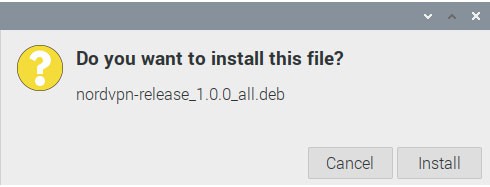
Click on “Install” to start the installation. - You will need to confirm by typing your password to complete the installation.
That isn’t clear on the NordVPN website, but this package is only here to install the NordVPN repository on Raspberry Pi OS.
NordVPN is not yet installed, it’s just available in the package manager.
So, you need to install it now.
Install NordVPN on Raspberry Pi OS Desktop
You can now use your package manager to install NordVPN:
- In the main menu, go to Preferences > App/Remove Software.
- Start by updating the repositories:
Options > Refresh package lists - Then type “nordvpn” in the search engine:
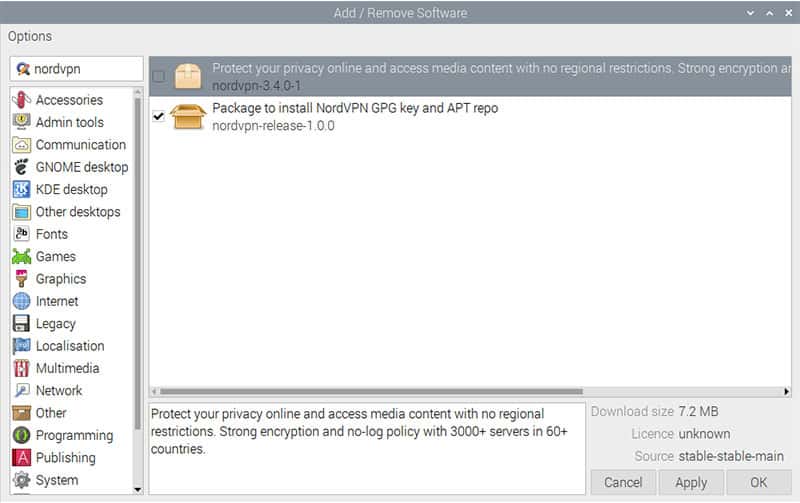
- Check the box near the nordvpn package and install it by clicking on “Apply”.
- Once again, you need to enter your password to confirm.
And that’s it.
This time it’s truly installed :).
Use NordVPN on Raspberry Pi OS Desktop
As I told you at the beginning of this section, there is no app available on Raspberry Pi OS Desktop.
So even on the Desktop version, you’ll need to use a few commands to connect to a NordVPN server.
That’s no so complicated:
- Open a terminal.
- The first step is to log in your account:
nordvpn login
- Enter your login and password.
You are now authenticated: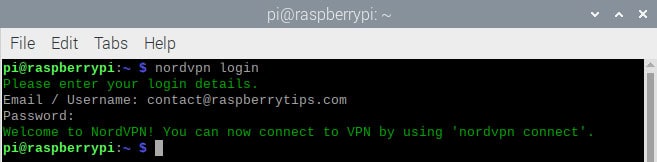
- The next step is to connect to a server.
You have two choices:- Either to a random server with:
nordvpn connect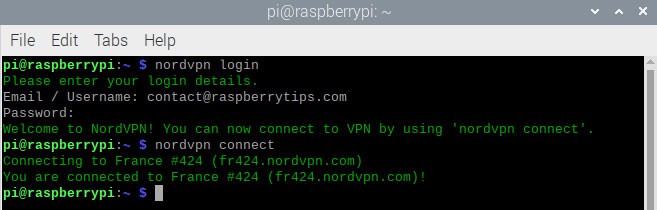
- Or by choosing a specific country with:
nordvpn <country>
For example: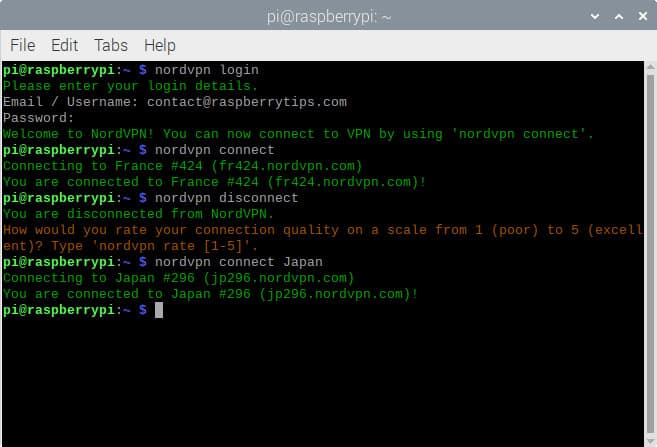
- Either to a random server with:
- As you’ve seen in the previous picture, the command to disconnect is simply:
nordvpn disconnect
That’s it, you know how to use NordVPN on Raspberry Pi OS Desktop.
Once connected, you can use any website to check your current IP address and location.
Here is an example with WebInpact:
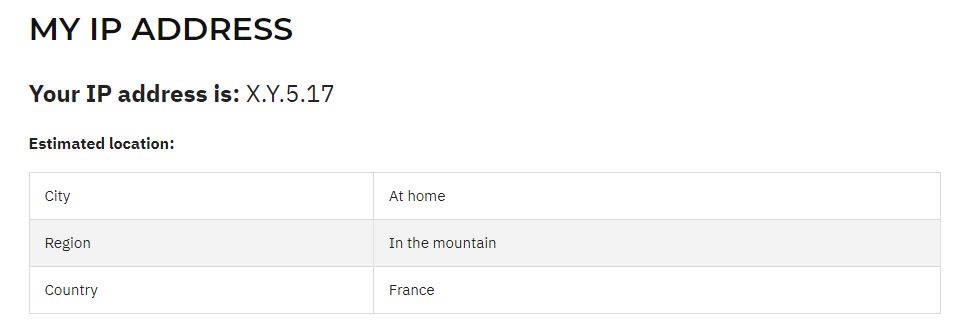
Cool right?
It's a free PDF guide containing every Raspberry Pi Linux command you should know!
Download now
NordVPN on Raspberry Pi OS Lite
Let’s now learn how to install it on Raspberry Pi OS Lite.
The process is almost the same, except that we need to do everything in command line :).
Download and install the repository package
- I recommend you start by enabling SSH, so you can copy and paste the command here from your computer:
sudo service ssh start
Then use Putty or any other client to connect to your Raspberry Pi. - As on Raspberry Pi OS Desktop, the first step is to download the package from the official website:
wget -qnc https://repo.nordvpn.com/deb/nordvpn/debian/pool/main/nordvpn-release_1.0.0_all.deb
I don’t think they update the file name, but you can go to the download page to get the latest link:
- Once downloaded you can install it with:
sudo dpkg -i nordvpn-release_1.0.0_all.deb
As on Raspberry Pi OS Desktop, this package is not the NordVPN app directly.
It’s just a way to install the NordVPN repository.
You can now use apt to install the app.
Install the NordVPN package
- As always, start by updating the local cache:
sudo apt update - Then install the NordVPN package with:
sudo apt install nordvpn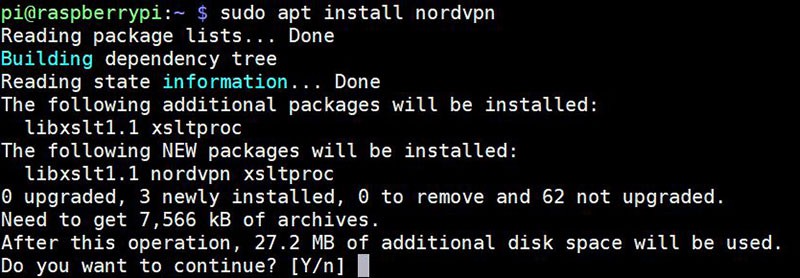
That’s everything you need to do.
The NordVPN commands are now available on your system.
Use NordVPN on Raspberry Pi OS Lite
The commands are the same as on Raspberry Pi OS Desktop.
I will give you more details in the last part of this tutorial, but here is the basic commands that you can use to check that everything works fine:
nordvpn login: Enter your login and password to authenticate on NordVPN.nordvpn connect: Connect to a random server.nordvpn connect <country>: Connect to a server in the specified country.nordvpn disconnect: Disconnect your VPN client.
Check your current IP and location
On Raspberry Pi OS Lite, you can’t use your browser to check that you are really connected to NordVPN.
But here is a way to do this:
- Enter the following command:
curl ipinfo.io - You’ll get a result like this:
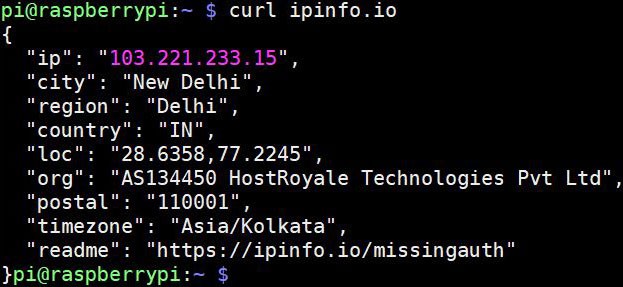
So, here I’m connected to a server in New Delhi (India) and my IP address is 103.221.233.15.
That’s it! You now know how to install and use NordVPN on Raspberry Pi OS Lite.
Don’t forget to check the last part with all the useful commands you need to know about NordVPN.
Installation on Kodi
In this part, I’ll show you how to install it on Kodi.
Even if you can install Kodi on Raspberry Pi OS and use the same procedure as the previous part, it isn’t convenient if you are mainly using your Raspberry Pi as a media center.
By following these steps, the VPN connection will be done inside the Kodi menus.
Let’s go!
Kodi installation
If you are ready for this, I suppose you already have Kodi installed.
If not, you can read my guide here on how to install Kodi with OSMC.
Kodi is the software we’ll use to browse into our media center (like Spotify for music).
OSMC is the operating system running on the Raspberry Pi (like Windows on a PC).
If you don’t know, Kodi allows you to play videos, music and other digital media files from local and network storage media or the internet.
NordVPN official procedure
At first, I lost a lot of time trying to follow the official procedure to install NordVPN with Kodi.
Here is the link if you want to try.
Basically, the idea is to install OpenVPN on Kodi, and use it as a client to NordVPN.
NordVPN does an excellent job by offering you to download the OpenVPN configuration.
You just have to change one line to define your login and password.
It seems easy, but it doesn’t work.
I managed to make it work in command line with OpenVPN (so my configuration is OK), but sadly it doesn’t work in the Kodi interface.
In the next section, I will show you the easiest way to proceed, and that works :).
A better solution to install NordVPN on Kodi
Allow unknown sources
If you aren’t already done on your installation, you need to allow the “Unknown sources”.
We’ll add a new repository on the next step, and by default Kodi doesn’t allow this.
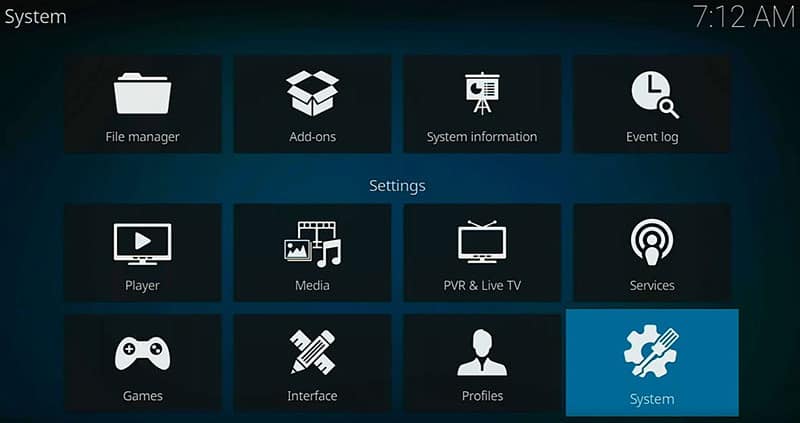
- Go in the Settings menu and click on System:
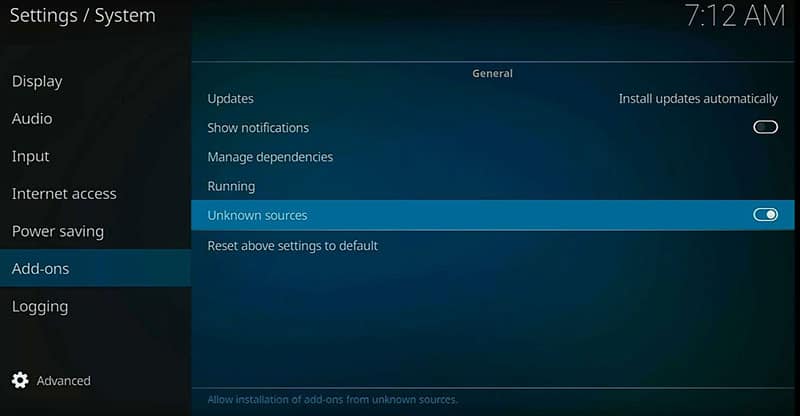
- Then choose “Add-ons” on the left menu.
- And allow the “Unknown sources”:
- A warning message appears, you can ignore it by clicking on “Yes”:
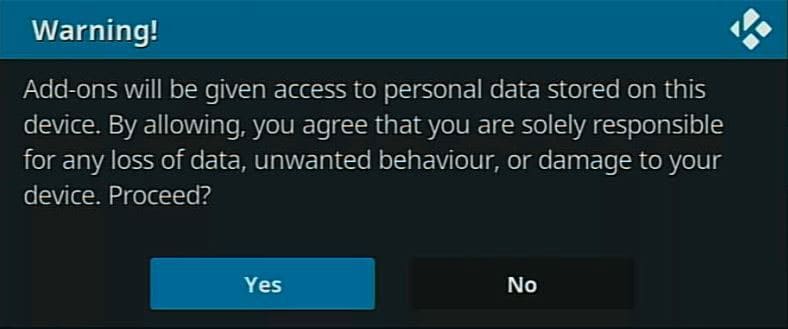
- That’s it, you can now quit this menu and move to the next step.
Download and transfer the Zomboided repository
- On your computer download the following file: Zomboided repository.
- You’ll now transfer it on your Raspberry Pi.
On Windows, you can use a tool like WinSCP or FileZilla to do this. - For example, on Filezilla, create a new site with the following parameter:
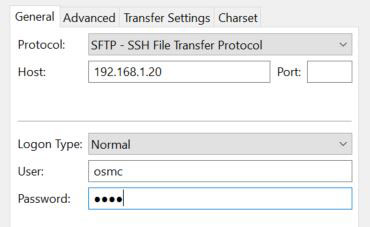
Change the host field with your IP address (you can find it in Settings > System information).
By default, the login is “osmc” and the password “osmc” too. - Transfer the file you just downloaded to the Raspberry Pi.
For example in /home/osmc.
Install the repository
Back in Kodi, you can now install the file:
- Go to Settings again, and choose Add-ons:
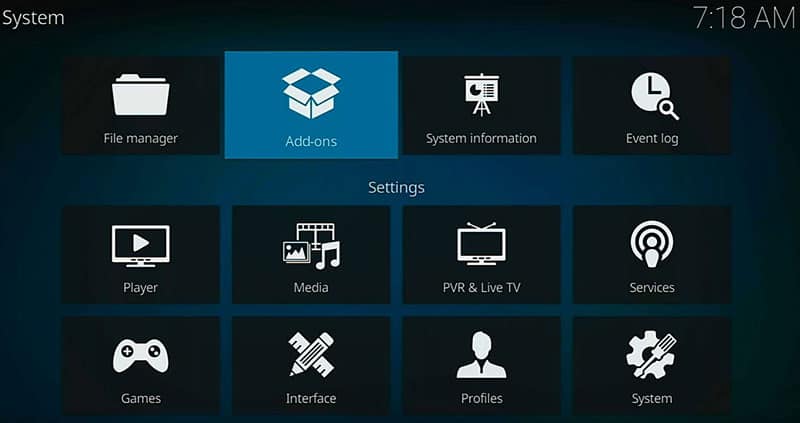
- Choose “Install from zip file” in the menu:
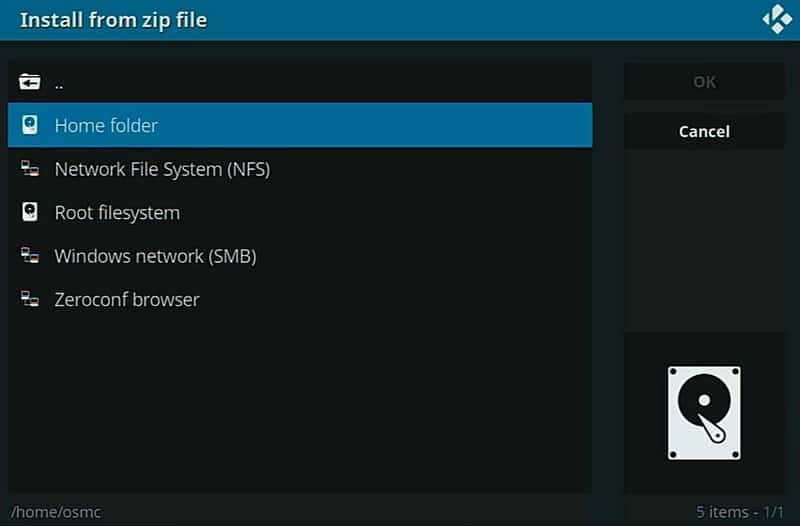
- Click on “Home folder” and select the file you just uploaded:
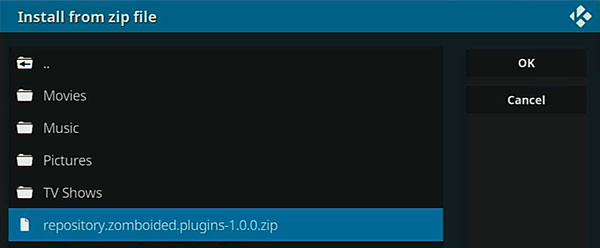
- A few seconds later, the repository is installed and ready to use.
Install and configure the VPN manager
The last step is to install and configure the VPN manager:
- Back to the Add-ons menu, select “Install from repository“.
- Click on “Zomboided Add-on Repository“:
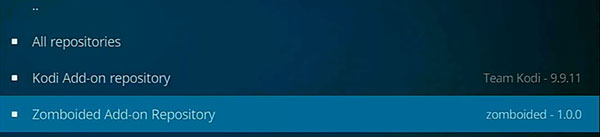
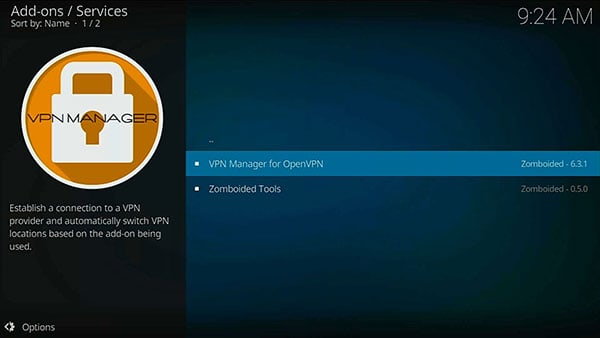
- Go into “Services“.
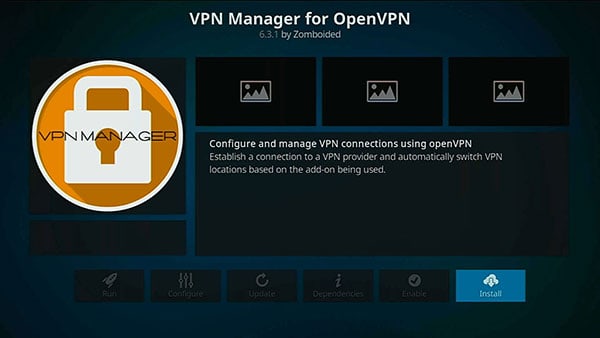
- And install the “VPN Manager for OpenVPN” package:
- On the next step, click on “Install” to start the installation:
- A complete wizard will guide you through the installation.
Asking for your provider (NordVPN), your credentials (login and password) and the country you want to connect for your first profile.
You can even choose to auto start the VPN connection on boot: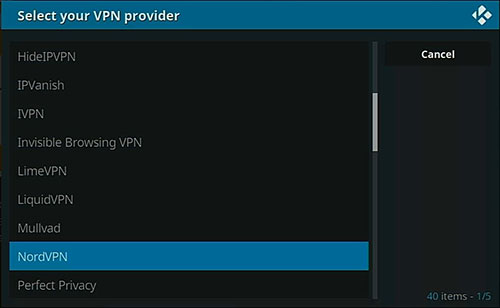
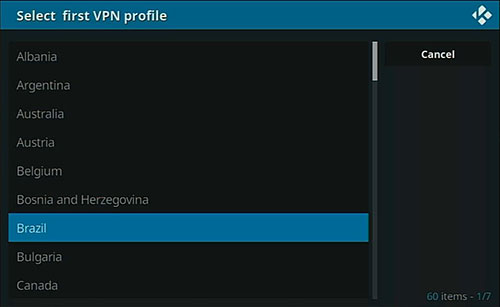
- You can create multiple profiles if you need (one by country).
- Once the configuration is complete, you’ll get a success message like this:
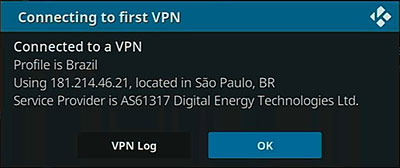
To manage the connection, you can go to Add-ons > VPN Manager from the main menu.
From here, you can check your settings, display the VPN status, connect or disconnect, etc.
That’s it, you now know how to install and use NordVPN on Kodi!
How to check that it’s working correctly?
A funny tip to finish, here is my strategy to check that I’m well-connected with OpenVPN:

Yes :).
If my country’s weather is displayed, there is a problem, otherwise the VPN is working correctly.
It's a free PDF guide containing every Raspberry Pi Linux command you should know!
Download now
NordVPN commands
As I promised you, here are the commands you can use on the three systems we have just seen (Raspberry Pi OS Lite, Desktop and Kodi/OSMC):
nordvpn account: show the account information if you are logged in (email and subscription status).nordvpn cities <country>: display a list of cities available in the specified country.
Ex:nordvpn cities Germany
nordvpn connect <option>: the main command to connect to a NordVPN server.
There are many possible options in this command.
Here are a few examples:nordvpn connect: connect to the recommended server.nordvpn connect <server>: connect to a specific server (check the list here).nordvpn connect <country>: connect to a specific country (as seen in the Raspberry Pi OS Lite part, check the next command).nordvpn connect <country> <city>: connect to a specific city (see previous command).
nordvpn countries: display a list of available countries over the world.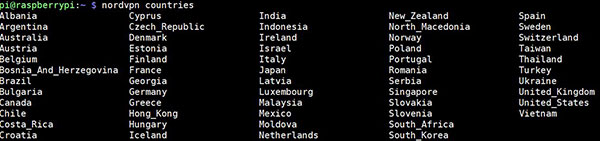
nordvpn disconnect: stop your VPN connection.nordvpn groups: a list of server groups you can use withnordvpn connect <group>.nordvpn login and nordvpn logout: commands to configure or remove your account from this device.nordvpn rate <value>: Once disconnected, you can rate the quality of the server you just used. This way NordVPN can improve its recommendations.nordvpn settings: Display the currents settings (technology, protocol, etc.). You can change them with the next command.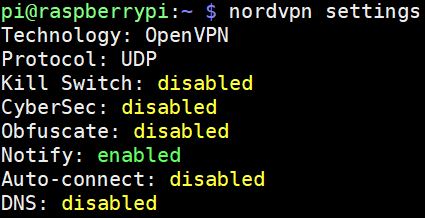
nordvpn set <option> <value>: Change a configuration option (usenordvpn setwithout any parameter to get the list of options and values).nordvpn status: As the name suggest, display the current status of your VPN connection.nordvpn whitelist <command> <options>: An advanced command to add or remove an option from the whitelist.
Example:nordvpn whitelist add port 22
This will allow you to connect to any SSH server without using NordVPN (if there is an IP filter for example).
That’s it!
You can use man nordvpn or nordvpn --help to get more examples for each command.
It's a free PDF guide containing every Raspberry Pi Linux command you should know!
Download now
Want to chat with other Raspberry Pi enthusiasts? Join the community, share your current projects and ask for help directly in the forums.
Conclusion
Wow! This was a giant post to write, but I hope above all that it’s comprehensive and helpful for you.
If it’s the case, you now have a complete guide to install and configure NordVPN on a Raspberry Pi, whatever the system you use (Raspberry Pi OS Desktop & Lite or Kodi directly).
If you have any question on the topic, feel free to leave a comment in the community.
And as usual, sharing this post on the social networks help me a lot (you can use the buttons below).
Not sure if NordVPN is the right fit for you? I have tested some others VPN providers for your Raspberry Pi, click on the link to learn more about them.
Disclaimer: Just to let you know that I wrote that post because I use and like NordVPN and it’s really useful on Raspberry Pi, but links to NordVPN in this post are affiliate links and I can earn a commission from qualifying purchases. The commission comes at no additional cost to you.
Whenever you’re ready, here are other ways I can help you:
The RaspberryTips Community: If you want to hang out with me and other Raspberry Pi fans, you can join the community. I share exclusive tutorials and behind-the-scenes content there. Premium members can also visit the website without ads.
Master your Raspberry Pi in 30 days: If you are looking for the best tips to become an expert on Raspberry Pi, this book is for you. Learn useful Linux skills and practice multiple projects with step-by-step guides.
The Raspberry Pi Bootcamp: Understand everything about the Raspberry Pi, stop searching for help all the time, and finally enjoy completing your projects.
Master Python on Raspberry Pi: Create, understand, and improve any Python script for your Raspberry Pi. Learn the essentials step-by-step without losing time understanding useless concepts.
You can also find all my recommendations for tools and hardware on this page.


Thank you for this easy-to-read guide! I’ve recently set up a Raspberry Pi to function as a remote IRC server, and I’m delighted that it’s this simple to get NordVPN working on it to stay protected.
Thank you so much for the great guide! I’ve run into a big of a snag though and was hoping you could give some advice, I’ve followed the Kodi steps (using a Pi 400 with OSMC) but when trying to connect to the VPN the first time with the wizard I’m getting hit with “Could not authenticate with VPN provider”.
My login details are all correct so I was just wondering if there’s anything I’m missing here? Thank you!