

Install Webmin: Configure Your Raspberry Pi Without Commands
In my job, I often train new staff with Linux commands, so I know how difficult it can be when you haven’t used them. Even if it’s mandatory as a Linux administrator, you may prefer to do this another way at home for your projects. Today, I’ll show you how to install Webmin to configure everything on the Raspberry Pi from a web interface.
The easiest way to install Webmin on Raspberry Pi OS, is to download the binary package from the official website, and installing it with a double click on it.
Webmin is a great configuration tool for a Raspberry Pi, but is not available in the default repository.
In this post, I’ll show you exactly how to download it (and provide a better solution to install it and keep it up-to-date). Then I’ll help you to discover how the interface works and give concrete examples of what you can do with it.
If you’re looking to quickly progress on Raspberry Pi, you can check out my e-book here. It’s a 30-day challenge where you learn one new thing every day until you become a Raspberry Pi expert. The first third of the book teaches you the basics, but the following chapters include projects you can try on your own.
Webmin installation
As said in the introduction, there are two ways to install Webmin.
But first you need to have Raspberry Pi OS installed on your Raspberry Pi.
Install Raspberry Pi OS
I didn’t try with other distributions, but the package available on the official website is a Debian package.
So, Raspberry Pi OS is perfect, and it’s probably the one you use the most anyway.
Any version of Raspberry Pi OS is OK.
I write this post with the beginners in mind – those that are probably using Raspberry Pi OS Desktop and trying to avoid Linux commands as much as possible. But any experienced person on Raspberry Pi OS Lite is entitled to try it to make their life easier.
If you need some help to install Raspberry Pi OS, you can check out my complete guide.
Then I recommend updating the system and enabling SSH, so you can just copy and past the commands I give you from your computer.
Option 1: Add a new apt repository
The first way to install Webmin is to add a new repository.
It could be a bit more complicated upfront, but I think that it’s the best solution.
This way you can manage updates in the same way as any other software (graphically or with apt upgrade).
I know, there are a few commands to copy & paste for this solution, but once Webmin installed, you won’t have to use a terminal anymore.
It's a free PDF guide containing every Raspberry Pi Linux command you should know!
Download now
So, here is how to do this:
- Open the apt sources.list file:
sudo nano /etc/apt/sources.list - Add this line at the end:
deb https://download.webmin.com/download/repository sarge contrib
Yes, Sarge is an old Debian version, but the repository is updated regularly.
It should look like this after the edition: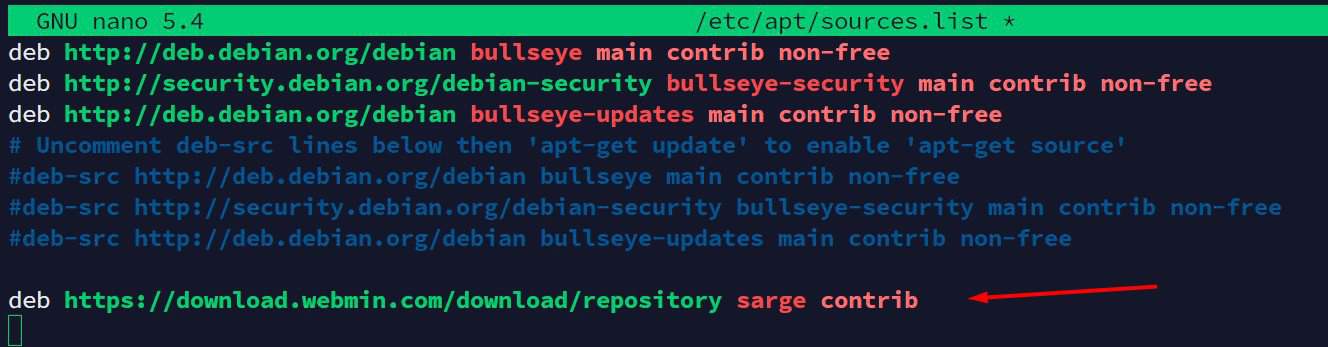
- Then you need to install the GPG key corresponding to this repository:
wget http://www.webmin.com/jcameron-key.asc
sudo apt-key add jcameron-key.asc - Finally, install Webmin:
sudo apt update
sudo apt install webmin
That’s it, it’s not very difficult, and each time you update your system, you’ll get updates for Webmin simultaneously.
But it can also be an issue on production systems.
In my job, I prefer to do the updates myself for critical apps, this way I’m already on the server and can check to ensure that nothing is broken.
As some of you may not like this option, I provided the second option that allows you to control everything manually.

Join Our Community!
Connect, learn, and grow with other Raspberry Pi enthusiasts. Support RaspberryTips and enjoy an ad-free reading experience. Get exclusive monthly video tutorials and many other benefits.
Learn moreAre you a bit lost in the Linux command line? Check this article first for the most important commands to remember and a free downloadable cheat sheet so you can have the commands at your fingertips.
Option 2 : Directly install the Webmin package
The second option is to download the latest version on the Official website and install it “manually”.
- Go to the official Webmin site here: http://webmin.com/.
- In the left menu, click on Debian package:
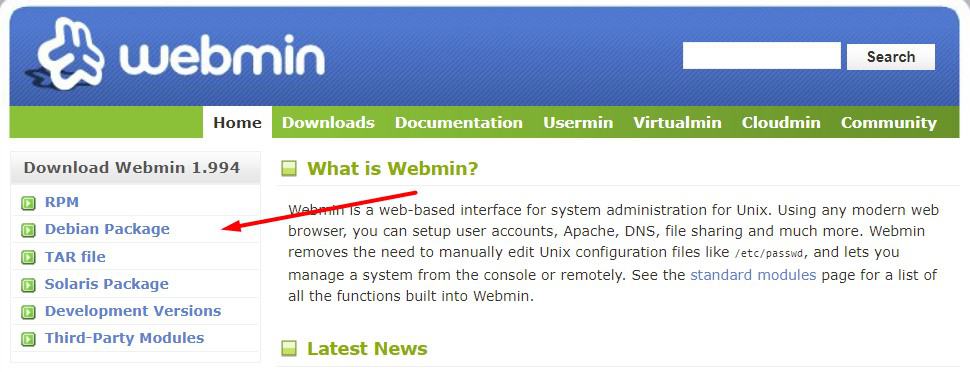
- The link leads to Sourceforge, and it will download it directly.
If you are on your computer, you can use SFTP to transfer it to the Pi, or copy the link (in your browser downloads) and use wget. - For example, for the 1.994 version:
wget http://prdownloads.sourceforge.net/webadmin/webmin_1.994_all.deb
You can also take that link and change the version number, depending on the version displayed on the website.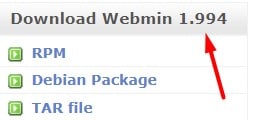
- Then install the downloaded package with:
sudo dpkg -i webmin_1.994_all.deb
If you are using a Desktop version of Raspberry Pi OS, you can just click on the downloaded file to install it on your system.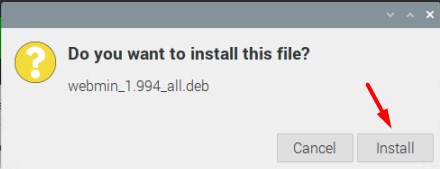
- It may warn you because of missing prerequisites, which is normal. We’ll fix this now.
- Finish the installation with:
sudo apt -f install
It will install Webmin and the missing dependencies.
Your Webmin installation is complete, you can move to the next part
Webmin interface
Webmin works with a web interface.
It’s pretty intuitive, but I will give you a few details here.
First access
Once installed, you can access it with the following URL:
https://IP_ADDRESS:10000.
For example: https://192.168.1.20:10000.
Check this quick tutorial if you don’t know your Raspberry Pi IP address.
You’ll get an SSL error in your browser as there is no certificate:
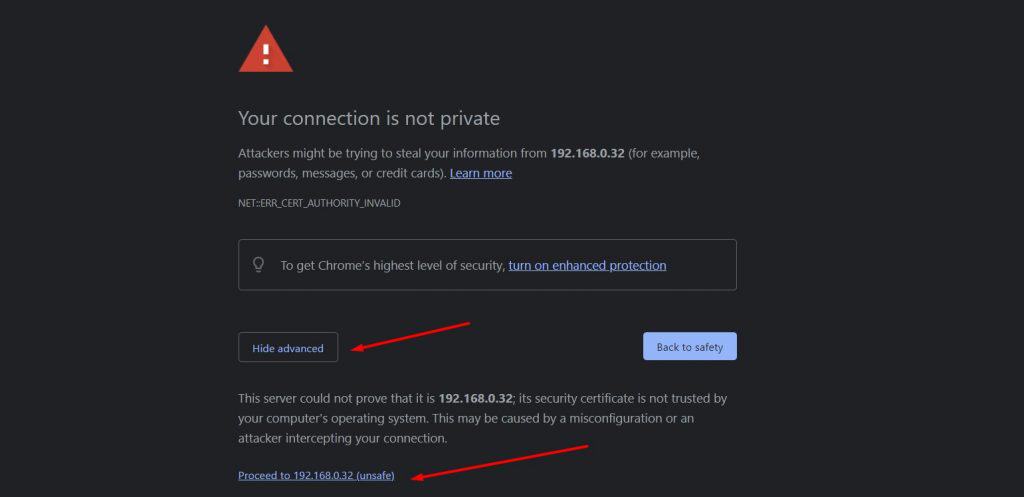
Ignore the error by clicking on Advanced > Proceed to IP_ADDRESS (unsafe).
You can also disable the SSL encryption if you prefer. You can do this in the Webmin interface directly (Webmin > Webmin configuration > SSL Encryption). The corresponding file on the Pi is /etc/webmin/miniserv.conf (change ssl=1 to ss=0).
You’ll get a login form with the Webmin logo.
The default credentials are the same as the system users.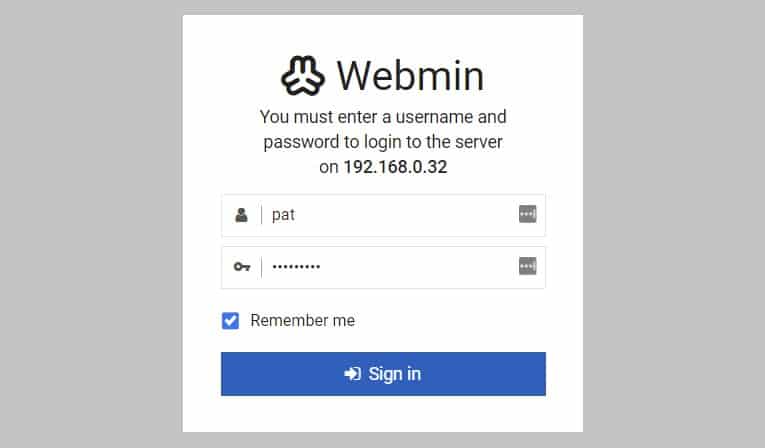
So, on an older version of Raspberry Pi OS, it might be “pi / raspberry”, but on recent versions, you’ll use the credentials that you created on the first boot.
It's a free PDF guide containing every Raspberry Pi Linux command you should know!
Download now
Interface overview
Once logged, you’ll get the Dashboard page: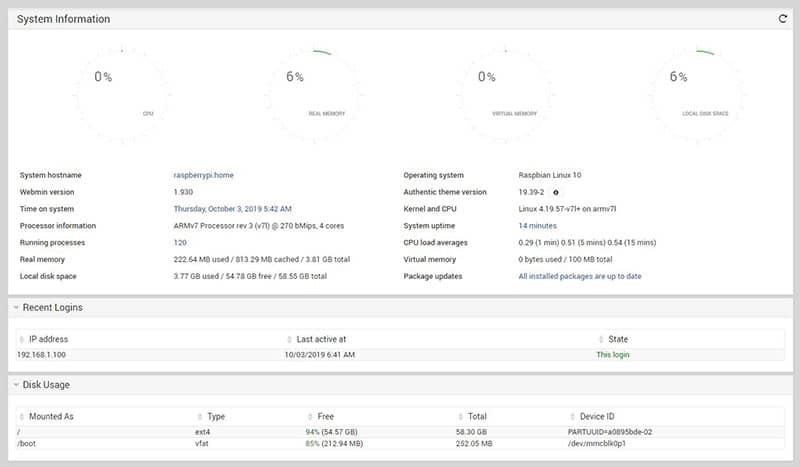
This first page allows you to have a quick overview of your server or Raspberry Pi.
Then, you have a menu on the left, with all the default submenus: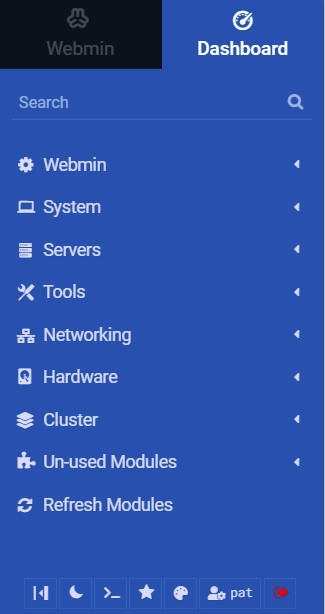
Click on one item to display the corresponding submenu below: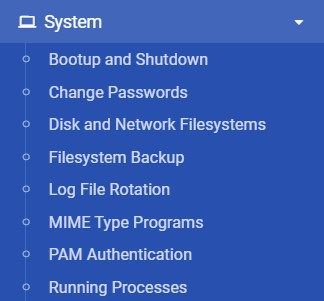
For example, you can click on Tools > File Manager: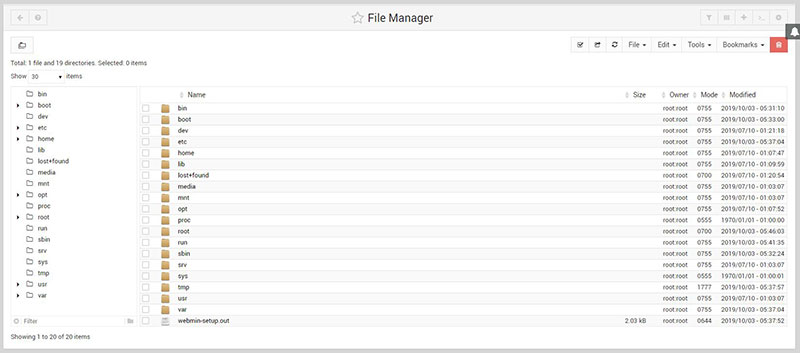
You now have access to a graphical file browser, even on Raspberry Pi OS Lite.
I’ll let you browse the different menus and submenus to have an idea of everything you can do with this powerful tool.
Warning: as soon as you are connected to Webmin, you have administrator privileges (as with sudo). So be careful if you change some values.
Examples
As you can see, there are many tools available by default.
Here are a few ones I like.
Users management
Creating and managing users and groups may be difficult for a beginner with the command line only. Webmin offers a tool to do this intuitively:
- Go to System > Users and Groups in the left menu.
- Here you can see all the existing users, and also the groups by clicking on the other tab.
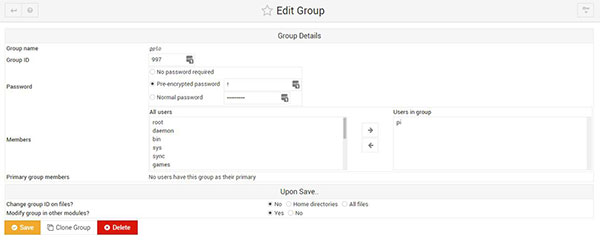
- From here you can add new user and groups, and manage everything easily.
- For example, when you click on a group, you can switch users in or out like this:
SSH Server
Another example is the tool to configure your SSH options.
The tool is in Servers > SSH Server.
From here you can manage the SSH server directly in the interface: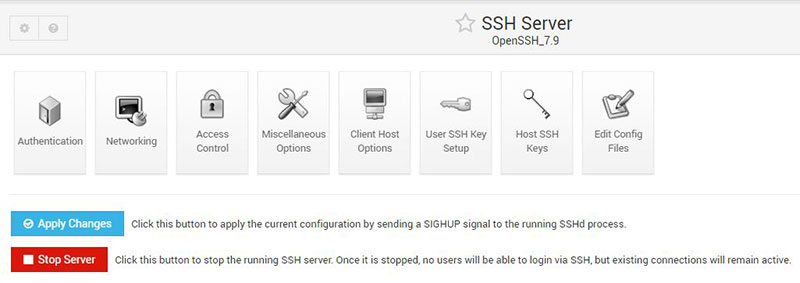
If you never remember the options you need to change or the corresponding values, it’s the perfect tool for you.
For each available option, there is a checkbox or a dropdown list, so that you can’t make a mistake.
There are dozens more like these, so take your time to browse the menu, and you’ll probably find tools for you.
Install new modules
That’s not all. You can also install new modules to Webmin.
You probably have seen the “Un-used modules” list in the left menu.
From here, you can see the default modules provided by Webmin, that are not enabled because you don’t use these programs: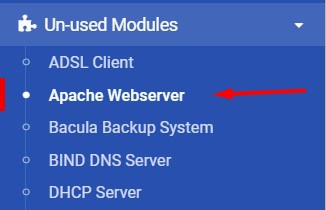
If you install one of them on your system later, Webmin will install the corresponding service on your system (the Apache web server, for example) and enable the corresponding module in Webmin.
You can also find other modules here on the Webmin website.
By default, you only get the one developed by Webmin, but there are many modules created by other developers.
Click on the previous link, and a search engine allows you to find specific modules.
For example, there is a module to manage the OpenVPN configuration: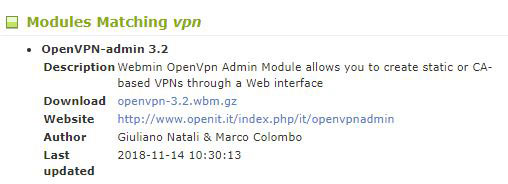
- Click on the Download it to get it on your computer, or just copy the link.
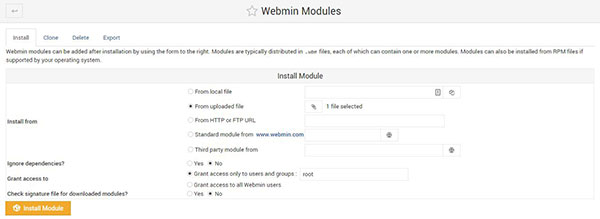
- Then go to Webmin, Webmin > Webmin Configuration.
- Click on the Webmin Modules icon.
- From here you can install a new module, from a local file or a URL:
- Your new module will appear directly in the menu after the installation:

It's a free PDF guide containing every Raspberry Pi Linux command you should know!
Download now
Video
If you want to see this cool app in action, you can check my video on the same topic here:
It's a free PDF guide containing every Raspberry Pi Linux command you should know!
Download now
Reminder: Remember that all the members of my community get access to this website without ads, exclusive courses and much more. You can become part of this community for as little as $5 per month & get all the benefits immediately.
Conclusion
That’s it, you know how to install Webmin on a Raspberry Pi and what you can do with it (almost everything). I hope you liked this post, I think it’s really a great tool for beginners, even if it’s a bit old school.
Once you’re ready to move to the next step in your Raspberry Pi journey, I encourage you to check the links below to use my book or course to expand your skills with Linux and the Raspberry Pi in general.
Whenever you’re ready, here are other ways I can help you:
The RaspberryTips Community: If you want to hang out with me and other Raspberry Pi fans, you can join the community. I share exclusive tutorials and behind-the-scenes content there. Premium members can also visit the website without ads.
Master your Raspberry Pi in 30 days: If you are looking for the best tips to become an expert on Raspberry Pi, this book is for you. Learn useful Linux skills and practice multiple projects with step-by-step guides.
The Raspberry Pi Bootcamp: Understand everything about the Raspberry Pi, stop searching for help all the time, and finally enjoy completing your projects.
Master Python on Raspberry Pi: Create, understand, and improve any Python script for your Raspberry Pi. Learn the essentials step-by-step without losing time understanding useless concepts.
You can also find all my recommendations for tools and hardware on this page.


Excellent article with good technical details . For the new guy in Linux and Raspberry pi programmer it is really boon to him like me.
KEEP posting your tips and guides for our benefit.
Hi,
Thank you very much for this comment
Is it possible to install “virtualmin” on Raspbian ?
Didn’t know this fork, but as it almost seems an exact copy of Webmin, it should be possible