
How to use your Raspberry Pi Camera as a Webcam? (Skype demo)
The Raspberry Pi camera is generally used for many projects, including doorbell, security or just recording timelapse. Another idea you seem to have, is to use your Raspberry Pi camera as a webcam. Is it possible? Yes! And I will explain everything in this article.
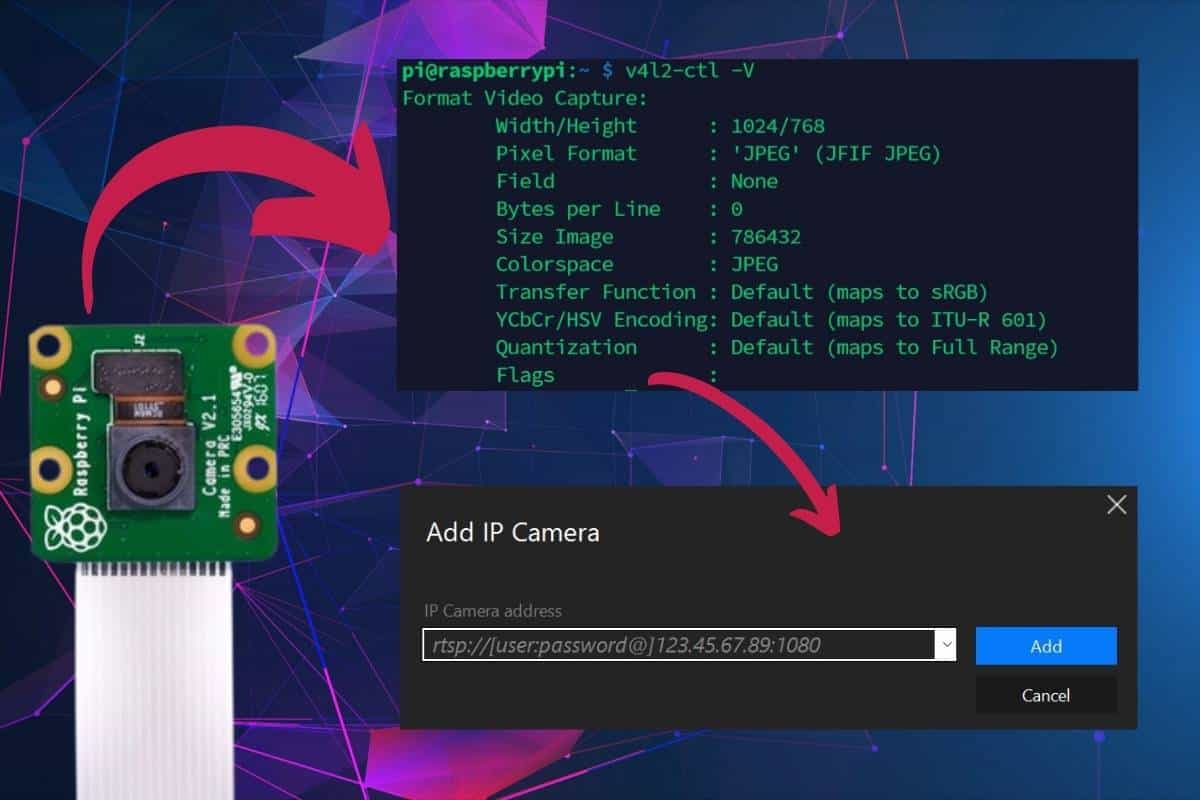
The Raspberry Pi camera module can be used as a webcam on a computer, by streaming the camera on the network. The camera will act as an IP camera and can be used as a webcam on applications like Skype or Zoom.
Keep reading this step-by-step tutorial to know how to use your Raspberry Pi Camera as a webcam. And as you’ll see, it’s straightforward, you only need the right tools on your computer and on your Raspberry Pi.
If you’re looking to quickly progress on Raspberry Pi, you can check out my e-book here. It’s a 30-day challenge where you learn one new thing every day until you become a Raspberry Pi expert. The first third of the book teaches you the basics, but the following chapters include projects you can try on your own.
Prerequisites: Raspberry Pi & camera
Let’s start by making sure you have everything you need:
- A Raspberry Pi, with an up-to-date operating system.
- A camera, configured correctly.
- The application we’ll use to stream the camera on the network.
Hardware: a Raspberry Pi and a camera
Requirements
All Raspberry Pi models include a port to plug a camera module, so you can use any model you have at your disposal.
It might be slightly easier with a Raspberry Pi 3B+ or 4 but use the model you have, no problem.
Here are my current recommendations if don’t have everything yet:
Plug the camera
You probably know how to do this if you have a camera, but don’t forget to plug it correctly on your Raspberry Pi.
Remove the slot protection and plug the cable as shown in this picture:
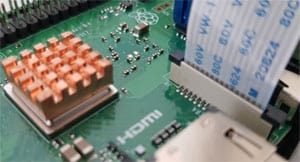
If you need step-by-step instructions on how to do this, you can check my dedicated tutorial on how to set up a camera on Raspberry Pi.
It's a free PDF guide containing every Raspberry Pi Linux command you should know!
Download now
Operating system: Install & configure Raspberry Pi OS
The easiest way to follow this tutorial will be to use the Raspberry Pi OS distribution. So if you don’t have it yet, I recommend installing it now. I have an entire guide on how to install Raspberry Pi OS on Raspberry Pi, so I will not repeat everything here.
You can pick any Raspberry Pi OS version you want. The Lite version is enough, but using a Desktop version might help for debugging purposes. I’ll give you the instructions for the Lite version, if you are on Desktop, open a terminal and follow the same steps.
Before going further you need to:

Join Our Community!
Connect, learn, and grow with other Raspberry Pi enthusiasts. Support RaspberryTips and enjoy an ad-free reading experience. Get exclusive monthly video tutorials and many other benefits.
Learn more- Install Raspberry Pi OS by following the tutorial if needed.
I’m doing this on Raspberry Pi OS Bullseye, but it’s the same thing with any version. - Connect the Raspberry Pi to your network (Ethernet or Wi-Fi).
In most cases, Ethernet will be connected automatically with your DHCP server.
To connect to a Wi-Fi network, you can use raspi-config:sudo raspi-configThen go to System options > Wireless LAN.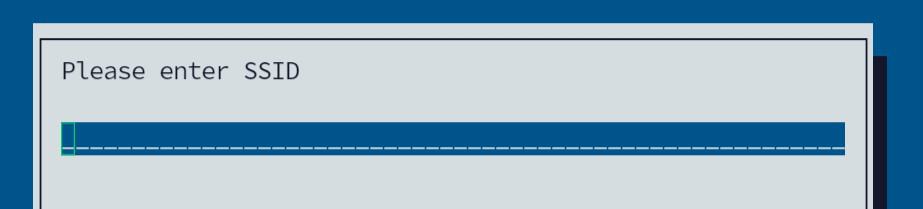
- Update the Raspberry Pi OS packages to the latest version:
sudo apt update
sudo apt upgrade -y
sudo reboot - Enable SSH: It’s often easier to do everything from your computer (via SSH), instead of typing everything on the Raspberry Pi. To enable it on your Raspberry Pi, you can use raspi-config:
sudo raspi-config
Then go to Interfacing options, SSH, and answer “Yes”.
You can now use SSH to follow the next part of this tutorial.
That’s it, you are ready to start!
Are you a bit lost in the Linux command line? Check this article first for the most important commands to remember and a free downloadable cheat sheet so you can have the commands at your fingertips.
Software: configure everything to use the camera as a webcam
Enable the camera
By default, the camera interface of the Raspberry Pi is not enabled.
To activate it, you need to use raspi-config:sudo raspi-config
Then go to “Interface Options” and select the “Legacy Camera” item.
Answer “Yes” and exit raspi-config.

The tool will ask you to reboot, accept and reboot.
After the reboot, the camera is enabled, and we can now install the software.
If you experience any issues with the camera installation, or for any reason, it doesn’t work as expected, please check this troubleshooting guide for the Raspberry Pi camera module.
It's a free PDF guide containing every Raspberry Pi Linux command you should know!
Download now
Install Motion
Motion is a powerful software to do everything with your camera.
We’ll use it to stream the camera on the network (IP camera), but it can do a lot more.
To use it, follow this procedure:
- Install Motion and the required dependencies from the default repository:
sudo apt install motion libavcodec-dev libavformat-dev libavutil-dev libjpeg-dev libjpeg62-turbo-dev libpq-dev libswresample-dev
Answer “Yes” to install all of them. - Enable the camera driver if needed:
sudo modprobe bcm2835-v4l2 - Use this command to check that the camera is working properly, it should show its settings:
v4l2-ctl -V
You should get something like: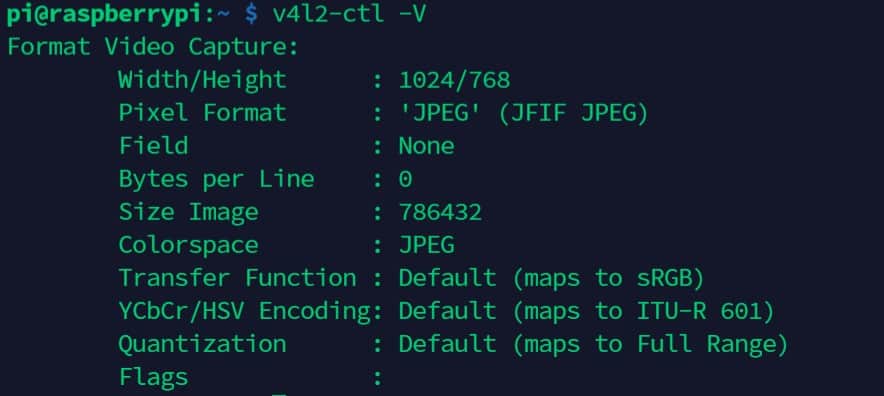
Then you need to configure motion. - The configuration is not intuitive at all with Motion, but you can download a configuration template from there:
wget https://www.dropbox.com/s/6ruqgv1h65zufr6/motion-mmal-lowflyerUK-20151114.tar.gz - Extract the files from the archive:
tar -zxvf motion-mmal-lowflyerUK-20151114.tar.gz - Start motion:
sudo motion -c motion-mmalcam-both.conf
Feel free to check and adjust the settings in this file to fit your camera configuration (image height and width, for example).
To finish the Motion installation part, you just need to check the video stream before moving to the computer configuration.
Check the video stream
The live stream is available in HTTP, by using the Raspberry Pi IP address and the port 8081.
Open your web browser and go to http://<RASPBERRY_IP>:8081.
Check that you can see the live stream correctly, with sufficient quality.
Now that you can see the live steam, you can adjust the Motion configuration again (for example, mine is never in the correct sens, I have to rotate the image).
The goal of this tutorial is not to explain to you how to configure Motion.
But you can find all the resources needed on their GitHub page.
Use the Raspberry Pi camera stream on your computer
We now have your live stream working, and we need to use another software on the computer to relay the camera image in a video call.
My software recommendation: SplitCam
SplitCam is the software we’ll use to turn your IP camera into a webcam on the computer.
SplitCam allows, among other things, to create a virtual camera on your computer and send an IP camera to flow into it.
We’ll use this software to have a camera available on Skype (or other video conference software), even if we don’t really have a camera on our computer.
Download & Install
SplitCam is a free software for Windows, you can download it from the official website.
Installation
To install it on your computer, follow this procedure:
- Double-click on the file you just downloaded.
- Keep the default values (“Next”, “Next”, “Next”).
- At the end of the installation, you can close the setup wizard.
SplitCam should be available in your main menu.
Configuration
- You can now start SplitCam.
- On the left, you’ll see a list of “Media Layers”, click on the “+” icon to add a new source.
- In the drop-down list, make sure you select “IP Camera”.
- You’ll get something like this:
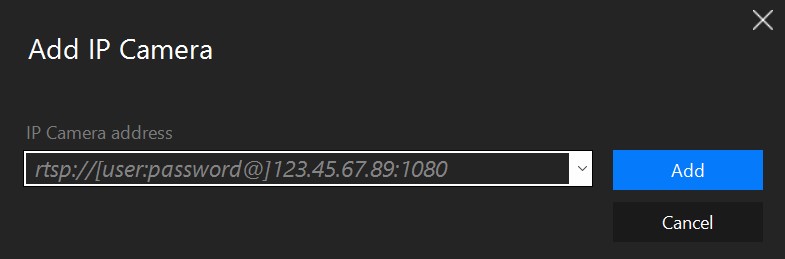
- Then in the URL field, enter the live stream URL.
For example: http://192.168.1.17:8081
Click on Add. - After a few seconds, the new line appears in the list and the image in the main window.
If you experience any issues, double-check the Raspberry Pi IP address and make sure that Motion is still running on the Raspberry Pi. Restarting SplitCam also fixed an issue on my side, so maybe you can try this if it doesn’t display the live stream.
You’re almost ready, you just need to configure your video call software now.
Skype configuration
I’ll show you how to use it on Skype, as I guess it’s always the most used tool for this.
But it’s the same thing with any software:
- Start Skype.
- Click on “…” in the left panel and choose “Settings”.
- In the settings windows, go to “Audio & Video”.
- In the Camera section, make sure that the “SplitCam Video driver” is your main camera:

- You can check the camera image below.
And you are ready to use your Raspberry Pi camera as a classic webcam.
It's a free PDF guide containing every Raspberry Pi Linux command you should know!
Download now
Related questions
How to auto-start Motion on boot?
We use a specific configuration file and command to start motion temporarily, but you can move the files to the default folders to configure it as a daemon.
Here is how to do this:sudo mkdir /var/log/motion
sudo chown motion /var/log/motion
sudo mv motion-mmalcam-both.conf /etc/motion.conf
Then enable the service to make it start automatically on boot:sudo systemctl enable motion
It's a free PDF guide containing every Raspberry Pi Linux command you should know!
Download now
Reminder: Remember that all the members of my community get access to this website without ads, exclusive courses and much more. You can become part of this community for as little as $5 per month & get all the benefits immediately.
Conclusion
That’s it, you now know how to use your Raspberry Pi camera as a webcam on any computer software.
I hope it was useful for you and that I saved you some money.
If you want to get more ideas on what you can do with a camera, check my article about 11 projects ideas to do with a camera on Raspberry Pi.
Whenever you’re ready, here are other ways I can help you:
The RaspberryTips Community: If you want to hang out with me and other Raspberry Pi fans, you can join the community. I share exclusive tutorials and behind-the-scenes content there. Premium members can also visit the website without ads.
Master your Raspberry Pi in 30 days: If you are looking for the best tips to become an expert on Raspberry Pi, this book is for you. Learn useful Linux skills and practice multiple projects with step-by-step guides.
The Raspberry Pi Bootcamp: Understand everything about the Raspberry Pi, stop searching for help all the time, and finally enjoy completing your projects.
Master Python on Raspberry Pi: Create, understand, and improve any Python script for your Raspberry Pi. Learn the essentials step-by-step without losing time understanding useless concepts.
You can also find all my recommendations for tools and hardware on this page.


I am trying to use my raspberry pi camera as a webcam camera.right now im stuck trying to install the libswresample-dev package but it keeps giving an error. I hope someone can help answer this. Thanks.
Hi Isaac,
Could you give us the error message?
“E: unable to locate package libswresample-dev”
So i went to the motion github (https://motion-project.github.io/motion_build.html) and installed the abbreviated building guide along with the libraries that need to be installed that are under that. All of that worked and I was able to enable the camera driver and check that the camera was on. I also downloaded the configuration and extracted the files. However, when it tried to start it it got an error.
sudo: motion: command not found
sudo mv motion-mmalcam.conf /etc/motion.conf
should be
sudo mv motion-mmalcam-both.conf /etc/motion.conf
Yes, updated
Thanks for your comment 🙂
I got to the very end, but all I see in the split cam app a loading screen of 5 blue dots crashing into each other. Is my camera not installed properly or incompatible? The camera I am using is one that shipped with the Pi so I doubt it’s incompatible
I had the same problem at first, for me the problem was that I had to write”http://” befor the IP-address.
I have tried this way and another method at this point, and neither have worked. For some reason, the “stream” either is just captured jpegs, or it is just running at very low frames. Please help. D:
Hurray
I could able to do it.. But unfortunately splitCam application is not stable, crashes many times, fails to connect many times.
Sorry but I messed it up
After doing
sudo mv motion /usr/bin/motion
sudo mv motion-mmalcam-both.conf /etc/motion.conf
Camera is not starting after reboot
When I tried manually I’m unable to do that
why I redone all the steps again, I got this message:
pi@raspberrypi:~ $ sudo motion -c motion-mmalcam-both.conf
motion: error while loading shared libraries: libavformat.so.56: cannot open shared object file: No such file or directory
Did you ever resolve this? I have the exact same issue.
Would this work with OBS without the need for Splitcam?
probably. I use droidcam directly that way. Use a http browser, i think
I Don’t know if splitcam.exe should be installed in the Raspberry Pi. In this case which application should I use for it? I Don’t know how to do with the. exe file to install splitcam in my Rasp
Hello,
No, you need to install Splitcam on your computer
And connect to the Pi Camera with the URL
How to use the raspberry pi camera module as webcam in chromium os??