How To Install & Use Gparted On Raspberry Pi (Partition editor)
Raspberry Pi OS is installed with two default partitions: /boot which uses about 256 MB, and everything else is available for the system installation (/). But you can change that after the installation, which is particularly useful if you use a big disk like an SSD or a giant SD card/USB drive. I will answer all of your disk partitioning questions in this article.
Gparted is a free, graphic partition manager that is often used on Linux systems. It can be installed on Raspberry Pi via the package manager, and used to reformat the SD card as needed.
I will start with a brief introduction about disk partitioning for those who need a quick reminder, and then I’ll show you how to install and use Gparted. I’ll also answer a few questions you might have, such as, how to do the same thing without a Desktop environment.
If you’re looking to quickly progress on Raspberry Pi, you can check out my e-book here. It’s a 30-day challenge where you learn one new thing every day until you become a Raspberry Pi expert. The first third of the book teaches you the basics, but the following chapters include projects you can try on your own.
Disk, partitions and file system: a short recap
If you are an expert, you can probably skip this part. I just want to make sure everybody is up to speed with the words I will use later, and how it applies to the Raspberry Pi.
Vocabulary
All of the data from your computer (or Raspberry Pi) is stored on a disk. On Raspberry Pi, it’s generally an SD card, but you can also use USB drives (USB keys, external drives, etc.) or SATA drives with an extension (like this one on Amazon).

A disk can be split in several partitions, which is a logical division of the entire disk. Partitions are often seen as different disks by the end user. For example, on this screenshot, I have one partition (D:) using a tiny part of the entire disk. But as the rest is unallocated, the end user will only see D: in the file explorer.
Each partition can use a different file system. A file system is like a set of rules to store files on the partition. File systems can differ depending on the operating system you use. So, if you plan to read files on different systems, you need to choose a file system that is compatible with all of them. I’ll clarify this later.
The default setup on Raspberry Pi
When you install Raspberry Pi OS on a SD card or USB drive, it will create two partitions for you:
It's a free PDF guide containing every Raspberry Pi Linux command you should know!
Download now
- /boot: Contains the file required to start the operating system, like the Raspberry Pi firmware and the configuration file (config.txt). In my case, this was a 256 MB partition, using only about 50 MB.
- /: Takes up the rest of the available space, and is used to store everything else (system, applications and user files).

The main partition (/) uses ext4 for the file system, while the /boot partition is formatted in FAT32.
EXT4 is a common file system on Linux distributions, but Windows can’t read it. This explains why you can see the system files when you insert an SD card into your computer. The only partition you can read is /boot because FAT32 is a file system invented by Microsoft, and fully supported on any Windows version.
What you can do from there
As you can see in the screenshot, a fresh installation of Raspberry Pi OS with Desktop (not the full version), only uses 4 GB on my USB key but takes up the whole available space (32 GB in this case).
This is where using Gparted can be pretty useful. Maybe not for a 32 GB drive, but more so if you use a bigger drive. For example, if you have a 500 GB SSD drive, you might want to reorganize and create another partition in FAT32 to store your personal files in order to read them from your computer too (if you use Windows).

Join Our Community!
Connect, learn, and grow with other Raspberry Pi enthusiasts. Support RaspberryTips and enjoy an ad-free reading experience. Get exclusive monthly video tutorials and many other benefits.
Learn moreWe can imagine something like:
- /boot: 256 MB, FAT32
- /: 50 GB, EXT4 – It should be enough for almost anything.
- /data: 450 GB, NTFS – Using the rest of the disk in a format that can be read on any operating system.
I’ll show you how to use Gparted on Raspberry Pi OS to easily create a partition.
Note: FAT32 is not ideal when you have bigger disks. In theory, it’s not possible to create partitions bigger than 32 GB and format them in FAT32. Using NTFS or another file system is recommended in this case.
Install Gparted on Raspberry Pi
As explained in the introduction, Gparted is available in the default Raspberry Pi OS repository, so installing it is straightforward.
You can either use a terminal, and simply use the following commands:sudo apt update
sudo apt install gparted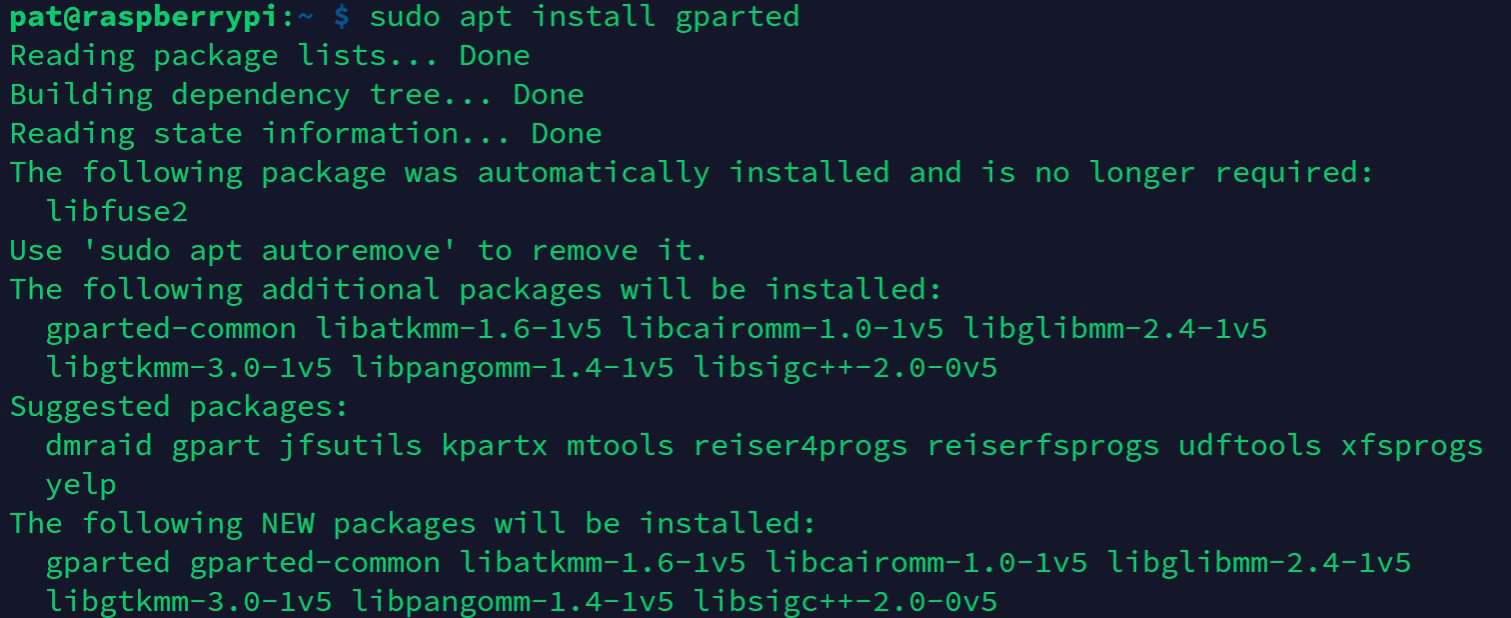
Or via the graphical tool (“Add/Remove Software”), open the package manager and look for Gparted: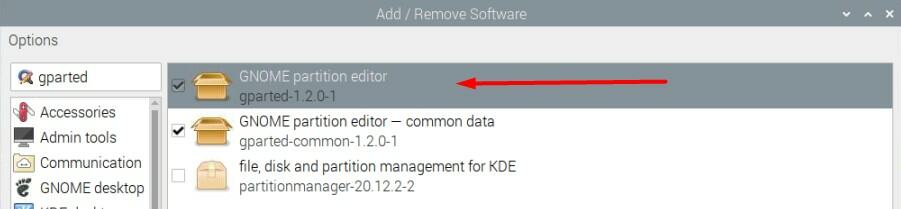
Check the box corresponding to gparted, and click “Apply” to start the installation.
Once installed, Gparted should be available in the main menu, under System Tools: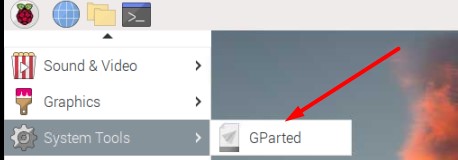
It's a free PDF guide containing every Raspberry Pi Linux command you should know!
Download now
Note: If you want to modify partitions on a disk where Raspberry Pi OS is already installed, you need to use another media to start Gparted. You can’t use Gparted to make changes on the current system.
It's a free PDF guide containing every Raspberry Pi Linux command you should know!
Download now
Use Gparted on Raspberry Pi
Once you understand how disk partitioning works, and what the default setup is on Raspberry Pi, using Gparted shouldn’t be that complicated.
When you start Gparted, you need to type your password (administrator privileges are required).
Then, you’ll get an interface looking like:
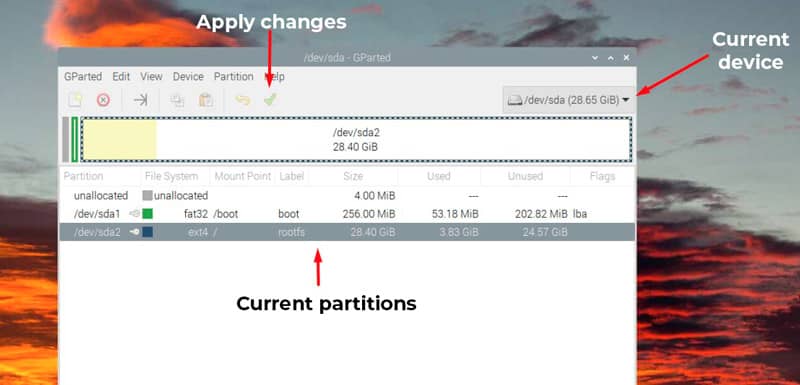
Start by picking the disk you want to modify in the top-right corner.
Reminder: It’s not possible to make changes on the disk you are currently using. You have to install Raspberry Pi OS on another device, and then plug the drive you want to edit.
Once done, you can change anything with a right-click on the partition name or in the graphical representation. I will show you how to resize a partition or create a new one.
Resize a partition
You need to unmount the partition before resizing it. That’s why you can resize the system partition once the system is loaded.
As Raspberry Pi OS will automatically mount all partitions, the first step is to right-click on it, and choose “Unmount”: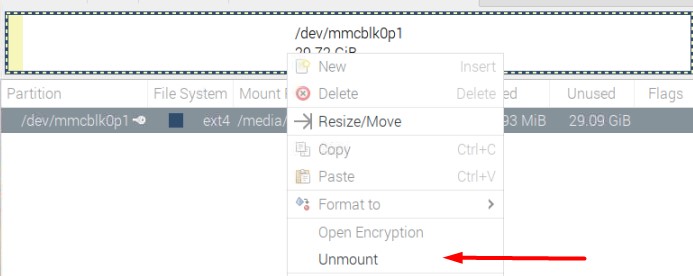
Then, you have access to the Resize/Move option in the menu: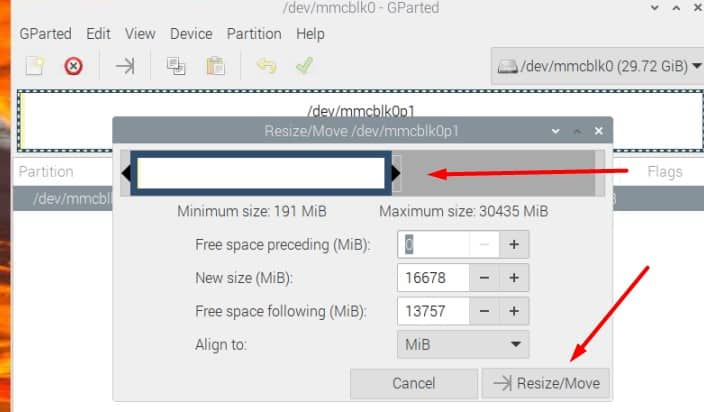
You can either move the cursor on the graphical representation to resize the current partition or type the new size in the form. Then, click on “Resize/Move” to save your changes.
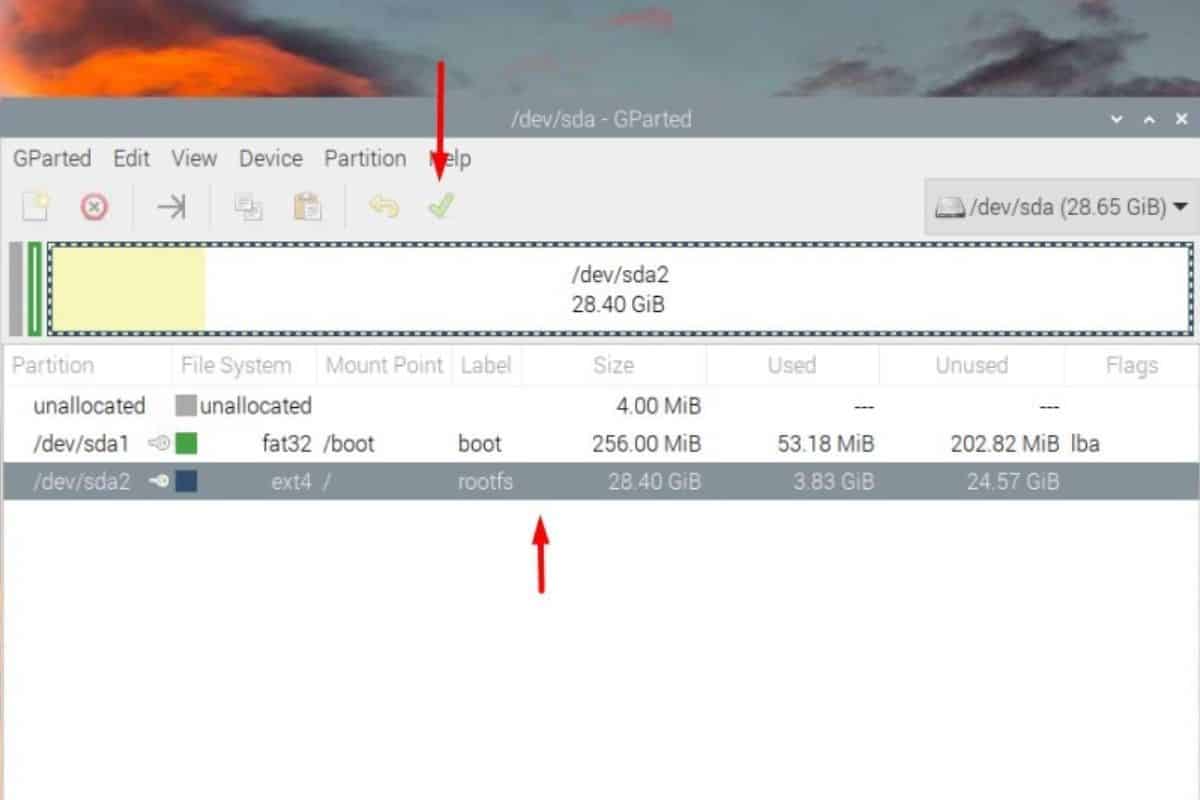
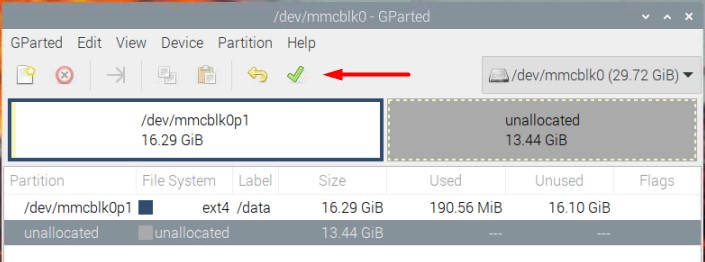
The last step is to click on the green tick to apply the changes on your disk.
Raspberry Pi OS should now automatically mount the partition each time you plug this drive.
Or you can use the mount command to do the same thing manually (learn all about the mount command here):mount <partition> <destination>For example:mkdir /home/pat/usb-drive
sudo mount /dev/mmcblk0p1 /home/pat/usb-drive
If the goal was to resize the system partition, you can now stop the Raspberry Pi, unplug the temporary system drive, and only keep the one you just resized.
Are you a bit lost in the Linux command line? Check this article first for the most important commands to remember and a free downloadable cheat sheet so you can have the commands at your fingertips.
Create a new partition
Once the disk is selected, make sure you have some unallocated space available to create a new partition. If not, you need to resize an existing partition first (or just delete one if you don’t need it anymore).
Then, click on the unallocated space, and choose “New” in the dropdown menu.
A form will show up. Make sure to check the values where I added a red arrow: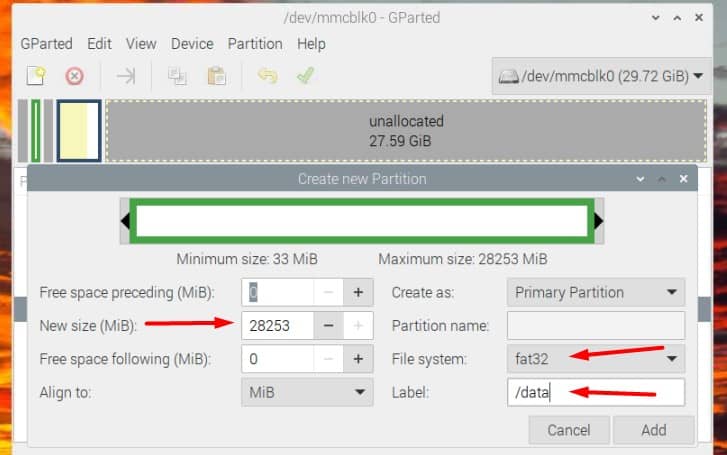
At least, you need to set the new size (it will use all the space by default), the file system (fat32 for a small partition that you want to read on Windows, ext4 if you’ll only use it on the Raspberry Pi).
You can also choose a label, that will be used in the file explorer.
Once done, click “Add”. You’ll directly see the impact of your changes in the graphic representation.
But you need to click on the green check to apply the changes on the disk.
It may take a few minutes, depending on the partition size and hardware you use.
Once done, you’ll get a success message like this one: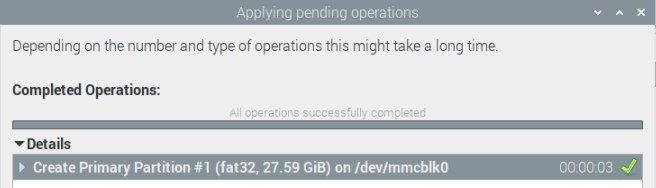
If you want to access the new partition within the file explorer, the easiest way is to unplug the drive and plug it in again. Raspberry Pi OS will automatically mount the new partition:
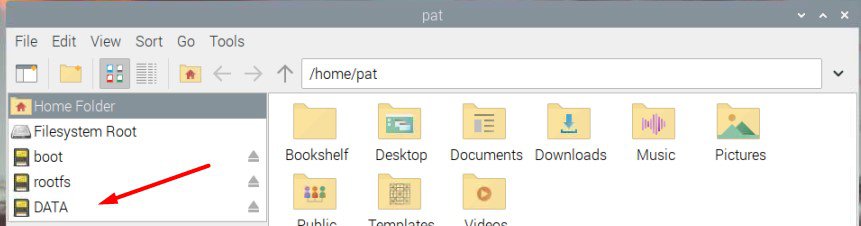
That’s it, you can now use it and create files in this folder.
It's a free PDF guide containing every Raspberry Pi Linux command you should know!
Download now
Reminder: Remember that all the members of my community get access to this website without ads, exclusive courses and much more. You can become part of this community for as little as $5 per month & get all the benefits immediately.
Q&A
How to use Gparted in a terminal?
Gparted is a graphical application, there is no way to use it directly in a terminal. If you are using a Lite version of Raspberry Pi OS, a combination of commands like fdisk and mkfs can do something similar.

How To Use ‘fdisk’: The Complete Linux Command Guide
This will require a complete article to give you all the details, but if you want the short version, this video will be pretty useful:
Can you partition an SD card on Raspberry Pi?
It’s possible to change the partitions on a Raspberry Pi by using a tool like Gparted. But Gparted can’t resize the partition for the current system, so you need to use a second SD card with Gparted installed on it to reorganize the partition on the main SD card.
Whenever you’re ready, here are other ways I can help you:
The RaspberryTips Community: If you want to hang out with me and other Raspberry Pi fans, you can join the community. I share exclusive tutorials and behind-the-scenes content there. Premium members can also visit the website without ads.
Master your Raspberry Pi in 30 days: If you are looking for the best tips to become an expert on Raspberry Pi, this book is for you. Learn useful Linux skills and practice multiple projects with step-by-step guides.
The Raspberry Pi Bootcamp: Understand everything about the Raspberry Pi, stop searching for help all the time, and finally enjoy completing your projects.
Master Python on Raspberry Pi: Create, understand, and improve any Python script for your Raspberry Pi. Learn the essentials step-by-step without losing time understanding useless concepts.
You can also find all my recommendations for tools and hardware on this page.